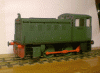
4mm An EM workbench - Peckett, The Marshal

Minfit
  • AJC

    Western Thunderer
    Minfit13.gif

    Minfit15.gif

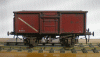
    A pair of post-completion portraits of my Parkside/Rumney Models hybrid minfit. Despite a near disaster with the first pass of weathering, I'm pleased with this. It's much, much better than my first attempt at one a decade and more ago.

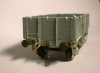
    The Presflos now look like this. One more weathering pass needed I think, but the overall impression is what I was after.

    Presflos4.gif

    Adam
     
    Clayliner Tank (Tri-ang and Bachmann)
  • AJC

    Western Thunderer
    After the diversion into parcels stock and with a desire to get some more projects at least physically complete, the last couple of jobs on the Clayliner tank were done last night. Nothing very exciting, just some bits of tank-top-ephemera, but the addition of hinges, screw clamps on the inspection hatch and whatever that valve arrangement is meant to do next to the filler adds to the sense of busyness up there and prompted a blast of primer while waiting for the cooker engineer this morning. I have now straightened that wonky ladder rung by the way.

    Clayliner14.gif

    Clayliner15.gif

    Now it awaits its turn in the paintshop when it warms up again...

    Adam
     
    Bogie Bolster D (from Bachmann BDA)
  • AJC

    Western Thunderer
    And back to wagons, and in time since this one was completed a month or so ago. Details of the conversion of this Bobol D from the Bachmann BDA begin earlier in this thread and was featured in my post, 'an afternoon shunt' but here it is, fully lettered by means of an ancient sheet of just-about-usable Woodhead transfers and numbering from CCT (usual disclaimer). Paint is my usual combination of Halfords' rattlecan and Humbrols and I'm quite pleased with it though I'm in no enormous hurry to do another.

    Bobol_D_complete.gif

    BobolD6.gif


    BobolD7.gif


    The decks of these bolsters seems to have been darker than was usual for other varieties of open wagons - and this has been accentuated by the bright sunshine these pictures were taken in - I guess that the mix of 'hammerscale' and rust these wagons were subject to from their usual loads were responsible so I'm reasonably pleased with the finish but would be interested to know what others think.

    Adam
     
    SR Open High (Cambrian)
  • AJC

    Western Thunderer
    DSCN9043.gif

    So, about 3 times life size. Doesn't look too bad does it? and, contrary to what I thought when I started, it seems the London Midland (Region) really did paint these boards in black and white. In this case, Halfords' satin black a coat of Klear and Humbrol white enamel (satin) floated around the letters and cleaned up with a thinners-moistened brush and a cocktail stick.

    The other ongoing work concerns the Cambrian-based SR open which has not received those fiddly little details which had been put off. Specifically, these include capping strips and clips - 5 thou' plastic - door bags, stays for the lever guides, safety loops for the brake push rods and a few bolt heads. Nothing very exciting but it all adds to the overall impression and it's now ready for painting.

    Cambrian_SR_open2.gif

    On the back of these pictures, I've just given the lever guide a tweak and tacked the capping strip back on...

    Cambrian_SR_open3.gif

    Adam
     
    NBL 0-4-0DH (Judith Edge Kits)
  • AJC

    Western Thunderer
    Next up, a birthday present to myself, bought a few months back, is this Judith Edge kit for a diesel hydraulic built by North British. It's not what most people might think! This type of 330hp 0-4-0DH was built for industry, but BR had a handful and a look the JE website will tell you about those but I wanted the industrial version, a pleasantly bulky thing which differed in many, many details from the BR versions. The ScR bought quite a collection of different types of NBL 0-4-0 and Mike and Judith will cheerfully sell you just about all of them.

    It assembles in the usual way for Mike Edge's designs with modular elements - bonnet/cab, footplate and chassis - all of which jig together and rely on each other to make assembly reasonably easy. The instructions assume that you know something about basic metal forming (why shouldn't they?) and that you are are capable of finding photographs to address which collection of details suit your chosen prototype. This is essential for this particular type; there seem to have been a collection of different bits which went together in various permutations, almost all of which are in the box with scale printouts from the CAD which answer just about any assembly question you might ask yourself. As such, it has rather flown together and I completely failed to take any pictures along the way so that we reach the point where the body and footplate are complete.

    DSCN9121.gif

    DSCN9125.gif

    There isn't much more to say except that I couldn't find part number 22 (risers for the inner cab floor). This doesn't matter since there is no shortage of scrap etch; straight, parallel strip, basically, to use instead. You can just make out that I've modelled the LH cab door open and added the large industrial headlights. Only the bezels for these are in the box, there were various styles and would be difficult to cast in resin but easy to make from scrap etch and shim. Basically, you solder the bezel to the scrap, centre pop the resulting sandwich and drill through to lend the resulting lamp a bit of depth. Then cut and file the thing to shape using the bezel as a guide, solder that to the top of the bonnet. Then cut a sort of squat 'T' shape from shim to represent the 'brim' over the top, form and test fit, trim to length and then solder in place. This can be filed up to shape and then the back filled with Miliput for the back of the fairing.

    Next for the technical bit.

    Adam

     
    Clayliner Tank (Tri-ang and Bachmann)
  • AJC

    Western Thunderer
    No change on the NBL, but the weather has been good enough for dad to (very kindly), spray my Clayliner tank. The original colour these were painted was Bowaters' corporate scheme of the time, a pale blue that, so far as I can tell from contemporary lorry pictures and dad's recollection of the rake, was near enough BR Ice Blue, as applied to fish vans and refrigerated containers. So that's what has been used. The two pictures, below, show how different the same colour can appear in two different lights.

    clay tank (2).gif

    clay tank.gif

    I reckon that's come out quite well though I can see a small repair job at the bottom of that ladder. :) Thanks dad. In the background can be seen the other denizens of the paintshop, a pair of Judith Edge kits. Little and large, these. My brutish Thomas Hill 0-6-0 and dad's 48DS, now a fetching shade of green.

    ruston (2).gif

    Adam
     
    NBL 0-4-0DH (Judith Edge Kits)
  • AJC

    Western Thunderer
    A couple more steps along the way; frames basically assembled, gearbox fitted to the motor and offered up to see that all fits as I'd hoped and, next up, the hornguides and bearings.

    Clancy229.gif

    Coming on.

    Adam
     
    NBL 0-4-0DH (Judith Edge Kits)
  • AJC

    Western Thunderer
    My NBL/MAN diesel has progressed to the stage where the first layers of paint have been applied and no major problems have bee identified. OK, so I realised that I'd forgotten to install the rear sand pipes or front sand boxes but that was easily resolved. The footplate assembly was due another coat of primer in any case since I'd also missed a small handle on the battery box and found some stray solder that needed removal. I've also added some lead shot encased in Miliput inside the battery box to give it some bulk and give the loco some extra weight.

    DSCN9316.gif

    DSCN9320.gif

    The last shot in this update shows my approach to chassis painting. I've never understood why many modellers take endless trouble to make a loco work and then take the whole thing to bits in order to do basic painting and thus start all over again. In 7mm, with all the extra detail I guess that this makes some sort of sense but for something as simple as this there's absolutely no need so I get the basic paint on as soon as practical.

    DSCN9312.gif

    The brake gear is a different colour because this is a removable sub-assembly. I was just testing it for fit post-paint (it was assembled with reference to a wheel). With a CAD-designed kit like this, there should be no real difficulties, but I did check that the rods matched the axle-centres first! Next it's time to assemble the flycranks and to make the thing run.

    Adam
     
    SR Open High (Cambrian)
  • AJC

    Western Thunderer
    I've had the paintbrushes out for a change over the last couple of evenings and among the results, here's a fully painted SR high, on the way to being ready for transfers.

    Cambrian_SR_open6.gif

    Cambrian_SR_open5.gif

    Now, back to marking...

    Adam
     
    Coil Wagons
  • AJC

    Western Thunderer
    Back in 2012 I started a pair of wagons... and in the intervening period they have actually gone backwards before, in the last week or so, having suddenly shot forwards. The pair of wagons in question were Coil S, one of many ways in which BR turned various bits of its open wagon fleet into wagons more or less suitable for carrying various types of coil. In the case of Coil S, these were open highs from various constituent companies and BR itself heavily knocked about to ship rod coil that had previously been transported in said opens, pipes or tubes. They did much the same thing to plate wagons. I think this happened in the very late '60s when lots of other things were tried.


    CoilS1.gif

    I had come to the realisation that plastic wasn't going to work so obviously brass angle work was required and for that reason these wagons have been sat at the bottom of the 'in progress box'. There are still lots of fiddly little details to do but this is the state of play this evening.

    CoilS2.gif

    There are quite a few detail differences between the pair indicating their origins. the top is based on an SR-designed open built in the early days of BR and an LNER version below. The LNER version will be modelled loaded, the SR empty. The various raves and stanchions are all heavily pinned into solebars so should remain where I've put them. The boltheads, however, can wait until another time.

    CoilS3.gif

    Adam
     
    NBL 0-4-0DH (Judith Edge Kits)
  • AJC

    Western Thunderer
    No, nothing to do with Thursday. Having been so blasé about chassis painting up the thread, I realised that my little North British was missing some fairly substantial brackets behind the buffer beams. It also occurred to me that the brake standard was also a bit floppy and rectifying this would be a good idea so it was subjected to a bath in cellulose thinners and all the paint came off again...

    On these locos, the sandboxes at the cab end also form seats for the driver and since they have quite a small area for gluing and resin does not take solder well I drilled a couple of holes through the cab floor to keep them in place. While I was at it I reshaped and detailed the resin control desk. As supplied I felt that it was both a bit big and not quite the correct shape based on the prototype shots so I cut the thing down, added some scraps of wire and plastic. The various control levers still want some blobs of epoxy on the ends to represent the appropriate knobs. I doubt anyone will actually be able to see all of this, of course, but in the scheme of things I reckon this is less bonkers than adding working inside motion to, say, a Jubilee. ;)

    NBL2.gif

    The console will only go in properly after I've made the chassis work. Before that, I need to get the paint back on!

    Adam
     
    NBL 0-4-0DH (Judith Edge Kits)
  • AJC

    Western Thunderer
    Small news on the NBL front which has made a tiny step forward in the form of a little paint. North British painted anything below the waist of the cab in livery colour (cream above, black line between) so you now know that the loco will be a drab mid-green. The console is fairly obvious, the other item is the cab heater which sat bottom centre of the cab backsheet. Yes it's tiny, but I did go and model the cab door open, didn't I?

    NBL4.gif

    NBL3.gif

    Adam
     
    NBL 0-4-0DH (Judith Edge Kits)
  • AJC

    Western Thunderer
    The next 'thing to prod wagons about with' has gone green (and black). Further detail painting is also under way and silver, dark grey and very light grey, the latter undercoat, applied. The chassis needed a little persuasion to go back in again and following a bit of scraping and filing, all is well.

    NBL5.gif

    NBL6.gif

    The battery boxes and sandboxes look a slightly different green: they need varnishing.

    Adam
     
    NBL 0-4-0DH (Judith Edge Kits)
  • AJC

    Western Thunderer
    One little job that I've been meaning to do for a while is to do something about the 'see-through' nature of etched diesels. This used to be a standard feature of etched diesel models (and quite a few steam ones) and was most spectacularly evident on things like 7mm scale EE Type 3s/class 37s. I have seen more that several models where looking over the roof fan or at the side grills where one was rewarded with a nice view of the drive system or the track. Such things happened in 4mm as well but bigger models offer more visible problems.

    NBL11.gif

    On the NBL this is simple enough: behind that big grill at the front there should be a radiator rather than the back end of a Mashima with a flywheel hanging from it. I could just have plonked a lump of plastic sheet in there but well, how hard can a dummy radiator be?

    NBL_Radiator.gif

    A few scraps of 40 thou' with a 15 thou' overlay and here we are. I made no effort whatsoever to seek out a shot of a real NBL radiator. The 'detail' is pure speculation, though I did take the trouble to scribe some impression of the vanes. There's a baseplate with a hole that locates over the fixing nut and in time it will be painted and epoxied in place. Job mostly done.

    Adam
     
    NBL 0-4-0DH (Judith Edge Kits)
  • AJC

    Western Thunderer
    Here you go Heather:

    Lacquer.gif

    And meanwhile, thanks to the kind donation to the cause of some Pressfix black and white lining, the NBL has reached the stage where the paint job is done.

    NBL12.gif

    NBL13.gif

    The bottom corners had to be touched in by hand, but neat enough, I think.

    Adam
     
    NBL 0-4-0DH (Judith Edge Kits)
  • AJC

    Western Thunderer
    Moving back to the NBL, we find the chassis mechanically complete, wheeled, quartered, gearbox fitted and ready for wiring up. And rewiring the correct way about, too no doubt...

    NBL14.gif

    ... and not just rewiring. I've just had to cut an additional section out of the footplate so as to get the flywheel in. Oops. :oops:

    Adam
     
    NBL 0-4-0DH (Judith Edge Kits)
  • AJC

    Western Thunderer
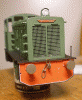
    After rather too long an interlude, back to Scottish-built diesel hydraulics. The 'little' NBL is now more or less complete barring the process of lead lining, front sandpipes, a bit of touching up and weathering. It was even wired up the right way about at the first time of asking (testing courtesy of my trusty length of EM Ratio track and a spare 9V battery for the smoke alarm). I can't remember the last time I managed that...

    NBL16.gif

    NBL17.gif

    First, however, the last of the paint on the wheels and rods has to dry.

    Adam
     
    Brighton Terrier
  • AJC

    Western Thunderer
    Something a bit different from the earlier loco projects, in that it's a bit more dainty and rather older in origin. It's a Branchlines chassis for a Terrier, in this case destined to go under a much-detailed (well, it will be...) Hornby body. The compensation method is directly pinched from Tim Shackleton's example in his Plastic-Bodied Locos (Wild Swan, 1999) but is very similar to that Mike Edge employs in his kits and having built one of those in a Thomas Hill 0-6-0DH I know it works. The front axle rocks in the usual way about a pivot while the rear pair are linked together by twin beams resulting a a fully compensated 0-6-0. Not 'true' twin beam compensation, but it does what I want it too. Anyway, that's not what the post is about which is one of those little details that Brighton Terriers picked up over the years, namely, injectors. The lightweight nature of the frames mean that these are all too visible and besides, it's the fiddly kind of detail I like.

    Terrier_1.gif

    It's all quite simple, just bits of copper wire and brass tube. The cut-outs in the frame around the centre and rear axles are a bit big so since taking these pictures, I've added blanking plates to reduce the visual impact a bit. Behind the wheels no one will ever know...

    Adam
     
    Last edited:
    Top