3mm Workbench: Scratch-building a chassis for a J50

BetweenTheTunnels

Active Member
Evening all,
Well im a relatively new member to Western Thunder, but have been reading the forum without a membership for a few months, finding my feet. I have a grand plan (well best laid plans and all that) for a late 1950s/early 1960s ECML. I cannot quite do what I want to in 4mm, and having tried 2mm/2mm Finescale, I have concluded it is just not quite right for me. But some experimentations with card models, suggested that 3mm could well suit me nicely, and I must admit I do like the idea of saying, I built everything. Whether im any good at it remains to be seen however, although I like to think I have high modelling standards, impossibly high sometimes.

I have dabbled with plastic kits in the past and touched on (and failed) with an etched brass kit, but that failure was more lack of knowing what I was doing with soldering, and not having the right equipment to hand. I've been away from the active modelling scene for probably 10 years now, but later this year I hit 45, so decided that I want something to do that relaxes me, that I enjoy and can be stepping stones towards a larger goal. So 3mm is currently the plan.

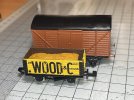
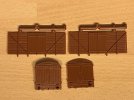
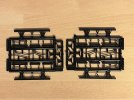
I've joined the 3mm Scale Society, and was amazed (and delighted) that as part of the welcome pack they send new members a plastic wagon kit to get them started. A lovely touch I thought. Mine is a GWR 'Mogo' Goods Van, which will be my first build and finished in BR colours, fitted with DG Couplings. My thought is that this will become my 'guide' vehicle for all future DG couplings to make sure i get them at the same height. Im modelling in 14.2mm gauge, so I will need to acquire some wheels for it, as those supplied are 12mm which I shall not be using, but that is easy enough once the Society Shop reopens from its annual stock take.
IMG_3076.jpeg

IMG_3078.jpeg
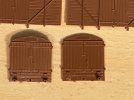
It is a shame that the kit is slightly damaged, with one buffer shank having been crushed, presumably in the post. However, I think the society does some cast buffers, so my plan is simply to remove all four and fit cast examples, which may look better as well.
IMG_3077.jpeg

Looking ahead slightly, once i've got this van built, my next challenge will be a Gresley D43 Full Brake, more of a scratchbuild in many respects, although using etched sides/ends and roof from Worsley Works. My plan is to scratchbuild my own compensated bogies for the vehicle, hopefully with pick-ups to power a 'lit' tail light, via a DCC function only decoder.

IMG_3074.jpeg

Beyond that a 3SMR whitemetal body kit of a J50 0-6-0T (which I think offers plenty of opportunity for detailing and visual improvement) will be next, with the aim that im going to mount it on my own chassis. The kit does come with its own chassis, but i concluded that an 0-6-0T was good test example to see if I can successfully design and build by own. I have just about got everything worked out I think, just a case of cross-checking measurements once i've built the body, before the chassis CAD design is finished and then goes off for etching. Hopefully all that will take me through for the next few weeks/months, and a small photo plank may be the next stage, who knows.

Hopefully forum members will be interested enough to follow along, even if 3mm isnt your scale. I welcome any thoughts, (polite!) suggestions and constructive feedback from people, as I am strongly of the view, that that is how we all learn, well me anyway!

Richie
 
Last edited:
Thread Contents

BetweenTheTunnels

Active Member
I've put this post here to try and help myself (and others) in finding things in the future. Assuming all plans reach fruition, there's a lot of model building to do over the next few years, aside from the layout, so hopefully by referencing the start of work each kit/scratchbuild/trackwork on here, we might even be able to find things in the future!

Thread Contents
Wagon No. 1 - 3mm Society/Parkside GWR 'Mogo' (Started/Finished: 19th Feb 2023)

Carraige No. 1 - Worsley LNER Teak D.43 Full Brake (Started: 23rd Feb 2023)
 
Last edited:

D6356

Western Thunderer
Hi Just to show what can be done, yes it is 12mm but certainly starting now 14.2 should be much easier and as one society sage pointed out having frames 1.5mm wider is a really good idea! TT wagons 1522021 001.jpg
Society kits in first coat, 20t brake, vanwide and two 12t vans all from the Parkside stable
TT 3mm soc 110223 005.jpg
Society cottage industry scratch aid Cov AB with bits added and homemade roof, stage is a lovely bit of Peter Gentle modelling, Minsterley.

TT 3mm soc 110223 009.jpg
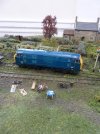
Sorry , blue box ! Lenny Seeney , Lincoln models on european chassis - correct with spoked wheels, flanges a bit deep but they do cut the grass this far up the branch. I suspect it will become D3656 at some point.
Apologies for hijack but hope it offers a view of what is possible on the kitchen table.
Robert
 

BetweenTheTunnels

Active Member
Hi Just to show what can be done ... Apologies for hijack but hope it offers a view of what is possible on the kitchen table.
Robert

Hi Robert,
No apology necessary. Nice to see whats possible. The brake van and 12-ton vans certainly look nice, I've a fair few of those to build if my eventual plan comes to fruition! I have to say im not totally convinced by pure 3D printing for bodyshells yet. Its 90% there, but im not sure its totally right yet. Having said that, the small Warship looks rather nice!

Im just waiting on some Humbrol Liquid Poly arriving to start this box van kit thats here!

Thanks for posting!
Richie
 

D6356

Western Thunderer
I have to say having been disappointed by price and quality of Shapeways 3D generated items, more so in recent times where they have seem - for us as modellers lost the plot. However the growth of home printers - filament and resin bath types then leaps and bounds forward. Yes it is modelling and quite a skill to go from 2D to 3D and make it work but Lenny seems to have cracked it nicely as has Modelu figures with line and grain free efforts. The slight downside is the amount of UV light curing time -I have found some brittle items so am guessing over cured or too quickly - sure an expert will expand/correct.
I have shown several 3D print models at Warley NEC show - and tomorrow at club open day that I have obtained from several sources and I say - not cheaper but different as body is plonked on an rtr chassis. In 3mm however it can be cheaper as it might "only" be a case of building a chassis where joy is from building and not the "quick plonk gratification." but it takes all to make the world so all valid outlooks.
Certainly the D63xx looks the part and with its chassis converted from a piko chassis is surefooted and a good slow runner -even with a 1970s 3 pole motor. Lenny does for around £150 offer a 12mm rtr chassis - but there is frame space for 14.2 you would have to ask him what is possible, while offered as DC conversion to DCC is easy enough and space a plenty for chips and speakers if that floats your boat. Given sound now available in the N gauge 08 the 3mm models are aircraft carrier sized in comparison!
I hope the glue arrives soon.
Robert
 

BetweenTheTunnels

Active Member
Hi Robert,
Yes totally agree, with Shapeways. A friend put me onto a 3D printing company in Sheffield, who seem very good, i've test printed a few bits with them, and a quick phone call before sending the 3D file to explain what it is and the finish im looking for has produced some very good results, although equally fair to say some better than others. A lot is, as you say, down to the resin or fillament used, the angle of the print and curing time etc.

Im looking at trying one of the Lincoln Locos bodys for a N2 as potentially a second loco (not wishing to get ahead of myself!) with a scratchbuilt chassis to it. But I might have a chat with them and see what is feasible, in terms of removing the delicate items from the print (handrails, coal rails, etc) and replacing them with my own rod/etched coal rails, society handrail knobs etc.. If its not possible, then ill possibly just cut them off/sand back if im not happy with it, but if they can be removed before printing, I think it should help to make it easier to sand, primer and possibly sand/primer again, to remove any lines. It will be a good experiment if nothing else!

I have to say one of the attractions of 3mm, is the ability to scratchbuild the loco chassis for each engine, to hopefully get them as good as they can be, primarily in running quality. Im sure from previous experience many years ago, my accuracy with a saw is not perfect, but a combination of 2D/3D CAD drawing and nickle silver etching, I think can produce something that im happy with (famous last words!)

As for the glue, you and me both - im chomping at the bit to get started!! Still working out the best way of approaching the Worsley Works coaches, and im thinking I may send for a set of Mk1 coach etches, which not needing the roof ends sorting out nor the overlapping sides, may be an easier into to coach building. Further thought need there.

Richie
 

ceejaydee

Western Thunderer
As an impoverished teenager, I enjoyed being active in 3mm scale and TT back in the mid 1980's; built a fair few Parkside wagons and really enjoyed rebuilding Triang locos learning a decent amount about motors and elastic-trickery along the way.
I drifted away in the mid-90's then have returned again a couple or more times over the years before (in my mind) finally walking away from the scale at the end of 2021; at that time the lack of interest in railways and the hobby in general were not conducive to working in builders scale.

Regardless I always thought 3mm was the ideal scale and always found myself frustrated that RTR models in OO, N then later HO lured me away at various times, but didn't hold my interest or any length of time once the purchase and initial running was over.

Recently got excited at the prospect of Hornby, Peco and others RTR TT only to find that it wasn't 3mm but 1:120 but I get that 12mm track was the driving force and I'm not rich enough to buy into the scale at the present time either.

Like the work you guys are doing/proposing in the scale and think that with the right approach 3mm is a fantastic builders scale. Whilst I have no problem with 12mm gauge the prospect of accessible 14.2mm gauge track makes it viable to be accurate as I was never personally happy with the look of 12mm but didn't have the skill in the early days to work in the wider gauge, then didn't have the enthusiasm to do it in later years.

Not really considering taking up a 3mm journey again but I will be interested to follow yours. The prospect of RTR TT is still exciting and I hope that the devlopments in 1:120 TT may drive interest in the 1:100 scale as it would be sad for 3mm scale to fade away.
 

BetweenTheTunnels

Active Member
Evening all,
If you want a visual, Wizard models do a booklet for £1.50 on making up etched coaches.
Robert
Thanks Robert, I'll take a look at that tomorrow, and I didnt know about the Wizard Models booklet. I may need to send to them for a few items in the not too distant future, so i'll see about finding the book and adding that on to the order!

As an impoverished teenager, I enjoyed being active in 3mm scale and TT back in the mid 1980's; built a fair few Parkside wagons and really enjoyed rebuilding Triang locos learning a decent amount about motors and elastic-trickery along the way.
I drifted away in the mid-90's then have returned again a couple or more times over the years before (in my mind) finally walking away from the scale at the end of 2021; at that time the lack of interest in railways and the hobby in general were not conducive to working in builders scale.

Regardless I always thought 3mm was the ideal scale and always found myself frustrated that RTR models in OO, N then later HO lured me away at various times, but didn't hold my interest or any length of time once the purchase and initial running was over.

Recently got excited at the prospect of Hornby, Peco and others RTR TT only to find that it wasn't 3mm but 1:120 but I get that 12mm track was the driving force and I'm not rich enough to buy into the scale at the present time either.

Like the work you guys are doing/proposing in the scale and think that with the right approach 3mm is a fantastic builders scale. Whilst I have no problem with 12mm gauge the prospect of accessible 14.2mm gauge track makes it viable to be accurate as I was never personally happy with the look of 12mm but didn't have the skill in the early days to work in the wider gauge, then didn't have the enthusiasm to do it in later years.

Not really considering taking up a 3mm journey again but I will be interested to follow yours. The prospect of RTR TT is still exciting and I hope that the devlopments in 1:120 TT may drive interest in the 1:100 scale as it would be sad for 3mm scale to fade away.
Hi Christopher,
Thanks for the kind comments, and im pleased to hear your still interested in the scale, even if not active with it any more. I know the 3mm Society is a small group, just under 600 members i think, but the range of materials, parts, kits etc, available for members is astonishing. I have been really surprised.

I have gone the other way to you, had a keen interest in railways, but moved away from modelling (lack of time really and the inability to make my mind up!). I must admit it was the Hornby TT120 with the A3/A4 that made me think could that be what I wanted, then realised it was only slightly larger than N, and while searching around I came across the 3mm Society and all of a sudden the boxes started ticking themselves! I like main line situations (enjoy watching branch layouts, but they just dont work for me from an operations point of view) so I know I have set myself a large challenge. Still its not a race, slow and steady is my motto - if it goes wrong, take it apart and do it again!

Glad to have you following along, chip in as and when you've got anything to add, or help/feedback - its all welcome, and I promise there will be some modelling this week (assuming the glue arrives!!) The kit is sat on the desk beside me and i can hear it shouting "build me, build me!"

Richie
 

Jordan

Mid-Western Thunderer
Sorry , blue box ! Lenny Seeney , Lincoln models on european chassis - correct with spoked wheels, flanges a bit deep but they do cut the grass this far up the branch. I suspect it will become D3656 at some point.
Well, NOW you really have my interest!! ;) I like Class 22s (or D63xx for some) due to their links to the last years of BR trains in the Forest of Dean.
But talking of D63xx, surely you mean your model might become D6356, like wot your forum name is? Not D3656. ;)
 

Joe's Garage

Western Thunderer
Welcome Richie and please keep posting. I too have an interest in 3 mm but not active now. I was a member of the 3 mm Scale Society for about 3 years and made up a few of the society kits (Parkside and Cambrian) which were just like the larger scale versions, lovely to assemble.
I followed John Sutton's weathering techniques and even though I kept to 12 mm gauge and very small versions of the hook coupling they were very acceptable models.
Jordan may like the next bit....as I exchanged this little lot for an HO Proto 2000 New York Central SW8....the dark side beckoned me..
I won't get into the gauge debate but there are or have been some lovely 12 mm models. Peter Gentle's Mullion, Keith ? Helston and of course John Sutton's Southwell. John's ability to capture the locos he spotted in his earlier years is reflected in the models even though, at his own admission, have no brake gear. I know there are others but these certainly influenced me. I have not even mentioned the buildings!
A thriving society and long may they continue. Nice touch about the wagon kit.
Look forward to more...but what is "Between the tunnels"?
Cheers
Julian
 

BetweenTheTunnels

Active Member
Welcome Richie and please keep posting. I too have an interest in 3 mm but not active now. I was a member of the 3 mm Scale Society for about 3 years and made up a few of the society kits (Parkside and Cambrian) which were just like the larger scale versions, lovely to assemble.
I followed John Sutton's weathering techniques and even though I kept to 12 mm gauge and very small versions of the hook coupling they were very acceptable models.
Hi Julian,
Thanks for the welcome, and your interest. The issue of the gauge debate fascinates me in some cases with 3mm, as i dont see what the debate really is - both are options, there for each modeller to choose as he/she wishes! I know there are some who prefer 12mm track, and those (like me!) who prefer 14.2, but at the end of the day its like choosing 2mm, 3mm or 4mm scale, its each to their own in my view. Glad you liked the 3mm kits, I think having Parkside and Cambrian as the manufacturers is (or was, as Parkside is now Peco) a big plus point for quality.

Look forward to more...but what is "Between the tunnels"?
Cheers
Julian
Well it started out as a 'name' for the a layout ages ago. I was trying to come up with something simple and easy to remember - we've got the likes of Gresley Beat and The Streamliner Years (Grantham) etc, and I think I was trying to be clever! Then it occurred to me that most layouts that are to and from hidden sidings emerge from a tunnel or bridge, and disappear through a tunnel or bridge .. therefore 'Between the Tunnels' sounded a clever play on the situation.

In reality, if everything works out as I want it too ... 'BTT' takes on another meaning, as the long-term 3mm layout would be set on a slightly modified London end ECML, around Belle Isle and Holloway - so Between The Tunnels becomes between Gasworks and Copenhagen Tunnels! But thats a bit of a way in to the future yet ... and will need significant stock building! Although my initial carriage and loco ideas, not to mention the thumbnail graphic on my username, may have given a bit of a hint in this direction!

Richie
 
Last edited:

BetweenTheTunnels

Active Member
If you want a visual, Wizard models do a booklet for £1.50 on making up etched coaches.
Robert

Robert,
Thanks for that, i've just finished watching all four of his videos on building the etched coach kit. Quite interesting and helpful, so thank you for that. Im thinking there are a couple of bits I may do differently, and it has reinforced my view that starting with an easier Mk1 coach, is a better way forward than a Gresley, due to the end roof issue and overlapping the sides, so have ordered a Mk1 CK kit from Allen Doherty at Worsley, but the GWR Mogo will remain No. 1 vehicle!

Work beckons for the next couple of days to finish my run of five shifts, by which time the glue should hopefully have arrived - amazing how much we miss local model shops, there's isnt one around here at all :( - and Wednesday/Thursday we should have some actual modelling! Yes really!
Richie
 
GWR Mogo Two-Axle Box Van (W01)

BetweenTheTunnels

Active Member
Evening all,
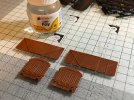
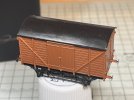
Well pleased to say the Humbrol Liquid Poly turned up this afternoon, so tonight has seen my first bit of 3mm scale modelling undertaken! Im sure many people have built plastic kits before, so i'll not do a 'blow-by-blow' account, except to say there are a couple of 'finishing off' items to be done - I need to acquire replacement buffers when the 3mm Society Shop is available, and some 14.2mm wheels. The roof needs painting white (I think) before being attached, and it also wants some liquid led weight inside it to weight it a bit.

So... at 19.45pm I started with this ...
IMG_3091.jpeg

and at 21:10 concluded with this ...
IMG_3113.jpeg

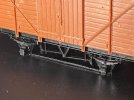
Really impressed with the kit - not surprising as its made for the society by Parkside i think. Easy to go together, very nice finish and very little flash to be cleaned up on the moudlings. Each only needed very minor dressing to sit right. I also think that the level of 'easily applied' detail on the underframe is superb.

IMG_3108.jpeg

This has also confirmed to me that there is a really nice size to 3mm modelling - compared with a five-plank N gauge wagon here ... the height isnt a fair comparison as the Mogo doesnt have wheels.

IMG_3117.jpeg

Overall very impressed and its confirmed that I think i might finally be on the right road.

Richie
 
Last edited:

Jim Read

Active Member
Hello Richie,
I was a 3mm society member some time ago and really liked the scale.
If you or anyone else reading would like a simple but very good pulse controller circuit, designed by Peter Humphreys. It's in the April 1979 issue of the magazine, only 9 components, the main ones are a power transistor and a 741 op-amp as an oscillator, I made it and used it for several years. I'll gladly scan it and send to anyone who asks.
Apologies for butting in, I wish you all the best Richie and that's a nice Van kit :)
Cheers - J
 

BetweenTheTunnels

Active Member
Hello Richie,
I was a 3mm society member some time ago and really liked the scale.
If you or anyone else reading would like a simple but very good pulse controller circuit, designed by Peter Humphreys. It's in the April 1979 issue of the magazine, only 9 components, the main ones are a power transistor and a 741 op-amp as an oscillator, I made it and used it for several years. I'll gladly scan it and send to anyone who asks.
Apologies for butting in, I wish you all the best Richie and that's a nice Van kit :)
Cheers - J
Hi Jim,
No apology necessary! Everything helps as they say. I'll see if I can find that ... loco wise im likely to look at DCC, but a simple DC circuit for testing would not be a bad idea!

Richie
 
Gresley D.43 Full Brake - Build Underway

BetweenTheTunnels

Active Member
This is a somewhat interesting comparison to the wagon kit. For starters its etched brass, rather than plastic, so solder rather than glue. Its also a Worlsey Works etch so more of a scratchbuilder helper than a kit, with no instructions. The Worsley Works etches, im told, follow the Comet Coaches way of building, an a friend has given me some help with some info on those, but is obviously not a book. I need to order the appropriate item from Wizard Models.

IMG_3128.JPG

However, I have managed to extract the inner ends sections that fold up and form the connection between the floor and body, and laminated these to the coach ends. To be honest I've done very little etched brass work in the past, so the soldering to me looked quite neat. Still a bit too much on the iron I think, but its all a learning curve. So we are underway! The next task will be to solder the window frames and vents on to the bodyside I think.

IMG_3125.JPG

In other news, as they say, I've now placed an order with Worsley Works for a BR Mk1 coaches, due in a few weeks when the etches are back in stock, and an order is about to go into the 3mm Society for 14.2mm wheelsets, some wagon kits and some rail. Nice to say things are slowly moving forwards, i've come up with a little 'dog bone' shaped test track, and got it designed in Templot. It might not be scenified, and it is something of a tail chaser, but it is primarily for testing locos, running in chassis and giving me somewhere to play run trains to start with, rather than being a proper prototypical layout - that will follow in due course!

Richie
 
Last edited:

BetweenTheTunnels

Active Member
Quick update, time constraints with work etc have taken their toll this past fortnight, but im hoping I may get some more progress with the coach tomorrow. Ahead of this, I've treated myself to a new temperature-controlled Antex 50w soldering iron. My previous one was a hand down from my dad, the bit was all over the place and I was struggling to find a make to get a replacement bit.

So hopefully the new one will see me for years to come. But a question to you kit-builders ... is there anything that you have to do with a new 'bit' before you use it, or is it just a dive in, pop some solder on and get on with the kit?

Tomorrow' task, is soldering the droplights and vents onto the coach sides.

Richie
 

simond

Western Thunderer
If it’s plated, just tin with rosin cored solder and get on in there!

If it’s not plated, you might have to boil it in eels or wash it in vampires blood or something…

in any case, tin it with or without extra flux and enjoy.
 
Top