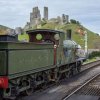
Adams T3

bambuko

Western Thunderer
... Chris has finished fabricating the loco's Stephensons valve gear and is now milling ports in the cylinders ...
I am curious about Chris's approach to manufacturing valve gear eccentrics.
Standard model engineering practice being to manufacture four individual sheaves and secure them to the axle with a grub screw for each one.
It seems clear from the attached photos that, this is how pump eccentric (single flange?) has been done.
Is it also the case for valve gear eccentrics? or is he doing something clever to make sure that valve gear is set correctly?
Hope you don't mind these questions :) but your excellent threads are great way to learn how things can be done - thank you! :thumbs:
 

Thirtysecond

Western Thunderer
I am curious about Chris's approach to manufacturing valve gear eccentrics.

Yes Chris uses grub screws on all eccentrics.

So the prototype tender progresses slowly. I have now added the two dummy toolboxes, completed the front water tank, added the fitments for the rear water tank and tested the whole thing for leaks. Next task is to add the rear tool box and the dummy tank filler to the cover (coal) plate which will hide the water pump and the Meths valve respectively.

IMG_2857.JPG

I still have to make up the Meths tank and the alternative supplementary water tank which fits in the same place for coal firing. Then we can start adding the various electronics and gauge and see how they fit into the very restricted space.

Here is the tender so far with top plate off.

fullsizeoutput_74d.jpeg
 
Last edited:

Thirtysecond

Western Thunderer
PROGRESS 22/8

Cylinders


Note that the piston tail is smaller diam than the piston rod (as it should be)

IMG_2861.JPG


IMG_2860.JPG


Tender

The rear toolbox and the water filler (minus lid) have been added to the top plate

IMG_2868.JPG

Underneath the top plate is the newly completed "extra water" tank to be substituted for the meths tank when coal firing.

IMG_2869.JPG

This plugs into the the well tank using a o-ring connector.

IMG_2871.JPG

Next week the meths tank!
 

Keith Phillips

Western Thunderer
I've come over all Elvis now. "Love me Tender, love me do........:p:D . Fabulous work. I am always in awe of such fine work as this.
 

adrian

Flying Squad
Note that the piston tail is smaller diam than the piston rod (as it should be)
With a keen interest in live steam this is an interesting design. Previous designs I've seen (Eddie Cooke et al) they drill the various valve ports directly in the cylinder block for the valve chest to work on. With the intermediate plate between the valve chest and the cylinder block I presume it makes it easier for drilling - however does this not add extra height to the whole assembly? Also that slide valve block looks a different colour - is this phosphor-bronze or something else?
 

Thirtysecond

Western Thunderer
All the cylinder metalwork is Brass. Just that it's all from the "Brass bits" bin so is of differing ages and therefore various levels of tarnishing. Height doesn't matter on this model as the valve chest is inside the frames and the cylinders (obviously) outside. Everything is mounted horizontally.

fullsizeoutput_703.jpeg

Tender Meths tank completed and to my utter amazement, no leaks first attempt. (I am definitely a convert to knurling!!!)

IMG_2893.JPG

So we now have interchangeable tanks for the tender dependent on firing method: meths tank for meths firing and "extra water" tank for coal firing.


IMG_2894.JPG
 

Thirtysecond

Western Thunderer
Tender raves, extra toolboxes and lids added.

I am surprised at how many toolboxes this tender had. As built there were 5!! What on Earth did they need 5 for? Luckily as preserved one of the side toolboxes disappeared so this one only has 4! It definitely detracts from the elegance of the loco a bit.

I am also amazed at how little coal space there was; essentially just the top of the water tank which went from front to rear along the top of the tender.

IMG_2922.JPG
 
Last edited:

P A D

Western Thunderer
Tender raves, extra toolboxes and lids added.

I am surprised at how many toolboxes this tender had. As built there were 5!! What on Earth did they need 5 for? Luckily as preserved one of the side toolboxes disappeared so this one only has 4! It definitely detracts from the elegance of the loco a bit.

I am also amazed at how little coal space there was; essentially just the top of the water tank which went from front to rear along the top of the tender.

View attachment 112269

My thoughts were the same when I built the Finney 7 T3. Maybe they broke down a lot and the boxes were full of spares, or perhaps they had extra coal. ;) Either way, it must have been fun for the fireman dragging the coal forward when moving.

Superb build by the way.

Cheers,
Peter
 

Andrew

Active Member
My thoughts were the same when I built the Finney 7 T3. Maybe they broke down a lot and the boxes were full of spares, or perhaps they had extra coal. ;) Either way, it must have been fun for the fireman dragging the coal forward when moving.

Superb build by the way.

Cheers,
Peter

Worth mentioning that Mr Adams' locomotives were extremely fuel-efficient (up there with the best in the country for coal consumption) which would have helped. By the way, they didn't often break down! As you may have deduced, I am a fan of the great man.

Watching this thread with interest.

Regards

Andrew
 

Thirtysecond

Western Thunderer
My thoughts were the same when I built the Finney 7 T3.

Peter, Any chance of some pictures of the Finney T3. To be honest I didn't know he had done a 7mm T3. Now that the dear National Railway Museum (or as they now like to be called, the Railway Museum!) unconditionally gave away this unique national treasure, any photographs of a Finney version will be as useful as those of the original (now in hundreds of bits and inaccessible!). Similarly copies of parts of the Finney kit instructions could throw a light on the the function of some controls. (Pictures of the cab are few and far between and we are still unclear as to the function of a few of the controls.)

Thanks

Chris Tolhurst and I will be on the 1/32 Finescale stand at the G1MRA AGM, Stoneleigh on Saturday 12th. The prototype will be on display so if anybody there fancies a chat please feel free to do so. Just to reiterate though, the loco and tender are prototypes, only the wheelsets, hand pump and enots valve will be used in the final models.
 
Last edited:

P A D

Western Thunderer
Hi 30 secs,
Here's a link to my Finney 7 T3 build on here.

Finney 7 Adam's T3 4-4-0

As to the instructions, those nice F7 chaps very kindly put them all on their website.

There are also excellent builds on here by Richard Lambert of Finney 7 (Dikitriki) and Andrew Childs (Funtley Works). Andrew Child's T3 was superbly painted by Warren Haywood and you will find pictures on his website.

Here are some photos of the T3 I found on t'internet with glimpses inside the cab.
100401trainset3.jpg
15021251075_c4d1d26d7f_b.jpg

swanagerail2.jpg

And one of the many bits that the T3 is now in, although this has probably been broken down further.

FLOUR-OVERHAUL.jpg

Hope these help.

Cheers,
Peter
 

P A D

Western Thunderer
Just for good measure, these are the other prototype photos that are floating around on the internet, in case you have not found them.

Considering it must have been in excellent external condition when it moved south, just look at the state of it in the last photo! Criminal.

Cheers,
Peter

110401trainset3.jpg 28377938_148486615823896_6949684925968918358_n.jpg 110401trainset2.jpg 28238897_148486445823913_7779534052360298595_o.jpg LSWR_Adams_T3_4-4-0_563_(1893)_Scans791_(10533309855).jpg 8508917611_2b2fb3372f_b.jpg 23551237_127789824560242_7326786803705348865_o.jpg download.jpeg 19642642_138610026811555_6858000957443765951_n.jpg download.jpeg.jpg SR-T3-at-Swanage.jpg 563.jpg DSC_5169-1024x683.jpg 3933015439_976abe74f8_b.jpg SR+Newsletter+T3+Flour+Mill.jpeg
 

David Halfpenny

Western Thunderer
Chris and Derek were indeed on the 1:32 stand at the G1MRA AGM, though I didn't catch Chris on camera.
Never mind, here's John Green with Derek:

20191012_142719.jpg
From the left, there's my A4-sized display of refining a modestly-priced commercial insulated wheel from G1MRA Standard to Dead Scale using hand tools in a simple woodworking lathe. On the left is a four-jaw chuck accessory for centring up a complete wheelset accurately, and on the right is a conical mandrel that holds an individual wheel square and true regardless of exact hole bore. In the middle are sample wheels, Before and after.

Next, Dave Bowden's Siphon C in progress, with the Tenmille etches he's adapted.
Thanks to his advice, I'm almost there with details for the 1:32 Siphon Gs I collected from Ken West at the show. (Damn! I forgot to get wheelsets!)​

Then John with his locomotives, and a heavy pile of etches for collaborators to collect - so at least some of you were there on the day ;-)

Swivelling view:

20191012_142733.jpg
Next is Derek, with his wonderful Warship and, behind it, a posse of 3D-Printed railwaymen. While they appear to be in the union ( No Use Rushing ) it's the embarrassment of being stared at that's keeping them immobile inside their IKEA rotating display case.
The Slaters Ricketts wagon is awesomely finished, to the point where I bet it would be hard to identify its size from a good photo. As a London-based wagon, it's ideal for my Widened Lines fleet, so no wonder Derek keeps it locked-up!
(Not knocking rail unions: I was a Shop Steward myself.)
Then Chris's prototype Adams T3, and some very fine lattice signals.

And finally, Dave makes a point:

20191012_142741.jpg
Beyond him and John, you can just see Alan Bullock on the Gauge One 3D Circle stand.
(We gave them a ride on 'our' tables because, while Making is scale-neutral, it's even more important to Finescalers than it is to others.)

While the show wasn't overcrowded, it was buzzing with excitement, especially a couple of dozen men and women in their teens and twenties re-enacting scenes from Thomas & Friends using some of the original TV props.
OK it was 10mm, and their target audience was on Twitter. But they took huge care over loose-laying their ballast with a correct shoulder, and getting their scenes Just Right - viz embryo Finescalers. Besides, when was the last time you saw this many folk with no white hairs at a G1-only event? ;-)
20191012_153956.jpg


Thanks to Dave, John, Chris, Derek, and all who stopped by to chat.

David 1/2d
 

Thirtysecond

Western Thunderer
Some of you may know that Chris designed a novel form of loco/tender connector for the batch of TME King Arthurs. The two part unit provides a physical towing link plus three pipe connectors for pressurised water from the hand pump, Meths from the Meths chicken feed and a return to the water tank from the by-pass. Although comparatively bulky it is hidden beneath the footplate and fall plate. See photo below of the male tender unit. There is a matching female unit on the loco which is not in the photo:

380C5B09-C31E-4278-9FF4-A6731A9766B3.jpeg

For the T3s we will be doing similar connectors so I have just milled and drilled 5 pairs of blocks to produce the components for them. This time however there has to be an extra pipe (4 in all) as the pressure gauge will reside in the tender not the loco and needs a supply from the boiler. Not quite as easy as it looks as all the holes on the joining faces have to be counterbored to exactly the same depth to accept the Silicon seals (yet to be added).

As you can see I didn't quite finish on Thursday and still have produce two more plates, put a slot in each and then they have to be soldered onto the pipe blocks.

IMG_2947.JPG

Chris has been working on a slo-mo for the T3; to see if its feasible. There isn't much room at all and to get all the gearing and a substantial flywheel in there without it being visible is definitely pushing the limits. But if anyone can do it , Chris can.

Air testing the chassis very soon and I'll try and get some video onto youtube with a link.
 

adrian

Flying Squad
This time however there has to be an extra pipe (4 in all) as the pressure gauge will reside in the tender not the loco and needs a supply from the boiler.
A fascinating solution. So you think you can get a solid enough seal on the connector to get an accurate reading on the pressure gauge? I suppose if the original 3 pipe connector would handle the water pump feed then it should be okay for the pressure gauge. What operating pressure are you looking at on the boiler then?
 

Thirtysecond

Western Thunderer
Agreed. SSP who make slo-mos for Roundhouse models in Australia use rubber mounts for the slo-mo unit. We don't have the space for such luxuries so are hoping that ball race bearings and nylon gears will be quiet enough. Still, that's what the prototype is for; if we can't get it to an acceptable sound level it won't go on the production models.

My experience is that it may depend where the thing is run. At a noisy show or outdoors I doubt you'll hear anything. So maybe it needs to be a switchable function?
 
Last edited:

Thirtysecond

Western Thunderer
So you think you can get a solid enough seal on the connector to get an accurate reading on the pressure gauge? I suppose if the original 3 pipe connector would handle the water pump feed then it should be okay for the pressure gauge. What operating pressure are you looking at on the boiler then?


The Silicon sleeves are fractionally longer than the combined counterbores of the two parts so when the two parts are pinched together the seals crunch up inside the counterbore cavity to provide a very thorough seal. On the King Arthurs the two parts were held together by a cam pin inserted through the cab floor into the male unit. The female unit was fixed. As the cam pin was turned 180 degrees it pulled the male and female parts together to complete the seals and make a rigid connector. We'll do the same on the T3s.

Working pressure will be 60lbs/in2
 
Top