jonte
Western Thunderer
Perhaps in hindsight, the title might sound a little grand, but hopefully reflects what I intend as a suitable heading for a thread, chronicling my ‘occasional’ endeavours to create a (small) scene, or two, which - hopefully - I will be in a position to offer for sale; or not, perhaps.
And ‘occasional’ will be the operative word, as I continue with my current venture; taking into account my glacial pace.
Having surveyed ‘the market’, I intend to aim my model at the RTR end of the spectrum, which I feel is not only an area with which I am most familiar, but seems to provide the most popular outlet for the hobby in general, too.
Additionally, it’s an opportunity to part with an accumulation of models, constructed over a period time, with the intention of adding an additional new item or two, perhaps to enhance the scene. And of course, ‘scene’ provides an ample opportunity to provide closure on a number of separate items at once (which, for somebody who prefers to bin rather than sell is an added bonus), as well as providing an alternative to just concentrating on a single subject, which can lead to mundanity.
So that’s the thinking; now here’s the doing:
No.1 in the ‘Occasional Series’: The Shed
I’ve often considered creating a ‘shed’ scene, and this plan found in the ‘Small’ section of the illustrated Peco layouts book, nicely fits the bill. I hope nobody minds my posting the plan/picture here, which I do so purely for reference purposes, although I will remove if required to do so and just make written reference:
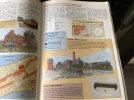
I think the diminutive size would appeal to any prospective ‘small layout’ customer, as well as a not too daunting affair to start off with.
I plant to build as per plan, however with one or two small changes: the rear-most line would be elevated on an embankment to provide a backdrop, and an opportunity to construct a ‘Stratford-upon-Avon’ coal hoist/water tower. This, of course, would require re-siting it from the position on the plan. An alternative structure or two would need to be provided in lieu to balance the scene, and perhaps provide a handy screen behind which to hide the integrated controls.
Of course, the primary part of the plan involves the use of a turntable, which provides a wonderful opportunity to construct my Peco kit, that has seen many plans for its use shelved on more than one occasion. About twelve months ago, when commencing my current layout, I had plans to incorporate it, which saw me going to the lengths of trying to motorise it (I’d also purchased the Expo motor and gears, but was put off by the negative ‘press’ received on the various fora).
In my quest, I discovered an article linked to Model Trains Catalogue on the basics of how to motorise the turntable via a stepper motor and something called an ‘Arduino’. As this was a language I couldn’t comprehend, I followed the instructions as best I could before ordering several parts from as far away as Hong Kong (I waited months for the arrival of a ‘collar’, for instance, which to my own credit, was the result of quite a lot of research - the article suggested drilling out the plastic spindle holder provided in the kit, but with only basic tools and a kitchen table to work from, I knew this was fraught!). Incidentally, by the time the collar arrived I’d moved on, resigned to consigning the idea of using the turntable to the ether. However, when I rediscovered it yesterday, I was delighted to discover that I had ordered correctly for once; it was a neat fit onto the stepper motor spindle, the top end being ‘stepped-down’ to the 4mm diameter required for the turntable spindle. I was soon disappointed to discover that a metal spindle isn’t supplied with the kit: but then I remembered the Expo kit!
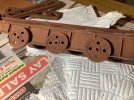
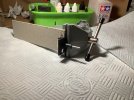
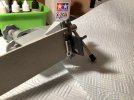
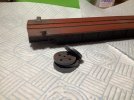
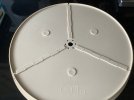
I’ve made a start on the turntable, racing ahead of the order of instructions by constructing the circular base first, which was belted and braced by using two part epoxy resin to supplement the styrene adhesive. The fit isn’t the best, but for once, the priority was to ensure that it was totally flat,as stressed in the many ‘how-to’s’ available. I’ll open out the joints later with a triangular file to increase the surface area, before filling with plastic filler:
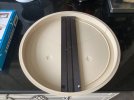
I won’t lengthen my first post with a blow by blow of intentions, but needless to say I will be making slight ‘aesthetic’ changes to the turntable’s appearance; the chunky hand rails will need attention for starters.
As mentioned, the turntable remains the priority, so it’s vital that it works and does so efficiently i.e. turns at an appropriate speed and lines up with each road automatically. To that end, I shall be seeking the advice of my nephew to ensure that the ‘free to use’ PC programme recommended is correctly installed, and to vet the list of parts already purchased (as well as to see if I’ve omitted others).
Technical/mechanical parts obtained thus far:
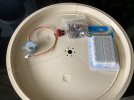
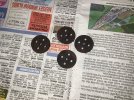
From left to right: Stepper motor, Collar with grub screws, potentiometers to control rate of turn and breadboard (?). Think I need the Arduino board, a shield and some ‘ribbons’?
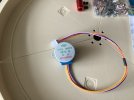
Motor details:
If, in the event, things don’t go according to plan with the online advice, I shall cut my losses and opt for the self-indexing system offered by Locotech. Watch this space.
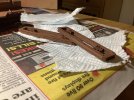
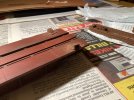
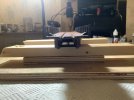
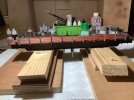
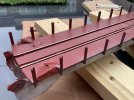
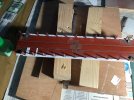
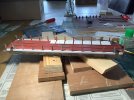
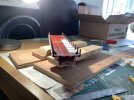
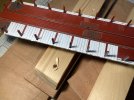
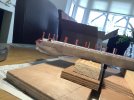
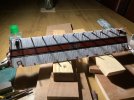
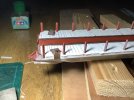
Elsewhere, I shall use the train shed I constructed a couple of years or so ago (originally as a station roof) for the engine shed, which will be left open on the viewing side for the operator to ‘enjoy’ the interior:
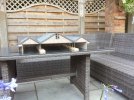
Of course, as it’s intended use has changed, there will be a requirement to provide additions such as venting-stacks and ‘hoods’, which I plan to construct from styrene.
And of course, I shall need to give some further thought to the choice of track, and here , I would be delighted to hear the thoughts of any kind soul taking the trouble of reading this.
Options:
Setrack (as per original plan)?
Code 100 Streamline (latest range)?
Peco Code 75 - Finescale?
Peco B/Head?
I’ve a feeling Setrack would be best, as any potentially interested party may still have coarser wheel sets to contend with, with the benefit being that the layout size wouldn’t be compromised.
Talking of size, I’d be building my own baseboard, having had the sections cut to size by my local wood yard. Two reasons: I’m not sure whether the proprietary MDF baseboards would sag beneath the turntable, causing a plethora of problems, plus I could offer a short scenicked ‘extension’ on which the operator can place their stock, if so wished, and would be part of the layout in any case.
Electrically, the intention would be for both DC and DCC operation.
So, I’ll leave it there for now, but I do hope some of you will enjoy following the development of my ‘occasional’ asides, as and when time permits, and please don’t forget that your thoughts and generous input are always welcome.
Jonte
And ‘occasional’ will be the operative word, as I continue with my current venture; taking into account my glacial pace.
Having surveyed ‘the market’, I intend to aim my model at the RTR end of the spectrum, which I feel is not only an area with which I am most familiar, but seems to provide the most popular outlet for the hobby in general, too.
Additionally, it’s an opportunity to part with an accumulation of models, constructed over a period time, with the intention of adding an additional new item or two, perhaps to enhance the scene. And of course, ‘scene’ provides an ample opportunity to provide closure on a number of separate items at once (which, for somebody who prefers to bin rather than sell is an added bonus), as well as providing an alternative to just concentrating on a single subject, which can lead to mundanity.
So that’s the thinking; now here’s the doing:
No.1 in the ‘Occasional Series’: The Shed
I’ve often considered creating a ‘shed’ scene, and this plan found in the ‘Small’ section of the illustrated Peco layouts book, nicely fits the bill. I hope nobody minds my posting the plan/picture here, which I do so purely for reference purposes, although I will remove if required to do so and just make written reference:

I think the diminutive size would appeal to any prospective ‘small layout’ customer, as well as a not too daunting affair to start off with.
I plant to build as per plan, however with one or two small changes: the rear-most line would be elevated on an embankment to provide a backdrop, and an opportunity to construct a ‘Stratford-upon-Avon’ coal hoist/water tower. This, of course, would require re-siting it from the position on the plan. An alternative structure or two would need to be provided in lieu to balance the scene, and perhaps provide a handy screen behind which to hide the integrated controls.
Of course, the primary part of the plan involves the use of a turntable, which provides a wonderful opportunity to construct my Peco kit, that has seen many plans for its use shelved on more than one occasion. About twelve months ago, when commencing my current layout, I had plans to incorporate it, which saw me going to the lengths of trying to motorise it (I’d also purchased the Expo motor and gears, but was put off by the negative ‘press’ received on the various fora).
In my quest, I discovered an article linked to Model Trains Catalogue on the basics of how to motorise the turntable via a stepper motor and something called an ‘Arduino’. As this was a language I couldn’t comprehend, I followed the instructions as best I could before ordering several parts from as far away as Hong Kong (I waited months for the arrival of a ‘collar’, for instance, which to my own credit, was the result of quite a lot of research - the article suggested drilling out the plastic spindle holder provided in the kit, but with only basic tools and a kitchen table to work from, I knew this was fraught!). Incidentally, by the time the collar arrived I’d moved on, resigned to consigning the idea of using the turntable to the ether. However, when I rediscovered it yesterday, I was delighted to discover that I had ordered correctly for once; it was a neat fit onto the stepper motor spindle, the top end being ‘stepped-down’ to the 4mm diameter required for the turntable spindle. I was soon disappointed to discover that a metal spindle isn’t supplied with the kit: but then I remembered the Expo kit!
I’ve made a start on the turntable, racing ahead of the order of instructions by constructing the circular base first, which was belted and braced by using two part epoxy resin to supplement the styrene adhesive. The fit isn’t the best, but for once, the priority was to ensure that it was totally flat,as stressed in the many ‘how-to’s’ available. I’ll open out the joints later with a triangular file to increase the surface area, before filling with plastic filler:


I won’t lengthen my first post with a blow by blow of intentions, but needless to say I will be making slight ‘aesthetic’ changes to the turntable’s appearance; the chunky hand rails will need attention for starters.
As mentioned, the turntable remains the priority, so it’s vital that it works and does so efficiently i.e. turns at an appropriate speed and lines up with each road automatically. To that end, I shall be seeking the advice of my nephew to ensure that the ‘free to use’ PC programme recommended is correctly installed, and to vet the list of parts already purchased (as well as to see if I’ve omitted others).
Technical/mechanical parts obtained thus far:

From left to right: Stepper motor, Collar with grub screws, potentiometers to control rate of turn and breadboard (?). Think I need the Arduino board, a shield and some ‘ribbons’?
Motor details:

If, in the event, things don’t go according to plan with the online advice, I shall cut my losses and opt for the self-indexing system offered by Locotech. Watch this space.
Elsewhere, I shall use the train shed I constructed a couple of years or so ago (originally as a station roof) for the engine shed, which will be left open on the viewing side for the operator to ‘enjoy’ the interior:

Of course, as it’s intended use has changed, there will be a requirement to provide additions such as venting-stacks and ‘hoods’, which I plan to construct from styrene.
And of course, I shall need to give some further thought to the choice of track, and here , I would be delighted to hear the thoughts of any kind soul taking the trouble of reading this.
Options:
Setrack (as per original plan)?
Code 100 Streamline (latest range)?
Peco Code 75 - Finescale?
Peco B/Head?
I’ve a feeling Setrack would be best, as any potentially interested party may still have coarser wheel sets to contend with, with the benefit being that the layout size wouldn’t be compromised.
Talking of size, I’d be building my own baseboard, having had the sections cut to size by my local wood yard. Two reasons: I’m not sure whether the proprietary MDF baseboards would sag beneath the turntable, causing a plethora of problems, plus I could offer a short scenicked ‘extension’ on which the operator can place their stock, if so wished, and would be part of the layout in any case.
Electrically, the intention would be for both DC and DCC operation.
So, I’ll leave it there for now, but I do hope some of you will enjoy following the development of my ‘occasional’ asides, as and when time permits, and please don’t forget that your thoughts and generous input are always welcome.
Jonte

