Chas Levin

Western Thunderer
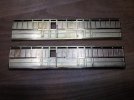
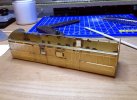
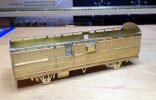
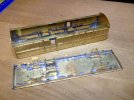
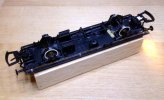
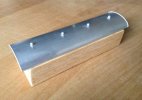
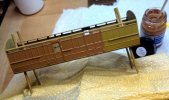
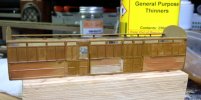
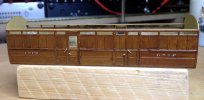
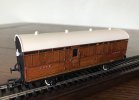
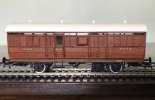
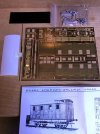
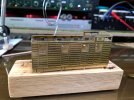
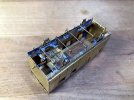
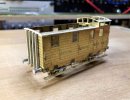
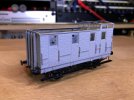
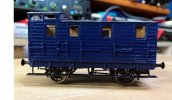
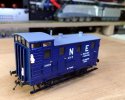
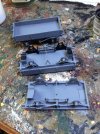
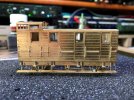
Here's another picture sequence of a build that I've dug out of the files - this one was the D&S LNER Pigeon Van (with acknowledgement that there's been some discussion of whether or not these vehicles were actually pigeon vans or just general brake and luggage vehicles). Everything was built as supplied and specified in Mr Pinnock's excellent kit, with the exception of the roof, for which I substituted an extruded aluminium one from Dart Castings in place of the plastic one in the kit. With no disrespect to plastic roofers everywhere, I think it added considerably to the look of the finished vehicle - there's a uniformity and solidity about it that I haven't been able to achieve with some other materials I've tried. Please excuse the blobby soldering in places (my technicque, particularly in cleaning up, has imroved since this model was made) and the variable camera work (again, things have improved there too, though not by as much!). Hopefully everything's self-explanatory, including some of the paints and varnishes I used for this attempt at teak. By the way, does anyone else whare my enormous liking for white tyres:

D&S_304_LNER_Pigeon_Van_Nov18 (1).JPG

D&S_304_LNER_Pigeon_Van_Nov18 (3).JPG

D&S_304_LNER_Pigeon_Van_Nov18 (4).JPG

D&S_304_LNER_Pigeon_Van_Nov18 (5).JPG

D&S_304_LNER_Pigeon_Van_Nov18 (6).JPG

D&S_304_LNER_Pigeon_Van_Nov18 (14).JPG


D&S_304_LNER_Pigeon_Van_Nov18 (17).JPG

D&S_304_LNER_Pigeon_Van_Nov18 (29).JPG

D&S_304_LNER_Pigeon_Van_Nov18 (15).JPG

D&S_304_LNER_Pigeon_Van_Nov18 (16).JPG

D&S_304_LNER_Pigeon_Van_Nov18 (21).JPG

D&S_304_LNER_Pigeon_Van_Nov18 (22).JPG


D&S_304_LNER_Pigeon_Van_Nov18 (25).JPG

D&S_304_LNER_Pigeon_Van_Nov18 (38).jpg

D&S_304_LNER_Pigeon_Van_Nov18 (39).jpg

D&S_304_LNER_Pigeon_Van_Nov18 (41).jpg
 

Rob Pulham

Western Thunderer
Very nice,

I built a couple of similar in 4mm from Chivers kits, one of which ended up in Canada. I never managed to get my hands on a 4mm D&S version. Indeed I just missed out on a 7mm version a few years ago at Telford after someone bought it while I was procrastinating.

All of this reminds me that I really aught to make some headway on the two Ian kirk versions that I have on the go...
 

Chas Levin

Western Thunderer
I can't remember now where this 4mm one came from Rob - it would either have been Ebay, or one of Danny's reissues from around 2016 or so: I think the latter, actually. I've seen a couple of build accounts of the Chivers one, seems to go together very nicely too.

I hope the chap who bought the 7mm you missed at Telford didn't actually push in and grab it knowing you were interested? I have seen things like that happen at various types of hobby or collector shows - people can get incredibly hard-nosed about things sometimes...
 

Rob Pulham

Western Thunderer
I hope the chap who bought the 7mm you missed at Telford didn't actually push in and grab it knowing you were interested? I have seen things like that happen at various types of hobby or collector shows - people can get incredibly hard-nosed about things sometimes...
No, nothing like that, I had moved on a little, looking at other things on the bring and buy while making up my mind but I should have just grabbed it.

This is the second of the Chivers kits that I built. I would count them as my first real successes with plastic kits since building Airfix kits in my teens. Until building them I hadn't got on well with plastic kits but then again I hadn't discovered liquid cements and MEK until then either...

9051208717_68326546a0_h.jpg


9051206477_b8572edd2d_h.jpg
 

Chas Levin

Western Thunderer
Glad to hear you weren't 'gazumped'!! Very nice van too (including my favourite white tyres!), they are a very attractive vehicle aren't they? And yes, plastic kits are a whole different thing to metal - the first plastic I built since teenage Airfix were some fish vans I think...
 

Chas Levin

Western Thunderer
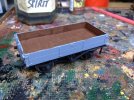
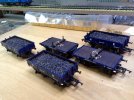
Here's another build photo sequence from a little while ago, part of a gradually growing LNER ballast train. I got one of the reissued D&S LNER (ex-GNR) Ballast Brake kits but without the accompanying ballast wagons, so I decided to 'adapt' the Ratio LMS ones to LNER use. With apologies to any purists who aren't happy about this sort of thing, I reasoned that as wagon stock was moved between companies a great deal, some engineering or departmental stock might find its way...
Everything was as per the instructions, with a couple of minor additions: I found the Brake's plastic roof wasn't quite the same radius as the curve of the vehicle top and added some plastic strip to pad out the gaps along the tops of the sides (I hadn't tried rolling my own brass roofs at this point); I added ballast to the wagons, brass bearings too and used reasonably suitable LNER transfers from the HMRS sheets; the too large link and very bright silver chain in the Ratio kit that's in place on the bolster wagons in the penultimate photo was changed for something better looking when the rails (pieces of Hornby) were added later, as seen in the final photo. Anyway, here are the photos, hope you enjoy them:

D&S_263_GNR_10T_Ballast_Brake_20190317 (1).JPG

D&S_263_GNR_10T_Ballast_Brake_20190317 (3).jpg

D&S_263_GNR_10T_Ballast_Brake_20190317 (10).jpg

D&S_263_GNR_10T_Ballast_Brake_20190317 (17).jpg

D&S_263_GNR_10T_Ballast_Brake_20190317 (20).jpg

D&S_263_GNR_10T_Ballast_Brake_20190317 (25).jpg

D&S_263_GNR_10T_Ballast_Brake_20190317 (29).jpg

D&S_263_GNR_10T_Ballast_Brake_20190317 (34).jpg

D&S_263_GNR_10T_Ballast_Brake_20190317 (36).jpg

Ratio_Permanent-WayX5_LNER_Mar18 (2).JPG

Ratio_Permanent-WayX5_LNER_Mar18 (6).JPG

Ratio_Permanent-WayX5_LNER_Mar18 (8).JPG

Ratio_Permanent-WayX5_LNER_Mar18 (16).JPG

Ratio_Permanent-WayX5_LNER_Mar18 (17).JPG

Ratio_Permanent-WayX5_LNER_Mar18 (18).jpg
 

Rob Pulham

Western Thunderer
Very nice, I particularly like the finish on those rails and the coupling between the bolster wagons.

I have a Medley Models/NER days kit for an NER V6 Ballast brake, which I am sure will be an "interesting" build when I get to it.
 

Chas Levin

Western Thunderer
Thanks Rob - the rails were done by spraying very imperfect coats of red, grey and black onto the NS rails, so that tiny spots of NS still showed through to give a slightly metallic look. I don't usually do any kind of weathering or try to model things other than freshly out-shopped, but the Hornby rails as supplied would have looked very poor so I thought I'd better have a go.
The coupling between the wagons is actually exactly as it comes in the kit; it works very well in transit but the wagon pair needs careful handling when moving it onto and off the layout as that entire coupling structure is quite thin plastic and while it allows a very wide angle of lateral movement, there's no provision for any vertical movement at all, so it you were for instance to pick up one wagon only, trying to support the weight of the other via that coupling, I think it might well fracture. I realise I may be over-cautious, but I don't intend putting it to the test!
Your Medley Models brake is 7mm, isn't it?
 

Rob Pulham

Western Thunderer
Hi Chaz,

Yes, it's 7mm. I moved up to 7mm about 12 years or so ago after making the fatal mistake of "just trying something as a mantle piece model", after seeing a 7mm A3 on the DJH Stand at Warley show in 2009,
 

Chas Levin

Western Thunderer
Ah - I knew you did (or have done) 4 & 7 but I didn't realise you'd fully 'converted' to 7 - I thought you still did both. Looking at some photos online it's often difficult to tell, though I know yours often feature coins of the realm for scale purposes...
 

Chas Levin

Western Thunderer
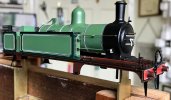
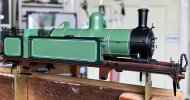
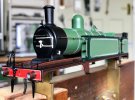
A quick update on the LRM GNR C2: I've finally done the dark green infill areas and, as recommended by Ian Rathbone, I did them with the bow pen. I used the mix of paint with 5% linseed oil added, to retard the drying sufficiently to allow the different areas of the bunker and the side tanks to settle into one film before drying.
I've found doing this part by far the most difficult - there's a lot to take care of all at the same time!
As well as making sure the paint only goes where it's supposed to (no small thing!) you also have to keep the wet edge going, make sure the oil-thinned paint isn't leaking out of the side of the bow pen, keep the pen moving sufficiently fast that the paint film is thin and even, join intersecting parts only enough to let them flow together but not overlap so that a raised area forms where the coat is double thickness, plus the model has to be re-positioned halfway through (flat for the side, on edge in the vice for the rear) and everything has to be done as quickly as possible, because even with the 5% linseed oil added, it all needs to be on within a few minutes so that it settles together.
I considered several different orders for doing the various areas and had decided to do the horizonals first and then fill in between them, but keeping that wet edge is so crucial that in the end I went round each section's consecutive sides in order, so that there was only one wet edge at a time; I left the areas around the handrails until last though, because you can't do everything at once and I reasoned that the handrails would hide any poorer joins. I did the corners on the second side by running the pen along the ruler too where possible, even though they're such small areas, because it's easier that way to keep the pen moving at the same speed as for the longer stretches and keep the paint film uniform: I'd tried doing the corners freehand the first time and it left slightly thicker paint in one or two small areas, though it's pretty unobtrusive.
I also found that because the paint is less viscous through adding the oil and flows very easily, you can hold the pen at a much wider range of angles. As you're laying each line against the last one, capillary action also helps draw out the paint, so I was able to get the pen right under the handrails - while still using them as a straight edge - where I'd anticipated having to fill in with a brush. I also realised - just as I was about to do the first line up against the side beading - that the beading and the footplate are there as ready-made straight edges! I'd got so used to use the ruler, I almost missed that!
LRM C12 20220604 (1).jpg
LRM C12 20220604 (2).jpg
LRM C12 20220604 (3).jpg
LRM C12 20220604 (4).jpg
LRM C12 20220604 (5).jpg
LRM C12 20220604 (6).jpg

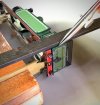
I kept the wet edge along the corner - and just over it - wet by drawing another line against it in between doing other parts, so that when I went back to fill in the final vertical, it was still wet:
LRM C12 20220528 (4).jpg

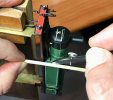
Doing the fronts of the side tanks called for some care: with the loco mounted on the stand and in the vise facing upwards, there's no way to position a ruler to do the few lines needed for the tanks' front faces, so I had to wing it, holding a square section piece of wood as a floating guide - actually a large firelighter matchstick I had in the house:
LRM C12 20220602 (7).jpg
I'm holding the left-hand end of the wood with my left hand, but the right-hand end is free, resting upwards against the underside of my thumb. I got away with it because the parallel touching lines you do for infills like this don't have to be terrifically accurate, providing they flow well and settle together into one coat. Next time I do something like this though, I'll work out a better way to do it!
 

Chas Levin

Western Thunderer
Thanks Phil! It's not as difficult as it looks - I think a big part of it is practice. It's been a little like school detention at times, sitting at my desk doing hundreds of lines... :D
 

PhilMortimer

Active Member
Thanks for your confidence Chaz!

I have to say that I find painting difficult at the best of times, wether it’s a model or the house. Never seems to go right and takes multiple attempts to get a good finish. The lining you are doing is just out of this world. That said, I have several drawing instrument sets and so should practice on some suitable scratch etch -I may surprise myself! Still prefer building over painting though!
 

Chas Levin

Western Thunderer
Yes, I prefer building over painting too, no question, but I want to do everything myself, so there's no escaping it in the end. Painting can also be very relaxing, though some of the more difficult lining isn't so much...!
 

Chas Levin

Western Thunderer
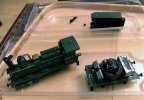
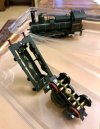
Another bit of RTR TLC in between further paintwork on the GNR C2: this was a recent impulse buy, propelled partly by my European railway interest and partly by my nineteenth century one, a Rivarossi PLM 030 'Boubonnais'. This is the Club Jouef version issued in 1991, with a little extra detailing that raises the look of it considerably.
I didn't realise before examining it that it was a tender drive - I'm not usually a fan at all, but it runs beautifully so I can live with it. Stripping it down, I was pleased to find brass gears though:

Bourbonnais 20220403 (1).jpg

Bourbonnais 20220403 (2).jpg

You can see the congealed gunk on those brass gears though - the second photo above is before a clean-up! Below is after some work:

Bourbonnais 20220407 (2).jpg

The loco hasn't got much going on of course, being tender drive, but it does the job:

Bourbonnais 20220410 (1).jpg

The little specs of lighter coloured material were from the pretty much disintegrated foam packing, cleaned off now of course - it's a very nice little loco:

Bourbonnais 20220410 (2).jpg

Next will be a light dusting of real coal dust on a thin layer of PVA to improve the look of that coal load, plus a crew of course...
 

Yorkshire Dave

Western Thunderer
Being an old Rivarossi model (albeit under Jouef branding) and not knowing how long it's been kicking around so to speak I would have been inclined to replace the traction tyres as well since they stretch over time.
 

Chas Levin

Western Thunderer
Being an old Rivarossi model (albeit under Jouef branding) and not knowing how long it's been kicking around so to speak I would have been inclined to replace the traction tyres as well since they stretch over time.
Hello Dave, yes, good idea, thank you: they look in decent condition and it does run nicely, but you're right I'm sure about the tendency to stretch and it may well be that they're not gripping as they should: are suitable spares still avavilable do you know? Would it be from Hornby, as they now own both Rivarossi and Jouef?
 

Dave Sutton

Active Member
I like the tender drive, can it be more simple.

GN boilers are notoriously small, so on the B3 single I opted for tender drive. I used a Mashima with a High level box on each end which can pull the proverbial house down although was a squeeze fitting into the tender.
 

Simon

Flying Squad
What a lovely model of a great looking prototype.

I mistreated the earlier less detailed version many many years ago, I'm afraid it didn't really live to tell the tale....

Simon
 
Top