Chas Levin

Western Thunderer
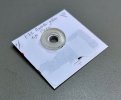
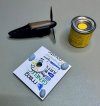
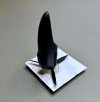
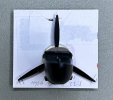
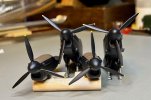
I don't know how other folks deal with this, but I was slightly concerned at the idea that the yellow prop tips might not be (reasonably) uniform in length, so I built a quick jig, based on a rubber washer cyano'd to a piece of thick card with a hole in and some other card discs on the back, so the engine can be stood on the hole, with each prop tip lined up with some pencil marks on the card - sounds more complicated than it is, hopefully these pics make it clear (and each prop tip does align above each pencil line when viewed in real life one by one, they just look odd through te camera):
Lan 20260319 (1) yellow prop tips.jpegLan 20260319 (2) yellow prop tips.jpegLan 20260319 (3) yellow prop tips.jpegLan 20260319 (4) yellow prop tips.jpegLan 20260319 (5) yellow prop tips.jpegLan 20260319 (6) yellow prop tips.jpegLan 20260319 (7) yellow prop tips.jpeg
 

Chas Levin

Western Thunderer
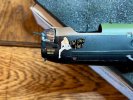
And if anyone wonders how much trouble you have to go to to stand a Lancaster fuselage with the front turret gun already in place vertically to allow for fixing the replacement rear turret guns, this is how much:

Airfix Lancaster 20260427 (1) Master-Model rear 303s.jpeg

Airfix Lancaster 20260427 (2) Master-Model rear 303s.jpeg

Moral? Never fix turrets in place until all gun barrels are already in place within them! :headbang:
 
Last edited:

Chas Levin

Western Thunderer
I'm now at the final assembly stage with the Airfix Lancaster:

IMG_1873.jpeg

I'm quite pleased with the matt finish. I've brushed on Ronseal's Interior varnish (water-based, and it's never yet attacked or upset any transfers, of a wide variety of types) over transfers for some years now and while it's fairly easy to get a decent finish on the shapes and sizes of my more usual builds, 4mm scale railway vehicles, and to live with slight striping if it occasionally occurs, the larger flat areas on a thing like this just won't do in anything other than an even level of matt. After some testing, I've now found that an even, reasonably generous but not flooded coat of Halfords' Matt Lacquer, on top of the Ronseal, flattens everything down to an even matt. I also know from experience that the Halfords' lacquer shouldn't be sprayed directly onto transfers (don't ask how I know) so this combination seems quite useful.

For the mid-fuselage gun turret and the main cockpit canopy, both of which need the metal framework painted to match the green and brown camouflage, I thought I'd have a go at mixing some of the Tamiya acrylic range to match the aircraft colours aerosols from their range that I'd used for the main colours (AS-9 Dark Green (RAF) and AS-22 (Dark Earth RAF). I've tried this once or twice before - matching aerosol colours by mixing brushed paint from pots - without great success and sure enough, the results weren't good! Typical recipes I found online were 1 part XF-58 (Olive Green) to 5 parts XF-62 (Olive Drab) for the green, and a 1:1 mix of XF-52 (Flat Earth) and XF-64 (Red Brown) for the brown. Even allowing for the different opacity and coat thickness from brushed paint as opposed to aerosol - something that can be compensated for and partially hidden) these didn't seem good matches to me: has anyone else tried these proportions, or found something better, for next time?

In the end, I went back to the technique I've used with enamel aerosols, of spraying quite a prolonged burst into the can's cap, enough to form a pool about 2-3mm deep if the cap's held at 45 degrees, then brushing it on with a 10/0 or 00000 brush, dipped, cleaned off and dried in cellulose thinners every few minutes. It worked better than I thought it might with acrylic aerosol, but the same things apply as when brushing aerosol paint. The small amount captured in the can top starts to cure very quickly, so you have to have everything set up to walk straight from (in my case outdoor) spraying to painting (including the lighting, magnification etc), and just like using a lining pen, you have to accept you'll only get a little done with each load of paint, because trying to do too much leads to trying to use half-cured paint. All this means it takes a long time, but the great advantage is of course that the colours match exactly:


IMG_1876.jpeg
 

Chas Levin

Western Thunderer
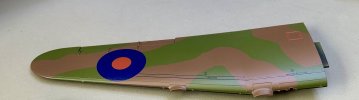
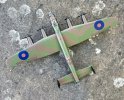
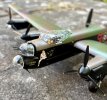
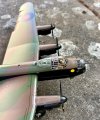
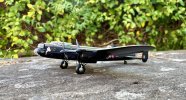
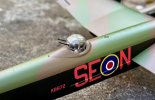
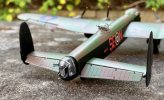
Finally, the Airfix 1/72 scale Lancaster build is finished! This was a nostalgia project (I built one as a kid, almost certainly the year this kit is from, 1979) and it was intended as a Christmas holiday treat... Life has intervened, but, better late than never:

Airfix Lancaster 20260626 front (1c).jpeg
Airfix Lancaster 20260626 aerial view (1).jpegAirfix Lancaster 20260626 aerial view (3).jpegAirfix Lancaster 20260626 cockpit aerial view (1).jpegAirfix Lancaster 20260626 cockpit LHS (2).jpegAirfix Lancaster 20260626 cockpit RHS (1).jpegAirfix Lancaster 20260626 front 3-4 LHS (1).jpegAirfix Lancaster 20260626 front 3-4 RHS (1).jpegAirfix Lancaster 20260626 mid turret (1).jpegAirfix Lancaster 20260626 rear turret (1).jpeg
 
Last edited:

Heather Kay

Western Thunderer
A tidy build. Well done! I have vague memories of building this kit. I remember being disappointed by silvering on the wing walkway transfers.

The pilot might want the fitters to have a look at the ailerons before the next sortie. They should work as opposites, one down, the other up.
 

Chas Levin

Western Thunderer
A tidy build. Well done! I have vague memories of building this kit. I remember being disappointed by silvering on the wing walkway transfers.

The pilot might want the fitters to have a look at the ailerons before the next sortie. They should work as opposites, one down, the other up.
Thanks Heather! Yes, the silvering is annoying and typically it didn't show up until after the second type of varnish / lacquer had been applied. There are a few faults as well as that, but there comes a point where you have to say "enough"!

The ailerons are not fixed, they move and that's just how I - with no aircraft knowledge to speak of - had posed them. Thank you for pointing out my error, I'll re-position them...
 

Chas Levin

Western Thunderer
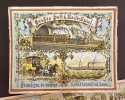
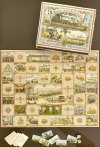
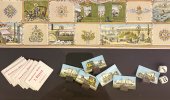
We're just back from a trip to Basel for my 60th and amongst other railway related things we saw was this beautiful early or mid 19th century Great Travel Game, in the Historisches Museum Basel's Haus zum Kirschgarten:

A&C Basel 20260710 (30) HMB Haus zum Kirschgarten, Great Travelling Game.jpegA&C Basel 20260710 (31) HMB Haus zum Kirschgarten, Great Travelling Game.jpegA&C Basel 20260710 (32) HMB Haus zum Kirschgarten, Great Travelling Game.jpegA&C Basel 20260710 (33) HMB Haus zum Kirschgarten, Great Travelling Game.jpeg

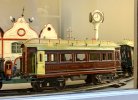
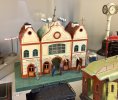
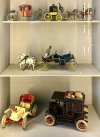
There's also a wonderful cabinet of early tinplate transport toys, many - not all - railway themed:

A&C Basel 20260710 (39) HMB Haus zum Kirschgarten, tinplate transport toys.jpegA&C Basel 20260710 (40) HMB Haus zum Kirschgarten, tinplate transport toys.jpegA&C Basel 20260710 (41) HMB Haus zum Kirschgarten, tinplate transport toys.jpegA&C Basel 20260710 (42) HMB Haus zum Kirschgarten, tinplate transport toys.jpegA&C Basel 20260710 (43) HMB Haus zum Kirschgarten, tinplate transport toys.jpegA&C Basel 20260710 (44) HMB Haus zum Kirschgarten, tinplate transport toys.jpegA&C Basel 20260710 (45) HMB Haus zum Kirschgarten, tinplate transport toys.jpegA&C Basel 20260710 (46) HMB Haus zum Kirschgarten, tinplate transport toys.jpeg

There were countless other treasures of course - not to mention the incredible Schlumpf car collection at the National Automobile Museum over the border in Mulhouse - but I'd not seen these before, even when I visited Basel as a boy.
 

simond

Western Thunderer
The Schlumpf collection is next door to the SNCF museum, and a museum dedicated to power generation and transmission. The latter is a “meh, done that”, but I’d do the other two again, in a few years’ time. Recommended.

thanks for the info re the Basel museum.

By coincidence I visited the Margate WonderWorks Hornby / Scalextric /Airfix museum today. Sadly that was quite “meh” too in my view, though there were some blasts from the past.. I had hoped to see the collection of full size locos, but that is only open by special arrangement, and not today (mid August, but I’ll be away) - they say “in a few years” for it to be fully open to the public, but the guy behind the. Punter sugggested that holding one’s breath was not a good idea. Sorry to say that the breakfast was a bit “meh” too. Ho hum.

oh if you want to spend £800 on a static model car kit, the Pocher kits were very impressive.
 

Chas Levin

Western Thunderer
The prices for static car kits and also for static car models, ready built, are quite astonishing to me, but I look at them and think about how different people like different things, and value money differently! Look at the different prices people pay for full size cars, after all!

How long has there been an SNCF museum there? I'm embarrassed to say I didn't know it was there! Something to include in the the next visit...!

I've been visiting the Schlumpf collection since 1984, not long after the French government had re-opened it in 1982. I used to go to Basel with my dad to stay with friends of his there. The first time we visited, almost nothing had been changed from how it was when the workers burst in following the company collapse a few years earlier. They'd had to put up ropes around the cars, because visitors had been walking on the gravel the cars stood on, raising dust. Other than that, it was exactly as they'd found it: quite incredible to imagine such a fully appointed museum being built in secret!

I won't clog up Western Thunder with lots of Schlumpf collection photos - there are already so many on the InterWeb as it is - but here's one with a railway connection, a 1936 Berliet 11HP Dauphine cabriolet. I learnt for the first time on this visit that the loco on Berliet radiator badges is in tribute to the American Loco Co., because in 1905 Marius Berliet licensed his car designs to ALCO and the lucrative deal provided the capital to expand the Berliet factory in Lyon, so the locomotive emblem was adopted in gratitude:

A&C Basel 20260706 (16) Nat'l Auto Museum Mulhouse, 1936 Berliet 11HP Dauphine cabriolet.jpeg

Another thing I'd never noticed before was a slight Bugatti to Mark 2 Jaguar resemblance:

A&C Basel 20260706 (11) Nat'l Auto Museum Mulhouse.jpeg

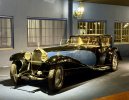
And to finish, I can't talk about this museum without at any rate one photo of the Royale Coupé Napoleon:

A&C Basel 20260706 (25) Nat'l Auto Museum Mulhouse, Bugatti Royale Coupé Napoléon.jpeg
 
Top