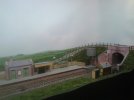
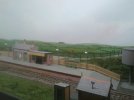
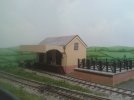
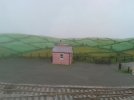
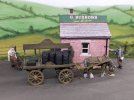
4mm Farleigh - Southern Railway in 00, circa early 1930's

Terry

Western Thunderer
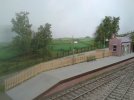
Having put off all thoughts of painting the backscene, I finally decided 'to take the bull by the horns' and make a start. I had previously bought a fifteen feet roll of canvas from an art shop. I estimated that I would need approximately nine feet so this was cut from the roll and nailed to a wall inside the shed. A pencil line was drawn along the canvas at the required height to match the height of the rear scenic boards. I armed myself with various cheap tubes of acrylic paint and made a very thin wash of cerulean blue. I quickly applied the wash to the canvas using a household paint brush. As the acrylic paint began to dry I wondered if it was possible to use a similar technique to that used in watercolour painting to depict clouds. I screwed-up a ball of kitchen roll and dabbed at the blue paint and was pleased to find that the technique also worked with acrylics. The kitchen roll removed the paint to reveal the white canvas beneath. It is possible to make quite pleasing clouds by this method. I touched in some runny mauve paint at the bottom of each cloud on the right side, the sun being imagined to be on the left. A small dab of cadmium yellow was applied to the top left side to represent the sunlight bouncing off the tops of each cloud. Unfortunately, the photos taken under the shed lights look rather drab and do not give a true reflection of the actual colour. However, if you look closely it is possible to make out the cloud formation.

711_151530_150000000.jpg


As the layout is set in south-east England, I wanted gently rolling hills in the distance. I walked down the length of the canvas with a 2H pencil to draw the wavy horizon line. Next, I applied a wash of sap green to the land mass from the horizon to the lower edge of the canvas. The lower 2cm will be hidden behind the baseboard frame. When dry, I mixed up a lighter green using sap green and titanium white. This was applied to the horizon line to a depth of about two inches. This was all very experimental at this stage. I was basically hoping that all would come good in the end! I hasten to add that I have no experience of painting scenes in acrylics and have only dabbled in watercolours, with no great success. Needless to say, John Constable's reputation as a leading exponent of painting rural scenes is not under any threat by yours truly!
20201023_165235.jpg

Terry
 

Terry
Western Thunderer
Emboldened by my success so far, out came the pencil again and the field boundaries were quickly sketched, with smaller fields near the horizon and getting larger towards the bottom of the canvas.

20201025_125539.jpg

At this stage I decided to try to eradicate the hard line between the two greens and painted another coat of green, mixed to resemble the static grass used on the layout, over the lower part of the canvas. I then used a stiff artist's brush (of the cheap ten brushes for £2 variety), and used water to scrub away in an effort to blend the two colours. Very forgiving stuff this canvas. I then mixed sap green with a very tiny amount of black and, using a small flat artist's brush, started to paint over the pencil lines to represent the field hedgerows, the lines getting thinner as they receded away to the horizon. Whilst still damp, I worried the painted hedgerows with a damp stiff brush to remove some of the paint, in an effort to reduce their intensity. Some of the fields were given a thin wash of yellow ochre to represent cereal crops.

20201115_173718.jpg


I decided to move things along by adding some trees to the landscape and to enhance the hedgerows. All achieved by dabbing a sap green/black mix onto the canvas with a small hog's hair brush. (Please excuse the horizontal lines caused by the shed lighting)..

20201120_194031.jpg
20201120_193748.jpg


The backscene is held in place with bulldog clips along the top edge.

20210203_172103.jpg
20210203_171052.jpg

Terry
 

Terry
Western Thunderer
Whilst painting the backscene, I was wondering how I could introduce a cattle dock to add more interest to the layout's operation. But where to site it? I realized that, if I situated the goods shed towards the end of the siding, I could put the cattle dock alongside. I made the cattle dock from card covered with Scalescenes' papers. The fencing and gates are commercial items which I had picked-up from a second-hand stall at a show.
The fencing adjacent to the ramp at the rear was made from styrene strip with wooden posts, left over from the post and wire fencing previously used on the layout. I must admit, it is all very cramped but then the scenic section is only six feet long, but it will give me an excuse to run some cattle wagons. Now, of course, another set of magnets would be required in front of the cattle dock for uncoupling purposes. I retrospectively fitted the magnets as I had done once before earlier in this thread. So, this is how things were looking..

20210203_171655.jpg


At this stage the coal office previously shown was fixed in place towards the rear of the goods yard.

20210203_171116.jpg


A yard crane was constructed using a Wills Kits crane on a card base, covered in Scalescenes' brick paper.

20210215_152027.jpg

Terry
 

Terry
Western Thunderer
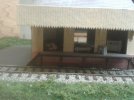
With reference to the layout lighting, a strip of LEDs were fitted behind the pelmet. An unfortunate result of this is that whilst the roof of the goods shed is well lit, the front of the shed, under the awning, is rather shaded. Having gone to the trouble of making packing cases and sacks to adorn the shed floor, I thought it would be nice it they could be seen from the front of the layout. I don't usually install lights in my buildings, generally viewing it as a waste of time as I have no intention of running my trains in the dark. Nothing shouts "unrealistic" as much as model buildings in which the lighting is so bright, you would think the occupents had bought up all the redundant searchlights from World War II!
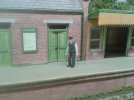
Anyway, back to the goods shed. How to cast a smidgen of light onto the front of the shed? What if I could redirect some of the light coming down from the pelmet? Maybe a small mirror to reflect the light? How would I fix it in position so that it wouldn't be seen? On the rear of a building? The mirror idea was a non-starter simply because of the difficulty in obtaining one so small. In any event, I didn't want a building obscuring the view of the goods shed.

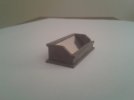
If not a building, what? I needed a small structure which was large enough to hold a small reflective surface of some kind. I was thinking laterally by now and the answer came to me - ballast bin! Would it be possible to make a lineside ballast bin which could hold a small strip of reflective material?

A quick search of the Web revealed a thread on 'chippings bins' in which the prototype measurements of a Southern Railway bin were kindly provided. Out came the card and it was a quickly built and given a coat of acrylic paint. And the reflective surface? A strip of very shiny silver plastic from the bag in which the LEDs were packed! Recycle and save the planet!

Here it is..

20201129_182109.jpg
20201129_213003.jpg

And the contents of the goods shed gently lighted. Not brilliantly lit but just enough to see the goods..

20201129_212010.jpg

Terry
 

Terry

Western Thunderer
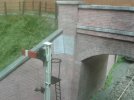
A friend reminded me that, as the signal was sited in front of the brickwork on the bridge, a signal sighting board should be considered. This either took the form of a white board fitted to the signal post so that it formed a backdrop to the signal arm, or the brickwork behind was simply painted white, usually a square or rectangle. I fancied the latter. However, painting the Scalescenes' brickwork white would not achieve the desired effect as the printed brickwork would simply disappear beneath the paint. Step forward Scalescenes' Painted Brick paper. It was simplicity itself to cut out the desired shape (two in this case), run a lead pencil around the edges to kill the bright white of the paper, and stick in place. I used a UHU glue stick. The brick courses don't quite match-up but is not noticeable from normal viewing distance. The Painted Brick paper gives the subtle effect I was looking for..

20201212_194758.jpg

Terry
 

Terry

Western Thunderer
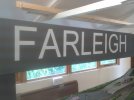
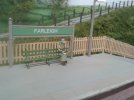
I am tempted to say that I hand painted this very professional looking lettering, but I didn't. These are 100mm high self-adhesive vinyl letters, obtained from ebay for just over £6. Delivered in three days! Applied in about sixty seconds. When ordering, I typed the eight letters in the correct order - F A R L E I G H - and they arrived in that format, correctly spaced, sandwiched between two pieces paper. It was a simple job to remove the backing paper, revealing the sticky backs of the letters, pull the front paper taught, and position the complete word, rub down the letters and gently remove the front paper. A bit like giant Letraset (for the older members present). I gave the entire facia a coat of matt varnish just to ensure the letters don't peel off at sometime in the future..

20200821_153433.jpg

Terry
 

Terry

Western Thunderer
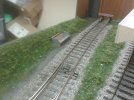
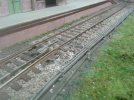
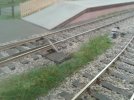
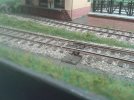
Point rodding. As far as I am aware, being a Southern layout the point rodding should be of the round type, they originally being gas pipes, as apparently, Stevens & Co. were originally a gas company before becoming involved with the railways. To my mind the best looking, and easiest to install 4mm scale point rodding available at present, is the Wills' product. It is probably slightly oversized for 4mm scale and is very fiddly to work with, but looks good when fixed in place. Unfortunately for Southern modellers, the rodding represents the square type (in reality an inverted U shape). But life is too short to spend the rest of it fiddling around with point rodding so I opted to use Wills' product. And very pleased I am. Here are some pictures to give a flavour of the work.

20210405_173957.jpg

20210304_193723.jpg


The problem of how to take the rodding across the baseboard joint. I inserted small pieces of styrene beneath the rods and splashed solvent over them. A dab of paint will soon render them invisible, although in real life they are not very noticeable..

20210304_193708.jpg


I didn't fancy trying to squeeze in the cranks in front of the signal box, so I opted for the dodge of covering the rodding with a walkway. 1mm card painted with brown acrylic paint. Job done!

20210405_173602.jpg


General view of the point rodding snaking its way along the layout. The sharp bend near the point doesn't look so sharp when viewed from the front..

20210304_193536.jpg

Terry
 

Terry

Western Thunderer
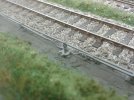
The next job was to run the signal cable from the signal box to the site of the ground signal. The small post which support the signal cables were made from short lengths of 40 thou square plastic strip with a slither of plastic rod attached to represent the pulley wheel on which the cable runs. The signal cable is .25mm nylon thread which fits nicely around the superb 3D printed signal pulleys. The SR ground signal is constructed from an etched brass kit which is held together with superglue.

20210405_173718-1.jpg

20210405_173639.jpg


Once the point rodding and signal cables were done, I was able to complete the telegraph wires. Fine black E Z Line was used for this. If you look closely at the following pictures you might just make them out.

20210405_173455.jpg
20210405_174038.jpg

Terry
 

Terry

Western Thunderer
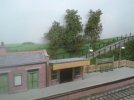
Trees. I thought that a few trees along the back of the layout might give some vertical height to an otherwise fairly flat railway. The current trend of using seafoam, also known as sea moss, appealed to me so I bought a box of the stuff from WW Scenics and after watching a couple of Youtube videos, got stuck in. This really is a very fast way of making presentable trees. I decided to make five trees and after selecting suitable sprigs, spent a couple of minutes picking off unwanted branches and the few dried seed pods which were present. Each sprig was given a short burst with brown spray paint and put aside to dry. Each sprig was sprayed with adhesive (again I obtained this from WW Scenics) and some suitable flock was dropped onto the branches. This was done over an empty biscuit tin. A second spray with the adhesive followed by more flock and the trees were complete.

Small holes were drilled in the scenic shell and the trees were planted with a blob of glue. A bit of flock was thrown over any excess glue at the base of the tree and the job was done.

Trees made this way will not stand up to rough treatment as they are quite delicate and easily broken. However, if handled with care I don't see why they shouldn't last for the life of the layout. If damage does occur they are easily replaced.

20210410_201118.jpg
20210410_201135.jpg

Terry
 

Terry

Western Thunderer
More figuers were added to the goods yard, along with other details such as coal heaps and sacks.

20210429_202508.jpg

20210429_201519.jpg
20210429_203557.jpg


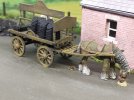
This recently rode into town..

IMG20220621201339.jpg
Coal dray and horse by Dart Castings. Coal sacks from Peco although they have been reduced in size. The empty folded sacks are made from masking tape.

The horse and dray form part of a small scene based around the coal office..

IMG20220621201459.jpg

Terry
 
Top