Gadgie’s workbench (EM)

Gadgie

Western Thunderer
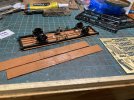
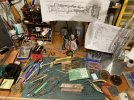
I’ve decided to start a workbench thread, having lurked on here for a while and having seen the images vanish from my RMweb thread. To get started, here’s a picture of the (rather untidy) bench itself.

B42CD5EF-8B91-4402-90BC-E8E4F5A62BA9.jpeg

Like many houses in Sheffield we have a cellar, and it’s great to have a dedicated space for modelling.

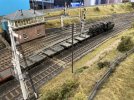
I’m part of the group that has built a model of South Pelaw junction, which was on the steeply graded Tyne Dock - Consett route in County Durham. There is a dedicated RMweb thread, and some images have survived the RMweb meltdown — South Pelaw and Stella Gill EM. Our main emphasis is on big freight engines and wagons, lots and lots of wagons. We’re going to be at Expo EM in Bracknell in a few weeks time — first show for two and a half years! — there’s a few things to fix, which give a flavour of the kind of thing that passes across the bench.
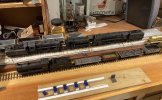
D6360CE9-238E-44A0-B3B1-E1E887605288.jpeg

At the back are mineral wagons in various stages of completion. Then we have 43126 (replacement DCC chip), 68038 (crew), and 92061 (minor repair). In front we have 65871 (weathering), one of 3 Dave Bradwell J27s on South Pelaw, and some wagons in need of couplings and other detail. Sneaking in on the right is a Dave Bradwell WD, destined to be 90016 — like most of his kits, a joy to build but rather time consuming.
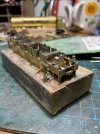
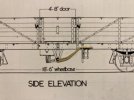
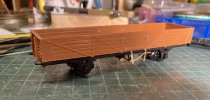
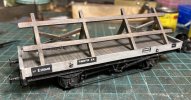
The eagle eyed might have noticed a Tube wagon under construction. We know that one of the traffics through South Pelaw was colliery arches, supplied by Raines of Derwenthaugh, and transported in Tube and Pipe wagons. I have a rough idea of what these arches might look like and how to make some, but does anyone know dimensions, whether they would be painted, or even if they would be covered?

Richard
 

Phil O

Western Thunderer
Hi Richard,

Some good modelling, I wish my bench was as clutter-free.

Hope to catch up with you at Bracknell, I'm there, helping Steve Sims with Dewerstone.
 

Gadgie

Western Thunderer
Thanks Phil -- do come over and say hello.

I was hoping to post an update on the Tube wagon, but I spent most of yesterday evening looking for a rather treasured pair of Lindstrom snipe nosed pliers that I have had for about 30 years. I use them a lot, and they have simply vanished. My wife and teenage offspring deny all knowledge. Our cat is a plausible culprit, but I'm pretty sure she lacks the dexterity to pick them up and carry them off without making a terrible mess. I can only imagine that they fell into the workshop bin and have gone forever -- but surely I'm not that careless :(
 

Phil O

Western Thunderer
I often spend more time looking for stuff that I put down absent mindlessly, only to discover it sometime later, right in front of me. Or knocked off the bench and it's gone under the cupboard, where you can't see it and I don't even think it would fit.
 

Gadgie

Western Thunderer
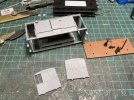
The pliers still haven’t turned up so I’ll report on progress with the Tube wagon. It’s a Parkside kit, to diag 1/448, but strangely the Modelmaster decals supplied appear to be for numbers allocated to diag 1/447 wagons, which were shorter. Maybe I’ll have a go at shortening the next one, as described by Geoff Kent, but this one will be a 1955/6 Darlo wagon with clasp brakes. As usual Paul Bartlett’s site has a good selection.

I’ve replaced the brake levers with brass ones from a Mainly Trains etch. The brass is soft enough to curve.

9C304F66-6960-4153-9F50-9B521ED58E87.jpeg

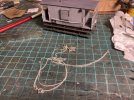
I’ve made a representation of the clasp brake gear. There’s nothing especially novel here, but it is fun to do (with the exception of the safety loops, which I always find quite irritating).

B494B0E6-AD21-4CE5-B79D-409ABD840FFA.jpeg

The rather nice rope cleats at the bottom of the sides have to go, as they don’t seem to have been fitted to the earlier batches. From my wagon books it is unclear whether these wagons would have been fitted with roller bearing axle boxes from new — anyone any thoughts? Paul Bartletts pics show a mixture, but my guess is that these wagons were built with plate axle boxes, and then upgraded later.
Richard
 

AJC

Western Thunderer
The rather nice rope cleats at the bottom of the sides have to go, as they don’t seem to have been fitted to the earlier batches. From my wagon books it is unclear whether these wagons would have been fitted with roller bearing axle boxes from new — anyone any thoughts? Paul Bartlett's pics show a mixture, but my guess is that these wagons were built with plate axle boxes, and then upgraded later.

Richard

Hi Richard,

I honestly don't know whether any were built new with roller bearings, but I suspect not. They would have been the kind of thing that was retro-fitted with them fairly early on, and possibly - for the unfitted examples that were retrospectively vacuum-braked - on conversion. That said, tubes are not a type I've much looked at so I don't know one way or the other - so follow the photos would be my suggestion.

Adam
 

Gadgie

Western Thunderer
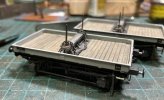
Thanks Adam — I’ve gone with plate axle boxes, for this wagon at least (there will be more). I’ve also fitted sides and ends. I realised part through this process that one of the sides was upside down (aargh). I blame post-covid brain fog. I was able to remove it, and the solvent had not had time to do too much damage, but it was rather careless. What’s worse is that it isn’t the first time, or even the second… At least it is a difficult mistake to make when building 21T hoppers.

146C6557-D02D-49DB-94E4-EFF5FB7A7499.jpeg

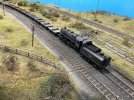
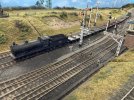
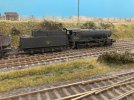
Today involved a trip to Tyneside, not for the football (thankfully), but rather to give my Ivatt 4MT (re wheeled and tarted up Bachmann) and J27 an opportunity to stretch their legs on South Pelaw following repairs and maintenance. I had finally lost patience with the flimsy Bachmann pickups on the 4MT, and fitted new ones from PB wire, as well as a new DCC chip. Here she is on empty steels running into the junction, and waiting for signals opposite the box to climb the bank up to Consett.

34CF0FB2-B940-408C-9AB7-86F1E3CC9875.jpeg

27457C64-1DAD-46ED-A2D8-9816571CBB00.jpeg
The J27 has received a crew, a pretty grim-looking load of coal, and an initial coat of weathering. She probably will get another coating, but 65871 was withdrawn in 1963 so probably didn’t have the chance to get really decrepit. She was seen on a remarkably similar train of bolsters and plate wagons.

A4497C93-4477-42A7-8953-D73608E3DBB6.jpeg

And so back to Tube wagons. It turns out that Consett steelworks did have a tube mill active in our period (1955-1965), and so it is reasonable to assume that there would have been tube traffic. But while we have plentiful evidence of bolsters and plate wagons, with steel billet and plate loads, I have yet to see a picture of tube wagons or tube loads. It is possible of course they went via Lanchester or the Derwent valley route, but if anyone knows more I would be very interested to hear from you.

Richard
 

Gadgie

Western Thunderer
I’ve been busy getting locos and stock ready for Expo EM next weekend. Much of the activity has involved tidying up paint chips and the like. But I picked up a Hornby Toad B in LNER brown quite cheaply, and a quick waft of Halfords grey primer has begun the process of changing it to BR livery. It’s a really lovely model, and the only real criticism is some rather weedy brake hangers.

8751E3D7-A6B6-4564-B804-ABB812563CAB.jpeg

I’ve also been adding some chains to some single bolsters, which has made a big difference to their appearance.

3133E88F-103D-4B30-9324-207139E704CF.jpeg

There are also some chains lurking in the Trestle wagon. I imagine these would be tucked away neatly rather than swinging wildly on the trestles, but I’d be interested in any evidence to the contrary. I’ve noticed that underframe is looking suspiciously clean, so may get some attention shortly.

9ADF5672-3BC8-4BC2-9933-3BA1DE6FABC2.jpeg

Richard
 
Last edited:

Gadgie

Western Thunderer
Something a little different this morning -- "Dad, can you fix my necklace ...?". It is fixed :thumbs:

Toad taking shape in the background. It's a lovely model. There are some nasty moulding recesses in the end timbers, and various missing items underneath. But these can wait to be be fixed post-Bracknell. The roof needs another coat of paint, and that probably can't wait, but in the meantime I have a job to attend to.

E1644474-5326-471F-A899-940825B33F6B_1_105_c.jpeg
Richard
--
 

Gadgie

Western Thunderer
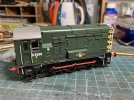
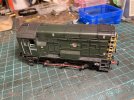
We could do with some additional locos for South Pelaw, so now that ExpoEM is over and done with, it is time to turn some of the boxes in my workshop into useful locomotives. First up is a 350 hp diseasel shunter (aka class 08) from Hornby. It is a lovely model.

16FB5E50-87DD-44F8-9E23-AA108A04B5C6.jpeg

I have had one of Colin’s (Alan Gibson workshop) conversion sets lurking in my stash for a while. I found Pete Hill’s notes on the EM conversion to be an excellent source of information for dismantling, supplemented by James Wells’ recent article in MRJ287.

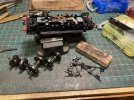
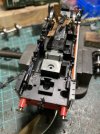
With the body off, the first job was to remove the brake shoes, linkages, and axle keepers. These had been glued in very thoroughly, and were a right royal pain to remove. In the end they came out in three parts, and I had to cut through some of the mounting lugs. More on this anon.

C463AD26-0734-45EB-B432-AEA7A925D1F3.jpeg

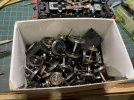
The wheels joined my big box of redundant OO bits and pieces. I don’t know why I keep them all. Maybe I should ebay them one day.

D885357F-207E-4AEE-82A4-A90214196BA7.jpeg

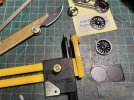
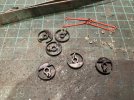
Balance weights were next. Black plasticard, Olfa compass cutter, and araldite.

3C0DA89C-5E86-45D0-B904-7475D8CC951E.jpeg

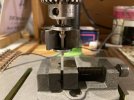
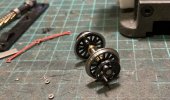
The great thing about outside cranks is that both wheels can be mounted on the axles using the drill — the small piece of blu tack is to stop the brass bushes falling off.

4DCA0560-2200-4029-89A6-48B0EB974A89.jpeg

The next stage was reassembly. But first I inserted some 0.6 mm rod to locate the brake mountings where I had had to cut the mounting lugs.

99F30390-D2C6-4EA5-B906-C9449B596806.jpeg

A final job for this evening was crankpin nuts, which are fixed with superglue.

9FF2F0A8-4746-40A2-A84A-147827DEBCFA.jpeg

This engine is destined to be D3455, shedded at Gateshead from 1959-1965, and so a plausible visitor. Trouble is, although my Hornby body has the correct number of vacuum exhausters on the footplate, it has flush engine compartment doors, and D3455 (08370) was one of the last to have external hinge straps. I don’t think I can live with the flush doors… Fortunately Tim Shackleton has been here before with the Bachmann version (MRJ124), so I have some idea of what the options are to fix them.
 
Last edited:
Hornby 08 EM gauge conversion

Gadgie

Western Thunderer
A little more progress to report. I left the cranks attached to their sprues, which meant that fitting them to the axles and quartering was a little easier than it would have been otherwise.

2CC0E3A6-763B-47DD-87D3-4B9B110EE881_1_105_c.jpeg

Initial fitting of the coupling rods was somewhat troublesome. The chassis ran perfectly with the rods fitted the wrong way round, but when fitted correctly there was binding and tightness once per revolution. It turned out that this was being caused not by faulty quartering, but by a rough edge on the rivet at the rear of the coupling rods, which was shaving microscopic bits of black plastic off the central crank. Ten seconds with a file and everything was tickety boo.

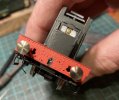
Then I decided to loosen up the rather stiff screw coupling on the front bufferbeam. It promptly broke. I thought that the hook might pull out, but that broke off too. OK, I thought, I'll drill it out and replace it with a Lanarkshire Models hook. I started the hole in the broken end of the hook with a drill in a pin vice. I then decided to continue with a minidrill to save time. Big mistake. I had assumed the whole buffer beam was moulded in whatever metal Hornby use for their chassis. I was wrong. It is plastic, the drill slipped, and ended up with a nasty hole in the wrong place (at around 7 o'clock).

B77AC67E-785F-4C73-B659-A514FDEDECB7_1_105_c.jpeg

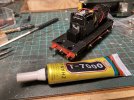
After some judicious excavation with a variety of tools, I managed to extract the broken off end of the hook, and drill a hole in the correct place (by hand). A Lanarkshire hook has been duly inserted, and secured (so far) with T-7000 adhesive. I bought this a while ago from eBay because my son had dropped his phone (sigh), and it was recommended for fitting a new phone screen, which is still in place. The glue is very strong, dries quickly, and being black, is fairly unobtrusive. It does string a bit, and may contain nasty chemicals, but I quite like it for jobs like this because it also acts as a filler.

6A6B2F34-9511-43BD-B62F-49EC2F962B4D_1_105_c.jpeg

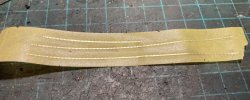
So the next jobs are fitting hinge straps, and renumbering. Of course one option would be to buy a replacement body -- Hornby do a version of the 08 with hinge straps -- but I have decided to go with the Tim Shackleton approach, using etched riveted strip. These strips are often a bit of pain to paint, so I have attached them to some masking tape to prevent them from being blown away by Halfords etching primer. I think this might make it easier to cut them to length, too.

525A7FA9-CE13-4D6F-A0A9-AE77A0BC56F5_1_105_c.jpeg

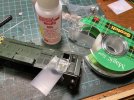
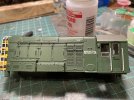
Next job was removing the old number and BR logo, since a more diligent search of Flickr has also turned up a picture of D3455 as 08378, but still in green livery, with a BR crest on the bonnet doors rather than the cabinet as in the Hornby model. I came across a video tutorial recently describing removal of printed numbers using microsol and magic tape. I'm delighted to say it worked very well, with the big advantage that no abrasive is required, so the paintwork stays nice and smooth. Complete removal did require a few applications of microsol and tape, but this methods seems much better than the alternatives.

C68BA100-2E23-4CE6-9736-A74B8D97F410_1_105_c.jpeg

FB04D92A-7789-40AE-8BB8-FCB8E3C6FB21_1_105_c.jpeg
 

Gadgie

Western Thunderer
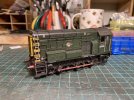
D3455 is just about done. A driver will be required. I was amazed to find that not only is the cab interior nicely detailed, but also that the doors open, so I’ll be able to pop him in when the time comes.

9299F369-8620-4769-A7D6-13E8F3C2B7FA.jpeg

I’m still not convinced about the ladder. But in the absence of evidence either way, I suspect D3455 would have retained it in the early 60s.

0CEF301F-260F-4AC6-AFEE-FB98781F0600.jpeg
 
Bradwell WD

Gadgie

Western Thunderer
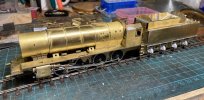
Summer has been and gone with its many distractions, and for me autumn is always a good and productive time of year for modelling. About a year ago I started work on a Dave Bradwell WD kit. It is intended to be 90016, which spent some time at Tyne Dock, and was photographed banking iron ore trains up to Consett. Something of a yardstick is my model of 90074, a much photographed prototype, which is an EM’d Bachmann example, with various modifications including a later (Doncaster) firebox. It runs beautifully, will pull pretty much anything, and looks OK unless you start zooming enough to see the chunky plastic.

08D702D6-05BE-4AC2-BAA4-94B6DA012581.jpeg
I started documenting my build of the Dave Bradwell kit on RMweb, but of course the photos have all vanished. I don’t intend a detailed recap here. Suffice to say that the kit is uncompromising, time consuming and immensely satisfying. I have also been inspired and occasionally forewarned by Ian_C’s account of building the same kit over here.

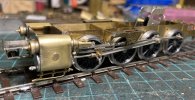
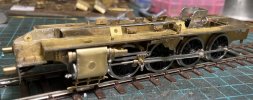
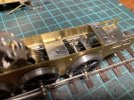
The current state of play is a nicely free-running chassis.

FB919D6B-2210-44DA-9DBC-A9B028308DBE.jpeg

A footplate.

D8F6CDCA-BDD4-46E3-A113-75F4C18E01CA.jpeg

Some upperworks, and a tender.

8F23C8D1-AA01-4F7D-ABF0-3A02FA57B379.jpeg

I decided on a motor in the firebox rather than the tender, so have fitted a High Level gearbox driving the third axle. I opted for CSB suspension rather than individual springing, based on the diagrams in the ever-informative CLAG website. The hornblocks are High Level, regular ones on axles 1, 2, and 4, and narrow ones to accommodate the gearbox.

F6FF4158-DDB0-4D87-9989-88EE40043A70.jpeg

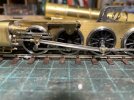
So far, clearances seem OK. There’s about 10 thou between the recessed crankpin bush on the front axle and the back of the crosshead. It’s not apparent from this photo, but the clearance between the crankpin on the number 2 axle and the connecting rod was also quite tight. I am a little concerned about going round bends; there’s some side play in axles 2-4, but the wheels are very close to the frames. We’ll have to wait and see if this results in fried DCC decoders.

7304F72B-C6AB-411D-9257-6908C4419439.jpeg

I’ve used Markits deluxe crankpin bushes with 12BA screws. I find this a much better option than AGW crankpins, not least because the whole bearing screws onto the pin using a Romford screwdriver.

0C1022AD-290F-475B-A417-F187BA588A7F.jpeg

Next jobs are fitting the valve gear, and the brakes. Two of my least favourite tasks. But it would look a bit daft without them.

Richard
 
Last edited:

Gadgie

Western Thunderer
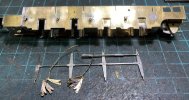
Ian_C had a bit of a nightmare with the brake hangar brackets, and I can confirm that if they are made up from the two parts supplied then they will foul the coupling rods. It’s a bit odd, because everything else has gone together beautifully. Anyway, I had an easy fix, which was to leave out the inner part, which would be hidden behind the brake hangers in any case, and solder the outer brackets to the frames.

BCB60847-DB68-435F-9CBE-FBC508602D64.jpeg

And I have been having fun making up the injector pipe work. Just the kind of satisfying detailing that floats my boat after a tricky day at work.

6B61A9F8-68AD-473C-B4F3-0E9B2F5CDDCD.jpeg

It needs a nice soak in the ultrasonic bath to shift some of the crud, but is starting to come together nicely.

There is something about building a kit like this that enables a deep appreciation of the subject. I find it very satisfying, and deeply relaxing, unless something bad happens but even then there is the challenge of putting it right. Given it is World Mental Health Day, it is worth reflecting on the pleasure to be gained from making stuff and finding solutions to the problems that arise in so doing. Ours is a great hobby to be involved in.

Richard
 

Chris Veitch

Western Thunderer
Given it is World Mental Health Day, it is worth reflecting on the pleasure to be gained from making stuff and finding solutions to the problems that arise in so doing. Ours is a great hobby to be involved in.
Wise words, especially in these troubled times.

I’ve just come across this excellent thread with interests me greatly as South Pelaw was a big part of my youthful spotting scene in the 1970s (and is part of one of my cycle routes today). I was just a bit too young to have anything but vague memories of steam on the route (I think I once saw a 9F on an ore train around Boldon) so most of what I remember was paired 37s passing my dad’s business, which was near the top of what used to be the Vigo Incline.

I can sympathise with the loss of your pliers - I also suffer from such losses but my attempts to alleviate this by getting my workshop really well organised means that I spend most of my time tidying it and very little modelling…
 

Gadgie

Western Thunderer
Thanks Chris. South Pelaw is on the road again at the Manchester Exhibition in December, so if Manchester is accessible to you do come along and say hello. John Donnelly is one of our team and he is building a P4 version of South Pelaw set in the 1970s. Interestingly his model is currently located within the EM 1960s version. He also maintains a website that collects together information about South Pelaw, with plenty of photos from the 1970s and 1980s.

I need to do something about organising my workbench ... but I do know (roughly) where everything is.

3E10F372-9BA5-4B9E-B370-7686B5804974_1_105_c.jpeg
 
Top