You are using an out of date browser. It may not display this or other websites correctly.
You should upgrade or use an alternative browser.
You should upgrade or use an alternative browser.
Gadgie
Western Thunderer
Long ago and far away, this thread began with construction of a Tube wagon. It has finally been painted, and awaits a little light weathering. Then it will be done.

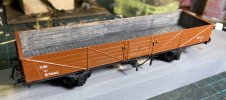
I really struggled with the Modelmaster decals, which disintegrated while coming off the backing sheet. It’s not the first time I’ve had this problem. Anyway I managed to cobble together enough to provide an identity that is not too far from reality.
Richard
—


I really struggled with the Modelmaster decals, which disintegrated while coming off the backing sheet. It’s not the first time I’ve had this problem. Anyway I managed to cobble together enough to provide an identity that is not too far from reality.
Richard
—
Nick Rogers
Western Thunderer
Evening Richard,
The Tube wagon looks excellent. May I ask what paints did you use? The bare wood looks very convincing.
All the best,
Nick.
The Tube wagon looks excellent. May I ask what paints did you use? The bare wood looks very convincing.
All the best,
Nick.
Gadgie
Western Thunderer
Evening Richard,
The Tube wagon looks excellent. May I ask what paints did you use? The bare wood looks very convincing.
All the best,
Nick.
Hi Nick,
I’ve been trying to move on from Humbrol dark earth as a basis for producing a bare wood effect, so I’m glad it looks OK to you. There’s some good tutorials around, for example this one, which are really helpful.
What I have done here is Halford’s grey primer, Tamiya deck tan (pale yellow), Tamiya pale grey dry brushed on, then a little Tamiya dark grey, dry overnight, then some Flory models black wash which I find brilliant. You can slap it on and allow to dry (again I leave overnight) then wipe off the excess with a damp cotton bud. It’s a fine clay suspension, so it sticks around in nooks and crannies, and seals in nicely with Dullcote or some other varnish.
Hope this helps,
Richard
—
South Pelaw to Manchester
Gadgie
Western Thunderer
Gadgie
Western Thunderer
Not a great deal happened on the workbench over Christmas and New Year. A house full of teenage/adult offspring has not been entirely conducive to modelling, except in the hours before lunchtime.
Before Christmas I decided to put the WD away for a little bit. I fancied a change from small pieces of brass, and this hobby is supposed to be fun, right? At the Manchester show I picked up a couple of Pipe wagon kits from a trader who had a box of Parkside sprues and was selling them for £2.50 per wagon -- a real bargain, but I managed to resist the temptation to buy more than I really need. Anyway, an opportunity to build some wagons that are superficially the same, but with detail differences that few will notice or care about.
So the first one was almost finished (or so I thought), based on a photo and drawing in An Illustrated History of BR Wagons. LNER pattern brake gear from a Mainly Trains (Wizard) etch, MJT W irons, Rumney Models axleboxes and springs, Lanarkshire buffers, etc.
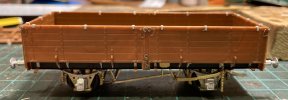
The in an idle moment at work I looked at some of Paul Bartlett's photos, and noticed that all the wagons with LNER pattern brake gear also had different strapping on the bodysides. On returning home, I realised that this was shown all to plainly on the drawing that I had been working from. Why did I not notice earlier, before the sides were attached to the chassis? If I left it would anybody notice? Probably not, unless they are a wagon geek. Do I care? Well actually I do care about this kind of thing, so it was out with a new scalpel blade and sanding sticks, aided by a bottle of rather nice Porter.
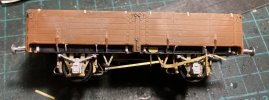
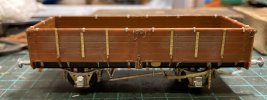
I then added some strapping from a Scale Link etch that is a smidgeon too wide, but will have to do and I hope will blend in once painted. A little more tidying up is required, I will need to make some representation of the hinges, and will need to repeat the process on the other side. At least I haven't broken anything (yet), or superglued myself to the model. And I'm having fun (kind of).
Richard
--
Before Christmas I decided to put the WD away for a little bit. I fancied a change from small pieces of brass, and this hobby is supposed to be fun, right? At the Manchester show I picked up a couple of Pipe wagon kits from a trader who had a box of Parkside sprues and was selling them for £2.50 per wagon -- a real bargain, but I managed to resist the temptation to buy more than I really need. Anyway, an opportunity to build some wagons that are superficially the same, but with detail differences that few will notice or care about.
So the first one was almost finished (or so I thought), based on a photo and drawing in An Illustrated History of BR Wagons. LNER pattern brake gear from a Mainly Trains (Wizard) etch, MJT W irons, Rumney Models axleboxes and springs, Lanarkshire buffers, etc.

The in an idle moment at work I looked at some of Paul Bartlett's photos, and noticed that all the wagons with LNER pattern brake gear also had different strapping on the bodysides. On returning home, I realised that this was shown all to plainly on the drawing that I had been working from. Why did I not notice earlier, before the sides were attached to the chassis? If I left it would anybody notice? Probably not, unless they are a wagon geek. Do I care? Well actually I do care about this kind of thing, so it was out with a new scalpel blade and sanding sticks, aided by a bottle of rather nice Porter.

I then added some strapping from a Scale Link etch that is a smidgeon too wide, but will have to do and I hope will blend in once painted. A little more tidying up is required, I will need to make some representation of the hinges, and will need to repeat the process on the other side. At least I haven't broken anything (yet), or superglued myself to the model. And I'm having fun (kind of).

Richard
--
Suffolk Dave
Western Thunderer
Love the attention to detail!
34091 Weymouth
Western Thunderer
Not a great deal happened on the workbench over Christmas and New Year. A house full of teenage/adult offspring has not been entirely conducive to modelling, except in the hours before lunchtime.
Before Christmas I decided to put the WD away for a little bit. I fancied a change from small pieces of brass, and this hobby is supposed to be fun, right? At the Manchester show I picked up a couple of Pipe wagon kits from a trader who had a box of Parkside sprues and was selling them for £2.50 per wagon -- a real bargain, but I managed to resist the temptation to buy more than I really need. Anyway, an opportunity to build some wagons that are superficially the same, but with detail differences that few will notice or care about.
So the first one was almost finished (or so I thought), based on a photo and drawing in An Illustrated History of BR Wagons. LNER pattern brake gear from a Mainly Trains (Wizard) etch, MJT W irons, Rumney Models axleboxes and springs, Lanarkshire buffers, etc.
View attachment 177390
The in an idle moment at work I looked at some of Paul Bartlett's photos, and noticed that all the wagons with LNER pattern brake gear also had different strapping on the bodysides. On returning home, I realised that this was shown all to plainly on the drawing that I had been working from. Why did I not notice earlier, before the sides were attached to the chassis? If I left it would anybody notice? Probably not, unless they are a wagon geek. Do I care? Well actually I do care about this kind of thing, so it was out with a new scalpel blade and sanding sticks, aided by a bottle of rather nice Porter.
View attachment 177391
I then added some strapping from a Scale Link etch that is a smidgeon too wide, but will have to do and I hope will blend in once painted. A little more tidying up is required, I will need to make some representation of the hinges, and will need to repeat the process on the other side. At least I haven't broken anything (yet), or superglued myself to the model. And I'm having fun (kind of).
View attachment 177392
Richard
--
We bought a load of stuff from him too Richard. It was the only stand we found some bits to buy.
Some very nice modelling on those wagons. I don't have the patience to put so many bits of brass on a wagon kit although I've enjoyed putting a few kits together myself recently.
Si
Gadgie
Western Thunderer
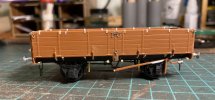
More wagons have been rolling off the workbench over recent weeks. Fortunately not in a literal sense. Another of the Pipes purchased at Manchester has been finished as an unfitted wagon, with Lanarkshire buffers and plastic brake gear.
Next, a Chivers Tube. Pretty much out of the box.
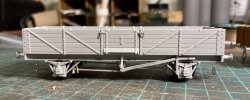
Finally, a Connoisseur etched kit for an LNER Lowfit that came my way. This was a bit of a struggle, but it is now finished. The etch was basic, so we also have Lanarkshire buffers, a Rumney models vacuum cylinder, MJT springs, LNER axlexoxes from Parkside 21T hoppers (which need outer plates adding), and Bill Bedford (I think) W-irons. Of the three, this is the wagon with the shortest wheelbase, and perversely is the only one that is sprung. I wasn’t 100% sure that I could get the chassis completely square, so springing seemed the logical thing to do. It glides very nicely.
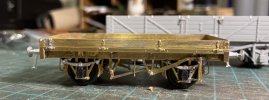
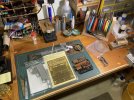
I realised today that the state of my workbench was acting as a low level irritant. It was a complete tip, with an ever shrinking area of space to work in. So there has been a Big Sort Out, lots of things were put away, and I even made a little stand to hold pliers and cutters. All very satisfying.
So next up is another Parkside Pipe, destined to be vac-fitted, another Chivers Tube, and another Conniosseur etch, this time for an LNER pipe. Decisions, decisions …
Richard
—

Next, a Chivers Tube. Pretty much out of the box.

Finally, a Connoisseur etched kit for an LNER Lowfit that came my way. This was a bit of a struggle, but it is now finished. The etch was basic, so we also have Lanarkshire buffers, a Rumney models vacuum cylinder, MJT springs, LNER axlexoxes from Parkside 21T hoppers (which need outer plates adding), and Bill Bedford (I think) W-irons. Of the three, this is the wagon with the shortest wheelbase, and perversely is the only one that is sprung. I wasn’t 100% sure that I could get the chassis completely square, so springing seemed the logical thing to do. It glides very nicely.

I realised today that the state of my workbench was acting as a low level irritant. It was a complete tip, with an ever shrinking area of space to work in. So there has been a Big Sort Out, lots of things were put away, and I even made a little stand to hold pliers and cutters. All very satisfying.

So next up is another Parkside Pipe, destined to be vac-fitted, another Chivers Tube, and another Conniosseur etch, this time for an LNER pipe. Decisions, decisions …
Richard
—
michael mott
Western Thunderer
A nice organized workbench, I particularly like the pliers rack.
Michael
Michael
Gadgie
Western Thunderer
Thanks! I’m sure it won’t stay tidy for long.
The pliers rack was inspired by a recent visit to a jewellers in Sheffield, where part of the workshop is just behind the counter and the bench has a nice set of tool racks.
There is an interesting overlap between what we do and the manufacture and repair of jewellery. But I think I prefer working with brass and nickel silver to worrying about filing precious metals, or losing diamonds to the carpet monster…
AJC
Western Thunderer
Some splendid wagons there. I do like a Pipe wagon, though they take a lot of effort with the minor details which is why I only have two... I'm intrigued by the lowfit, I hadn't noticed the kit in that range - now lost, I think (to 4mm, anyway), and superseded by Parkside which is, erm, rather faster to assemble!
I have one of the Connoisseur Tubes - an eBay rescue - which has all the bits, but those multi-layer sides act as quite a heat sink, so it's waiting on a bout of enthusiasm to add all the details and accompanying scorched fingers. It does look like a nice kit, however, well-thought out and designed.
Adam
Herb Garden
Western Thunderer
Adam,
I have to agree with you those old style layered brass wagon kits are hard work.
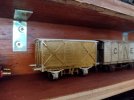
I built this worsdell van from a Peter k kit last year which involves 3 layers on each side before you get to ironwork..... Not fun...
I've since purchased an RSU unit and the second one went together much easier
Herbie
I have to agree with you those old style layered brass wagon kits are hard work.

I built this worsdell van from a Peter k kit last year which involves 3 layers on each side before you get to ironwork..... Not fun...
I've since purchased an RSU unit and the second one went together much easier
Herbie
Gadgie
Western Thunderer
I’d agree with you both about the brass wagon kits. They are somewhat more satisfying than plastic, but much harder work and I’m not sure they look any better. I’d love to have an RSU at some point, as I’m sure it would make life easier.
The Connoisseur etches came from a friend, and it seems a shame not to make them up. The LNER Pipe, unlike the Lowfit and the LNER Tube, is not a part of the 7mm range, so there are no castings, no W-irons, and no instructions. And it is labelled as an imperfect etch, whatever that may mean. Should be fun though, and maybe it’s next.
The Connoisseur etches came from a friend, and it seems a shame not to make them up. The LNER Pipe, unlike the Lowfit and the LNER Tube, is not a part of the 7mm range, so there are no castings, no W-irons, and no instructions. And it is labelled as an imperfect etch, whatever that may mean. Should be fun though, and maybe it’s next.
Gadgie
Western Thunderer
Well at long last the Connoisseur Pipe is complete, bar paint and vac pipes. I have aimed for a representation of B740552 as pictured in the 1970s, with LNER pattern brake gear and plate front axle boxes.
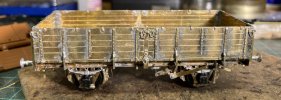
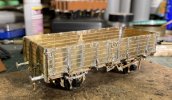
It was hard work compared to a plastic kit, but satisfying in its own way. I’m hoping that the messy soldering will disappear under paint and weathering. We shall see.
For the record, axle guards and springs are MJT, axle boxes are Parkside spares, buffers (and vac pipes when added) are Lanarkshire Models, wheels are Alan Gibson, and vac cylinder label clip and builders plate are from Rumney Models. Where would we be without all these small traders? — thanks guys. Finally the end stanchions and door hinges are filed down T-section brass and bodges from scrap respectively.
One more to go, and then I’m done. With Pipes that is. It’s the final Parkside, and will be finished as B74090?, as pictured at York in 1963. There will be a 10% probability of correctly guessing the last digit of the number, but I’m OK with that .
Richard
—
Bogie Bolster C
Gadgie
Western Thunderer
Having exhausted my stock of Pipe wagon kits, as well as the odd Tube, it was time for a change and an agreeably damp bank holiday Monday gave me the opportunity to make some progress on a Bachmann Bolster C conversion based on some of Justin Newitt’s wonderful bits and pieces.
Back in 2018 I bought a pack of four Bachmann bolsters, and set to with one of them to turn it into a diagram 1/474 (or 1/477) wagon using Justin’s cast bolsters and underframe detailing etch, running on a pair of Cambrian BR plate bogies. This turned out OK, and was described in the other place, but of course the photos have all gone.
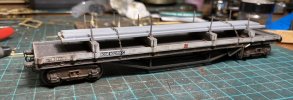
So after 5 years I decided to embark on the next one. The question was, could I remember enough about what I had done. This is the starting point.
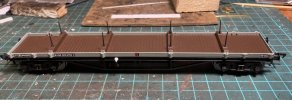
The first step was a rather brutal removal of the original bolsters using cutters in the first instance, then a craft knife and chisel to remove the last vestiges. Very carefully.
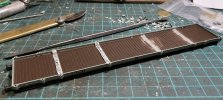
Until the new bolsters sit nicely.
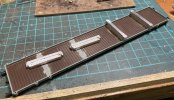
Parts of the underframe were removed with a razor saw so that the new brake gear could be fitted. The details are covered in detail in the Rumney Models instruction sheet for the replacement levers and vees, so a photo will suffice here.
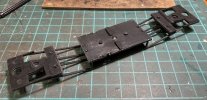
Fitting the plates that support the bogies was more challenging. Initially the wagon rode about 1.5 mm too high, and eventually I remembered that in the first wagon I had removed a little plastic from the pips on the bogie plate. A repeat performance reduced the ride height, and, pleasingly, the plates were firmly attached to the underframe using MEK. Before fixing the underframe to the body, screws were attached with epoxy.

Overall, quite a quick job to create an interesting variant of a common RTR wagon. Tonight’s task will be to fit the bolsters and pins (they are still loose), and worry about coupling hooks. The buffers are pretty good representations, and so I’m not going to change them.
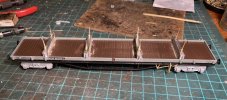
Then I’m going to have to think about painting. And decide what to do with the remaining two bolsters. I have another set of bolster castings, so there maybe a repeat performance, hopefully before another 5 years are up. In the interest of variety the other one may retain the original bolsters and bogies.
Richard
—
Back in 2018 I bought a pack of four Bachmann bolsters, and set to with one of them to turn it into a diagram 1/474 (or 1/477) wagon using Justin’s cast bolsters and underframe detailing etch, running on a pair of Cambrian BR plate bogies. This turned out OK, and was described in the other place, but of course the photos have all gone.

So after 5 years I decided to embark on the next one. The question was, could I remember enough about what I had done. This is the starting point.

The first step was a rather brutal removal of the original bolsters using cutters in the first instance, then a craft knife and chisel to remove the last vestiges. Very carefully.

Until the new bolsters sit nicely.

Parts of the underframe were removed with a razor saw so that the new brake gear could be fitted. The details are covered in detail in the Rumney Models instruction sheet for the replacement levers and vees, so a photo will suffice here.

Fitting the plates that support the bogies was more challenging. Initially the wagon rode about 1.5 mm too high, and eventually I remembered that in the first wagon I had removed a little plastic from the pips on the bogie plate. A repeat performance reduced the ride height, and, pleasingly, the plates were firmly attached to the underframe using MEK. Before fixing the underframe to the body, screws were attached with epoxy.

Overall, quite a quick job to create an interesting variant of a common RTR wagon. Tonight’s task will be to fit the bolsters and pins (they are still loose), and worry about coupling hooks. The buffers are pretty good representations, and so I’m not going to change them.

Then I’m going to have to think about painting. And decide what to do with the remaining two bolsters. I have another set of bolster castings, so there maybe a repeat performance, hopefully before another 5 years are up. In the interest of variety the other one may retain the original bolsters and bogies.
Richard
—
Pipes again
Gadgie
Western Thunderer
The first Pipe wagon has now been completed. I was rather taken with the unpainted wood, japanned metalwork and primed floor scheme adopted by Overseer for his excellent 7mm model, so as I had some Cambridge Custom Transfers for B740000 with the ‘Empty to Stanton Gate or Ilkeston’ branding, I rather shamelessly copied it.
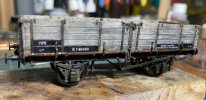
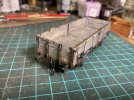
It is looking a bit more battered; my models aim for late 1950s to early 1960s condition. My guess is that B740000 would have been fitted with vacuum brake at some point in this period, so is depicted ready for a little sprucing up.
The vacuum braked Pipes are painted, and awaiting decals/transfers.
Richard
—
(Edited for typo)
Herb Garden
Western Thunderer
Beautiful stuff Richard!
It looks like it's had a hard paper round
It looks like it's had a hard paper round

