Mike Walker
Member
HELLAND WHARF
As suggested by Rob Gunstone (NHY581), welcome to a thread about my cameo layout Helland Wharf which represents the classic location on Cornwall’s Wenford branch inspired by the photographs of Peter Gray and others.

For those who might not be familiar with the line and location here’s a bit of history. The Bodmin & Wadebridge Railway was one of the first in the country being opened as early as 1834. Despite the name, its ‘main line’ was regarded as the line between Wadebridge and Wenford Bridge with the section from Dunmere Junction into Bodmin being regarded as a branch. Another short branch ran to Ruthern Bridge. The line was built to carry sand dredged from the Camel estuary and granite from the DeLank quarries above Wenford Bridge which were reached by an inclined plain.
Whilst existing in total isolation, the B&W was acquired by the LSWR in 1846. Although that company had barely reached Salisbury at that time, it had its sights on building all the way to Truro and reasoned that acquiring the B&W would give it a foot in the Duchy to block the Great Western. Ironically it was the GWR that provided the B&W with its first connection with the outside world when it opened its branch from Bodmin Road to Bodmin in 1894 followed by the connection to the B&W at Boscarne in 1895. It was not connected to its parent until 1899 when the North Cornwall line reached Wadebridge.
The LSWR had extensively upgraded the line between Wadebridge and Bodmin to passenger standards in the late 1880s/early 1890s with several realignments to ease the sharp curves of the original and provide a heavier track but the line from Dunmere up to Wenford Bridge, now regarded as the branch, was never done and was always freight only although it appears it was possible to buy a ticket at Wadebridge and ride in the brake van.
Because of its light nature, the Wenford Branch was severely restricted as to what locomotives and stock could be used. Long wheelbase and bogie vehicles were always banned and when the original B&W locomotives needed replacing the LSWR tried several alternatives before settling on the Beattie Well Tanks. It appears ten of the class were employed at various times but after the general withdrawal of the type it was the famous three that remained at Wadebridge. Further tests to find replacements proved fruitless so heavy overhauls were authorised. The Southern looked to replace them in the 1930s but again nothing suitable could be found and so further rebuilding/overhauls were carried out. Finally, in 1962 following trials with Pannier 1368 it was decided that type was suitable and 1367 and 1369 moved from Weymouth to replace the venerable Well Tanks.
Traffic had evolved. The carriage of sand, which was used as a fertilizer, ceased as did the granite traffic from DeLank. General traffic was carried to Wenford Bridge which was a public goods station so any general merchandise including domestic coal was carried whilst timber was loaded at Wenford Bridge. Early in the 20th century one of the earliest china clay works was established alongside the branch just short of Wenford Bridge. The clay was extracted on Stannon Moor up on Bodmin Moor and passed down to the dries as a slurry by pipeline. After drying it was shipped out by rail and became the principal traffic for the branch until closure which occurred in 1982 as a result of BR wanting to replace the traditional clay wagons with the CDA hoppers. However, these were too big for the branch and with BR unwilling to upgrade it, the business was lost to road transport. This didn’t last long either and today the dries stand derelict. The rest of the branch now forms part of the Camel Trail, a long distance footpath and cycleway that extends all the way to Padstow.
THE MODEL
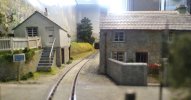
This represents Helland Wharf which was approximately midway between Dunmere and Wenford Bridge. Here the line squeezed between two existing cottages before crossing a public road. I originally planned it to be a diorama or photo plank to try some new techniques for my larger loft layout based on Boscarne Junction. However, a good friend suggested I turn it into a small exhibition layout which I duly did.
The layout is built on a 1200 x 250 x 15mm shelf for the scenic section with a matching 600mm section at each end for fiddle yards. All are braced with 20 x 15mm strip wood. Facia and back boards were custom laser cut from plywood.

The three sections are joined with bolts and wingnuts with DCC Concepts dowels ensuring perfect alignment. The whole thing takes about half an hour to set up or take down.
The track is Peco Streamline code 75 bullhead laid on a cork base which covers the entire scenic section. The siding, which fell into disuse in the early 1950s and was closed and lifted by the end of that decade, has been included to add a bit of operational interest – Rule 1 applies. The single point, a medium radius example, is operated manually by means of a brass strip running between buried guides with a pin soldered into it which engages in the point tie bar. Rugged but simple and, above all, reliable.
Electrically it couldn’t be simpler. It’s good old DC analogue and as the prototype was worked by ‘one engine in steam’ the whole layout is a single section although droppers are fitted to each section of track to ensure electrical continuity.
Once the track had been laid and tested to satisfaction both rails and sleepers were painted. Thoughts then turned to ballasting. For the main running line I used OO ballast applied in the time honoured way of laying it dry then using diluted PVA to fix it. The siding was done the same way but with N gauge ballast. With hindsight I wish I’d done the whole layout with the smaller ballast – a lesson for next time. Despite this, the overall appearance looks good and I often get asked if it is EM or even P4! I think it’s the wider spacing of the longer sleepers on Peco bullhead that creates the illusion. Incidentally, the two fiddle tracks are code 75 flat bottom to save cost. The buffer stop is a Peco one I happened to have in stock which has received a wooden beam to replace the original rail one and a tie bar was added. The siding was given some grass growing in the 4 foot particularly around the buffer stop.
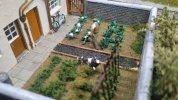
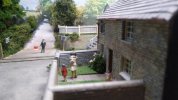
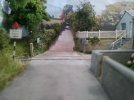
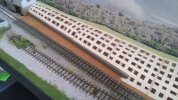
A few photos of the layout...


More details to follow.
As suggested by Rob Gunstone (NHY581), welcome to a thread about my cameo layout Helland Wharf which represents the classic location on Cornwall’s Wenford branch inspired by the photographs of Peter Gray and others.

For those who might not be familiar with the line and location here’s a bit of history. The Bodmin & Wadebridge Railway was one of the first in the country being opened as early as 1834. Despite the name, its ‘main line’ was regarded as the line between Wadebridge and Wenford Bridge with the section from Dunmere Junction into Bodmin being regarded as a branch. Another short branch ran to Ruthern Bridge. The line was built to carry sand dredged from the Camel estuary and granite from the DeLank quarries above Wenford Bridge which were reached by an inclined plain.
Whilst existing in total isolation, the B&W was acquired by the LSWR in 1846. Although that company had barely reached Salisbury at that time, it had its sights on building all the way to Truro and reasoned that acquiring the B&W would give it a foot in the Duchy to block the Great Western. Ironically it was the GWR that provided the B&W with its first connection with the outside world when it opened its branch from Bodmin Road to Bodmin in 1894 followed by the connection to the B&W at Boscarne in 1895. It was not connected to its parent until 1899 when the North Cornwall line reached Wadebridge.
The LSWR had extensively upgraded the line between Wadebridge and Bodmin to passenger standards in the late 1880s/early 1890s with several realignments to ease the sharp curves of the original and provide a heavier track but the line from Dunmere up to Wenford Bridge, now regarded as the branch, was never done and was always freight only although it appears it was possible to buy a ticket at Wadebridge and ride in the brake van.
Because of its light nature, the Wenford Branch was severely restricted as to what locomotives and stock could be used. Long wheelbase and bogie vehicles were always banned and when the original B&W locomotives needed replacing the LSWR tried several alternatives before settling on the Beattie Well Tanks. It appears ten of the class were employed at various times but after the general withdrawal of the type it was the famous three that remained at Wadebridge. Further tests to find replacements proved fruitless so heavy overhauls were authorised. The Southern looked to replace them in the 1930s but again nothing suitable could be found and so further rebuilding/overhauls were carried out. Finally, in 1962 following trials with Pannier 1368 it was decided that type was suitable and 1367 and 1369 moved from Weymouth to replace the venerable Well Tanks.
Traffic had evolved. The carriage of sand, which was used as a fertilizer, ceased as did the granite traffic from DeLank. General traffic was carried to Wenford Bridge which was a public goods station so any general merchandise including domestic coal was carried whilst timber was loaded at Wenford Bridge. Early in the 20th century one of the earliest china clay works was established alongside the branch just short of Wenford Bridge. The clay was extracted on Stannon Moor up on Bodmin Moor and passed down to the dries as a slurry by pipeline. After drying it was shipped out by rail and became the principal traffic for the branch until closure which occurred in 1982 as a result of BR wanting to replace the traditional clay wagons with the CDA hoppers. However, these were too big for the branch and with BR unwilling to upgrade it, the business was lost to road transport. This didn’t last long either and today the dries stand derelict. The rest of the branch now forms part of the Camel Trail, a long distance footpath and cycleway that extends all the way to Padstow.
THE MODEL
This represents Helland Wharf which was approximately midway between Dunmere and Wenford Bridge. Here the line squeezed between two existing cottages before crossing a public road. I originally planned it to be a diorama or photo plank to try some new techniques for my larger loft layout based on Boscarne Junction. However, a good friend suggested I turn it into a small exhibition layout which I duly did.
The layout is built on a 1200 x 250 x 15mm shelf for the scenic section with a matching 600mm section at each end for fiddle yards. All are braced with 20 x 15mm strip wood. Facia and back boards were custom laser cut from plywood.

The three sections are joined with bolts and wingnuts with DCC Concepts dowels ensuring perfect alignment. The whole thing takes about half an hour to set up or take down.
The track is Peco Streamline code 75 bullhead laid on a cork base which covers the entire scenic section. The siding, which fell into disuse in the early 1950s and was closed and lifted by the end of that decade, has been included to add a bit of operational interest – Rule 1 applies. The single point, a medium radius example, is operated manually by means of a brass strip running between buried guides with a pin soldered into it which engages in the point tie bar. Rugged but simple and, above all, reliable.
Electrically it couldn’t be simpler. It’s good old DC analogue and as the prototype was worked by ‘one engine in steam’ the whole layout is a single section although droppers are fitted to each section of track to ensure electrical continuity.
Once the track had been laid and tested to satisfaction both rails and sleepers were painted. Thoughts then turned to ballasting. For the main running line I used OO ballast applied in the time honoured way of laying it dry then using diluted PVA to fix it. The siding was done the same way but with N gauge ballast. With hindsight I wish I’d done the whole layout with the smaller ballast – a lesson for next time. Despite this, the overall appearance looks good and I often get asked if it is EM or even P4! I think it’s the wider spacing of the longer sleepers on Peco bullhead that creates the illusion. Incidentally, the two fiddle tracks are code 75 flat bottom to save cost. The buffer stop is a Peco one I happened to have in stock which has received a wooden beam to replace the original rail one and a tie bar was added. The siding was given some grass growing in the 4 foot particularly around the buffer stop.
A few photos of the layout...


More details to follow.


