4mm Lynton & Lynmouth - 4mm scale, 8mm gauge.

Tim Watson

Western Thunderer
Fair enough Phil, but he way I mullered the sleeper tops wouldn’t be a good starting point for soldering onto. I always look for continuities by holding the track up to the light as well as a meter to confirm.

Tim
 

Scale7JB

Western Thunderer
Purely from my own experience in the past, I have found that sometimes despite the copper clad being completely isolated, the pcb material can for a short while absorb the flux causing a short.

Just a little thing to look out for sometimes.

JB.
 

Tim Watson

Western Thunderer
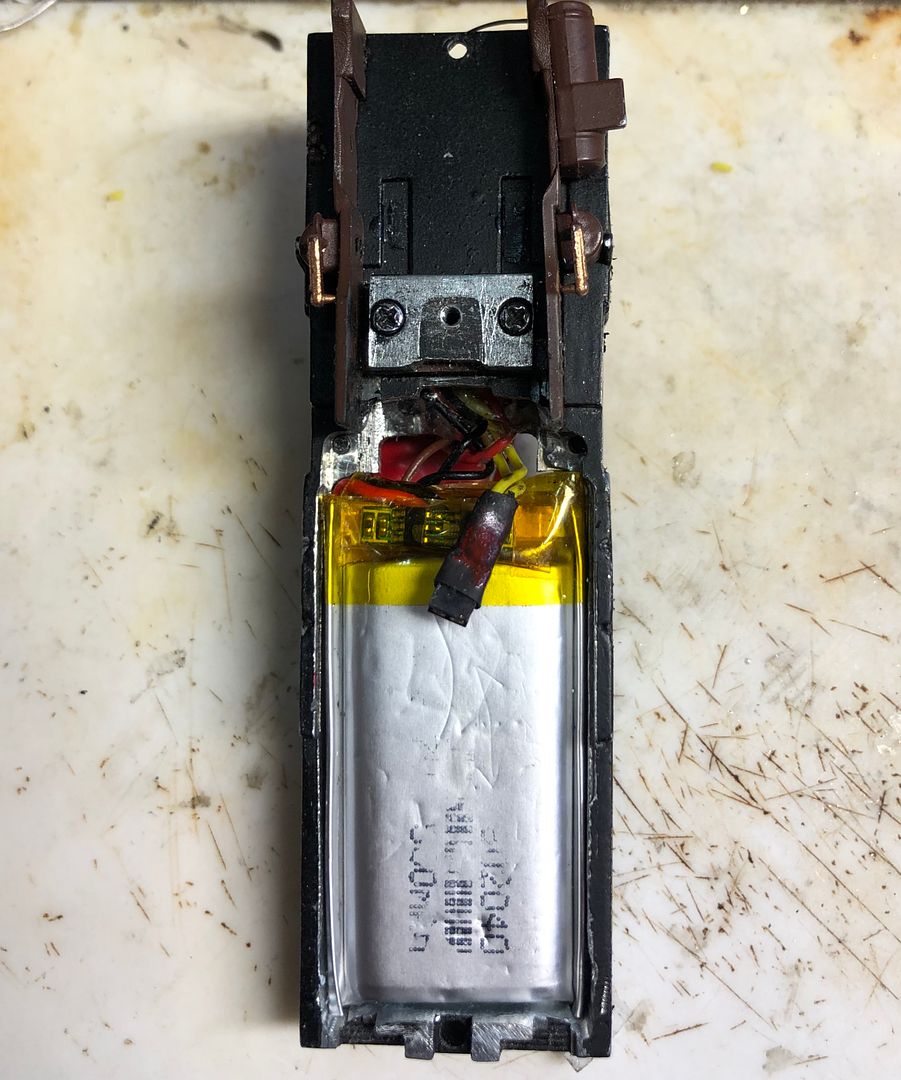
I wasn’t convinced that the 100 mAh battery on Yeo would give sufficient endurance on an exhibition layout. Running light engine, in thin air, it would turn over for about 90 minutes continuously. I have therefore sourced a 500 mAh battery. The only problem is that it is 40 x 20 x 6 mm. With some careful milling, there would be clearance in the tanks to accommodate this large slab.


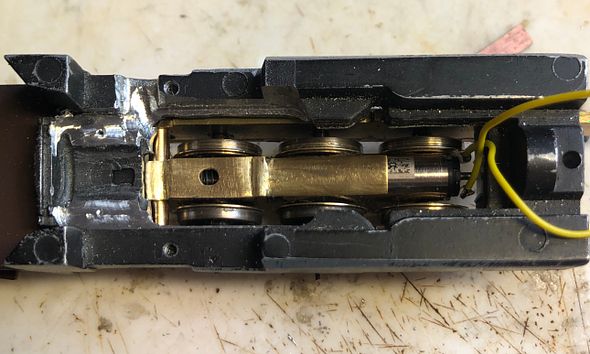
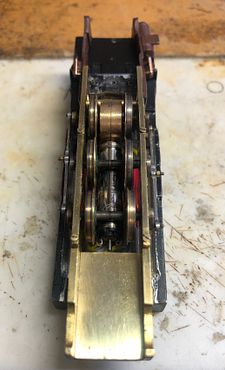
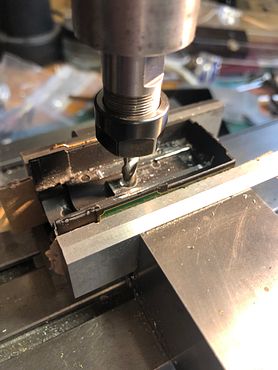
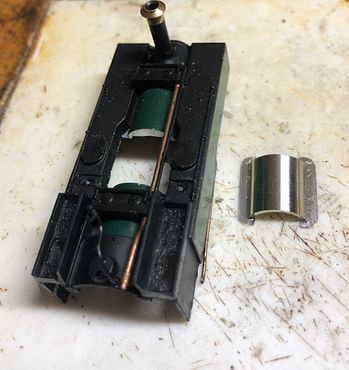
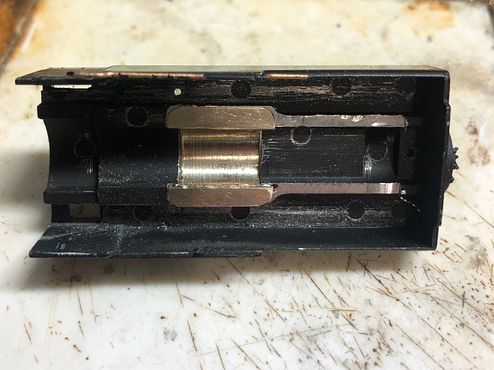
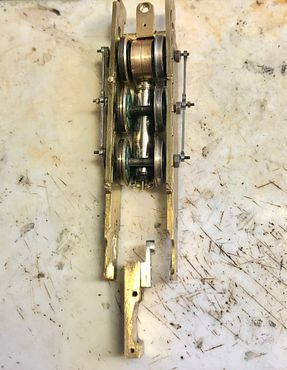
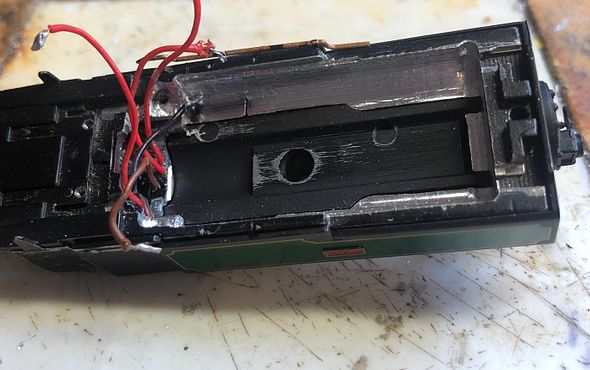
This would require the receiver and aerial to move rearwards into the space previously occupied by the small battery. I then had a light bulb moment (well LED actually) to use the little indicator light on the Rx to simulate a firebox glow. Before that little frippery, I spent a long time carefully removing a large amount of metal from the tanks. This was approached from underneath, maintaining the top for rigidity; the casting would otherwise be very fragile.


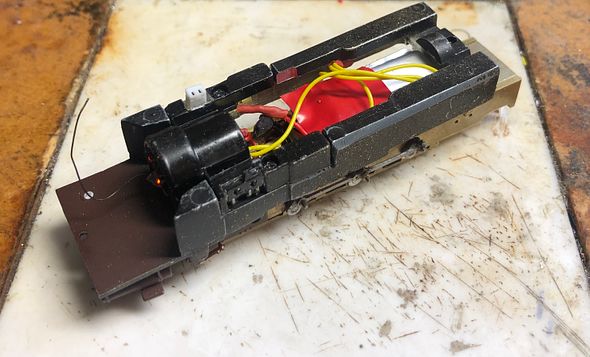
The Medusa’s head of wires would be tamed with the new Rx arrangements.

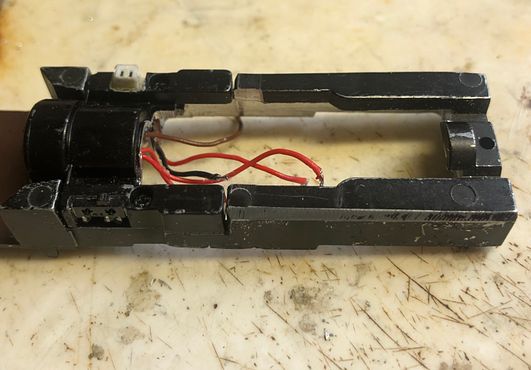
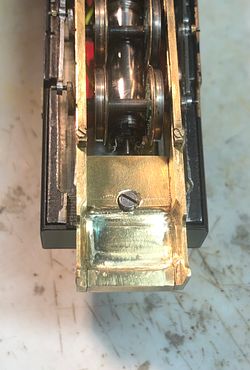
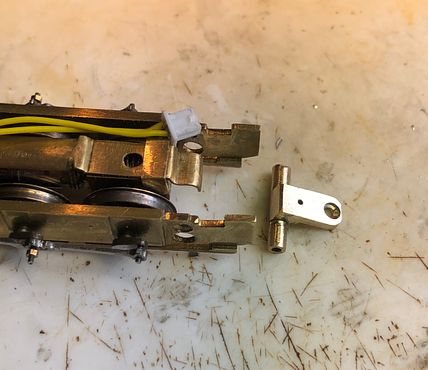
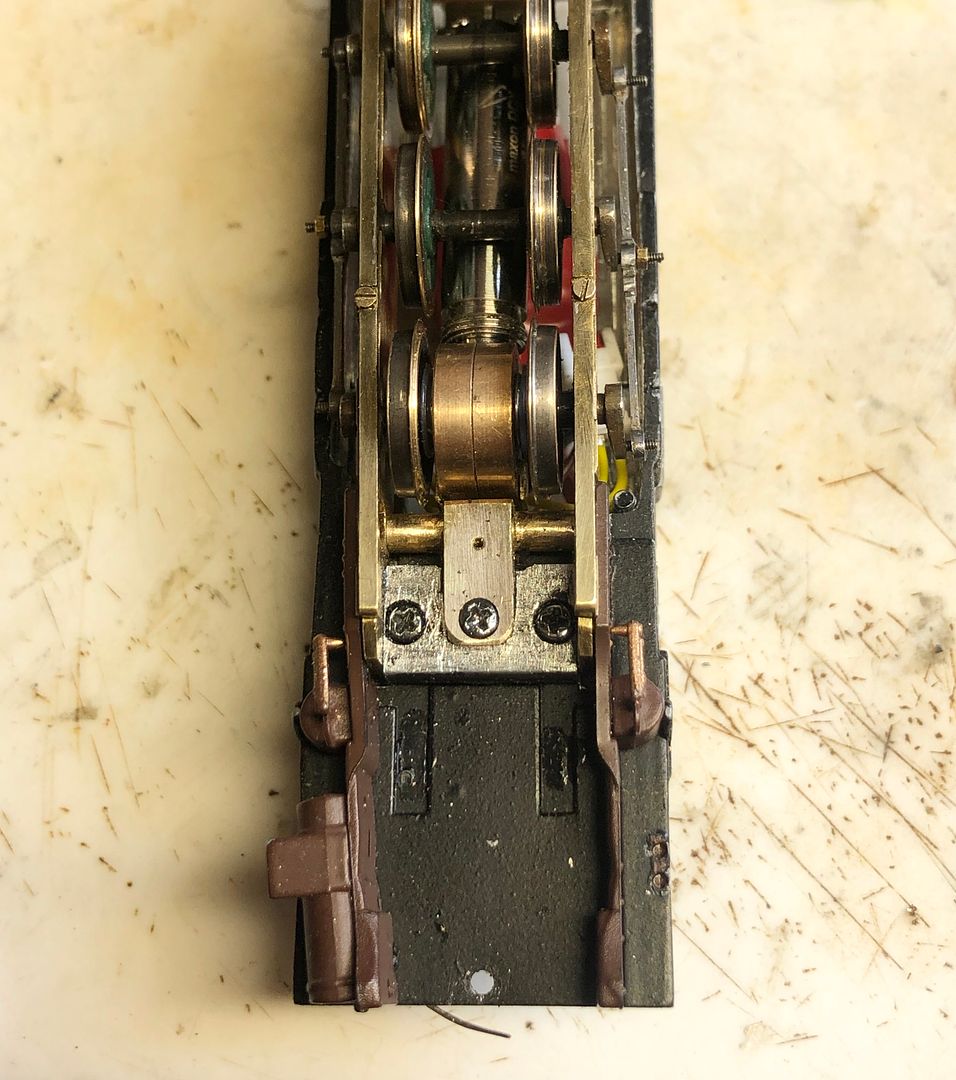
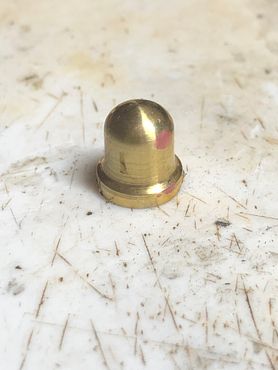
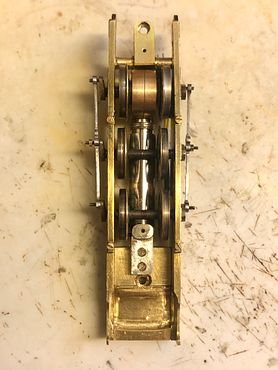
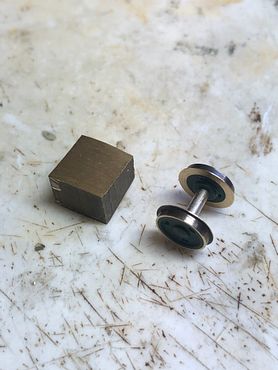
I don’t think the loss of weight will be significant because there will be a substantial brass block at the front as a frame spacer and mounting for the pony pivot - the original went in swarf up the hoover.

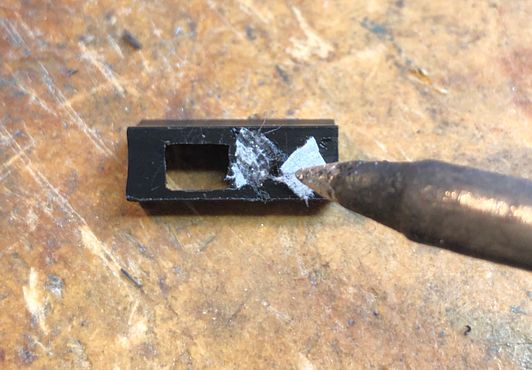
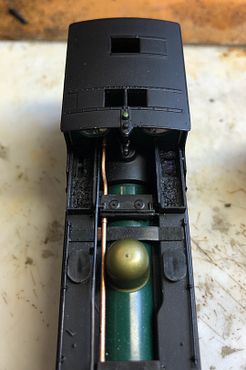
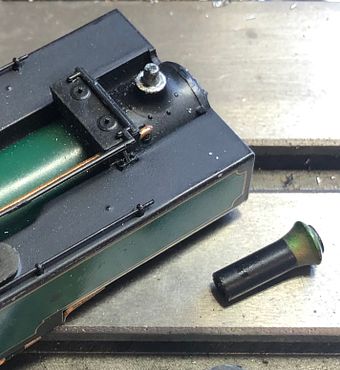
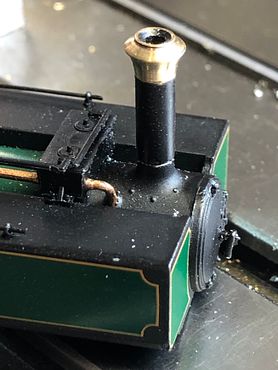
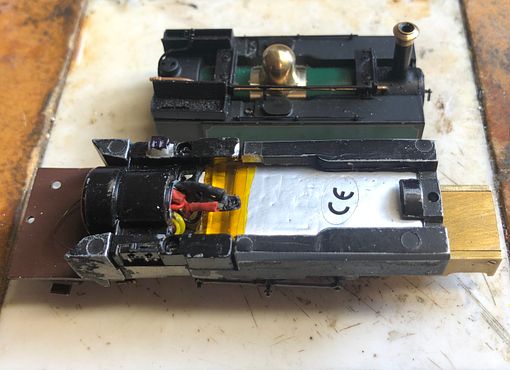
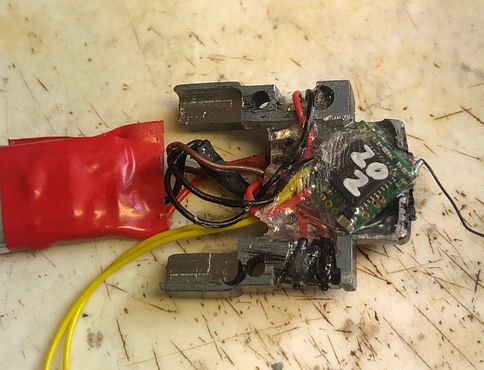
Turning to the receiver, this required space to turn it through 45 degrees so the the little LED On the corner could slightly protrude from the firebox doors which, along with other bits, were opened up with a TC bur in a lab hand-piece. The whole assembly was then glued into place with lashings of 5 minute epoxy resin - it’s important to sign your work with a thumb print, BTW (I have subsequently re-coated the Rx with Araldite, so the fingerprint has gone)


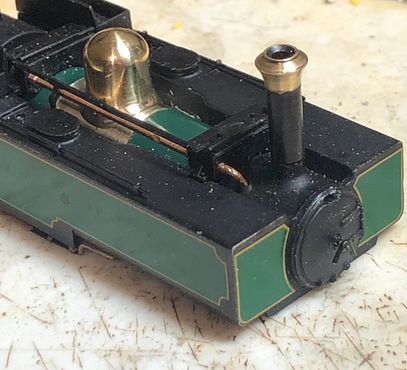
I roughly reassembled the bodywork to give this end result:

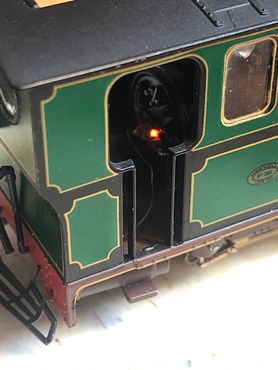
The fireman is very lazy to leave the firebox doors open, but it does look quite jolly. The light is actually quite important to see because it lets you know the status of the Rx. The aerial will double up as a rather long slack pipe.

Quite a pleasing days work. All I need to do now is wait for the new battery to arrive from over the seas and far away.

Tim
 
Last edited:

Tim Watson

Western Thunderer
Having filleted Yeo’s innards at the front to make room for the new mega battery, there was a need to re-make a fixing for the bodywork and front pony truck. A bit of nose weight would also help to keep the engine balanced.

The front turned spacer has therefore been replaced by a rectangular lump of brass: this will be drilled through in the mid line to take a bolt as the main front body fixing between the chassis and the body casting, locating the internal cast tank weight at the same time. In comparison, the Heljan assembly methods do seem to be overly complicated.

I have extended the thick brass to the buffer beam. It will need a bit of vertical clearance for the pony wheels and the front frames will be thinned from the inside to scale thickness for clearance. This is somewhat less challenging than OO9 because of the narrower gauge and wheels, whilst Lynton does not have any tight curves to worry about.


This rear view shows the Rx LED in the firebox & the aerial, with the charging socket and isolating switch in the L & R bunkers.


Tim
 

Tim Watson

Western Thunderer
Not a huge amount of evidence of half a days work, but the motor wiring has been further tidied up, the chassis dismantled and the frames and spacer milled out to give clearance for the front pony truck and wheels.

On checking against the prototype I found that the Heljan pony truck arm was 5mm shorter than it should be: there is no wonder they have been beset with tracking problems, especially with the loose wheel - rail relationship in OO9. I will therefore have to extend the mounting back to just before the first axle to correct this. It will be a good excuse to get more weight at the front end as well as the solid brass cylinders.

Tim
 

Tim Watson

Western Thunderer
Bit of light relief this morning has been to reinstate the coal bunkers. These needed cutting away to give access for the slider switch (helpfully black) and the UM charging socket (unhelpfully white). The top and visible corners of this were therefore blacked out with a permanent marker.
The bunker mouldings are nylon and shiny. Gently scraping a scalpel over the surface helped to loose this shine, whilst a soldering iron was used to rough up the floor of the boxes to look like small coal.
.

I do not want real coal in the bunkers in case it gets displaced into the switch or socket when the area is poked at with a cocktail stick or screwdriver.
Making an bond to nylon is incredibly difficult with domestic adhesives. However, adhesive retention can be achieved by taking a laminate of tissue paper (doesn’t have to be Andrew quilted) and using a soldering iron to melt the fibres into the surface.


The end result is good enough from normal viewing distance: I will need to run a little paint around the raw casting edges when the body is next dismantled.


That awful dome is really annoying me now. Question really is how best to get rid if it?

Tim
 

Tim Watson

Western Thunderer
I will obviously need rolling stock wheels for Lynton, so a stache of 6mm diameter 14.80mm axle length wheels arrived today from the 2mm shop. These are direct replacements for Peco wheels, but obviously set to 2mm FS back to back.
The Peco wheel is top, 2mm FS middle and 4mm scale, 8mm gauge bottom.


The Association wheels are made to very tight tolerances: moving the wheels by hand will inevitably mess them up. An exceedingly simple jig was made to reduce the B to B dimension to 7.1mm. It consisted of drilling a 1.2mm hole nearly to the wheel front-to-pinpoint tip measurement, that was then counter bored 0.5mm to accommodate the pinpoint end, so supporting the axle on the cone, rather than damaging the tip.


To re-gauge the wheels they were simply placed in the (stationary) lathe with a similar fixture again bearing on the cone of the axle pin-point in the tail stock. The lever feed tailstock was then used to press the wheel against the jig and advance it along the axle. The axle was then turned around, the exercise repeated and job done!

Forty axles were completed in 15 minutes. If anyone else is silly enough to follow these standards, I would happily assist with re-gauging the wheels.

Tim
 

garethashenden

Western Thunderer
This is a fantastic thread Tim! I’ve considered a small rundown industry supported by an equally rundown narrow gauge system, these are probably the standards to use.
 

Tim Watson

Western Thunderer
A wheely good day today!
The rear off side wheel on Yeo had a crack in it at the hub, was running eccentrically and needed replacing. I was fortunate to be given some replacement wheels from Gaugemaster. What is interesting is that these are for the new style chassis. The photo shows a green original type wheel with a through-and-through axle, whilst the black wheel on the left shows the replacement style. These have a blind-ended square cavity in the end, presumably to take the crank and automatically quarter it. The centre wheel is a replacement and has been drilled through very carefully and slowly (lots of backing off and clearing the swarf) with a 1.9mm TC mill drill. This ensured a good fit on the 2mm diameter pivot steel polished axle. The extended hub is useful to centralise the wheels in the frames. The new wheels make the engine run much better and I have continued to fine tune the gearbox and motor set up in the frames.

The RC system is really working very nicely.
Continuing the the wheel theme, I tried out the new wheels in a Peco L&B carriage. The axles are of course very undernourished, compared with the Peco versions, and so a 10thou styrene packing piece was glued to the keeper plate to prevent them from wriggling out of the axle boxes.

Working on the carriages will be a good job for when we finally get away in the camper van...

Tim
 

Attachments

  • upload_2020-6-13_22-57-52.gif
    upload_2020-6-13_22-57-52.gif
    43 bytes · Views: 3
Last edited:

Tim Watson

Western Thunderer
As mentioned earlier in the thread, the pivot point for the pony trucks is misplaced on the Heljan mechanisms. For the rear truck it falls just behind the round chassis spacer on my new chassis: I therefore decided to make a rearward extension to this. The first attempt was made back to front. The second one would have been OK, but I then realised I could pick up the Heljan pony pivot screw as a rear fixing for the new chassis. Third time lucky!
Whilst the two components could have simply been soft soldered together, I thought it would be much better to silver solder them for added strength. I use silver solder paste from Palmers Metals a lot these days for small jobs as it is very convenient to handle. The items to be soldered need to be placed on a refractory material or charcoal block to avoid heat damage around them; they are simply coated in the paste.

I use a little gas torch for heating the metal; it is the sort sold in fancy cook shops. It’s important to slowly heat up the big piece of metal - solder always moves to where the heat is - look out for it next time you’re using a soldering iron.


The spacer, body fixing point & pony pivot were tidied up and the holes opened up for clearance for the body screw and tapped 14BA for the new pony pivot. The difference in length is immediately apparent (in this photo the spacer is actually upside down relative to the chassis).


The whole assembly is now well attached and integrated with the Heljan body work. The remaining plastic frames will need a space at the back to straighten them up a bit.


Silver soldering is considered a bit of a ‘black art’ by modellers, but it really is very straightforward and has the advantage of making much more robust components.

Tim
 

Tim Watson

Western Thunderer
I have finally had enough of the painted boiler fittings. I had noticed that there was shiny metal showing on the chimney top where I had been handling it. It also pulled off the body casting quite easily.

A few moments in the lathe and the paint was off and a nice shiny chimney top emerged.

Why do they paint it when they have such a nice turning hidden underneath? The dome has also been worked on, but that won’t be for the faint hearted...

Tim
 

AdeMoore

Western Thunderer
Nice work Tim. Seems funny to cover in paint.
Dead impressed with what you are creating here.
Cheers
Ade
 

Tim Watson

Western Thunderer
I couldn’t find a way of removing the cast painted done subtly. So I milled out the back of the boiler, dome and all. The side tanks were gripped carefully with soft card packing in the machine vice.


This was replaced with a turned boiler segment with two side pads to locate in the tanks.


The dome was roughed out on the big lathe.


This was then transferred to the watchmakers lathe, with a dowel Loctited in a hole in the base so that it could be held in a collet. The shape had a thick base to allow for trimming to fit the boiler.


The underside was cut out with a TC trimmer in a hand piece and the fit checked against some of the boiler that had been cut away.


The ‘shoulders’ of the dome were also trimmed down with the same TC bur, and the fitting was then polished with abrasive rubber points, crocus paper and finer, in the lathe. The TC bur and polishers can be seen here, as well as the mandrel to hold the dome for polishing.


The final result is, I think, a significant improvement on the painted dome. To be fair, their latest versions have a better gold paint on them.

It’s quite a long time since I made a ‘full fat’ dome. About three hours work for the dome itself and very relaxing.

Tim
 
Last edited:

Tim Watson

Western Thunderer
I have connected up the new 500 mAh battery today. Big enough for a Tesla, if it gets caught short.

The connecting wiring is tricky to tuck away. The new boiler fittings do catch the sun nicely.

Yeo runs quite steadily, considering the massive unsupported rear overhang, with no pony truck steering.
I’ll probably turn my attention to the ponies next.

Tim
 

Tim Watson

Western Thunderer
The front pony pivot has been made. It needed to be removable in order to allow the wheels to be dropped. It also needed to be rebated to clear the underside of the motor, as can be seen in the photo with the frame spacer on its side between the frames.

The rearward position of the bogie pivot is apparent in the underside view, with the block held in place by a couple of 14BA screws.

Nothing to stop the ponies being made now.

Tim
 
Top