You are using an out of date browser. It may not display this or other websites correctly.
You should upgrade or use an alternative browser.
You should upgrade or use an alternative browser.
Martin's Workbench - Buildings in 1/19 scale (16mm:1ft)
- Thread starter Greengiant
- Start date
Greengiant
Western Thunderer
Thank you Michael, I used the same tool multiple times and finished off with the next size up ball end to round the corners.View attachment 208274
Hi Martin I really like your brick work, in an earlier post you showed the chisel you used for vertical lines, and that the horizontal lines were embossed with a ball ended tool. In the picture above the horizontal lines look a lot more like the chiselled vertical lines. How did you accomplish this?
Michael
Easy enough to do because I tape the Foamex to a parallel motion drawing board, this makes repetitive scores simple.
Martin
Greengiant
Western Thunderer
Thank you.And how did you preserve your patience…?
really lovely, precise, crisp…
I do need to be in the right frame of mind and listen to a podcast or three while scribing. I find setting myself small targets of scribing to achieve helps, quite often exceeding the target gives some satisfaction. Which reminds me, I must get out more!
Martin
michael mott
Western Thunderer
Thanks, that makes sense I have one of those parallel motion bars on my drawing board as well.Easy enough to do because I tape the Foamex to a parallel motion drawing board, this makes repetitive scores simple.
Michael
Jon Nazareth
Western Thunderer
Martin
Absolutely brilliant, amazing workmanship!
Jon
Absolutely brilliant, amazing workmanship!
Jon
Greengiant
Western Thunderer
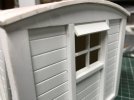
More progress on the van body shed. The window know has a peak above it.
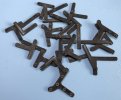
Ironwork was cut out from Trolase before they changed the specification for the material.
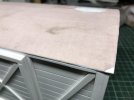
The roof canvas was made with old cotton bed sheet, flooded with MEK to stick it down.
Patches were cut out to represent torn canvas, in this instance a piece also folded back. Wood grain was scribed into the planks that are exposed.
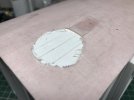
Once the MEK had gone hard it was a simple matter with a razor blade to trim the edges.
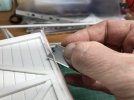
The completed covering.
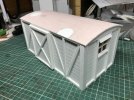
The main parts were primed in suitable colours.
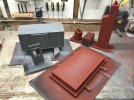
A close up in the primer stage.
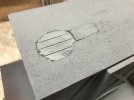
The ironwork fixed in place and the base with some initial colouring.
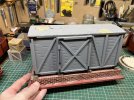
Here pictured alongside a narrow gauge box van.
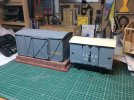
There are plenty of little details and weathering to do, this will happen when the whim takes me. For the time being it sits on the shelf awaiting inspiration.
Martin

Ironwork was cut out from Trolase before they changed the specification for the material.

The roof canvas was made with old cotton bed sheet, flooded with MEK to stick it down.

Patches were cut out to represent torn canvas, in this instance a piece also folded back. Wood grain was scribed into the planks that are exposed.

Once the MEK had gone hard it was a simple matter with a razor blade to trim the edges.

The completed covering.

The main parts were primed in suitable colours.

A close up in the primer stage.

The ironwork fixed in place and the base with some initial colouring.

Here pictured alongside a narrow gauge box van.

There are plenty of little details and weathering to do, this will happen when the whim takes me. For the time being it sits on the shelf awaiting inspiration.
Martin
