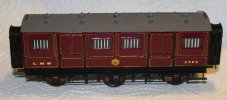
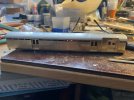
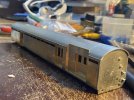
Mike G's Workspace.

Dave Holt

Western Thunderer
Mike,
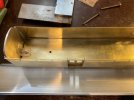
You could add a fold line on the tab part of the steps, set so that when folded up the tab sits vertically upwards behind the main step. The angle of bend can be adjusted to get the step square to the main part before soldering. I find this far easier than trying to hold the step square using tweezers whilst soldering.
Dave.
 

simond

Western Thunderer
is there space for a stiffener at the back? Might save them breaking on the blue fold through accidental handling.
 

Mike Garwood

Western Thunderer
More good ideas. Thank you gentlemen. Now to print them out and see what they look like as a mock up.

Many thanks for all contributions.

Stay safe

Mike.
 

Mike Garwood

Western Thunderer
I hope you all had a good Christmas, and I wish you all a wonderful New Year. Please God let it be better than last year, I miss seeing my friends. I miss being in the same room as them.
I'd also like to thank the Mods - who run this site - for all the hard work they put in. Without this place, my hobby would be the poorer and so would I.

Moving on....

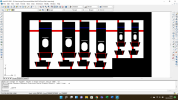
The front steps are done and all set into a nice little etch. I now need to sort out the dummy frames. It's great to be back doing things. Thanks to Father Christmas (and my son) I now have a chassis for the Bachmann 94xx.

1641150300668.png

No New Year promises, but I really need to finish the engines with daft pick up problems.

Stay safe

Mike
 

Mike Garwood

Western Thunderer
Since Christmas I just haven't felt the need to scratch my modelling itch.

I have done some more work to a Hall that I built over 12 years ago, but never added brakes or G hangers to it. The brakes are done. Little bit of CAD work and and little bit of 3D magic from Mr Newitt and hey presto. Perhaps I shall do this for the G hangers, I really haven't decided.

A few days ago I received a text from a friend of mine, Fred Lewis. Fred is well known builder of O gauge and a class act. Anyway, he had, had some P4 items that he thought that I'd be interested in. So yesterday evening we met. It's the first time that I've been to my club in probably 3 years. Certainly the first time since lock down 2 years ago.

Fred had with him a collection that he had bought from a fellow modeler and mutual friend, after his passing and with the blessing of the immediate family.
Tony Thorne (to most he was known as Tall Tony) and I used to meet most Thursday evenings in his spare bedroom to natter, model, smoke some fags and drink tea. After many years we drifted apart, for one reason or another, mostly the demands of work and family. So when Fred brought the enormous box of bits...imagine a tea chest and you won't be far out...

On opening the box, memories of completed work by Tony and myself, flooded back. 2, 9f chassis, a completed 56xx chassis, a pannier chassis all completed and running. Plus more spares than you can throw a stick at. As far as I can remember Tony ever completed one engine. An Avonside B3. This was a CSP kit. Tony was a very accomplished modeler that kept his light, well hidden. His passion for railways was all encompassing. BR, LNER, GWR and LMS all had a place in Tony's church.

So, what is this ramble about? The missing of a friend who'd passed, the past haunting the present. Or is it something else...all I know is that I'm grateful to my friend for the time we had together, for time that he helped me complete countless engines of mine, usually at the expense of completing his own work. It was a very odd feeling trawling through my friends possessions. But it showed me how much he loved his hobby. It showed a man with a burning passion not just for modeling but for the things that he modeled.
Looking back through Tony's collection has been a very sobering experience. Thanks to Fred for allowing me to reminisce.

Yes, I did come away with some treasures from Tony. I hope in the months to come to do them justice, just as Tony would have.

Stay safe

Mike
 

Mike Garwood

Western Thunderer
It would appear that my modeling malaise has finished. Having been back to Barrow Road a couple of weeks ago. I took my Royal Scot to stretch it's legs as it hasn't had a decent run in years. Once there I have been given the task of building a couple of LMS mail coaches for Robin. This has happened to have coincided with my wife getting covid - two weeks away from retiring!
So while she catches up with Corrie, I have cleared the work bench, wetted the soldering iron sponge and stayed well out of the way! I did assure her that the Life assurance policies were paid to date, for some reason she didn't appreciate this news.

Anyway...

I have 2, 247 Development coaches to do. This is a first for me. I've not built any of these before. The etches all look good and well etched, the instructions, what there are of them, are a bit light. Don't get me wrong, there are plenty of historical details given. But basic 'putting it together' stuff seems a little light. Perhaps, I've been spoilt with other kits that have a blow by blow account of construction.

It's nice to be sat at the bench, Matt Munro singing in the background, doing something I love.
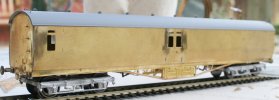
Tonights progress has seen the sides of the floor folded up and the pivots for the bogies soldered on - as you can see from the photo. A few things I can't make out from the instructions is how the body fits to the chassis. So if you've built some of these - how did you fix yours?

LMS mail coach 1.jpg

The etched lines you can see on the chassis is where the solebar is soldered to. This presents a problem as I glue the roof to the sides and use rubber bands to keep this firmly in place while the glue dries. I suspect that the bands will deform the solebars if I do this...which is where fixing the chassis to the body problem also comes in.

Time for a coffee and some more thinking...

It really is still out there and hope as we may, nobody is immune. Please stay safe.

Mike
 

Phil O

Western Thunderer
Hi Mike,

Could you solder a couple of stretchers across the bottom of the body and drill through both stretcher and floor, solder small nuts to the stretchers and secure with machine screws, hopefully the solebars will hide the screw heads.
 

Mike Garwood

Western Thunderer
Today has been a good day...

Tumblehome in both sides - check

Recessed doors installed - check

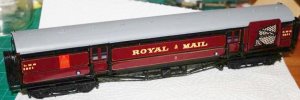
LMS coach 2.jpg

LMS coach 3.jpg

I really did think these recessed door would cause problems. But no, everything fitted with the minimum of fuss. The real fuss came in forming the tumble home. Nightmare, absolute nightmare. Has anyone got any tips on how to form one without the use of copius blue words, g clamps and steel rulers?

Stay safe

Mike
 

simond

Western Thunderer
Mike,

I sympathise. I thought I had it sussed when I built my newspaper van, and it did work, but not as well as I hoped.

I sanded a length of wood to a slightly tighter curve than the tumblehome, clamped the flat portion above the tumblehome to it, and gently batted the lower edge down. And then used my fingers to get it to a better shape, and then soldered it to home made formers…

still, what you’ve done looks very tidy.
 

Heather Kay

Western Thunderer
@Rob Pulham has a technique where the body side is taped to the thing you’re using to form the curve, and then gently pulled to shape by rolling the roller back. It helps to anneal the side first. It’s also best to use a rod that's slightly smaller than the end radius of the curve, if you see what I mean. I’ve used the technique on some GWR Dean coaches. I’m sure Rob can explain it better than me.

The other method, which works better for roofs, is rolling on a soft surface, like a mouse mat. I have an ancient copy of Yellow Pages for the task.
 

Rob Pulham

Western Thunderer
@Rob Pulham has a technique where the body side is taped to the thing you’re using to form the curve, and then gently pulled to shape by rolling the roller back. It helps to anneal the side first. It’s also best to use a rod that's slightly smaller than the end radius of the curve, if you see what I mean. I’ve used the technique on some GWR Dean coaches. I’m sure Rob can explain it better than me.

The other method, which works better for roofs, is rolling on a soft surface, like a mouse mat. I have an ancient copy of Yellow Pages for the task.

I can go one better, I can give a photo how to which I did on the forum a few years ago. If you have a look at this post 7mm - Rob P's Coaching Stock Workbench - Kirk Twin Set Diag 105/125

Unlike Heather I haven't annealed any of mine, I had read a horror story where someone had annealed some coach sides and they all rippled which I must admit, put me off even trying it.
 

Mike Garwood

Western Thunderer
Well today has been a bit of a surprise. Despite all my best intentions I have caught COVID :rant:. I love the way my wife shares ALL of lifes glories. The contractor in me says, no work, no pay. The modeler inside me says "PARTY TIME". Feels just like a very heavy cold and I hope it stays that way.
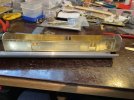
Back to the Mail coach...

Whoever said soldering brass to whitemetal is a piece of cake needs a swift kick! Soldering brass coach sides to whitemetal ends has been...trying. Yes, I tinned everything with 145 before trying to solder with 70 degree. What a PIA. Trying to keep everything level and straight, without melting the castings, even with an adjustable soldering iron. Just so frustrating. Tack one end on, the tack isn't big enough and falls off, clean up and repeat. You get the picture.
Got there in the end as you can see. I had to go over the ends with 100 degree solder to fill in the gaps (for want of a better word) and then clean it up with files and emery paper.

The roof width and profile are completely different to the casting. I suspect that this a Comet roof, which is of LNER origin and nothing like the more rounded profile of the LMS. A bit of filling on the ends should sort the profile problem. Any gaps that occur will be infilled with thick glue. The width problem is going to take something a little drastic to get right other than using a file to solve.

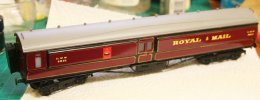
LMS coach D1792 4.jpg

I have also cut the roof to length and started the lengthy process of making all the cutaways for it to fit the recessed doors, Just finished marking out the recess for the larger door for the collector. Unfortunately or fortunately my drill ran out of charge, so I'm calling it a day. Tomorrow will see the underframe tackled.
Thanks to Phil O for the tip on getting the chassis to fit.

LMS coach D1792 5.jpg

Worked a treat. One thing that I've found since starting back up is my ability to problem solve has been, well, laboured. I'm assuming this is something to do with this illness.
And another thank you to Rob for pushing in that piece about forming tumble homes, very helpful. I know have to go to B&Q and get some qtr inch and half inch doweling. Except I can't!

So coming along in leaps and bounds.

Stay safe

Mike
 
Last edited:

Rob Pulham

Western Thunderer
Hi Mike,

Initially it hadn't sunk in what you are building.
I have actually built one of these in the distant past. The only thing that I can remember about it was that I was daft enough to add the 'stick out' postal sorting areas on the far side that some of them had.
I will see if I can find any photos of it.
 

simond

Western Thunderer
Another vote for NOT annealing, particularly half-etched anything.

batting brass around a former with a suitable bit of light wood is surprisingly effective.
 

Rob Pulham

Western Thunderer
Further to my post earlier, although mine was a 247 Developments kit, I had fitted brass ends rather than the whitemetal ones supplied. I have a feeling that I got those from 5522 models (Alistair Wright).

These may be of some use, maybe not.

247 Development TPO 020.JPG247 Development TPO018.JPG
I don't seem to have a photo of the letter sorting 'attachments' in brass only this one in primer.

247 Development TPO 047.JPG
Modelling-September 005.JPGModelling-September 007.JPG

I also built at the same time an ex LNWR WCJS TPO Sorting Van. I can't recall whose kit it was

Apologies for the poor photos I wasn't geared up to take decent photos back then.

WCJS TPO Sorting Van1.JPG

WCJS TPO Sorting Van.JPG

Someone must have liked them because when I moved to 7mm and listed them on eBay I got £460 for these two and a GWR Tadpole fish truck built from a Jidenco kit. A guy in South Africa was bidding against a guy in Norway or Denmark. The South African won and off they went.
 

Mike Garwood

Western Thunderer
Thanks for posting those Rob, what a superb set of builds those are. I didn't even think about replacing the ends - see what I mean about problem solving!

Not feeling the greatest today, so I finished fettling the roof and got it finished.

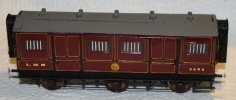
LMS coach D1792 6.jpg

LMS coach D1792 7.jpg

The recessed door needs some filing back and some filler added to make the job look respectable - although when I glue the roof in I may use the Araldite as the filler. I was going to tackle the under frame. But feeing so rough I think that can wait. Next job is to drill and put the air vents in. The whitmetal ends are really pitted, that will have to be tackled as well. A visit to MJT for those, the ones in the kit are horrible.

I really appreciate all the comments and help, it is what makes WT so special. Coffee, fag and bed.

Stay safe

Mike
 
Top