Tim Watson
Western Thunderer
I do like the way you have made a really tricky component (the tank fillers) simple by clever design.
Tim
Tim
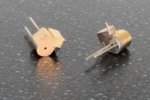
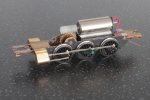
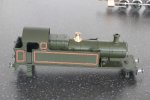
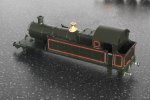
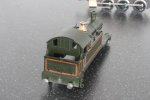
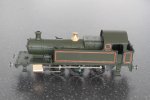
For my next 2mm scale engine I had been considering an Armstrong Goods 0-6-0 tender engine (which I will also build) but in the end I've decided to begin work on a GWR "Buffalo" 1076 class. This engine is effectively a tank engine version of the Armstrong Goods, having the same wheelbase but slightly smaller wheels (and obviously no tender), and also has outside frames. For my chosen period (c.1906) nearly all of this class still had their saddle tanks (they were later rebuilt with pannier tanks).
Drawing on the experience of my first 2mm scale engine (my 1854 class saddle tank), I decided that this one will be fully scratch built (the predecessor being a "conversion" from a Farish 57xx - I say "conversion" because in reality there isn't a huge amount left of the Farish model!). One of the main things that bothers me about the previous model is that there is no rivet detail on the saddle tank where the plates of steel were joined together. It looks OK from normal viewing distances, but I know it's missing - I could add some using Archer's rivet transfers I suppose, but as I said in my RMweb blog when I was building the model there are other compromises so eventually I will probably give it a complete new body. That said, it did what I hoped it would do - to allow me to prove to myself that I could model in 2mm Finescale, and more importantly get a locomotive to work in the scale.
However, I've digressed. So on to the "Buffalo"...
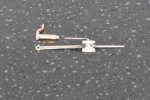
As mentioned above, for this model I intend to put a representation of the rivets on both the saddle and the outside frames. To this end, the first thing I needed was a rivet press!! So, armed with various pieces of steel I made myself one!
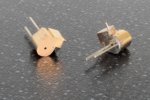
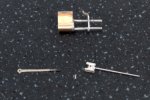
View attachment 47025
This has been made so that I can locate it in the lathe chuck, and use the cross slide and top slide (locked at 90 degrees to the cross slide) to allow evenly spaced rivets to be pressed into some sheet material.
View attachment 47024
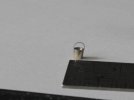
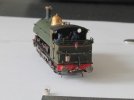
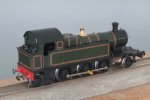
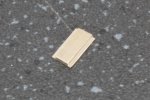
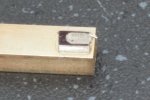
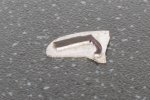
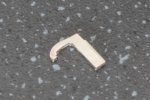
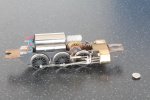
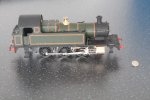
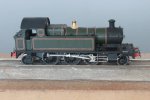
So today, I have done just that. A piece of 0.005" brass was cut roughly to size and mounted on the lathe and a good many rivets pressed in at a 0.020" separation. I'm not a rivet counter, and all I'm after really is some relief to an otherwise plain area of sheet metal. Once all of the rivets were pressed, the brass was finished to size and rolled to the profile of the saddle - I had previously fretted out a pair of formers of the correct profile for the front and rear of the saddle (one will actually be the smokebox front eventually) - and the whole lot soldered up. Below are a couple of photos complete with the requisite coin of the realm to illustrate the size.
View attachment 47023
View attachment 46866
Now I've managed to prove that my riveter works, and that I can form the saddle the next stage will be to begin work on the chassis. For this I will utilise the same method as I did for my Metro Tank, and will mill up a solid brass chassis albeit retaining the standard 2mm scale split axle methodology of construction.
Ian
Lovely work Ian, I think Jerry Clifford has met his match. How did you get the rivets so close the the edge without distorting the edge or did you cut the brass to the edge of the rivets?For my next 2mm scale engine I had been considering an Armstrong Goods 0-6-0 tender engine (which I will also build) but in the end I've decided to begin work on a GWR "Buffalo" 1076 class. This engine is effectively a tank engine version of the Armstrong Goods, having the same wheelbase but slightly smaller wheels (and obviously no tender), and also has outside frames. For my chosen period (c.1906) nearly all of this class still had their saddle tanks (they were later rebuilt with pannier tanks).
Drawing on the experience of my first 2mm scale engine (my 1854 class saddle tank), I decided that this one will be fully scratch built (the predecessor being a "conversion" from a Farish 57xx - I say "conversion" because in reality there isn't a huge amount left of the Farish model!). One of the main things that bothers me about the previous model is that there is no rivet detail on the saddle tank where the plates of steel were joined together. It looks OK from normal viewing distances, but I know it's missing - I could add some using Archer's rivet transfers I suppose, but as I said in my RMweb blog when I was building the model there are other compromises so eventually I will probably give it a complete new body. That said, it did what I hoped it would do - to allow me to prove to myself that I could model in 2mm Finescale, and more importantly get a locomotive to work in the scale.
However, I've digressed. So on to the "Buffalo"...
As mentioned above, for this model I intend to put a representation of the rivets on both the saddle and the outside frames. To this end, the first thing I needed was a rivet press!! So, armed with various pieces of steel I made myself one!
View attachment 47025
This has been made so that I can locate it in the lathe chuck, and use the cross slide and top slide (locked at 90 degrees to the cross slide) to allow evenly spaced rivets to be pressed into some sheet material.
View attachment 47024
So today, I have done just that. A piece of 0.005" brass was cut roughly to size and mounted on the lathe and a good many rivets pressed in at a 0.020" separation. I'm not a rivet counter, and all I'm after really is some relief to an otherwise plain area of sheet metal. Once all of the rivets were pressed, the brass was finished to size and rolled to the profile of the saddle - I had previously fretted out a pair of formers of the correct profile for the front and rear of the saddle (one will actually be the smokebox front eventually) - and the whole lot soldered up. Below are a couple of photos complete with the requisite coin of the realm to illustrate the size.
View attachment 47023
View attachment 46866
Now I've managed to prove that my riveter works, and that I can form the saddle the next stage will be to begin work on the chassis. For this I will utilise the same method as I did for my Metro Tank, and will mill up a solid brass chassis albeit retaining the standard 2mm scale split axle methodology of construction.
Ian
If I remember correctly, I put the rivets in place then filed the edges of the sheet back to the correct length of the saddle, then rolled it to fit the profile formers.Lovely work Ian, I think Jerry Clifford has met his match. How did you get the rivets so close the the edge without distorting the edge or did you cut the brass to the edge of the rivets?
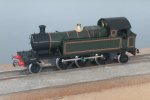
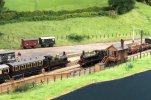
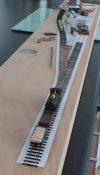
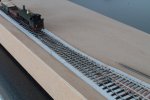
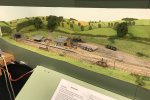 An elevated shot taken first thing Saturday morning just after I'd put the stock on the layout.
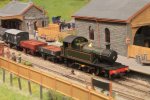
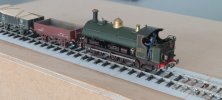
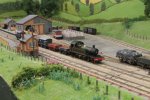 45xx heading a short goods train. The 3 plank and 4 plank wagons have loads of bricks from the Steer Point brickworks further along the line.
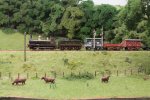
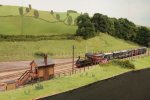
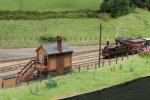
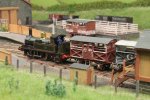
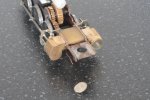
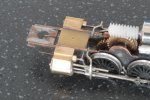
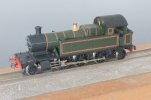
I hope all is well at Narrow Planet, I am still waiting for part of an order from last December, i received the nameplates, but no cabside, smoke box number plates or shedcode, unfortunately I have not received replies to emails enquiring about the missing itemsWith RailEx just a few weeks away, I have finally "finished" the 45xx (although it still awaits its number plates, which are on order from Narrow Planet).
I raised and order with light railway stores/narrow planet back in 2021 and still haven't received anything..... Must be some communication blackspot or something as they have provided a superb service every other timeI hope all is well at Narrow Planet, I am still waiting for part of an order from last December, i received the nameplates, but no cabside, smoke box number plates or shedcode, unfortunately I have not received replies to emails enquiring about the missing items
Mark
