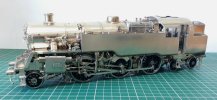
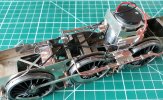
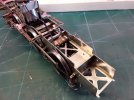
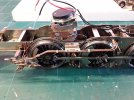
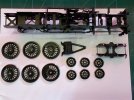
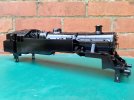
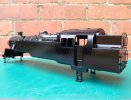
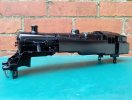
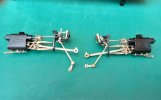
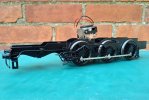
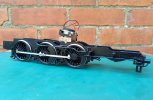
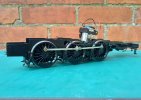
7mm MOK BR Standard 4MT Tank

Allen M

Western Thunderer
Tim
That is super but would not suit my 1925 Colonel Stephens type line! As a youngster I always lusted the Hornby Doublo one but never got it.
Personally I think it is the best looking tank loco to run on BR. Thanks for the photos.
Regards
Allen Morgan
 

welshwizard

Western Thunderer
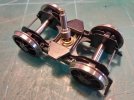
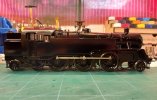
On the home straight now with the 4MT. Still plenty of detail to be added. I've had a delay on the chip fitting as through carelessness I managed to short it. You Choose have come to the rescue and I'm now ready to start again. The pony truck is not ye attached to the loco, just put in place for a couple of snaps. The lining and numbers are from Fox and crests are Methfix.

Tim

View attachment 140073 View attachment 140074
Very nice Tim very neat job on the lining !!.
 

Eastsidepilot

Western Thunderer
On the home straight now with the 4MT. Still plenty of detail to be added. I've had a delay on the chip fitting as through carelessness I managed to short it. You Choose have come to the rescue and I'm now ready to start again. The pony truck is not ye attached to the loco, just put in place for a couple of snaps. The lining and numbers are from Fox and crests are Methfix.

Tim

View attachment 140073 View attachment 140074

Superb job Tim :thumbs:

Col.
 

P A D

Western Thunderer
On the home straight now with the 4MT. Still plenty of detail to be added. I've had a delay on the chip fitting as through carelessness I managed to short it. You Choose have come to the rescue and I'm now ready to start again. The pony truck is not ye attached to the loco, just put in place for a couple of snaps. The lining and numbers are from Fox and crests are Methfix.

Tim.

Looks very nice Tim.

Mine is still to be painted but will be going to Warren Haywood along with my Stanier 2-6-4 at some point.

Cheers,
Peter
 

Dog Star

Western Thunderer
Thanks to Richard for the heads up on the slide bar support and to Dave and Mike for their input. Having looked at it in the flesh, the support was at the wrong angle. There was also a slight bend at the upper slide bar, towards the front which added to the miss aligned appearance.
Three years plus later and we have found a similar situation with Peter's 4MT. Forewarned, we have changed the assembly sequence in so far that the cylinders and motion brackets are attached temporarily to the frame plates without slidebars. Visually the motion brackets are at different angles to each other. Dave Sharp (proprietor of Modern Outline Kits) has checked his CAD drawings and advised that, on the prototype, the motion brackets are parallel to the rear face of the cylinder block. I bent and adjusted the location of each bracket until (a) the bracket is straight and (b) the distance between bracket and block at the top of the bracket was the same as the distance when measured at the bottom of the bracket.

Almost there... after aligning the brackets with the cylinder block I noticed that the bottom of each bracket was further out, from the frame plate, than the top of the bracket. More bending, this time side to side rather than front to back.

As to the accuracy of the castings when received, this is what Dave had to say on the question...

<<quote>>
When it comes to the Motion Bar accuracy, then these are castings, produced in rubber moulds and so dimensionally will be somewhat fluid in accuracy which is unavoidable. A little straightening would be in order and to be expected."
<<end quote>>

I have no problem with Dave's comment, maybe a warning in the instructions might have been helpful.

regards, Graham
 

P A D

Western Thunderer
Peter (@P A D),

This post is addressed to Peter, others who have built the kit are welcome to contribute (possibly @farnetti, @Mudhen) .

I am considering how to collect power from the wheels, current liking is the plunger pickup from Slaters. How have you arranged for power pick-up? Which product? If Slater's plungers then where are those parts located?

thank you, Graham
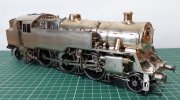
Time to resurrect another dormant thread, but first an apology to @Dogstar for my lack of reply to his question regarding pick ups. My apologies Graham, I'd not been on the forum for a while when you posed your question so I missed it until now.

This is where I'd got to with the build before the pandemic. All complete and running ready for stripping down for painting.
20181002_214809.jpg

20180929_182316.jpg

I'd originally gone with phosphor bronze wipers acting on the top of the wheel tyres as below.
20180927_191522.jpg

However, I now prefer to have the wipers acting on the edge of the flanges so I've modified them and the front ones are now like this.
20230709_104102.jpg

And the middle and rear like this.
20230709_104218.jpg

Here's how I shape the wipers. First a 90 degree bend.
20230708_162740.jpg

Then fold over to make a U bend.
20230708_163111.jpg

Snip off the excess with side cutters and solder to the copper clad.
20230708_163235.jpg

I made a start dismantling the model for painting. My original intention was to send it to Warren Haywood, but I've not painted a loco for a while so I've decided to do it myself. Lining will be done with the Fox dedicated lining set for this loco.
20230709_104751.jpg

Cheers,
Peter
 

Ressaldar

Western Thunderer
Hi Peter,

do you not run the risk of the wheel rim acting as a blade and cutting through the wire and if so, will you just re-bend the wire to rub on the wheel tread as and when needed?

A great build and looking forward to seeing the finished loco

regards

Mike
 

P A D

Western Thunderer
Hi Peter,

do you not run the risk of the wheel rim acting as a blade and cutting through the wire and if so, will you just re-bend the wire to rub on the wheel tread as and when needed?

A great build and looking forward to seeing the finished loco

regards

Mike

Mike,
Thank you. I believe it was @Dikitriki (or could have been @mickoo) who suggested it to me and I posed the same question. Richard Lambert told me that after using this method with extensive running on a large layout, there had been no problems. The edge of the flange will be polished very smooth at final assembly. The advantage of this is it keeps the wiper where it should be and is less prone to picking up crud from the track. Also, if they ever do fail, it will be easy enough to replace.
What a superb job and in my opinion the prettiest tank loco built

Thank you Steve. I'm teetering between this and the Stanier 3P when fitted with separate dome and top feed as the best looking tank loco. Each to his own though.

Cheers,
Peter
 

mickoo

Western Thunderer
Mike,
Thank you. I believe it was @Dikitriki (or could have been @mickoo) who suggested it to me and I posed the same question. Richard Lambert told me that after using this method with extensive running on a large layout, there had been no problems. The edge of the flange will be polished very smooth at final assembly. The advantage of this is it keeps the wiper where it should be and is less prone to picking up crud from the track. Also, if they ever do fail, it will be easy enough to replace.


Thank you Steve. I'm teetering between this and the Stanier 3P when fitted with separate dome and top feed as the best looking tank loco. Each to his own though.

Cheers,
Peter
I've been fitting them to models for a few years and Richard will have more mileage I'm sure, the PB is a tough ole metal so it'll take some time before it wears through and as Peter notes, easy enough to change.

The big advantage is the lack of drag and running on a surface (rim) less prone to collecting dirt. Where I can't use wipers I use the low friction sprung plungers from Germany, they're more like Ho in size/pressure and work really well.
 
Last edited:

P A D

Western Thunderer
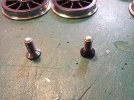
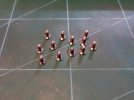
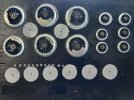
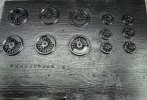
Here are the wheels after masking up and mounting on my trusty board ready for spraying. It was last used for the A4 wheels hence the eight grey circles from spraying the tender wheels. The axle ends (wheels screws) will be black on this one so I've mounted them as well. A 2.8mm hole drilled into the board gives a nice fit that holds the screws but allows easy removal. The wheels treads were masked with flexible tape and the crank pin screws with silicone tube.
20230711_145827.jpg

Priming was with Upol acid etch 8 and the top coat is Halfords satin black, both in rattle cans. Interestingly, on the Upol websites it says that the top coat should be applied within 60 mins of the primer drying, otherwise you need to sand the primer.
20230711_165916.jpg

Unfortunately the chamfer on the wheel screws picked up some overspray, so I removed it by spinning in the mini drill and scraping off with a scalpel. I was going to counter sink the mounting holes in the board, but I though it would be difficult to get the screws out, risking damage to the paint so I passed on that. For the next set I'll drill the 2.8mm holes all the way through and counter sink. That way I can push the screws out from the back of the board with a length of rod.
20230711_171843.jpg

It only took about 5 mins to clean up the lot.
20230711_172846.jpg

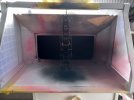
To spray the pony and bogie I was able to hold them in forceps, but the frames are much too big. I did them using a cake turntable for the primer, but for the top coat I rigged up a simple wire hook from the top of the spray booth which meant I could rotate the frames by twisting the hook. As I needed to spray close to the top edge of the booth, I masked off the frame to avoid overspray. The booth is an Expo 510 with double fans and LED lighting. It comes with a small flat turntable but I prefer to use a cake decorating turntable bought from Hobbycraft, as the table is about 3 inches tall so you can spray lower down on the model from a low angle. This will be the first loco I've used it for, but I've done quite a few 1:18 model Ferraris and it works a treat. Highly recommended!
20230711_165811.jpg

20230711_180053.jpg

I chemically blackened the wheels on the Stanier 4P some time ago which you'll see when I get to that. The black treads do look nice and the Casey's gun blue gave a good result. However, I find the process a bit hit and miss and the gun blue is very poisonous, so I prefer not to use it.
20230711_183123.jpg

I may get the body sprayed today but I've got other commitments so we'll see.

Cheers,
Peter
 

P A D

Western Thunderer
The body is now sprayed ready for detail painting and adding the lining. It's quite glossy now to facilitate the application of the water slide lining but the model will be weathered later so much duller in the end. I've got the dedicated lining set for this loco from Fox Transfers.
20230713_163207.jpg

The result achieved is not in the same league as the work of the likes of Warren Haywood and Ian Rathbone, but I'm happy with it.
20230713_163242.jpg

20230713_163259.jpg

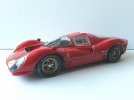
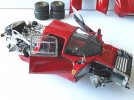
I've sprayed quite few model cars in my time away from WT, but still approached this with trepidation as the more complex shape of a steam locomotive with all the nooks and crannies, makes it more difficult. This was my last model car project before getting back on the rails. It's a 1:18 1967 Ferrari 330 P4 (the Ferrari in the film Ford vs Ferrari) made by GMP. It wasn't cheap, but I picked it up for about half the lower end going price on Ebay. It represented the prototype car painted black, but while in reasonable condition suffered from sever paint rash. The working suspension front and rear was also very stiff (the springs were too hard) or jammed. Long story short, I broke it down, fixed the suspension, upgraded it in one or two places and repainted inside and out and rebuilt. The main upgrade which vastly improved the appearance was lowering the ride height which was much too high as it came, a common fault with this model. It doesn't match the black image on the box artwork any more, but hey, a Ferrari's not a Ferrari unless it's red!:) By rights the shell wing mirrors should be covered in a shroud, but I dont like them that way so I left them off.
20230615_152751.jpg

The model is fully opening with working knock off wheel spinners, suspension, steering, opening doors, sliding windows, opening fuel fillers and covers. The spare wheel is removable via the prototype bungy cords which I made to replace the GMP ones which were glued to the fasteners, either at manufacture or by a previous owner.
20230615_155812.jpg

Back on message, here are the cylinders after removing the masking and scrsping off the odd bits of overspray here and there on the valve gear.
20230713_163410.jpg

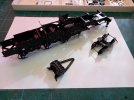
I put the body aside for a while and made a start on reassembling the chassis.
20230713_163745.jpg
20230713_163805.jpg
20230713_163822.jpg

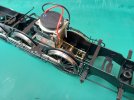
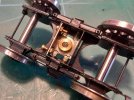
Note the blowdown valve lever wrongly position on top of the spacer. I knocked it off during dismantling and refitted it in the wrong place, but didnt realise until looking at this image. :rant:I've since corrected it but need to touch up the paint on the spacer. The pick ups are back on as well but I overlooked to take a photo.
20230713_163834.jpg

Refitting the bogie slider and springs was a little fiddly, but nothing too onerous. I put the front springs in first, then backed off the retaining screws for the slider retaining plate one at a time, added the rear springs then re-tightened.
20230713_195337.jpg

The pivot is a bit more complex than the captive screw and spring that I usually go with.
20230713_195324.jpg

Cheers,
Peter
 

Lancastrian

Western Thunderer
Peter,

The bogie pivot from MOK is very, very good though. I've fitted them to three Schools, a D1 and an E1, all built from David Andrews kits.

Ian
 

P A D

Western Thunderer
Hi Ian,
Yeah, I agree. That wasn't a criticism, just a statement of fact.

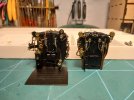
I've been working on the 3P so the 4MT has been put aside. However, I have made a start on the detail painting beginning with the buffer beams and the backhead is done apart from adding the dials. Here are the 4MT and 3P backhead. I started scribing some planks on the 4MT floor but then decided to do it in plasticard and glue it on.
20230716_210111.jpg


20230713_203842.jpg

Cheers,
Peter
 
Top