Nick Dunhill's Workshop - JLTRT LMS 10001

Nick Dunhill

Western Thunderer
Several others have posted threads on building this kit, but I thought I'd do a quick overview of my take on it.

The client wanted the engine bay doors on the roof modifying to represent the loco as built in 1948. There were a host of mods to the roof,
(boiler room chimney and vent etc) and some to the cab moulding that I'll come to later.

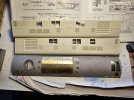
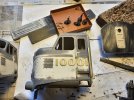
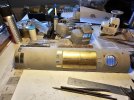
The engine bay doors are assymetric, and not as cast on the moulding. I pondered how to achieve this for ages. I am conscious that if you scar the surrounding areas with the cutter of your choice, it'll be hard to repair. I decided to cut the roof sections away leaving only small areas to be reduced/sanded.
53696450930_62c34eabe8_b.jpg

I made all the replacement panels from brass sheet, as that's where my expertise is.
53696009606_8692bc0bf9_b.jpg

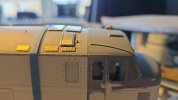
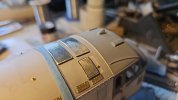
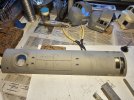
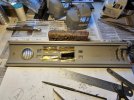
Here's the modified roof. The new access doors make a difference I think.
53696357684_b3b6ca5d5a_b.jpg

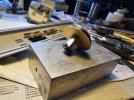
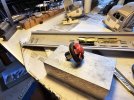
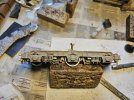
Not so pretty underneath!

53696222208_e6c38ceac7_b.jpg

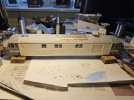
The body sides only needed some flush screw witness marks. I used a short length of 0.6 mm thin walled tube in a pin chuck to make the indentations. I also scored some panel joins in the tumblehomes, and on the roof.

The cab mouldings have a panel on each side, in front of the number, that is raised but should be flush. I have bought some emery sticks to have a go at them on tuesday after the Bank Hol break. I have to confess I am a bit apprehensive about carrying the mod out. I'm fearful of damaging the surrounding area.

Looks ok so far though...
53696222283_4cb6c85a64_b.jpg
 

Yorkshire Dave

Western Thunderer
I have to confess I am a bit apprehensive about carrying the mod out. I'm fearful of damaging the surrounding area.

Protect the surrounding area with masking tape then sellotape or similar thinner tape as you reach bodyside level. You have to be patient and take your time over this.

And of course time is money :).
 

richard carr

Western Thunderer
Nick

Yes sanding sticks are very useful when building these resin kits, one of the challenges is not to remove detail when trying to get a really good joint between the cabs and the body/roof. It always takes a lot longer than you might imagine.

Richard
 

Yorkshire Dave

Western Thunderer
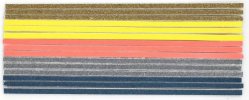
I use these sanding sticks from Albion Alloys. The pack comes with various grades and are widely available.

At a couple of quid a pack I treat them as consumable items.

Sanding.jpg

For final finishing on anything like this I tear off small pieces of fine/extra fine (240 grit and upwards) wet & dry emery paper and use it wet.
 
Last edited:

Nick Dunhill

Western Thunderer
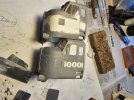
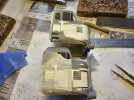
With the roof finished I moved on to the cab mouldings. The nose panels have to be removed, with all the rivet detail, but not the loovred panels. I thought the process of would be a nightmare, but with some sanding sticks, and the advice of some of the MIOG modellers who do this a lot, it was actually fairly easy to remove them. I then had to restore the rivets/screw heads and score the panel joint. I made a brass 'mask' to allow this to be done. They were taped to the moulding and the positions of the rivets could be marked, and the panel joins scored.

53712134725_78c544a704_b.jpg

53711916733_71431a91cd_b.jpg

As can be seen, I also removed all the details not needed on an early version. There were an awful lot of rivets/screws to be let into the bodies (24 per panel.) The next task was to make the etched cab door handrails, and drill the bodies to accept them. This was also a bit of a fiddly job, but worth the effort. I also cleaned the glue, paint and etching cusps off all the numbers. It was also worth the effort. I wish the number had have actually been 17, it would have been a lot easier (science joke!)

53712134935_a664b18dbe_b.jpg

In the background of this photo you can see that I have also fettled all the buffers, lamp irons and other castings to be attached to the bodies post-paint. Also in this photo you can see the cab bulkhead for no.2 end. It has had the resistor lockers removed and blanked off with a thin sheet of nickel silver.

Next up was the roof fan. A kind modeller had donated a Heljan roof fan motor and I screwed it to an a old boiler former. The boiler former and motor were glued to the moulding in the kit for the fan. The fan was drilled to accept the motor shaft, and off we went.


53711702616_4b75558c08_b.jpg

53710796527_835a4b1833_b.jpg

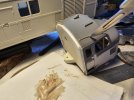
Everything was set to glue all 5 body mouldings together to complete the body. This was the point when it all went badly wrong. The chassis needed a small amount of fettling to accept the cab mouldings, and the body sides fitted up to them with a minimum amount of filing. (These resin kits do make an awful mess in your workshop when you sand it, and I'd just cleaned it out! Bah!) The roof panel ends did not match the cab roof moulding....by a country mile.

53712136335_994e9e1892_b.jpg

53712038639_336f525270_b.jpg

I had a rant and a cuppa and made 2 cuts along the underside of the 'whisker' rain strip. This allowed the cab roof to be dropped down slightly to meet the body roof and I applied glue, filler etc. Mercifully I seem to have got away with it, and a rivet strip masks the join.

53712037654_ef1ae9167b_b.jpg

53710796827_b3a2a39944_b.jpg

The top edge of the body side mouldings, and the chassis were banana shaped too, and needed attention.

Thanks to Andy Childs for warning me about this, happy Nick went to the pub for a couple of pints of Neepsend Blonde.
 

richard carr

Western Thunderer
Nick

I have to say that is the worst fitting cabs to roof I've seen with these kits. Checking the fit of these parts is always one of the very first things I do with these kits., just in case you ever do another one.

Richard
 

Nick Dunhill

Western Thunderer
Yes Richard it was really bad. I was warned that it can happen with these kits by Andy Childs. I assume that the mouldings shrink at different rates when they come out of the moulds.

Were customers able to specify a particular loco/period and JLTRT would send the appropriate sets of mouldings? If so perhaps it was just bad luck. It has made me reluctant to make another JLTRT deisel (double time!)

To be fair, I have made a couple of steam locos with resin boilers, or parts of boilers, from other manufacturers where the fit of the mouldings has been appaling. Always best to make your own structures as they always fit.....or if they don't I'm to blame.
 

richard carr

Western Thunderer
Nick

I've built about 15 of the diesel kits, mainly 37s and 40s, getting a really good fit between the roof and cabs is always a time consuming process. You just have to be patient and keep chipping away on the inside until they line up really well. Then it doesn't take much to get a smooth finish on the outside when they are glued together. The coach kits are similar, getting a good fit between the ends and the roof is always the biggest challenge, and I've made plenty of those and now you can buy them all ready to run !

Yes generally they did most versions of a class of locos, so for 37s they did the 37/0 with split head codes, and centre head codes, with both of these with and without skirts. They also did the 37/4 and I think a 37/5 with the different lights that they had. They also did the welded and rivetted roof for a 37. So you get plenty of choice. It was similar thing with the 40s the 25s etc.

I still have a couple of 47 and 27 kits to build and 1 more 40 at some point.

I think you have been very unlucky here, I also suspect that they did the cab ends for the early version that you are making. Sadly we probably won't see these available again.

Richard
 

Nick Dunhill

Western Thunderer
Yes it's a shame really. I did think of dabbling with JLTRT diesels, being a trainspotter in the mid to late 70s blue diesel era. My first spot was 60 Lytham St Anne's, and I lived very close to the Woodhead extension to Wath-on-Dearne, so my favourite locos were the EM1s or 76s in TOPS days.

I don't imagine I'll ever build anything like this now. I build professionally and full time, so I like to spend my free time doing other things away from O Gauge locos. So far this has prevented my enthusiasm for building locos in the week diminishing (although several kit manufacturers have pushed this close to breaking point.)

Maybe when (if) I retire I'll build a pair of EM1s, an EM2 (although I never saw one in service) and a model of D11 62666 Zeebrugge....and if there's time a model of 61661 Sheffield Wednesday. Warren H will need to buy lots of 6s!
 

Dog Star

Western Thunderer
The coach kits are similar, getting a good fit between the ends and the roof is always the biggest challenge, and I've made plenty of those and now you can buy them all ready to run !
To think that we (jokingly) referred to those kits as "JNQLTRT" (not quite)... and then the RTR came along and those were definitely NLTRT!
 

Nick Dunhill

Western Thunderer
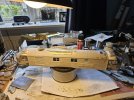
It took me three days this week to more or less finish the loco. I managed to make an invisible repair to the roof. Thanks to all of your advice (above,) I'm now a convert to sanding sticks. I sorted out all of the other components that will be fitted to the body post paint, wipers, windows etc etc.

53727726221_f460ef17f8_b.jpg

53728068604_8f35f4f92a_b.jpg

I added a 3D printed shore box to the side of the battery box (cheers Michael) and a fuel/water? filler.

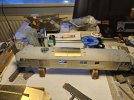
Then on to the bogies. They went together ok, a bit of fettling required, but nothing drastic. They're 'as in box' apart from the addition of the pipework on the bogie sides, and the sand pipes (which annoyingly hinder separating the bogie chassis from the frames.)

53728068714_57fc037309_b.jpg

I test fitted the body to the frames and found I had to cut some bits off a 3D printed engine that will sit inside the body. Much lead was added.

I now have a box of bits sitting waiting for the motor bogie to arrive from ABC. The motor bogies ran very badly when I got them. The 29.2 mm axles had been plonked out brutally, and S7 ones plonked in. The bearings and one of the motor mounting plates was Donald-Ducked. The knocking stick needs to remain in it's box for loco building methinks. They went back to Brian C for a refurb.

Apparently I have a model of 10000 (16, there's the science gags again, come on keep up) to build soon (double-bubble), and each will have one power bogie and one unpowered. This of course makes fitting a decoder a doddle. Each loco can have a Loksound V5 in it, as there's loads of headroom in the decoder's rectifier with only one motor (plus a mini motor for the fan.) I pre assembled all the components of the decoder with a speaker upgrade. I know JLTRT locos often have 2 motors fitted. The motor in this loco is the same as would be fitted inside a pacific steam loco, so I often wonder why a second motor is desirable? Makes fitting a decoder much more difficult.

53728068644_44d0f488d2_b.jpg

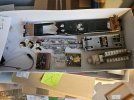
Here's the box o'bits waiting for a power bogie. More when it arrives.

Although I don't have any photos I spent 3 hours cleaning out my workshop after sanding all the resin parts. I had to take everything off the shelves and dust/vacuum, books, pending kits, the lot! I have a model loco in a display box. It's the only model I own, and the display box had got resin dust inside! Be warned!
 
Top