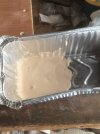
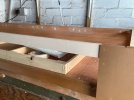
On my workbench

jonte

Western Thunderer
Spent the last week endeavouring to raise my flagging enthusiasm for the hobby after my long line of failures.

This is my solution(?) and last ditch attempt. If it even dares to go the way of its predecessors, I’m throwing in the towel….

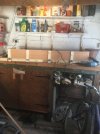
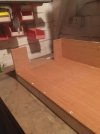
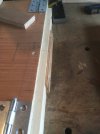
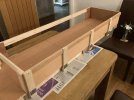
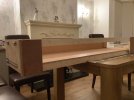
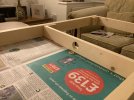
It’s a self contained base board measuring 5’ x 16”, 4’6” of which will be scenicked, and built using traditional methods of 12mm ply for the surface, glued and screwed to a 2”x1” PSE frame.

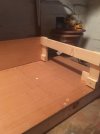
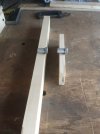
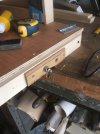
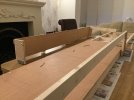
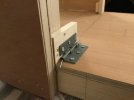
There’s also a 3’ fiddleyard adjoining which utilises a baseboard joiner I’ve had for many years, rescued along with other bits and pieces as they headed for the inevitable bin. This will be supplemented by split hinges as per my ‘Monks’ layout. Cassettes - again as per ‘Monks’ will be the choice of fiddleyard operation.

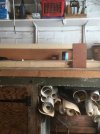
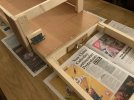
And here I’ve boobed already: following ‘Monks’, I boarded over the whole frame, only realising last night that, unlike Monks, I won’t be using cork underlay due to the very low backscene, designed for easier carting around and storage. Only part of the frame should have been boarded for storage of the cassettes……… Hence, a second trip to the wood yard. Still, I suppose it could have been worse.

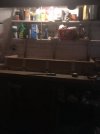
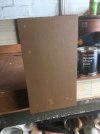
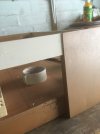
I won’t harp on, apart from to say that the backscene is removable on three sides: the rear, left side adjoining as you look from the front, and the whole of the right side. Experience has shown that trying to work around a fixed backscene is a pain, so this will almost full access. Once I’ve ‘finished’ the project, it can be fixed down securely. I’ve also installed a drop-down door to the left side via a piano hinge to enjoy a look over the buffers and out along the station throat to supplement the single traditional view from the front. Well, that’s the idea.

The proscenium arch is yet to be fixed in place and just placed for the photo, and all the screws will be removed and the holes filled for aesthetics.

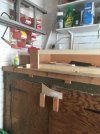
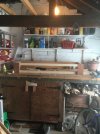
This shouldn’t have taken a week, with most of it spent in contemplation, as there was no plan as such, just an inkling of what I wanted, but add to this the fact that all I have at my disposal in the form of tools is a low cost drill, a couple of screwdrivers and a (blunt saw), and absolutely no idea as to how to cut straight! Hence, most of it was ‘jigged’ up on the bench, which accounts for the plethora of holes!!

Oh, and btw, it’s going to be yet another GWR BLT…………

(Apologies for the poor quality photos).
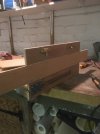
84111728-B2EC-4127-B8E6-BA7E7ACDFFA9.jpegA011DB28-26E5-4070-BCB4-C24596EC3E20.jpeg4C27F323-EF4B-4AD1-B2F5-7A68506149EA.jpegD16CC3A0-99CF-40F0-9058-B5AFE2CB2EB5.jpeg5E063BBF-2850-4870-AB2D-F264523E31BE.jpegAB6098EB-1BC6-4AD9-82F1-6DEDC1F9F5ED.jpeg
jonte

B57549D1-72EC-4798-93A8-3DF08E941920.jpegBD390D3F-7F3A-42B8-B89E-DC01C622C756.jpeg
 

ceejaydee

Western Thunderer
Surely there are no true failures Jonte, only previous projects that may not have fully met your aims but taught you things during the journey?
As much as projects that don't work out cause frustration, you are really undertaking the process of learning by doing which is arguably far more productive than just planning and contemplating without subsequent action.

There is no hurry to reach completion but I understand the frustration as indeed all my recent efforts have seemingly come to nothing as I have become a serial baseboard builder but don't get as far as laying track before I change my ideas :confused:

Now get on with it and finish that GWR BLT before the end of the year? ;)
 

jonte

Western Thunderer
Surely there are no true failures Jonte, only previous projects that may not have fully met your aims but taught you things during the journey?
As much as projects that don't work out cause frustration, you are really undertaking the process of learning by doing which is arguably far more productive than just planning and contemplating without subsequent action.

There is no hurry to reach completion but I understand the frustration as indeed all my recent efforts have seemingly come to nothing as I have become a serial baseboard builder but don't get as far as laying track before I change my ideas :confused:

Now get on with it and finish that GWR BLT before the end of the year? ;)
Thanks, Christopher D.

Not sure about the end of the year (several jobs around the house pending, starting this week), but I’ll give it my best shot :)

Jon.
 

jonte

Western Thunderer
Following my massive boob with the cassette deck as per my last, I returned to the same wood yard to order further lengths of 2”x1” (or metric equivalent) to rebuild the frame. However, never plain sailing for me, when placed against the outer bearer of the baseboard to drill for the joiner refit, I noticed a slight discrepancy in height. Replacing it with a further length, in the event this was merely a rogue section, I had no such luck: the wood purchased on this occasion was higher in section!

Not wishing to endure a hiatus in proceedings lest my new found enthusiasm waned once more, I made did and mended. This consisted of utilising what was left of the thinner section used on the decorative surround, which was of the same height, but using the new outsize section for outside runners as they won’t affect the use of the cassettes on the ‘tray’. This produced a further problem: the baseboard joiner was designed for the thicker section of 2”x1”, so it was either a reluctant return to the wood yard whenever, or increase the section with offcuts of suitable dimensions. Luckily, I keep a couple of plastic bags full of offcuts, just in case……

The problem, with the thinner section to the right:

C8F78499-0D67-40DA-9A50-2893EA14C197.jpeg

The solution:

6B22818A-3CDF-45DC-88D3-CE89E05A66F1.jpegE199820A-E272-4B35-B001-4A59394AEEC7.jpeg

Resolved, it was on to building the rest of the cassette deck as described but reinforced with offcuts at the joints as the thinner crossmembers are a little lightweight.

The fitting of pieces (of 12milli ply) to carry the transitional sections will be fitted in due course once the plan has been drawn onto the baseboard surface, together with a hardboard (I’ve some spare) shelf towards the front on which to place a spare cassette. Both will render some much wanted robustness to the construct.

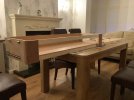
Then I set up the layout in the ‘unextended’ dining room table to check for fit:

980294A0-93F5-4AD8-8912-C86910DDD866.jpeg5A7B9C05-4095-4793-9490-E6A704EE7C93.jpeg7772DD54-0AF2-4384-A1C6-AA602146E9D3.jpeg

The backscene removed for better access:

EBDC4AF9-AEA0-4CDC-9948-3F2A2766D5C3.jpeg

…….and returned and secured:

1C0C044F-0C90-4861-AE17-C7808164FA79.jpegFFAE3734-28B3-48CE-B5A6-A6F2E91F8C9B.jpeg
And a close-up of the cassette deck:

23663836-A81E-470D-A121-C677C81F9056.jpeg

Despite the odd set back, I’m extremely pleased with the build and delighted that it fits adequately within the average sized home environment without too much upheaval. Result.

Thanks for looking.

jonte
 

jonte

Western Thunderer
Presentation of the ‘carcass’ was an early consideration, if for nothing more than to serve as a clue to what was contained within its bowels.

To that end, whilst shopping for masonry paint t’other day (first job on the domestic list was painting the pebbledashed bay), I occasioned a couple of tins or so of what is described as furniture paint. What attracted me was the fact that the tins were not much bigger in size than a large tin of Humbrol paints (wonder if they’re still available?) as the larger tins were far greater in volume for what I required, and with an accompanying price to match, more or less. Worth a punt, an added bonus on reading the label was that no primer or undercoat would be required:

36D83229-2E8A-4769-A0D2-40F890064BE5.jpeg

In between waiting for coats of masonry paint to dry, I dabbled with the baseboard to see how my mystical paint would pan out (apologies…). The glutinous slurry inside wasn’t the easiest to smoothly apply, but more concerning was the yucky colour of ‘wood’ that resulted from the ‘brown’ variety. Looking more like N.E. teak coaches, it couldn’t have been further from the WR brown I sought:


D42BEEF3-0E9A-4C1B-8C26-F06F16C609D0.jpegGiving the creamier colour a go across the arch, was a sign of more disappointment to come as it looked more China white than cream.

I must add that as greys seem de rigeur in national decoration, these were the nearest colours available to fit the bill; should have known better.

Then my luck changed. My wife thought she’d seen old tin of brown emulsion paint on one of the high shelves in the garage earlier that day. A brief search proved her right, but the ‘weathered’ tin kept the lid on my hopes. Expecting an encrusted sludge to greet me on opening, how surprised was I to discover that the paint appeared unchanged from the day it left the factory. Now that I come to think of it, it was apparent that it had never been opened; why it hadn’t, and even more to the point, why had I purchased it in the first place, remains one of life’s un-greatest mysteries.

The bonus was that the paint looked very like the WR brown of the Station Colours site, so that would do for me:

EF49F92B-E2B7-4EB1-93E9-247FEC388FF8.jpeg


I’ll sand the yucky brown currently applied to provide a suitable key for the emulsion which should do the job.

But what about the ‘cream’?

A further search of dusty shelves on various levels to find say a tin of magnolia paint left over from whenever, to act as a substitute for WR cream proved fruitless, so I resigned myself to a further visit to the piggy bank and the shops. Then it occurred to me that the two colours of furniture paint might mix into something suitable, and this was the result:

CF997758-C8D0-47B8-A37E-2B328FC6ED74.jpeg


I’ll await further judgement till it dries on the job, but early signs see me buoyant:

ECD0D6CF-8ACE-4CA2-AD70-734948D4EC46.jpeg

Admittedly, it still looks a little too light, but if it dries to the tone in the mixing dish, then I’ll be happy.

Happier still that the pebbledash is finished :)

jonte
 

jonte

Western Thunderer
Mixed up another concoction, this time with more of the ‘brown’ added:

B628454A-F7E9-4576-8743-D58A65E15507.jpeg

I’m happier with this.

Applied, you can detect the deeper shade, although the camera doesn’t seem to have picked it up too well:

4D772B09-3303-44D2-B519-49EEACA2390B.jpeg

Shouldn’t look so anaemic against the darker shade of brown when it’s applied.

Incidentally, I’d like to lose the exposed baseboard edge, but as I mentioned in an earlier post, I can neither cut straight nor do I have the necessary tools Hopefully the modelling will distract.

This will be the last of the posts on this thread as I’ll start a new one in the Layout section to explain what I have in mind and provide fuller details.

Thanks for your interest.

jonte
 

simond

Western Thunderer
Jonte,

you could cover the edge, perhaps with extruded aluminium or plastic angle or angle bead. The plastic stuff is cheap enough from the likes of Screwfix.

atb
Simon
 

jonte

Western Thunderer
Jonte,

you could cover the edge, perhaps with extruded aluminium or plastic angle or angle bead. The plastic stuff is cheap enough from the likes of Screwfix.

atb
Simon
Thanks, Simon

However, I’ve since applied the emulsion; it’s dark shade and viscosity seem to have done the trick!

jonte
 
Top