Rivermead Central

40057

Western Thunderer
A little more on the Stephenson Clarke wagon by Pealling.

Thank you to Overseer for the livery information above. I can add that an illustration from a Gresham Model Railways catalogue is reproduced on the MilbroModelRailways website (Other wagon makers) showing a Stephenson Clarke wagon by Pealling that appears to be in the familiar grey livery.

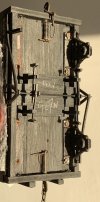
This morning, I thought I would start looking at the options for replacement wheels. First, simple, job: Take off a couple of the axleguard castings so the existing wheel sets could be dropped out. Except it wasn’t a simple job. The small steel screws that secured the axleguards were heavily corroded and very difficult to shift. On closer examination, there was a deposit of salts around each screw. I wonder if the steel had reacted with the alloy casting or if some water based glue had also been used to hold the axleguards in place? Anyway, I did eventually manage to remove two axleguards without causing any damage.
4E386CCF-9BA0-421F-A745-EF7651540782.jpeg

I will have to find four replacement screws, unfortunately.

The above photograph gives a good view of Pealling’s method of constructing dummy brake gear, using card. The price is clearly visible. Also written in pencil, what looks like ‘GE/N’ or possibly ‘Gt7N’. I have no suggestion what this could indicate.

The wagon is probably going to get Bassett-Lowke cast iron wagon wheels, the type sold after WWII and possibly for a few years just pre-war. These wheels are exactly the same diameter as those on the Pealling wagon until this morning. The Bassett-Lowke wheels have a back-to-back measurement of 0.5 mm less and are 1 mm wider. They will fit between the axleguards. The issue is the journals on the Bassett-Lowke wheel sets are of larger diameter and longer. So, to use the Bassett-Lowke wheels, they will have to be removed from their axles (not easy — forced on) and the journals turned down. Other options are still under consideration.
 

40057

Western Thunderer
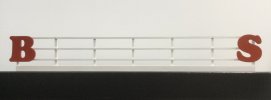
I am slowly progressing the roof sign for the Benham’s factory.

Once the letters were prepared, I started by fixing the first and last letters at each end of the supporting frame:

4BB6B397-E30E-4858-89F0-9AE753BDC0EC.jpeg

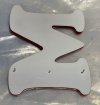
This gave me a definite length for working out the spacing of the intermediate letters. Because of the limited surface area of each letter in contact with the framing, I decided pegs were necessary to ensure a firm and durable attachment:

835A0B31-AE13-48A1-9F9E-C17FAA9AFB98.jpeg

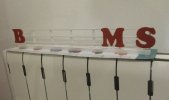
The pegs fit into holes drilled in the relevant vertical post. An action photo of the glue setting (aided by the radiator) after the ‘M’ was put in place earlier today:

E4C3D023-1830-4238-8CE8-A11B40839429.jpeg

The ‘M’ and the ‘S’ are more widely spaced than the other letters will be due to the possessive apostrophe. I will double-check the positions of the four remaining letters so they look even (taking into account their shapes) before attaching these.
 

40057

Western Thunderer
Effectively, a work diary update for myself.

The Benham’s factory roof sign now looks like this:

7173BE36-3C98-4D40-9407-852670B4480B.jpeg

If I was just gluing the letters in place, I could probably fasten several (or all of them) in one go. However, because I am using pegs glued into drilled holes, there is little scope for adjusting position at the time of gluing. So I am going one letter at a time to make sure the positioning is exactly right.

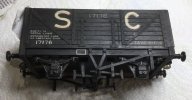
The Stephenson Clarke wagon is fully repaired apart from its replacement wheels:

93A329D3-177D-4378-A660-FD5252112380.jpeg

It has buffers again. In the photo above, the left hand brake shoe and the brake lever pin rack are replacements for parts that were missing. The new parts are copies of the surviving originals still present on the wagon. I managed to match the paint (there are a lot more than fifty shades of black) so I really don’t think the repair shows. Happy.
 

40057

Western Thunderer
I generally like to have at least half a dozen ‘projects’ on the go at once. Switching from one thing to another makes for variety in modelling activity and can provide a break from uninteresting, repetitive tasks while still maintaining progress overall. Setting something aside for a time may be necessary while paint hardens, or when waiting for materials, or to consider how to approach a repair or restoration.

My Pealling Stephenson Clarke wagon is nearly finished but I am now waiting for some replacement size 0 wood screws to arrive in the post before I can refit the axleguards with the wagon’s new wheels. So I have selected the next wagon for repair in the shops. It is this:

727D7E53-E272-4EA2-8FC6-0D8310A85D9F.jpeg

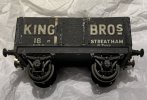
A 10-ton, side-door only mineral wagon. I know nothing about King Brothers but I presume they were local coal merchants in Streatham, though apparently a big enough business to own at least 18 wagons.

This evening’s job was to make an initial appraisal of the work needed to bring the wagon back to usable condition.

The model is wood with card strapping and metal fittings. There is no trade mark but the builder is easily identified. The wagon is undoubtedly the work of Leslie Forrest who traded as the Windsor Model Company. The method of attaching the solebars and headstocks using moulding pins passing vertically upwards into the body sides is distinctive, as is the painting style and very well executed lettering. Absolutely unmistakable though is the representation of the nuts and bolts that on the prototype secured the W-irons to the solebars. Each is represented by a spot of white paint with a smaller dot of black paint on top.

I am very uncertain regarding the age of this wagon. The Windsor Model Company traded before WW2 and even produced a couple of catalogues in the early 1930s that showed an impressive range of models. But the company was also active after the war, when Leslie Forrest was particularly known for building wagons and locomotives for Norman Eagles’ layout ‘The Sherwood Section of the LMS’. My King Bros wagon has post-war Bassett-Lowke cast iron wagon wheels which suggests 1950s/60s as a likely period of manufacture. Small firms like Windsor necessarily bought in fittings such as wheels and I think those on the King Bros wagon are probably the wheels fitted to it when new. I don’t know when Leslie Forrest ceased making models. There is a date (30/4/74) pencilled on the base of the wagon which might even be the date the model was completed, though to me the wagon looks older.

Repairing this wagon will involve a fair amount of work, much more than for the Pealling Stephenson Clarke wagon. Firstly, the King Bros wagon is absolutely filthy and will require a thorough clean. There are some old wood worm holes that will have to be filled. The coupling chains are a mixture of brass and nickel silver links of varying size, so I think missing links have been replaced. Some of the strapping is missing or hanging loose. Fortunately, the strapping appears to be the type sold by Mills Brothers (Milbro) so I have some unused original lengths I can use to replace the missing sections.

A nice period wagon though, and definitely worth the effort that will be needed to put it back into good order.
 
Last edited:

40057

Western Thunderer
Prompted by commencing work on my King Bros wagon, I thought I would see if I could find out anything about the real life wagon’s owners.

It occurred to me Leslie Forrest might have based the model on a wagon he saw or photographed. His business was originally based at 5 Windsor Road, Denmark Hill. By 1932, Windsor Models had relocated to 7a The Parade, St. John’s Hill and as far as I know remained at this address.

Alternatively, especially if the model was not made until well after WW2, Leslie Forrest might have worked from a published photograph. There is apparently some reference to King Bros of Streatham Common in the book ‘Private Owner Wagons of the South East Part 2’ by Simon Turner. Unfortunately I don’t have this book.

There may be a published drawing or photo in some magazine, but not to my knowledge.

I would be very interested to hear if anyone can shed any light on the King business or its wagons. Thank you.
 

40057

Western Thunderer
I said yesterday (post #65) that my Pealling Stephenson Clarke wagon was ‘nearly finished’. It depends, I suppose, on one’s definition of ‘nearly’.

Nothing, it seems, is ever quite as simple as anticipated. Firstly, the replacement wheels. Ideally, cast iron because turned cast-iron wheels run so nicely and the wheels originally fitted by Pealing were turned cast iron. I considered fitting new cast-iron wheels from Walsall Model Industries, but their wagon wheel casting would have resulted in much smaller wheels (about 1.5 mm less in diameter). Bassett-Lowke post-war type spoked cast-iron wheels match the diameter of the Pealling wagon’s original wheels exactly, but have much thicker spokes. Bassett-Lowke cast-iron wheels tend to be very difficult to remove from their axles. But I would have to take these wheels off their axles in order to fit them on the Pealling wagon; the diameter of the journals of Bassett-Lowke wheel sets is 2.8 mm, 0.4 mm more than required for the Pealling wagon, so the diameter of the journals would have to be reduced.

In the end, I have opted for post-war Bassett-Lowke alloy wheels. These too are an exact match for the original wheels’ tread diameter. The alloy wheels are, of course, broader and with deeper flanges — but that’s why I’m making the swop. The alloy wheels are very like the original wheels in terms of the shape of the spokes etc. So, compared with fitting Bassett-Lowke cast-iron wheels, the alloy wheels are a better match to the appearance of the originals and involve less work. This type of alloy wheels was fitted to some of Bassett-Lowke’s own range of wooden wagons, as seen for example on the 10-ton LNER merchandise wagon pictured in my post #31.

My late father would almost never throw anything away on the grounds that one day, just possibly, the item ‘might come in handy’. The replacement wheels for my Pealling wagon are a vindication of his approach. The wheel sets I have fitted were in amongst some spare parts I bought many years ago. However, when closely examined after purchase, I discovered the axles had been crudely shortened by sawing a few mm off each end. The wheel sets (at least, the axles) were therefore useless for fitting to Bassett-Lowke wagons. But I took my father’s general advice and didn’t throw them away. Considering, what to do about replacement wheels for my Pealling wagon, I remembered these damaged wheel sets. By some minor miracle, I could even remember where I had put them. And they were ideal. The shortened axles were just slightly too long to fit the Pealling wagon.

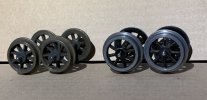
Bassett-Lowke post-war alloy wheels are a simple push fit onto axles of 2.8 mm diameter steel rod. They are fairly easy to remove (and replace) with suitable encouragement. So I took off the wheels, shortened the axles with a file and reduced the journals to 2.4 mm diameter using emery paper and a drill to turn the axles. The resulting wheel sets are these:

B017EE3B-CE99-4B82-B19A-26FF4853A8A6.jpeg

The original wheel sets fitted to the Pealling wagon are on the left, the replacements on the right. The colour difference between the cast iron and the alloy is obvious (especially so in the photograph). The flange of the Bassett-Lowke wheels is slightly deeper, but the shape of the boss, spokes and rim thickness are a close match to the original wheels. The appearance of the wagon will not be significantly altered by its new wheels and the swop could be easily reversed, with no damage to the wagon. The replacement wheels are the correct standard for my Bassett-Lowke track.

I could of course have modified intact Bassett-Lowke wheel sets by shortening the axles and turning down the journals. But I really don’t like altering useful, undamaged, original parts. It feels too much like vandalism. As it is, my conscience is clear.

Next issue. The screws that fasten the axleguards to the wagon floor. As previously indicated, the screws turned out to be very heavily corroded and very difficult to undo. A couple of them are so rusted there is almost no thread left. So I need replacement screws. I have 1/4” 0 gauge wood screws ‘in stock’ as these are pretty standard for fixing the axleguards of wooden wagons. But, unexpectedly, the screws on the Pealling wagon are 5/16”, longer than usual. I can see why, the particular casting used for the axleguards is somewhat thicker than is typical and a 1/4” screw really is too short. I have no 5/16”, 0 gauge, countersunk-head, steel, wood screws. Nor can I find anyone who can supply them. So I have ordered some that are 3/8” long and I will have to shorten some and reshape the ends.

As I said, nothing is ever that simple.
 

40057

Western Thunderer
It’s always good to bring a project to a successful conclusion. Here is my Pealling mineral wagon fully repaired, completed, finished, done:

80BCBB8B-7AA3-4647-ABDB-FB2C89CC976D.jpeg

The accumulated dirt of eighty years removed. Replaced, matching, buffers. Missing parts of the brake gear copied from existing, glued on and painted. Minor paint repairs to the body. Wheels replaced with Bassett-Lowke die-cast wagon wheels.

A nice, historic, wagon by a renowned builder.

Ready for traffic, when I get the layout to a stage where I can run trains.
 

40057

Western Thunderer
Yes, I assume there are at least 92 others. But I don’t know what the number series was. Was mine the 93rd pannier? Or the 93rd of the 0 gauge single cylinder 0-6-0s? (I know there were LMS 3Fs that were mechanically the same as the panniers, maybe other types too). Or the 93rd model by HB Models across all types produced in 0 gauge, or any gauge?

There was a very attractive two-cylinder 0 gauge Tilbury tank offered for sale in a recent auction. It was attributed to HB Models and although I didn’t see the loco I think the attribution was almost certainly correct. So there was at least one other, completely different, 0 gauge live steamer produced.

I am pretty confident there will be no other clockwork ones, or surely Harold Denyer would have mentioned that?

By way of a follow-up to the discussion in May last year about my clockwork HB Models pannier tank (post #10 et seq.).

This loco is currently for sale in an internet auction:

A8AC9A02-3C4C-48A3-8444-08F04D093C14.jpeg

(Photo kindly supplied by John Neale of StoptheDrop Auction)

It’s an electrically powered (3rd rail, skate pick-up) HB Models 57XX pannier tank. A real surprise this. Again, the same pressed metal parts were used as in the live steam version of the model. The photo above clearly shows one of the vertical plates provided to shield the burner and the hole for the regulator is visible in the back of the cab. I haven’t seen this loco in person, but I suspect the incorrect green livery is original. I am advised it is stamped underneath ‘HB 072’.

I’m guessing this, like my clockwork HB Models pannier, was another one-off special order. However, clearly there was a preparedness to adapt the parts used for the advertised live steam model, so maybe there are other electrically powered HB Models pannier tanks out there.

I would be very interested to hear if anybody has or knows of any further variants.
 
Last edited:

40057

Western Thunderer
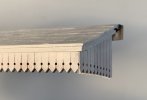
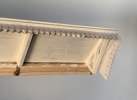
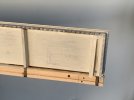
I’ve been doing some more work on the Benham’s warehouse building. Specifically, progressing construction of the canopy. I’m making the canopy as a separate unit but test fitting it to the building periodically as I go.

I have endeavoured to counteract the tendency to warp of the main plywood sheet forming the roof. In various places I have almost cut through the ply (two and a bit of the three layers) with a tenon saw and glued in pieces of strip wood to fill the cuts. My hope is that any warping will be confined to the sections between the cuts, but the sheet of plywood as a whole will be kept as a more-or-less plane surface by the framing and roof supports being firmly anchored to the front of the building.

The dagger boards are now attached to the front and sides of the canopy and painted with primer:

908169A4-D7B9-4A07-BC86-4843B4ACF712.jpeg

The dagger boards and roof supports were supplied by Poppy’s Wood Tech.

There are four roof supports corresponding to the brick piers either side of each set of doors. This is the support at the right hand end of the canopy:

33CCC5C7-DC01-4008-B3CE-5B207DAAF648.jpeg

The unpainted wood at bottom in the photograph will sit on top of the existing wall, and will become the upper part of the raised section in the centre of the building. The rear (exposed) face will be painted brick colour once the canopy is attached to the building. The back face of the building’s front wall, the part above the roof, will not be visible from any normal viewing angle when the building is in place on the layout. Painting the wood brick-colour is sufficient.

This is the arrangement of framing joined to the roof support to which the dagger boards are attached at the ends of the canopy:

66E0E20B-EA56-4230-9A6C-D1553FB78D16.jpeg

There just might be a little mission creep here. My aim when I started construction was a simple, impressionistic representation of a building. Absolutely not this kind of complex, time-consuming construction. My difficulty was that the dagger boards had to have a supporting frame, for strength. So it was the practical option, albeit a more complicated construction than I would have liked.
 

40057

Western Thunderer
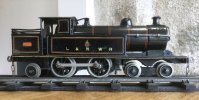
Everybody loves a Precursor tank! At least, apparently, since they were very popular in the years before and after the First World War — judging by the number of models produced.

Bassett-Lowke first offered Precursor tanks in gauges 0 and 1 in 1909. These models were made by Marklin and were not exclusive to Bassett-Lowke, being also retailed by Gamages and listed in Marklin’s own catalogues. Clockwork and electric models were offered in both gauges, steam in Gauge 1 only. In 1911, Bassett-Lowke replaced the Marklin version with models made by Bing. Bing’s Precursor tanks were much better proportioned than Marklin’s with superior paintwork. The Bing Precursor tanks were produced on an exclusive basis for Bassett-Lowke. Again, models could be either clockwork or electric in both gauges, but there was no steam version. The Bing Precursor tanks were presumably designed by Henry Greenly, as per the many other locomotives produced by Bing to Bassett-Lowke’s specifications. They must have sold well; today, Precursor tanks are probably easier to find than any of the other classic locomotive models produced by Bing for Bassett-Lowke in the 1910–20 period. Production stopped, of course, during WWI but resumed post-war. However, in 1921 the production of 0 gauge Precursor tanks was switched to Winteringham’s, Bassett-Lowke’s associated manufacturing company in Northampton. The Winteringham Precursor tanks were almost identical to those made by Bing. For surviving models today, manufacture is quite often attributed to the wrong company. The production of Winteringham Precursor tanks continued after 1923, these later models being in LMS livery. All the LNWR liveried models (of whatever manufacture) were numbered 44, the LMS ones were numbered 6810. The Marklin Precursor tank model similarly had a long production run. Though no longer sold by Bassett-Lowke, Marklin Precursor tanks were also made well into the 1920s and were produced latterly in LMS livery.

So, for a vintage model railway like Rivermead Central, I feel a Precursor tank is an appropriate representative model. They were made in large numbers, by several manufacturers and over a long period. There ought to be one as part of telling the story of model railways in the 1900–1960 period.

I have today finished doing the conservation work on this:

7D181B5C-5B9C-4F6A-8BE2-0266038866A6.jpeg

Conservation work in this case involved a thorough clean, the treatment of some rust patches on the underside (almost certainly due to flux residue, not cleaned off properly after manufacture) and stabilising a few small areas of flaking paint. I have not undertaken anything I would classify as ‘restoration’ for this engine. Its imperfections are part of its charm and the story of its 115 year existence.

One hundred and fifteen years old! We can be pretty certain of that, give or take a year. This model is one of those made by Marklin and retailed by Bassett-Lowke in 1909 or 1910. To put it in context, the first quantity-produced 0 gauge models that attempted to represent specific full-size locomotives appeared in 1904. Very few ‘model’ (as opposed to ‘toy’) locomotives had been made by any manufacturer prior to 1909. Yet here we have Marklin, who were definitely toy makers, producing an instantly recognisable Precursor tank. Sure, the wheels are all too small, the boiler should be higher pitched and the cab is too tall. But the essential features are all there and the livery is well reproduced. The model is extremely well built in heavy-gauge tinplate. The chimney is a brass casting, the coal rails are half-round brass wire. The smoke box door furniture is recognisably LNWR:

C2D21736-B22B-49FC-86B1-248E6CF95F88.jpeg

Even the front and rear cab windows are a different shape, as on the prototype:

794D55B1-A4BD-4C5D-BAAA-5E37F5C0EB26.jpeg

The absurdly small lead buffers confirm this to be a very early model, as do the solid wheels on the bogie and pony truck. Later Marklin Precursor tanks have turned nickel-plated buffers, spoked bogie and pony truck wheels, driving wheels with more spokes and a single coal-rail that is part of the same pressing as the bunker sides and back. Later models with clockwork motors also have a speed control.

Another early feature is the brake acting directly on the leading driving wheels, instead of internally in the mechanism:

E64D2D0B-3A34-400F-A21D-73F70E11AB52.jpeg

My Precursor tank has unfortunately lost its headlamps. Pretty much every 0 gauge locomotive up to the 1920s, even 0-4-0s, carried headlamps indicating its train was an express.

I have the original Marklin wooden box for this locomotive. It has the Marklin catalogue number (TCE 1020) written in pencil on the underside (presumably done at the Marklin factory) and the remains of a Marklin paper label at one end (presumably removed at Northampton prior to sale). The ‘bought in’ nature of these models for sale by Bassett-Lowke (as opposed to models made specifically for Bassett-Lowke) is further emphasised by the painted out Marklin trade mark on the underside of the locomotive:

A9AB4B9E-2B41-418A-80A1-9A46C45743A1.jpeg

(Photo taken when the pony truck was removed for conservation work).

The red Marklin trade mark is just detectable to the left of the footstep under the slightly glossier patch of black paint Bassett-Lowke used to obscure it. The other give-away that this particular locomotive was retailed by Bassett-Lowke is its couplings. Bassett-Lowke removed the Marklin couplings (which were of distinctive design and not compatible with most other manufacturers’ couplings) and substituted three-link couplings. So every Marklin Precursor tank sold by Bassett-Lowke must have been unpacked at Northampton, had the Marklin trade mark and identification removed/deleted from it and its box, its Marklin couplings removed and new ones fitted.

I’m not a toy collector so most Marklin products are not for me. This Precursor tank though is a real period piece from the time when model railways (as opposed to toy trains) first appeared. Bassett-Lowke, who sold models, not toys, put it in their catalogue. Undeniably, a serious attempt has been made to portray the real locomotive. Within the limitations of the manufacturing methods then available, it’s a pretty good effort. It’s really nicely built. I feel privileged to be looking after it.
 

40057

Western Thunderer
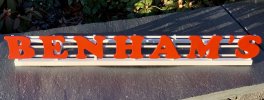
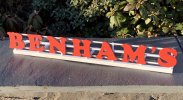
The advertising sign for the roof of the Benham’s factory building now stands upright by itself:

518048C9-6AA3-4EBA-BD2C-BB6A727E09B0.jpeg

2149ED40-550A-437D-85E7-71F4DF9B0F89.jpeg

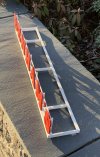
This is because I have added the supporting wooden frame that rests on the building’s roof:

56C19C01-48FD-4E9E-8D20-819A954D1D4D.jpeg

I wanted to get the letters all painted and fixed whilst I could still lie their supporting posts and rails flat.

I have some diagonal bracing to add before the structure is finished.
 

40057

Western Thunderer
Today is the first anniversary of me starting this thread. Of course, I would like to have got more done over the last twelve months — but I am reasonably happy with progress on Rivermead Central.

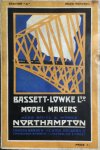
This, from exactly 100 years ago, will do as a birthday card:

1ED4CB93-4A9F-4B66-B7A9-F2B938C59CFC.jpeg

It’s the cover of the spring 1924 Bassett-Lowke model railways catalogue. Slightly faded, I’m afraid, but a great piece of period design. Of the Bassett-Lowke catalogues I have seen, this is my favourite cover artwork. I think it was only used for the spring 1924 edition, whereas some other designs were used for several years.

Thank you to everyone who has read, liked, and posted on this thread over the past year.
 

40057

Western Thunderer
I now realise that I have still said absolutely nothing about passenger coaches for Rivermead Central.

Pre-WW2, three very different approaches were used by manufacturers of 0 gauge model coaches.

First, lithographed tinplate assembled using ‘tab-and-slot’ construction. Used by toy makers, but also by Bassett-Lowke to produce (relatively) inexpensive scale models.

Second, bodies made of wood. Various systems were used based on machine made small wooden elements assembled and painted by hand. Mills Bros of Sheffield (‘Milbro’) were undoubtedly the largest producer of such coaches. The Leeds Model Company made a more basic type of wooden-bodied coach where glued-on printed papers were used to represent the features of the sides and ends.

Third, bodies constructed using a one-piece metal wrapper to form the sides and roof of the coach. This was the approach used by the Bradford firm Edward Exley Ltd.

In keeping with my ‘preserved model railway’ approach, I would like a representative set of coaches of each type of construction. Fate has decided my set of Exley coaches will be Southern Railway corridor stock.

I will say right now that I am not knowledgeable about Exley coaches. The firm’s post-WW2 vehicles are well known and were manufactured up to 1962. These coaches have aluminium shells, wooden floors, interior detail and glass windows. They are scale length and have fine but rather fragile paintwork. I don’t have any post-war Exley coaches as I consider them unsuitable for use on Rivermead Central. They are too heavy for clockwork locomotives to haul long trains and too long to look comfortable on 3’ radius curves. Before WW2 though, in addition to the scale length vehicles, Exley made a limited range of simpler coaches.

I have never seen a pre-WW2 Exley catalogue. So I do not know the full range of the simpler type coaches that was offered nor the rationale for making them. Presumably, they were cheaper than the detailed, scale-length, models with interiors and glass windows. The simpler coaches are also shorter and weigh far less. Perhaps they were marketed as being suitable for tinplate railways and haulage by clockwork locomotives? Whether or not these benefits were pointed out by Exley at the time, these are exactly the reasons for me choosing the simpler type for my representative rake of Exley coaches.

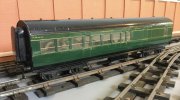
The simple type Exley coaches are 35 cm long. They represent corridor coaches with an outside door into each compartment. The window spacing is the same as on the scale length coaches. The shortening is achieved by omitting the toilets and vestibules — the compartments come right to the end of the coach. Gangways are fitted, so the layout represented is nonsense and wouldn’t work in reality. The simpler type coaches are ‘glazed’ with a plastic strip (celluloid, presumably) overlying a sheet of black paper and nailed to a length of wood. The piece of wood is held in place by nails through the ends of the coach. The coach ends are alloy castings, the gangways are constructed of paper and card glued to a block of wood. The body shell (sides + roof) is nearly always aluminium, very occasionally tinplate. The bogies are of rigid construction with cast sides and seem to have been made specially for the simpler type vehicles. The only representation of under-frame detail is two battery boxes (blocks of wood). Like the scale-length Exley coaches, lining and lettering was done by hand.

Although I assume the simpler type Exley coaches were less expensive than the more detailed, scale-length, models, they were surely not cheap. The construction is complex and components must have been hand assembled and finished. Effectively, each coach is to a significant degree an individual hand-built model. It is difficult to imagine Exley promoting their simpler coaches as cheap or cheaper. The company seems to have had a very different ethos, as evidenced by the quote from John Ruskin included in post-war catalogues to the effect that good quality items are expensive to make but better value.

The first coach I obtained for my planned rake of Exley coaches was this:

338E8E97-13B3-48B8-964A-0706AD6BDDF6.jpeg

It’s a brake/3rd made sometime in the mid-1930s. The main characteristics of the simpler type coaches can be seen in this photograph. This coach is in excellent condition and all I have done to it was to give it a light clean.

The second Exley coach I obtained — about two years ago — was a different story. It is a full third. It had badly damaged gangways and the bogies had been replaced by LNW-pattern bogies made by Bassett-Lowke. I have now obtained a spare pair of the correct type Exley bogies. So I am proceeding with the repair and restoration of the full third. I’ll cover this in a future post.

I have not yet found my third Exley SR coach. Pre-war Exley coaches aren’t common in good condition, particularly in SR livery. Clearly though, I need some first-class accommodation, so a 1st/3rd composite or a brake/1st would be perfect. A three coach rake would make a lovely train.

(Edit, 3/4/24: I realise I should have listed a fourth manufacturing approach. Just before WW2, the Leeds Model Company introduced coaches made of moulded Bakelite. They used the same material to make wagons. No other manufacturer was using plastic for rolling stock — at the time …)
 
Last edited:

40057

Western Thunderer
I have completed and painted the canopy for the Benham’s warehouse building:

1C75EE24-654B-49D8-8111-74529DC3354B.jpeg

FF557505-5C43-40DD-BB18-E52EF66AFE53.jpeg

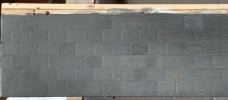
Quite a time-consuming job. Tricky too, getting a straight edge between the grey on the tiles and the white paint on the woodwork underneath.

The impressed slates on the sheet of plywood forming the roof look quite effective when suitably painted. The plywood sheet I used was recovered from a derelict, beyond repair, vintage building.

Next job, attach the canopy to the warehouse building.
 

40057

Western Thunderer
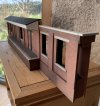
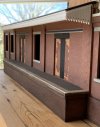
A major milestone! The canopy over the loading platform is fixed in place on the Benham’s warehouse building:

095199FA-8CA7-4E80-8202-5D71C1CAF1C7.jpeg

2D07E3E9-DC92-4F8D-B83B-7DF87E39E0B0.jpeg

69598A74-AB45-411C-81EC-A908D3B7768F.jpeg

I need to cover the join and add coping. Once that’s done, the doors and windows can be installed. Also the railings at the ends of the loading platform. I drilled the holes in the walls for these before fastening the canopy.

A big thank you to Poppy’s Wood Tech for the dagger boards, which I think look really convincing.
 

Fitzroy

Active Member
I'm really enjoying this, Martin, having only just found it. How do you clean the wagons you are restoring?
Pieter
 

40057

Western Thunderer
I'm really enjoying this, Martin, having only just found it. How do you clean the wagons you are restoring?
Pieter

Thank you, Pieter.

I am always very careful with cleaning to avoid damage. First, a soft paintbrush to remove dust and loose dirt. Then, if necessary, water — either moistened tissue paper or cotton buds (for awkward corners). I rarely use anything else on bodywork. I would definitely rather leave some residual dirt (a ‘patina of age’ as it says in the auction catalogue) than risk damaging paintwork. Much of the dirt on some items is clearly soot, reflecting either historically high levels of background pollution or domestic coal fires. That will be quite acid and must cause damage over time. So I think cleaning is an important conservation measure. Old, sticky, oil residues on wheels and around axleguards won’t come off with water. I use alcohol (methylated spirit) and a cotton bud to clean wheels, being very careful not to touch painted areas. If I have to clean oily residues from axleguards, white spirit is generally effective and doesn’t usually damage old paint — but I test it first somewhere that would not show.

Almost never do I use any soap or abrasive agents.

These wagons are not Titians. However, they do deserve to be looked after and are historic objects in their own right.
 

40057

Western Thunderer
I spent some time today working on another Lowko Track point. Apart from some black paint, I have now finished the ‘crossing end’ of this turnout:

A17F7ACB-EAE3-48D8-B1EA-B341BBB61061.jpeg

As described in my post #4, I have had to remake and reinforce soldered joints around the crossing broken by the movement of the switch blades over time. I have also had to repair soldered joints at the ends of the rails broken by the repeated joining and disconnecting of track sections that is inevitable with temporary layouts set up on the floor or in the garden. And I have had to move both check rails closer to their respective running rails so that they are properly functional. The remade joints are obvious in the above picture. That’s the crossing done, then — just the tie-bar to re-attach to the switch blades, the modified linkage between the tie-bar and the point lever to fabricate, and the rails and lever to be re-installed on the sleeper raft.

Dear me, this really is too much work just for one set of points. Getting the rails off the sleepers without causing damage was a major task. Then cleaning and rust removal. More than half the soldered joints have had to be repaired and the most vulnerable ones invisibly reinforced with 12BA screws into the webs of the rail. I see from my post #4 that it is a year since the last set of Lowko Track points was finished. To fully dismantle, repair and reassemble all the Lowko Track points I need for my planned layout will just use too large a proportion of my modelling time and take too long. So I have had to consider what I can do to reduce the work needed on the track.

I certainly don’t want to abandon using Lowko Track. It’s an appropriate, period, track system, and matches the wheel standards I am using. The baseboards are constructed to match the standard Lowko Track 3’ 2 1/4” radius curve and 15” long track panels. I have already repaired a good quantity of Lowko Track and laid some of it. But what about using some other track system, which requires less work, for part of the layout?

After all, real railways generally have track of different types and ages.

I have reluctantly decided that I will have to use an alternative track to construct a proportion of my layout. I really arrived at this conclusion gradually over the last year. One option I considered was to use one of the ‘vintage style’ track systems currently manufactured. On the plus side, I could just go and buy brand new track and lay it. On the downside, the new ‘vintage style’ track systems I looked at were seriously expensive compared with the cost of original vintage track. None of the new systems had the variety of point work and other track pieces offered in the vintage ranges. Also, I didn’t think any of the new systems looked right and would sit well alongside true vintage track with real wood sleepers.

Amongst the alternative vintage track systems, the obvious choice was Bassett-Lowke scale permanent way. The essential features of this track are wooden sleepers, cast alloy rail chairs, drawn brass (or steel) rails. Scale permanent way track is more ‘scale’ than Lowko Track but was more expensive. Small scale permanent way track was first produced in 1905 and continued in production until the 1960s. Over that period, there were many changes in the detailed design of scale permanent way. Pre-WW2, scale permanent way points, like Lowko Track, relied on the flexibility of the rails for the movement of the switch blades. The biggest repair issue with Lowko Track, broken soldered joints between the switch blades and the tie bar, is also a problem with the scale permanent way. But after WW2, the design of permanent way points was changed. Now, the switch blades were joined by a transverse brass strip at the crossing end, and by a tie bar at the toe end, and the whole assembly was free to pivot on a screw near the crossing. This is a much better design, not inherently likely to break with normal use. The post-WW2 range of permanent way track included numerous different types of point work and two standard radii of curves, 3’ and 3’ 3” (enabling double track). Plain line track panels are 18” long. Post war permanent way track is easily found and, compared with buying track made today, an economical choice.

Here, as an example, is a postwar, 3’ 3” radius, scale permanent way turnout:

DF73A008-7153-4618-8F3C-D25CF7184984.jpeg

So, post-war permanent way will be my ‘other’ track system. I acquired a couple of sets of points years ago in a local auction because they were being sold for the price of a cup of coffee. I have recently obtained further pointwork. Essentially, all any of this track needs is cleaning — otherwise it’s ready to use.

My plan is to use the post war track for Cavendish Goods, the lower level section of the layout. Just the goods yard itself — but that will reduce the number of Lowko Track points needed by five. I think, fortuitously, I can actually use the space available more efficiently because of the different geometry of the permanent way track.

Having a yard to ‘showcase’ Bassett-Lowke permanent way track will be a nice additional feature on the layout. It was a type of track first sold right at the beginning of proper model railways. By the time it ceased to be manufactured in the 1960s, Bassett-Lowke were also selling Peco track of essentially similar type to what is made today.
 

David Waite

Western Thunderer
Hi Martin
It‘s such a history lesson reading your thread thank you.
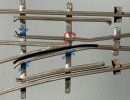
With the flexing of the switch blades braking the solder joints and to keep the points looking as they should with no noticeable alterations would it be worth pivoting the two fixed blades by removing the solder at positions marked with a Blue X and making the two fixed switch blades pivot at the position shown in red on the photo below by using a 12 ba screw or a piece of rod or similar through from the underside of the sleeper into the rail and (if needed closing the gap a little by bending the rail shown in Black so when the diverge position is set the check gap is correct).
David.
IMG_5797.jpeg
 
Top