Heather Kay
Western Thunderer
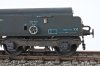
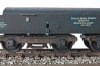
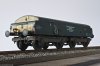
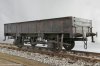
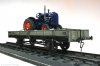
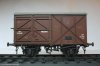
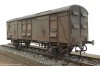
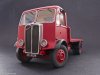
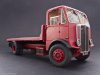
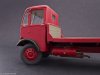
I was asked to post some examples of my modelling. Some of these are commissioned work, some are personal models. This bunch is 7mm scale, S7 standards.
.jpg")
.jpg")
.jpg")
.jpg")
.jpg")
.jpg")
.jpg")
.jpg")
 View attachment 15913View attachment 15914View attachment 15915View attachment 15916
View attachment 15913View attachment 15914View attachment 15915View attachment 15916
View attachment 15913View attachment 15914View attachment 15915View attachment 15916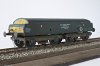


.jpg")
.jpg")
.jpg")
.jpg")
.jpg")
.jpg")
.jpg")
.jpg")
")