Painting and lining

warren haywood

Western Thunderer
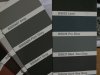
I wasn't happy with the lining on the coach so removed the lot and started again. The problem was that the gold paint was very inconsistent, maybe it's past it's sell by date cos it was fine last time out.
I used a dirty yellow colour instead that pretty much looks like gold and once I did a test with the vermillion around the windows it looks fine.
Anybody wishing to practice hand painting corners ought to do one of these there are 31 panels x4 corners x4 colours = 496 brushed in corners on this side alone, going for a lye down now :)


image.jpg


image.jpg

Warren
 

JimG

Western Thunderer
Warren,

How would you line the panels on a panelled coach - i.e. painting along the edges of the panelling? I've got some Caledonian coaches to paint and line some time in the future and some hints might prevent me from putting it off for ever.:) I'm wondering how you could use a bow pen along these edges and still control the paint flow if one of the blades goes "over the edge".

Jim.
 

warren haywood

Western Thunderer
Jim,

A bow pen is perfect for this job. Hold the pen at a low angle and just go along freehand. If the etchings are consistent the pen will just follow along, you can even turn it around the corners. The only time it might pop over the edge is with poorly etched kits. Capillary action will keep the paint flowing
If you are a bit nervous of free handing it, hold a ruler well away from the panel still keeping the pen on a low angle.
Like many things, it's easier to do than explain.

Warren
 

Steph Dale

Western Thunderer
Warren,

On a slightly-related subject I should have some ex-SECR stock to do in BR Crimson and Cream livery, where the lining goes through the waist panels. I can't imagine doing that with a bow-pen, surely it'd blob every time the pen went across a beading?

Steph
 

warren haywood

Western Thunderer
Hi Steph
It would be no different to going through a line of rivets, if the paint is too thin it will blob, one reason I leave it to thicken with the lid off for a couple of weeks. Even if you do still get blobs it's easy to tidy em up with a brush and white spirit.
Another little trick is as the pen hits the panel alter the angle so the narrow part of the tip is always at 90 degrees, does that make sense?
Warren
 

ZiderHead

Western Thunderer
Hi Warren

Thanks for all the lining secrets and tips on this thread - extremely useful :thumbs:

A quick question - do you think it would be possible to thicken up humbrol a bit for lining by syphoning off a little of the clear thinner/oil/carrier/whatever it is from the top of a new pot thats settled?

Thanks :)
 

warren haywood

Western Thunderer
Hi Jon,
It's not something I have done, suppose it's worth a try
What I tend to do is mix humbrol with a similar precision gloss colour as this paint has more body and is thicker than humbrol. You might say why not use that then? The problem with it is that it dries too quickly, in the tip of the pen and also on the brush whilst doing corners. Mixing the 2 gives a good balance especially with red and yellows.
I still prefer neat humbrol if it's thick enough tho.
Warren
 

JimG

Western Thunderer
Jim,

A bow pen is perfect for this job. Hold the pen at a low angle and just go along freehand. If the etchings are consistent the pen will just follow along, you can even turn it around the corners. The only time it might pop over the edge is with poorly etched kits. Capillary action will keep the paint flowing
If you are a bit nervous of free handing it, hold a ruler well away from the panel still keeping the pen on a low angle.
Like many things, it's easier to do than explain.

Warren,

Thanks, I'll give it a go. I can mill myself test pieces of coach sides to try things out. :) I model S scale so the corners of the panelling might be a bit too tight for turning the pen round the corners. I've got several Riefler pens in the two drawing sets I have so they might get used at last - I always used Rotring pens for drawing before CAD, plotters and printers appeared on the scene. :)

Jim.
 

warren haywood

Western Thunderer
All the vermillion and black on now, really makes the livery stand out,
Looking at the pictures of the real coach, it should have window frames which are not in represented in the kit, I will probably leave the window surrounds black but I think they should be polished wood. Can anyone confirm this?

Having done this livery it makes you wonder how much the LMS spent on painting it's coaches in the early days!


image.jpg


image.jpg


Other side to do this week, I may have a go at an LNWR coach next

Warren
 

warren haywood

Western Thunderer
Kitchen side completed, the lining on this side has taken in the region of 10 hours


image.jpg


Corridor side started, a little easier as most of the panels are around windows or are singles.


I've also done a little correction work to my Deltic, I want it running as in the summer of 81 with silver grille surrounds York City coat of arms. I have removed the numbers from the right hand end which were only on FP white cab locos and replaced the printed on data panels and depot codes which were actually for Gateshead. I have also ordered a set of plated over headcodes from shawplan as the model has dominos, again totally wrong for this loco.
At over £2000 I don't think I should have had to do any of this, the end of the box says 55013 York May 79 - dec 81, only 5 errors and that's only in the paint finish.
If anyone needs to alter thiers the paint I used was RAL 5010 sea blue which is an exact match.


image.jpg

All that said, once it's had some weathering it will look the dogs :)View attachment 31855 View attachment 31855 image.jpg
 

warren haywood

Western Thunderer
The postman delivered my marker light panels from shawplan today. I have used the white part of the wrapper from some Tamiya masking tape for the lenses. A light dusting of muck on roof and underframe left to complete. This is how 55013 should be, well worth the extra bit of effort, but taking a file and some wet n dry to a two grand model took a bit of nerve :)

image.jpg


image.jpg

Happy now :)
 

warren haywood

Western Thunderer
Had a busy day spraying today. That's the beauty of celly, all of these were in primer this morning,

The hush hush is darker in the flesh, my customer supplied me with a pot of cellulose flint grey which I am told is the correct shade for the loco as built, the loveless model is in dark sea grey, I suppose no one will remember the exact colour but it would have darkened very quickly.

The Brit is coming together nicely, I wasn't sure if the copper plumbing would look right but I think I quite like it, the model is not going to be weathered so it just adds a bit to it, the brass hand holds also give it a bit of 'bling'

The V1 has been sat around for a couple of years now but I thought I could do with a lined black loco for Cleckheaton, that piece of steel rod shows how glossy the finish is, just how they should be for lining, the lacquer will take it down at the end.

I have also finished side 2 of the coach, not quite in Nicks pipe fitting league for intricacy but not far off :). I will give it a good clean up tomorrow then on with the lacquer. Must also get the chassis and bogies done aswell.


image.jpg


image.jpg


image.jpg


image.jpg

Warren
 

Cliff Williams

Western Thunderer
The Hush Hush looks very dark in the pics, worth taking a look at this video footage on the new Pathe Youtube channel.

There is also debate about the colour Lawrie Loveless uses on his Silver Jubilee set - people say it is too dark.
However the B/W shots in their day are over exposed and lighten it dramatically and Lawrie tells me it has been matched to a sample he has.

This video is interesting at 3.10, Oh Mr Porter shot alongside 2509, have a look at the chaps white shirt and compare it to the cab side colour, it does show quite difference.

Then watch what happens when the Loveless rake transitions from shade to light about 1.10

So it is a minefield, do you try and replicate the shots or aim for something darker?
 

warren haywood

Western Thunderer
Hi Cliff,
Very interesting. 10000 certainly looks darker in the film .
I've been looking at the model in different lights, and without a lamp near it it is fairly dark, I suppose reflected light really affects things. It looks ok to me, but as long as my customer is happy then that's all that matters, he did supply the paint after all.
From the film it looks like it should have a black cab roof, but Lauries hasn't. Think I will leave it grey! Easier to add than remove :)
Cheers Warren
 

Cliff Williams

Western Thunderer
HI Warren

I showed Lawrie the pic - hope this helps. William Brown who has written an amazing book on Hush Hush assisted Lawrie as well http://www.kestrelrailwaybooks.co.uk/10000.htm

As you say the customer has given the colour spec to you but for the record......

1)the colour is BS 635 Lead. This is confirmed by a letter signed by Gresley himself which makes it about the most bullet proof colour spec out there! A photo taken by a respected model collector and in my possession shows the model prior to the damage

2) Flint grey is very light and is probably an attempt to match the grey undercoat with which the NRM model was hand painted after water damage some 20 years ago

3) Dark Sea Grey is darker but nowhere near dark enough.

4) . The dark colour is actually very discernible on the model as the light grey primer was not applied very well.

5) to be totally accurate the Gresley letter says "....with a little black added". As this is to all intents meaningless we added none.


6) Long time since we made these but there might be some decals somewhere
 

Attachments

  • 038.JPG
    038.JPG
    365.8 KB · Views: 23

warren haywood

Western Thunderer
Hi Cliff,
Just had a natter with Lawrie, obviously can't argue with his source of information.
But, as the customer supplied the paint then that is how it shall remain.
Cheers Warren
 
Top