7mm Mickoo's Commercial Workbench

Ian@StEnochs

Western Thunderer
Well now, there's a point worth expanding on.

First off drawings will be the source information, I have very little faith in anything on this DA, or any DA kit, being 100% accurate. That's not a hidden criticism but an observation from building the kits; possibly because when the kits were drawn out the information wasn't available at the time (NRM library).

Second, depicting weighted engines on springs, some points to consider.

If you hadn't have mentioned it, would anyone know the difference.
You have mentioned it and I don't bother, would anyone notice the difference.
If I do add it, do I now to go back and alter all the tender axles boxes/springs to suit whatever coal load I put in, typically most kit tender springs are near empty.
If I do add them, should I then replace the kits passing nod to the J hanger profile to suit the more accurate springs with weight compensation.
If I make new J hangers should I then upgrade all the brake hangers, pivots and shoes.
If I make new brake gear should I then make all new accurate frame spacers.
If I make all new frame spacers should I now make new plate frames to the correct profile.

Where do you stop :D

On a green field site you can tailor everything to match, the DA kits are brown field sites and you're always going to be dragged back by the lowest denominator, therefore is there any real point adding bits that are 100% accurate when the rest of the model is barely 80% accurate?

For the record the springs will be weight compensated, simply because it takes no extra effort at all to draw the curved lines at a shallower radius. I have no idea what that radius will be, the drawings show an empty engine and I have no clue how much Royal Scot driving wheels deflect when fully loaded. In short I'm going to 'best guess' which then begs the question, if I don't know does anyone else and will they be able to tell the difference ;)

The weight of a loco in steam will vary very little as the boiler will always be filled too around, give or take 3", the same level. However tender weights will vary throughout the working day from max coal load and full tank to stour and dregs! Virtually all modellers make the tender footplate at the same level as the loco but photos show the variations.
 

Genghis

Western Thunderer
Trisha and I got ours as a souvenir from Australia, fortunately symptoms didn't appear until the day we got back. Probably means we were spreading it like crazy via Adelaide, Singapore and London without realising it.

Get well soon.

Dave
 

mickoo

Western Thunderer
Some days you just have to accept are going to be crap. I was confused by the growing shimmering puddle of white metal on the work bench....until I looked at the front end. I'd caught the white metal face plate with the edge of the iron whilst soldering the handrail knobs in :D You just have to laugh and move on :cool:

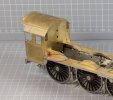
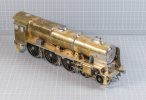
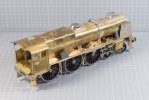
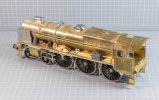
3D sand boxes and cylinder cover just posed, new smoke box saddle trapped between new securing fixings between smoke box and footplate. The kit saddle doesn't fit, too shallow and bolt pattern incorrect. Kit sand boxes are usable if you want to spend an age cleaning them up. Front cylinder cover is just hopeless, a sheet of half etch with a hole in, no guides on where to bend or help in the instructions, real wilderness on you own sort of thing.

The fire box I was dreading but it actually forms up nicely if you take a lot of care, next time (note to self) I'll use the kit one to make a template for one in a thinner material, forming 0.45 mm is hard work :eek: The half etch ledge at the front for the wrapper is only half a former thick (0.35 mm) which makes fixing it later a bit of a faff, you can take the inner former down all the way around and end up with a 0.7 mm ledge to work with. There's plenty of wrapper at the rear to take up the extra 0.35 you'll need.
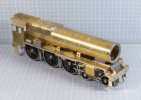
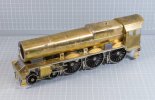
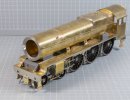
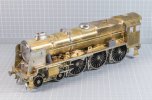
Already armed with the cab being wrong I suspected the firebox might be as well, indeed mine was too long by 1.5 mm at the rear, maybe it's designed like that? Offer the wrapper sheet up first and check with your splashers before you bend it, you may need to shorten the assembly aid spacers in the kit or else the rear bulkhead will be too far back.

I cut my spacers 2 mm shorter as that leaves a thin edge of the wrapper extended past the rear, this you can trim to get an accurate fit.

Don't fit the firebox rear wrapper angle to the cab as instructed, the etch is too short at the base and when you offer up the assembled kettle the angle will be no where near the crown of the firebox. The fixing holes between the cab front and firebox rear are also out by 2 mm height wise. The angle plate matches the cab front holes for alignment which sadly is too low.

Leave the angle off until the end, then use the fire box location once it's all line up to determine it's final position and then fit.

Other than that, it all went tickity boo.

IMG_11056.jpg

IMG_11057.jpg

IMG_11058.jpg
 

mickoo

Western Thunderer
Mick, what was wrong with the cab? Cheers.
It's a combination of errors and it's hard to point to suspect #1 as everything seems to be compromised to fix a a problem elsewhere and they all feed back into the same pot.

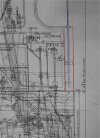
Primarily the main footplate is too long with respect to the valance up sweep so lets walk through this with some crayons and pictures.

Image1.jpg

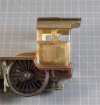
Out of the box the footplate rear and splasher rear are too long and overhang the swept up cab footplate, this means that when the cab is butted up it leaves an ugly gap between the footplate and side sheet, to compensate for the cab being too far back the rear turn in side sheets have been shortened, in reality the turn in sheet is the same width either side of the handrail center line, as can be seen, more plate is ahead of the handrail than behind, this is due to the whole cab being too far back and a correctly sized plate would overhang rear.

If you shorten the footplate and splasher rear then the cab butts up nicely to the curved footplate and valance, however your turn in sheet is now too short but at least the cab is now in the right place. I need to snap off the turn ins and butt solder new wider ones at some point, dress back and make good.

One other point is the cab footplate, once curved to fit the valance and butt up nice and neat it's too short at the rear, simply because it's designed to butt up to the overly long footplate, this means the lip over the rear drag beam is near non existent. There is nothing I can do about this now and you only find out when it's too late and you're fitting the cab.

If we look at the works drawings we can clearly see the turn in sheet discrepancy.

Image3.jpg

Having put the cab in the right place, well right in relation to the rest of the model as I've zero confidence it's in the right place scale wise, we now have to deal with two detail overlays, these are one piece double L riveted strips, they are designed to fit the overly long splashers, consequently they are now too long by about 1.5 mm.

IMG_1017-2.jpg

I made a parallel cut to the cab front in the red circle and shortened the long section until it fitted at the front and then blended it all in.

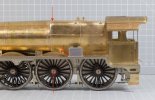
Having gone through all that I just knew the firebox would not fit as it too had been designed to suit the overlong footplate, there are four brass bars inside the formers and when you bolt the inner core all up you can see immediately that the throat plate doesn't line up with the center line of the intermediate axle.

Essentially the front firebox clothing strap should be in near perfect alignment with the intermediate axle center line.

IMG_1059.jpg

Mine is still a little too far forward, partly because I placed it a little more forward than the drawings to make it look better in respect to the front domed shoulder area, it does look better dead side on than at an angle like the photo. Even if I moved it back the correct 0.3 mm to suit the drawings it would still be miles of the axle center line.

The whole firebox still needs to go back a bit more to be accurate, the problem now is that the boiler is becoming too short at the front and you're soon going to run out of smokebox overhang. If you move the firebox back further then a gap will open up between the wrapper sheet and the intermediate splasher rear face, at the moment the boiler is still loosely fitted and I've yet to fill and make good all the gaps.

It was at this point that I lost the will to live, there comes a point where further polishing of the :shit: is not going to cover up the fact that it is actually a :shit:

The other solution is to cut the main valance, move the up sweep back by 1,5 mm and fill the gap in the main valance. Then you need to cut the valance under the footplate and remove 1.5 mm so that the drag beam is in the right place. This way the cab floor will line up with the footplate and splasher rear, the cab will fit fine and the cab footplate overhang the drag beam, but it will not solve the short turn in sheet. The firebox will then fit better and need less hacking to suit. I also think the it'll move the up sweep too far back if scaled off the drawings, it's a visual compromise to suit the mess of etches.

Image1a.jpg
 

mickoo

Western Thunderer
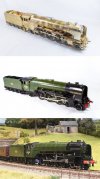
I received a photo of one of my earlier builds running on Bucks Hill and decided to do a little montage, always nice to see models bringing happiness to owners :thumbs:

For the records :-
David Andrews A2.
Alan Harris cast wheels on split axles.
ABC gearbox with. if my poor memory serves me right, Maxon 10W motor.
Assorted supplementary castings by Ragstone.
Painted by Warren Heywood.

60534.jpg
 
Last edited:

mickoo

Western Thunderer
Mid week update, nearly finished, all the body and footplate is done sans back head which I do whilst the model is away for paint.

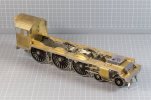
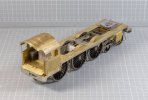
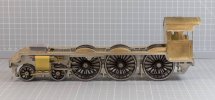
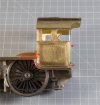
Next up is a return visit to the chassis to finish off the last few pieces, sand pipes, springs and horn guides, ash pan module, injectors and valve gear.

Watch your front end details, handrails changed as did the smokebox front, you'll need to check references, some have rivets around the bottom of the front face, others are smooth, 46133 went for a heavy general (HG) in 1959, the boiler was changed and the front plate went from smooth to riveted during that visit. Handrails and deflectors also changed in that HG from just above the front steps to the smoke deflector and oval holes were cut in the footplate above the front steps.

The model is depicted just before that HG whilst based at Kentish Town 14B in late 1958, early 1959.

IMG_1063.jpg

IMG_1064.jpg

IMG_1065.jpg

IMG_1066.jpg
 
Last edited:
Top