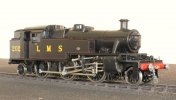
7mm Stanier 3P 2-6-2

LarryG

Western Thunderer
Hunkering down for 12 weeks might be useful for completing some railway modelling projects but I expect for many of us, just staying alive is the biggy. I did my last big shop at 7.30am this morning. Relying on the young 'uns and shoppin' on line is the future...
 
Last edited:

oldravendale

Western Thunderer
I reckon you have it in one there, Larry. We've never used on line grocery shopping previously but we are now. The only problem is that delivery is ten days away! However, younger friends and neighbours have come up trumps and we have so many offers of help it's difficult to know where to start. In fact we've just had two deliveries, one by friends and another by a neighbour, and our outgoing mail has also been collected. These people are really sensitive to the situation too and keep well away when they drop stuff off, which Mrs D then disinfects with an appropriate cleaner.

We are so lucky with our community here and I find it quite humbling that people I wouldn't claim to really know have taken such efforts to let us know that they will provide whatever help they can.

Brian
 

P A D

Western Thunderer
Hi Dave,
I loaded the wrong video. That's was our kid bemoaning the fact that the 05 had uncoupled! I've changed it now.
Cheers,
Peter
 

P A D

Western Thunderer
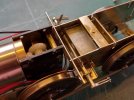
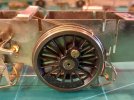
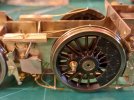
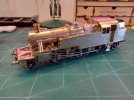
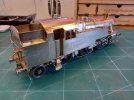
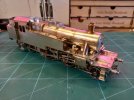
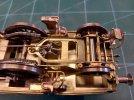
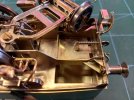
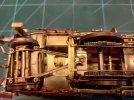
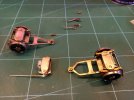
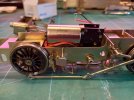
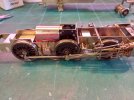
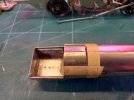
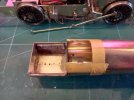
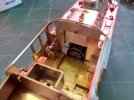
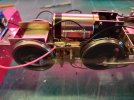
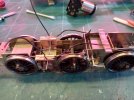
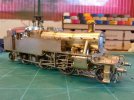
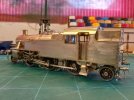
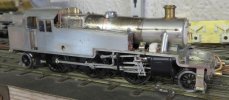
So with the Finney A3 and A4 completed the 3P is back on the bench after a 3 year hiatus. Here's where it's at now, a bit less pristine tha in earlier images but complete apart from motor and pick ups.
20230705_151811.jpg20230705_151825.jpg20230705_151838.jpg20230705_151753.jpg

It took some head scratching to figure out how to remove the rear chassis fixing screw. The problem is that the screw is obscured by the rear truck and the truck is prevented from being removed by the brake cylinder frame and pull rod, which is screwed to a spacer from above.
20230705_151958.jpg

Fortunately it all came flooding back. Unscrewing the truck allows it to be moved to the side to reveal the chassis fixing screw.
20230705_152014.jpg

The front screw is easily accessible through the A frame of the front truck.
20230705_152028.jpg

With the body off, the screw to the brake cylinder frame can be removed which releases the rear truck.
20230705_152649.jpg

20230705_152739.jpg

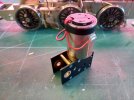
As built, the only option for fitting the Portescap motor I'm using is on the centre axle. To get it to sit down parallel to the top of the frame I had to grind a curve into the top edge of the spacer mid way along the motor.
20230705_164312.jpg

The cables are lifting the motor slightly but it does sit down parallel.
20230705_171609.jpg

The gearbox fouls the rear of the boiler so a cut out was required for clearance. Fortunately I made the boiler detatchable to aid painting and lining so it's easy to modify. Here it's marked up with masking tape and I've made a start with the slitting disc to cut out the required area.
20230705_164331.jpg

And done ready for cleaning up.
20230705_164542.jpg

I also had to remove a little metal from the front edge of the footplate to clear the rear of the motor, but in now fits like glove.
20230705_171828.jpg

Now I have to figure out where to mount the pick ups.

Cheers,
Pete
 
Last edited:

P A D

Western Thunderer
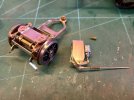
Many thanks Mike. I spotted a reply from you on a build thread on the Scalefour Forum, where you mentioned that you were waiting to receive an order for the 4mm scale version. Have you built it yet and if so, how did it turn out? I note in the images that were posted in the thread, that the etchings included the correct U shaped frame for the rear pony truck, so I assume Mike Edge modified the fret before releasing it for sale. The 7mm fret had two A frames for the trucks and I had to scratch up the rear one. I see the boiler barrel etching is also included whereas I had to cut the part from NS sheet using a paper template provided by Mike Edge. U frame and boiler barrel circled.
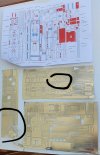
20230706_204627.jpg

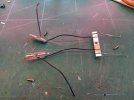
Back on the big one I made and fitted the pick ups yesterday. Wipers from phosphor bronze wire acting on the edge of the flanges are my preferred option. These are the mounting plates ready for fitting. The long one is for the front wheels and the shorter one for the middle and rear ones
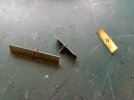
20230706_143835.jpg

Here's where the front one is fixed.
20230706_145440.jpg

And for the middle and rear wheels, one either side in between. Note the curve in the spacer that I made with a sanding wheel to allow the motor barrel to fit parallel to the frames. Remember this when you see all the dust from this on the spoke of the rear wheel in a later image.
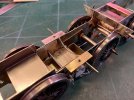
20230706_175709.jpg

Here are the wipers for the front wheels being soldered to the copper clad circuit board. I make a right angle bend at one end, then bend again and trim to give a small V shape that will act on the rim. To keep the alignment of the V relative to the copper clad when soldering, I put the sheet under the end so I can align the wiper then press and hold to solder.
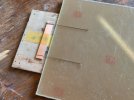
20230706_154159.jpg

Here's the front set up.
20230706_192428.jpg

The middle.
20230706_192358.jpg

And on the same mouting, the rear. Excuse the particles on the wheel from sanding down the spacer mentioned above. 20230706_192304.jpg
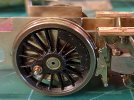
Heres a view from above. The middle wheels have some side play on the axles to allow movement on the curves, so the wipers are cranked to ensure they don't rub on the back of the flange, increasing friction. The edge of the flanges will be polished on final assembly to ensure smooth running.
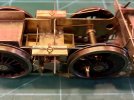
20230706_192250.jpg

To gain clearance for the front pick ups, I had to cut some spaces in the boiler and running plate. The gap further out was to give clearance to the return cranks which were catching the underside of the running plate at the top of the stroke. I wonder if that occurred on the 4mm version?
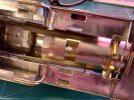
20230706_164641.jpg

Wiring it up will be next, the I can give it a test run.

Cheers,
Pete
 
Last edited:

Dave Holt

Western Thunderer
Hi Peter.
First, may I echo those who've already said how good it is to see you posting on WT again? This 2-6-2 model is another inspiration for me to strive for every better standards in my models. The fully painted A4 is also a superb model.
I can really relate to the problem of remembering who models go together/come apart and hidden fixings that test the memory after some years. Interesting to see you solution to the brake actuating mechanism passing through the rear truck frame. I had the same issue with my 4 mm Br Standard and Ivatt Class 2 tanks. My solution was similar although I attached the brake gear part to the back on the main keeper plate with screws from underneath.
Hope you will continue to wow us with your super modelling efforts in the future.
Dave.
 

P A D

Western Thunderer
Mike, I'm sure you'll enjoy the 3P when you get to it. Mr. Edge's etches are a joy to put together.

Thanks for the kind words Dave. I've got a fair bit of my mojo back so I'll bd around for a while. I've still to complete my BR Standard and LMS 2 6 4s as well as starting a Gladiator Stanier mogul, so plenty to do. Yeah, when you leave a model for so long it looks like a Chinese puzzle when you first get back to it.

When sub assemblies that need to be removable are trapped by other components, it takes some thinking to come up with a solution that allows for subsequent disassembly. In this case the dummy turn buckle is above the truck mounting screw but I can just turn it with a small screw driver.
20230707_190721.jpg


So I got the wiring done this afternoon. Unfortunately captain cock up had paid a visit during the last session and I realised that I'd sawed though the copper on the pick up mounts for the middle and rear wheels, thereby isolating the rear pick ups. Dozy git!
20230707_155334.jpg


I've got around it for now by scraping off more of the insulation and soldering the exposed wire to the rear of the mounts and so bridging the gap.
20230707_184028.jpg
I epoxied a piece of copper clad either side of the motor barrel for attaching the wires.
20230707_155132.jpg

This was before I'd bridged the gap in the side mounts and fitted the motor.
20230707_155114.jpg

I dont have a transformer so I gave the motor and pick ups a quick test with a battery.


Looks like job's a good un, so I've put it back together (apart from backhead and couplings) to take over to my brother's for a run on his layout. Assuming all is well I'll then strip it down for painting.

20230707_192949.jpg20230707_193024.jpg

Cheers,
Peter
 

PeteT

Member
Hi Pete,

As the author of the Scalefour forum topic, with the build currently in hiatus through no fault of its own, can I thank you again for posting this wonderful build & noting potential issues.

I'll keep my eye out on the return crank - & thank you for getting the rear pony truck changed before the production etches appeared!

Cheers,
Pete
 

P A D

Western Thunderer
Now for some gratuitous advertising: I have an agreement in principal with Michael Edge to release this as part of the Gladiator range. Watch this space as they say.
David
There goes my claim to my model being built from a limited edition of two kits! :'(:'(:'(:'(:'(

Good luck with that David. The etchings are excellent and with a few mods and the right castings, it will make a wonderful kit.

By the way, the drain cock castings are from Warren Shephard, not Laurie Griffin as I wrote in my mail. I got the pony truck axle boxes from Dave Sharp at MOK, but they are of course cast br Sanspareil. The chimney is from Laurie Griffin. It is an Ivatt 2 6 2, the third tall version that he does, cut down by 3mm. If you need any more info on the castings I used, just get I touch.

Hi Pete,

As the author of the Scalefour forum topic, with the build currently in hiatus through no fault of its own, can I thank you again for posting this wonderful build & noting potential issues.

I'll keep my eye out on the return crank - & thank you for getting the rear pony truck changed before the production etches appeared!

Cheers,
Pete
Hi Pete
No offence taken, but I've always been a Peter not a Pete. I grew up in a back to back house and council flat in Bradford, so it's not because I'm posh, it's just always been Peter.

I'm glad you found my thread useful in building your 4mm version. As to correcting the rear pony truck, I claim no influence over Mike Edge for that. When I bought the 7mm etchings from Mike the 4mm version was still under development, so it may be that Mike just cut and pasted the A frame in the CAD artwork as an expediency to get some test etches knocked up. As I recall, he later mentioned in his RM Web thread that he had modified the artwork to produce the correct rear truck frame. Did he also amend the position of the strengthening strips for the truck frames, as his original design had them fitting in a central groove on the face of the frames, when they are actually on the edge on the real thing? The 7mm etchings only came about as he had a commission to build a model for a customer but luckily for me he had two sets made.

Cheers,
Peter
 
Last edited:

Michael Edge

New Member
Peter,
After prompting by David Hill I've just read through all this and been very impressed by the quality of your work - as a professional builder i shudder at the length of time it must have taken you though! As David said above we are now developing this as a Gladiator kit and your comments will be very useful.
I have to correct you at this point though, the 7mm etch is actually the original, done to produce one for a customer, the 4mm etches were reduced from this and corrected after my first build. Below is the first one after painting by Ian Rathbone and the first one I built from the 4mm test etch, this one for me to run on Herculaneum Dock and still not painted.
Michael Edge
IMG_0630.JPG
19-01 fr painted small.jpg
 

P A D

Western Thunderer
Hi Mike,
Thanks for the kind words. I'm glad you will find my build useful in developing the etches into a kit with David.

As to the origin of the 7mm etchings, I stand corrected. I obviously miss misunderstood what you told me when I picked up the etchings and thought you meant that the 7mm was derived from the 4mm, which you were developing as a kit. I should have realised that was wrong as you told me your customer provided the works drawing from the NRM to assist in producing the 7mm model.

Needless to say, the parts went together without problem and were a joy to assemble. I think I've said everything I can about the build in the thread but if you have any questions please let me know. I don't know if I mentioned this in the thread, but I found the boiler was a little too small in diameter and did not match the smokebox. I had to add a strip down the seam to correct it. However, that's not to say the template you gave me to cut out the boiler was incorrect, as an error could have crept in on my part during cutting. You can see the infill in post #148 in the image showing the cut out I made to clear my pick ups.

I've seen the finished model for your customer before on Ian Rathbone's thread and very impressive it looks too in LMS livery. Mine will be in BR livery with the LNWR style lining.

Cheers,
Peter
 

Lancastrian

Western Thunderer
Now for some gratuitous advertising: I have an agreement in principal with Michael Edge to release this as part of the Gladiator range. Watch this space as they say.
David
Peter,
After prompting by David Hill I've just read through all this and been very impressed by the quality of your work - as a professional builder i shudder at the length of time it must have taken you though! As David said above we are now developing this as a Gladiator kit and your comments will be very useful.
Michael Edge
I was discussing the 7mm version on Sunday with a friend and his son, who would like one, and suggested they contact Mike to see if he'd do another set of etches for them. It looks like that's one sale guaranteed.

Ian
 
Top