7mm American O scale Southern Pacific Motive Power and Rolling Stock

Stephen

Western Thunderer
It's been a long time since the last update, and in all honesty there hasn't been a huge amount of progress on any of the projects mainly due to the day job. However I find myself with time on my hands currently due to be stuck in a hotel in Orlando with my flight home today cancelled and rescheduled to tomorrow.....via Manchester!

Been a bit of a strange holiday, seeing as last week, it was stupidly warm - not what you'd usually get in Florida this time of year. Alas there hasn't been any 1:1 railroading (apart from the Disney 3ft Railroad), but I did managed to organise a visit to the HO layout of the Central Florida Railroad Modelers (Central Florida Railroad Modelers ). Wasn't to busy on my visit, but an impressive layout and really welcoming club members who took me through their whole operation.

IMG_5696.JPG

IMG_5697.JPG

IMG_5699.JPG

IMG_5700.JPG

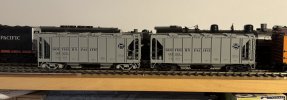
The one nugget of O scale I have had during this trip was the delivery of this loco to my hotel from a chap in California:

IMG_5765.JPG

The loco in question is a Car Works Limited 'Sacramento Northern' Steeple Cab electric loco. It is another example of how this 'side project' of American O scale has manifested into the main interest. Whilst I never envisaged going down the route of having anything of this nature, seeing a few models of Pacific Electric and other California interurban cars/electric locos, I really fancied getting hold of one, so here we are.

There is also a tenuous link that I saw similar locomotives working on the Hershey Railway in Cuba in previous visits over twenty years ago, so I've always had an interest in these type/styles of locos.

IMG_5681 2.JPG

The photos don't do the model justice - it really is cracking, so looking forward to getting home and testing it with a short consist of box cars.

I'm already on the lookout for a suitable caboose to go with it, and potentially a SN box car, which it seems various kits are available for including one by San Juan.

It does mean that any potential future layout will now need to have OLE added to a section of it, which could prove interesting, but that's a problem for five years time!

Cheers,

Stephen
 

Stephen

Western Thunderer
I decided to have a trip to up Birmingham this weekend and see what the 'New Warley' show at the NEC was like. Full credit to Warners for taking the show on, but it really was a shadow of its former self and was pretty underwhelming in all honesty. Good to catch up with @Scale7JB however, who like myself couldn't find any decent American O scale on offer.....guess that was all at the Guildford Guild meet! :)

Anyway, a few weeks ago I had another trip to @richard carr's layouts, and discussed potential 3D printing options for a few improvements to some of my Atlas 70Ton Covered Hopper Freight cars:

IMG_6120.JPG

Nice models, although its the massive Atlas Trucks that let the models down. Intending to replace the trucks, I had previously purchased some Protocraft 70Ton AFC A-3 Ride Control Trucks with a 5'8" wheel base, which quite timely went hand-in-hand with Sarah Griessenboeck producing replacement Bolster and Draught coupling box, which as always is available to download free of charge: Atlas 70 CH

Richard and Robin (@Boyblunder) kindly agreed to undertake some trial printing of the parts, and these were duly received by post a few days ago. With no purchases from the NEC to be pondering over, I decided to have a bit of a bash at getting these printed parts fitted to another 70Ton Hopper which is in the process of being repainted.

These are the printed bolsters:

IMG_6130.JPG

IMG_6131.JPG

A small amount of filing was required to the bolster area of the atlas frame, but with minimal effort the new bolsters were slid into place:

IMG_6128.JPG

IMG_6129.JPG

Trucks were screwed into place and the body / frame reassembled to get an overall check of the fit - perfect!

IMG_6121.JPG

The difference (in my eyes) is very visible and a huge improvement - the original:

IMG_6126.JPG

With new draught coupler box:

IMG_6122.JPG

And a comparison of the two vehicles:

IMG_6125.JPG

I need to have a play about with the couplings, seeing as I don't think they will have as much swing in the printed boxes as they do in the Atlas boxes, but hopefully that shouldn't make a huge amount of difference operationally. There is also a slight difference in ride height between the two cars which will need a bit of research into working out which one is 'correct'.

The protocraft Trucks will need priming, then painting the same SP grey as the body of the Covered Hopper. Naturally I'll batch paint the trucks for replacement on the other two SP Hoppers.

Thanks again to Richard and Robin for the printing to get this conversion started - much appreciated!

Cheers,

Stephen
 
Last edited:

Stephen

Western Thunderer
Another shot to show the vast improvement to the underframe of the covered hopper.

IMG_6137 2.JPG

I'll probably take a punt and use some filler to seal the gaps between the existing frames and the 3D printed part. Famous last words, but I wouldn't enviasge myself needing to take the new boster frame off of the frame once it has been painted.

Cheers,

Stephen
 

Scale7JB

Western Thunderer
Another shot to show the vast improvement to the underframe of the covered hopper.

View attachment 228014

I'll probably take a punt and use some filler to seal the gaps between the existing frames and the 3D printed part. Famous last words, but I wouldn't enviasge myself needing to take the new boster frame off of the frame once it has been painted.

Cheers,

Stephen
Night and day!

JB.
 

Stephen

Western Thunderer
I would agree, but a little while back I compared a brand new Atlas Gp7 against a Precision Brass wagon (I.e. 20-30 years old), and the couplers almost didn’t touch due to there being such a difference. Which one is correct?

JB.

I've taken the stance that the Glacier Park Models will be my bench mark for coupler height - with all the research and time spent crafting such a brilliant model, they would surely have the coupler height correct wouldn't they?!? Surely.....! :):D

Don't get me wrong, although 'suitable' coupler height needs to be addressed for future reliable operations, I guess what's presently on my mind is the general look of the hoppers from a side view. I always felt they seemed a little squat with the original Atlas Trucks, so the raising of the hopper car with the new bolster does give a slightly different view. However, seeing as I plan to replace all three of my covered hoppers with these printed bolsters and Protocraft Trucks, they all should be the same height when in a consist.

Cheers,

Stephen
 
Last edited:

Stephen

Western Thunderer
Firstly, hope everyone had an enjoyable Christmas and best wishes for 2025!

I've managed to get a few sessions of modelling sorted between Christmas and NYE, so have carried on with the conversion of the 70ton Hoppers.

Whilst the first hopper is awaiting the bolster to be primed and painted, I've had a bash at another vehicle, but this time one which is already in SP livery. Apologies, no 'in the process of' photos, just of the finished article (bar painting), although with a direct comparison of an 'untouched' vehicle.

Firstly an underside view with the untouched hopper on the left and with the Protocraft / printed bolster combo on the right:

IMG_6297 2.jpg

An ground level view:

IMG_6296.JPG

And a close up of the two differing hoppers;

IMG_6299.JPG

I do like the Protocraft Trucks, despite the $50 cost per pair, but with only 3 Covered hoppers, the expense is justified. The only issue I have with them are the axle box covers not being fixed, so flap about whenever you tilt the vehicle. I think a bit of lube will be applied and then I'll add a small dab of glue to hold them closed rather than seal them completely.

Another 3D printed part courtesy of Train Kitchen and Richard/Robin is the replacement coupler box for the Intermountain R-40-10 Reefer. I have about six of the cars and revised coupler box is a nice touch, so all vehicles will be fitted with them in due course.

The printed item:

IMG_6293.jpgIMG_6294.jpg

And a few of the close up of the installed coupling box after priming and painting:

IMG_6291.jpg

IMG_6292.jpg

The other thing I've started todo was have a bit of a muck about with weathering washes - as always the camera is a cruel master, but certainly gives food for thought for improvement, and I should stress this ISN'T the finished article in anyway, but just a first bash with seeing what can be done as a basis for more further weathering.

It should be noted that the SP side has had the wash applied directly onto the factory finish, where as the UP side was sprayed with Halfords Matt Varnish first. It was certainly easier to play about on the varnished side, although some overly zealous down stroking did see a grab iron as a casualty for later replacement.

IMG_6300.jpg

IMG_6301.jpg

Just doing the first wash certainly brings in some questions, such as whether I should undertake the majority of weathering before fitting ladders etc. If has also made me think more about painting all the IM body parts (ladders / door hard ware etc, seeing as the plastic moulded black really is a weak link).

Hopefully 2025 will see more regular modelling.

Cheers,

Stephen
 

Attachments

  • IMG_6298.jpg
    IMG_6298.jpg
    163.4 KB · Views: 7
Last edited:

richard carr

Western Thunderer
HI Stephen

Happy new year, the hopper cars look really good .

How are you making the wash ?

I've started using an oil paint based one, I thin the oils with enamel thinners and brush it onthe sides where the rivets are on yours.
Then I start taking it off with a paint brush and start spreading it around, cleaning the paint brush with thinners and wiping it on kitchen roll.

Richard
 

Stephen

Western Thunderer
HI Stephen

Happy new year, the hopper cars look really good .

How are you making the wash ?

I've started using an oil paint based one, I thin the oils with enamel thinners and brush it onthe sides where the rivets are on yours.
Then I start taking it off with a paint brush and start spreading it around, cleaning the paint brush with thinners and wiping it on kitchen roll.

Richard

Hi Richard,

Happy New Year!

I’ll hold my hands up - I’m using the lazy man route currently and just use a Vallejo pre-mixed wash - it’s dark grey rather than black:

IMG_6302.jpeg

Presently, I just spread the wash over the whole of the side of the vehicle and walk away from it for an hour or so. I then return with a few different sized paint brushes, and a small pot of water. The brushes as given a bit of a swirl in the water then dragged down the side of the vehicle at different pressures to remove more or less of the wash. Then when I’m happy (content) with the finish I’ll leave to dry.

Next steps are to go back with some wetted weathering powders and build up some more crud around the rivets and strapping. I might even dry then giving another wash over the vehicle, but with a slightly different shade.

What is interesting with the PFE Reefers is that there are literally no two freight cars with the same level of weathering in any one consist - poor quality screen grab to as follows:

IMG_6303.jpeg

What I do like is this example where you have a relatively recently repainted car next to one which is almost black with filth!

IMG_6305.jpeg

I’ve not attempted the roof or ends yet, need to find better quality colour images to get a feel of how they grubbed up.

Cheers,

Stephen
 

richard carr

Western Thunderer
Hi Stephen

I haven't tried vallejo washes but I do like their paint for weathering.

It certainly works. The oils I use are mix of MIG colours basically black and brown giving a dirty grey shade.
I'm going to try a white wash to fade paint when I'm back home again.


Richard
 

Stephen

Western Thunderer
I got back on Monday from my second jaunt to the March-O-Meet in Lombard, Chicago. Although I didn't go over for as long as last year, I still managed to catch the majority of the programme I wanted to, and inevitably came back with a few new additions to the fleet.

First port of call on the Thursday was the Fox Valley O Scalers Layout at Ted Schleps in Elgin. Details about the layout can be found at the following website: Rails Unlimited - Fox Valley O Scalers

The layout is very much set around operating the railroad as a real railroad operates with each freight truck having its own waybill, and each person having their own loco and a designated task for the five hour operating session. This year I was charged with two train operations throughout the afternoon, and it was in short - bloody good fun. I've uploaded a few videos onto youtube, the first of which shows a walk through of the lower part of the layout:


The next video is just a quick run past of Milk Train #4, which I was operating through practically the whole length of the line, picking up and dropping of reefers at designated stations/depots.


At the end of the operating session one of the marshalling yards had seen 250 freight cars handled by the dispatchers! In addition the preparation works for the Thursday session required 4 hours of marshalling the previous evening, with the usual operating team undertaking the movements on track only - 'hand of god' not allowed - they really do try and run this as a real railroad. Interesting to note that the layout has over 1200 individual freight cars on track, and they all have waybills....

Friday it moved to 1:1 scale and another trip to the Illinois Railway Museum at Union (Website: Illinois Railway Museum in Union, Illinois - A Museum in Motion) with Jim. Alas there were no trains or interurban cars operating, but the site was pretty much free range to explore with a tour of the steam and diesel workshops run for a few hours.

Set over a 100 acres of land you certainly get your step count up exploring over the day. Whilst Jim spent a few hours measuring up/drawing parts for future O scale part production, I had a decent wander throughout the various barns. I also targeted two box cars to photograph for Sarah Griessenboeck to confirm underframe and door details for future models.

A few shots of some of the locos around the museum:

J. Neils Lumber 3-Truck Shay No.5 - operational, just in for winter maintenance in the steam shed:

IMG_7277.JPG


Freshly painted EMD F7A Chicago & North Western No.411:

IMG_7385.JPG

Recently painted Chicago Burlington & Quincy SD24 No. 504:
IMG_7391.JPG


Atchison Topeka & Santa Fe EMD FP45 No.92, stored operational:
IMG_7389.JPG

The next two days were spent at the 'main event' which is the March-O-Meet show - very much of what I would class as a traditional swapmeet, but only American O scale two rail on offer. It goes without saying Southern Pacific themed purchases were duly made.

Cheers,

Stephen
 

Stephen

Western Thunderer
So the main purchases were as follows:

First Up, a 3rd Rail (Ex-Sunset) SP SD7 in Tiger Stripe Livery:
IMG_7466.JPG

This one had been on order for over a year now, and was duly delivered to Richard's office and I thus picked it up whilst over there. Really nice model, although there is currently an isue with the DCC board, which I hope can be rectified without shipment back over to the states.

Secondly, this was the curve ball of the trip - an Glacier Park Models SP M-6 2-6-0 Mogul:
IMG_7465.JPG

A cracking model, and completes the set of having one of each class of SP loco GPM produced. I would have referred to have the tender with just the Southern Pacific' scrip rather than the additional 'lines;, but for the price paid, I was not going to be too picky. It is DCC fitted with a Tsunami decoder, but lacks a stay-alive capacitor.

Asper usual a few SP box cars were also purchased, and await the queue to be built and weathered. I also however picked up these two items from American Scale Models. Both SP Prototypes, the left hand model bing a Water Column, whilst the right hand item is known as a Rose Oil Column. Bit of planning way in advance for a layout at somepoint in the future.

IMG_7467 2.JPG


Cheers,

Stephen
 

simond

Western Thunderer
Many years ago, as a teenager, I fired oil burners (mainly Linda and Blanche) on the Ffestiniog. We fuelled from a bogie tanker at Portmadog, which had an electric pump. One shift they told me the electric pump didn’t work and we needed to hand fuel.

I didn’t question it then, but to this day, I don’t know if they were winding me up…
 
Top