Blacker Lane Disposal Point NCBOE (4mm/OO)

Dave

Western Thunderer
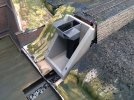
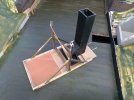
I've been trying to get the staithe/chute to work. The idea was to have the coal loads drop out of the hoppers, along the chute and into the waiting barge, as per prototype. I ought to have known that this would be nothing but trouble and that gravity doesn't scale down from previous experience with Harboro Stone.

The angle of the chute, as first made, was too shallow to get the material to flow, so it had to be steepened. It would then flow but when it came out of the end it went all over the place and not just through the hole in the baseboard. Narrowing the chute to give more control and direction worked to an extent but that was with trickling material through. When the working hopper doors open the load will all go instantly and so I replicated this by tipping in material from a wagon. The chute couldn't take so much so quickly and blocked.

I think the answer is to not have the material go into the barge at all. Instead, it will drop straight down, through a vertical chute that has a greater section than the hopper door, which should guarantee that it can take more volume than the hopper can deliver faster than the hopper can deliver it and so shouldn't block up. That's the theory, anyway. The chute into the barge will be a false one.

The other thing may be material spraying out from the hopper door and not going down the chute but instead landing on the deck. If it isn't much then I suppose this can be vacuumed off every now and again, but if it's too much then the entire thing will have to be scrapped and it's back to the drawing board to come up with something to use end-tippers. At least they will drop their loads completely clear of the rails and deck.
20230929_181756.jpg


20230929_183643.jpg
 

Brian McKenzie

Western Thunderer
Just an idle thought, but it might be worth experimenting with other materials like rice (albeit non realistic), or instant coffee that might have better flow characteristics?
 

Dave

Western Thunderer
Just an idle thought, but it might be worth experimenting with other materials like rice (albeit non realistic), or instant coffee that might have better flow characteristics?

The trouble with anything like that is that it's the wrong colour, size and shape. It needs to work with something that looks like coal, otherwise I'll have to rebuild the entire layout as a paddy field or coffee plantation. :D

This morning I had a go using the one hopper that I built for the job. The chute itself works but the problem is with the hopper wagon and the load material.

I tried real coal that had previously been used on my old 7mm layout. It blocked the doors in the hopper and wouldn't fall out.

I then tried the only material that I have which is small enough - Woodland Scenics ballast. As you will see in the video, below, the magnets release the doors and the load falls out.
The problems now are that the particles are so small and light that if they hit anything at all they bounce. See the spillage onto the deck from just this one wagon load. Not all of the load discharges due to it being so light and this is a problem because the hopper doors don't always close far enough to stop such small particles from falling out. It wouldn't take long before the stuff built up on the deck and anywhere along the layout. All this spillage and dust is also going to contaminate the rail tops on the staithe and the wagon wheels are going to spread it around the layout.

This morning I went to my local model shop and had a look at Woodland Scenics "lump coal" as the load. It's slightly larger than the ballast I tried but not much. It also costs £6.50 for a bag that will fill only 2 or 3 hoppers! When the layout is fully working, and loading trains at the screens, I'll have up to 22 wagons to fill from the same source, so I'd need a lot of the stuff, which would be very expensive. On the other hand, I've got an ice cream tub full of coal from the Beeston seam at Kellingley, which cost me nothing.

End tippers aren't fussy about particle size as the door opening is virtually unrestricted.
The tippers were sometimes used in a tipper house, which in model form will enclose and hide any overscale mechanism.
The tipper house will also prevent any spillage from going onto the canal surface.
The load discharges free from the rails and so will not contaminate them.

I've just got to build one now and somehow make wagons with working end doors. Hmm...
 

simond

Western Thunderer
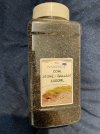
Try activated charcoal, used for refilling air purifiers and fish tank filters etc. Looks like coal, about 2-3 mm grain size

lots of sources on line, eg.


beware the health fad stuff and the pellets!
 

Dave

Western Thunderer
Try activated charcoal, used for refilling air purifiers and fish tank filters etc. Looks like coal, about 2-3 mm grain size

lots of sources on line, eg.


beware the health fad stuff and the pellets!
Thanks, Simon, but I can use real coal with end-tipping wagons and I've got plenty of it.

I've been digging in my box of gears and have come up with a way of operating the platform.
382245071_345065331297206_5356897892416807287_n.jpg
The First Motion shaft will extend all the way out of the baseboard front and will have a winding handle attached. I'd rather work it manually than by an electric motor as any resistance or overwind can be felt through the handle and it saves the need for micro switches and whatnot to prevent this. The small gear on that shaft drives the large gear, which is fixed on the layshaft. The small gear on the layshaft drives the large one on the first and this large gear is free to turn on the shaft. It drives the small gear, which is fixed on the final shaft. On the end of this will be a Delrin sprocket, which in turn drives a similar sprocket on the platform shaft, via a chain. I don't know exactly how many rotations of the winding handle will be needed to take the wagon from level to maximum tip, but it'll be somewhere around 3. I chose just two sizes of gear to simplify marking out of the centres when it comes to making the gearbox itself.
 

simond

Western Thunderer
Well, the bag I’ve got (free, chuck-out at work) is free-running, and seems a bit less dense than the real stuff, but if you’ve lots of that…
 

Dave

Western Thunderer
Gearbox.
382717230_1032679567917585_6011064963615840824_n.jpg
I will chop the shaft short and add a dog clutch so that the operating handle and shaft can be installed into the baseboard and allow for the gearbox and the entire tipper house to still be removed until it is proven to work and is also cosmetically finished.
 

Dave

Western Thunderer
I have got the tipper house to an advanced stage now. It needs some more work and detailing on the coal chute at the front and the handrails need weathering and fixing in place.
DSCF0347.JPG

The building isn't yet fixed down and the canal embankment needs to be restored once it is.
DSCF0345.JPG
 

Dave

Western Thunderer
The building is now fixed in place. It needs a corrugated iron lean-to to hide the gearbox and for the entire thing to be bedded in to the terrain.
DSCF0350.JPG
The lean-to will have a door to provide access to presumed internal stairs in order for workers to get from one level to another. A ladder will be fitted to the wall, just in front of the grounded van body that provides somewhere for them to eat their snap.

To operate the tipper takes only a third of a turn on the handle, which is on the baseboard face and has stops to prevent overwind built in.
DSCF0348.JPG
 

Herb Garden

Western Thunderer
The building is now fixed in place. It needs a corrugated iron lean-to to hide the gearbox and for the entire thing to be bedded in to the terrain.
View attachment 197821
The lean-to will have a door to provide access to presumed internal stairs in order for workers to get from one level to another. A ladder will be fitted to the wall, just in front of the grounded van body that provides somewhere for them to eat their snap.

To operate the tipper takes only a third of a turn on the handle, which is on the baseboard face and has stops to prevent overwind built in.
View attachment 197822
Very nice! Very nice indeed!
 

Dave

Western Thunderer
I gave the canal surface a coat of something shiny.
DSCF0356.JPG
I use a product called Army Painter Quickshade soft tone when painting figures. It comes in small bottles and when I ran out of it I saw 250ml tins on sale so thought it better value to have a large tin. It turned out that although it's made by the same company, and uses the same name, it isn't the same stuff at all. That in the bottles is an acrylic and dries matt within minutes. This stuff smells like I don't know what and takes hours to dry to a gloss finish, which is no use at all for painting figures but it has turned out to be useful for covering painted surfaces that are supposed to represent water.
 

Dave

Western Thunderer
Wagons to be used with the tipper.

I did this Parkside PC69 as a bit of an experiment. I chose the Parkside kit because the door end fits between the sides, as per prototype, and isn't a chamfered fit, like the fixed end. This means that the door can be easily separated from the headstock and doesn't require any further modification itself, which makes it an easier build than converting a RTR wagon, where cutting out the door would effectively destroy it and a scratchbuilt one would need to replace it.
DSCF0343.JPG

The hinges are a bit rough but you wouldn't notice riding by on a galloping horse. Now that I know what I'm doing the hinges on the next ones should be nicer.
20231015_120853.jpg
The arrow indicates a piece of bent wire that acts as a stop for the door. The wire runs in short lengths of tube and at the other end of the wagon it becomes a lever that can be worked by using the same pole used for the 3-link couplings.

Batch build.
20231015_120829.jpg

And a shot of the tipper building now that it's all bedded in to its surroundings.
DSCF0361.JPG
 

Dave

Western Thunderer
I abandoned the door stop, with the lever at the other end of the wagon. It didn't look great and was difficult to operate. It required a very steady had and often resulted in the wagon becoming derailed. The chances of this happening were great as the lever had to be moved to unlock the door before tipping and moved again to lock afterwards.

I devised a catch on the side of the wagon that isn't visible from the viewed side. The catch hits a trip inside the building as the wagon end descends but does have to be reset manually. This is very easily done by use of the magnet on the shunting pole, which lifts the operating catch.

The first picture shows the stuff that you can't normally see and the second shows what it looks like from the viewed side.
DSCF0365.JPG

DSCF0364.JPG

Going back to the car hoarder's house, the laser-cut fence looked too neat and tidy and would also have been expensive to construct. It didn't fit in with the nature of the rest of the site and the outbuilding, so I took it down. It will be replaced with a fence of old house doors and corrugated iron panels.

I was going to buy a pack or two of Wills doors and windows but when I went to my local model shop they were out of stock, so I have made my own. They'll look alright with some paint slapped on.
20231028_163452.jpg
 

PaulRhB

Member
The trouble with anything like that is that it's the wrong colour, size and shape. It needs to work with something that looks like coal, otherwise I'll have to rebuild the entire layout as a paddy field or coffee plantation. :D

.

Have you seen this by WWS? It’s a bit larger than the Woodland Scenics stuff.
 

Attachments

  • IMG_2286.jpeg
    IMG_2286.jpeg
    174.6 KB · Views: 12

Dave

Western Thunderer
Have you seen this by WWS? It’s a bit larger than the Woodland Scenics stuff.
I haven't. The issue with a lot of these things is that they have iron in them and they don't tell you that on the packet. The only way to find out is to buy it and test it with a magnet. I don't want anything that's going to be loose and attracted to a magnet. It would play havoc with DCC speakers and of course with motors. I'm going to stick with real coal as I've got plenty of it and it was free.

The car hoarder's new fence. This would be my dream home. No neighbours, dogs can roam free, a drive full of old knackered cars and an industrial railway on the doorstep. I'd have sign that would read: NO JUNK MAIL. NO RELIGIOUS GROUPS. NO SALESMEN. TRESPASSERS WILL BE SHOT. I'd sit outside in a rocking chair with a glass of bourbon and a banjo :D
20231029_163725.jpg

370207986_301728579471061_3837863187451950896_n.jpg

20231029_163940.jpg
 
.

Dave

Western Thunderer
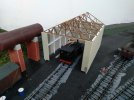
I started to build the engine shed. I had bought some laser-cut MDF roof trusses, so made the shed to suit these. I used Wills corrugated asbestos sheet for the sides. I used these things for ease of building but I wasn't happy with any of it. The proportions were all wrong for a start; it was too wide and too tall to suit the available space.

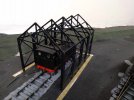
I decided to scrap it and build from scratch. This allowed me to make the shed more like the one at British Oak, which had no doors and no sheeting whatsoever on one end. This means that the trusses are in full view and so need to look prototypical, so I used a photo of the British Oak shed to base the new build on.

The first attempt.
375757224_264569419911082_8017197404194372738_n.jpg
The water tower, made from two Bachmann boiler loads, seemed like a good idea at the time but is overkill and that too will be scrapped in favour of something more in keeping with the site, although I have never seen a photo of the watering facilities at British Oak.

The second attempt, made from Plastikard. I made a pattern and milled the trusses on the pantograph. The frame will be clad in individual panels of corrugated aluminium foil.
371505845_1384448569144399_1190893574657487418_n.jpg
Sometimes you've just got to do things the hard way.
 

Dave

Western Thunderer
The boiler has gone. Replaced by a tank that is more in proportion with the engine shed. The shed itself has all of its cladding in place. There were no doors on the shed at British Oak and the photos that I have seen show the central area of the roof being open to the elements. Whether this feature was down to design or storm damage at some time, I do not know. I can't decide if I should leave the roof open, or put a raised section on that would allow smoke out and finish the roof in that way.
20231129_141532.jpg
 
Top