2mm Found in the Attic!! - FS160 Switching Layout.

JimG

Western Thunderer
Jim, just catching up, I am gobsmacked by the amount of fine detail you have achieved on the warehouse building. The track-work at such small scale is now beyond my abilities, Age and motivation with the smaller scales seems to be inversely proportional to my advancing age. Good wishes for continued recovery on the eye surgery.

Michael,

The recovery is going well - one or two slight ups and downs but generally going very well. I've now got two pretty good eyes and with the old brain doing its bit with binocular vision, I hardly need glasses at all for medium to long distance viewing. But I still need something for close work and reading, and the old glasses prescription doesn't match the new eye lens very well and gives some discomfort after a while. I have to wait for another week or two before going for an eye test for a new prescription.

So I'm tending to avoid a lot of close work when I can, and that counts out a fair bit of modelling work. But I've got the CNC machine working on some things and I'm looking at machining the point blades for the switching layout. It's the one thing I don't like in track making - filing point blades. :):):) I did a rig on the CNC machine to produce the blades for my S scale switching layout a year or two ago so I'll see if I can do the same thing in N scale but it might be a bit tricky with Code 40 FB rail. But with fourteen sets of blades required it will be worth it to make it happen. :):)

I'm also still trying to tame the back garden which rapidly became a jungle last year. I'm sort of getting there and maybe this week of promised fair weather might let me get it a bit closer to being tamed again. :):)

Jim.
 

JimG

Western Thunderer
Well, I managed to make a jig to machine the point blades and the first tests have shown that it works well.

Fine160-092.jpg

The alloy jig has a shallow slot cut in it to accommodate the base of the 2mm Association Code 40 flat bottom rail - the slot is just 0.1mm (0.004") deep. The two brass clamps hold the rail firmly in this slot.

Fine160-093.jpg

The cutter has already planed the rail head only on the farther side and is part way down the nearest side and will go right down to plane the base of the rail - this side being the side which will mate with the stock rail on the switch. I was worried about the possibility of the rail flexing under cutter pressure but two tests done so far have shown that that doesn't appear to be happening. The firm clamping of the rail in the slot seems to be sufficient when cutting the rail head on the back side - the front side of the slot holding the rail is machined away to allow for the cutter going down to the rail base on the near side. The cutting on the front face looks to be fine since the rail is supported by the rear face of the slot as well as the clamping action.

Fine160-094.jpg

A finished blade which just needs a small amount of cleaning up with a small fine file. I purposely didn't machine the blade to a point, but left it about 0.1mm (0.004") thick at the end to leave a bit of strength at the tip. When the blade is in place on the turnout I will finish it off with a fine file.

The other thing I have been doing - as well as cutting back the jungle which is my back garden :):) - is getting my head around another 3D CAD program. I had fallen out with Fusion 360, especially after I lost a file on which I had done a lot of work somewhere between my desktop and the cloud. I had picked up the Siemens were offering a free, full feature Community edition of Solid Edge. I had downloaded it a few months ago but had only really tinkered around with it and looked at one or two Youtube tutorial videos. But I decided to try and get under the skin of it and spent about two weeks getting my head around it. Siemens provide a lot of tutorial material and I spent days just wading through that to get a feel for how the application worked. I then reckoned on producing something that I had been thinking about for a while -

Fine160-091.jpg
...it's an uncoupler for N scale Kadee couplers.

and here's the thing out of the 3D printer.
Fine160-088.jpg

The magnets which make it work are small tubular neodymium jobs...

Fine160-089.jpg
...which fit in the holes at the bottom of the arms.

Fine160-090.jpg
Here's the finished product with its magnets fitted and a wooden skewer as a handle - and it doesn't work. :headbang:
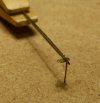
. Well it does work but too well. The uncoupler is placed so that the magnets are on each side of the couplers and the couplers should then be attracted outwards which opens the Kadees. But the problem is that when the coupler arms start moving towards the magnets, the attraction gets stronger and stronger and this is sufficient haul the coupler hooks out over the rails and pull the wheels off the tracks. Back to the drawing board. :):)

But at least it was a reason to actually get under the skin of Solid Edge and produce a file for 3D printing. I also found something else out. Eagle eyed viewers may note that the 3D print is a mirror of the drawing in Solid Edge. Apparently my 3D printer mirrors along the long axis of the machine and I hadn't been aware of that up until now since I had previously been printing symmetrical objects. There's a setting in the slicer to allow for printers mirroring so that's now set permanently for future use.

Jim.
 
Last edited:

Jordan

Mid-Western Thunderer
'N42' on the packet is an indicator of magnetic force. The most common on ebay seems to be N35, which isn't as strong.
 

JimG

Western Thunderer
I've found some N35 strength magnets and I'll give them a try when I receive them. But I suspect that I might still have the same problem.

The only success I had with a Kadee remote uncoupler in N was to use the guts of an old 50V Carpenter relay dug out of a skip at the BBC in Glasgow many years ago. :) This has twin coils on a U shaped pole piece and I was able to place the ends of the pole piece under the N gauge rails. I fed it from a pretty basic form of capacitor discharge unit which gave a starting spike of about 80V then reduced to 50 V. The starting spike was sufficient to get the Kadees started moving and the reduced 50V field was sufficient to keep them moving to their full extent without pulling the vehicles off the rails. I didn't opt to go further down this path since the relays were quite bulky to use in N scale and I didn't nick enough from the skip all those years ago. :)

As you might have guessed I've had several goes at getting good remote operation of Microtrains couplers in N scale since they first came out many years ago, including the "official" Kadee plate magnet. This did work, but caused a fair bit of unintentional uncoupling since small N scale stock tends to bounce a bit when being hauled which was enough to compress the knuckles over the magnet. I think one of the answers at the time was to fit small springs between the wheels and axleboxes to increase the rolling resistance of the stock and reduce the bouncing, but I didn't want to go down that road.

If the N35 magnets don't work, I suspect it will be back to the wooden skewer, which seems to be the recommended way on all the US forums I frequent. :):)

Jim.
 

JimG

Western Thunderer
I've now gone back to working on the new track - specifically fitting the point blades I had machined on the CNC mill. The track needs to be sitting on an underlay to give enough clearance for the tiebars I intended to use and I was a bit reluctant to lift the track panel built so far from the building board until I had proved the method. So I built another single turnout which would be the test bed.

In the first track build using the 2mm Association Code 40 wire rail, the 0.45mm brass droppers from the blades to the tiebars could be soldered to the side of the rail, which is basically rectangular, and still leave clearance for the FS160 wheel flanges. However, now using Code 40 FB rail, to get clearance for the flanges, the brass wire would have to be soldered edge on to the base of the rail and that might give a weak joint. So I opted to place a small strip under the rail base then solder the brass dropper to that which would give a much better mechanical joint with much more joint surface.

I cobbled up a simple jig to help.

Fine160-095.jpg

The base of the jig is a bit of B&Q alloy strip with a bit of brass bar at the left as an end stop for the blades and a couple of bits of card from an waste coffee box to stand the blades on and provide heat insulation from the alloy base. There's also a 0.4mm hole drilled in the alloy plate which is a nice clearance for the brass wire. You can just about see it by the centre/left edge of the leftmost strip of card. The wire dropper is a bit of 0.4mm/.016" brass wire from MSE and the short length of NS strip is a bit of 1mm x 0.2mm from Eileens.

Fine160-096.jpg

The small plate is placed at the edge of the card and the brass wire fed through the hole and placed on the plate.

Fine160-097.jpg

Then the blade is added, butted up to the brass end stop and clamped down using the reversed clothes peg and the assembly soldered using solder paste. I did this first set of blades soldering all parts at the same time, but I'm thinking of soldering the wire and plate first then soldering the blade after. I think I will get a better and neater joint doing that.

Fine160-098.jpg

Here are the two blades with all their bits soldered on...

Fine160-099.jpg

...and now in place on the turnout with the tiebar (2mm gapped sleeper) in place

Fine160-100.jpg

From the underside...

Fine160-101.jpg

...then the brass wires are bent over...

Fine160-102.jpg

...then hammered lightly to get as close to a right angle bend as possible then the excess length cut off.

Now to do another thirteen. :):)

I am very pleased with the CNC milled blades. They fit very nicely to the stock rails and really don't need any more finishing. I might just breathe on them with a small file to fair in the top edge of the blades to the stock rails.

Jim.
 
Last edited:

JimG

Western Thunderer
Two years on and a lot has changed. :) I ran into more problems trying to get crossing noses far enough apart to let the frog juicers work. I had redesigned the layout a few times to try and overcome this but I started to run into other problems. When I first built the layout I had experimented using the coils and pole pieces from Carpenter relays to operate the knuckle couplers. These coils and pole pieces were quite large so there were quite a few large holes in the baseboard top to accommodate them, all hidden under the cork sheet underlay. When I started moving the track around in Templot to solve the problems with the frog juicers, these holes became a problem. So things were put on the back burner until I could work out a solution.

And the solution was to scrap the existing layout and build a new one. :) And the new one would be built along a wall of the lounge rather than be a free standing layout as the previous one was. My problem with a free standing layout was that it would have to be set up every time it was used, and shut down when finished. Whereas a "permanent" layout would avoid all that. So a new layout plan was drawn up :-

Fine160-114.jpg

Not quite "less is more". :) But it's basically a four road yard with various industries along the back of the layout. The main line is the inner road coming from the lower right and that will be fed by a fiddle stick taking a cassette. I've also put a bit of relief into the layout to get away from the flat earth look with the incoming main road rising to the yard and the feed from the yard to the industries rising even further. The green lines on the plan show the breaks between the different levels. The pointwork on the layout is also quite straightforward with no complex formations since I want to use frog juicers and don't want any problems. :)

The area for the layout is in the rear corner of the lounge over the piano.

Fine160-103.jpg

The layout will be supported on the four brackets - two over the piano and two on the end wall over the chest of drawers and the radiator. The chest of drawers has been re-purposed from a bedroom suite to hold a lot of railway stuff - N scale stock on the top drawer, DCC equipment and S scale bits in the second, and various power supplies and wall warts in the third.

Fine160-104.jpg

The baseboards will sit on a sub frame, shown here on the floor in front of the piano.

Fine160-105.jpg

The two parts of the subframe are bolted together using 6mm bolts and Teenuts...

Fine160-106.jpg

...and the sub-frame is locked in place on the brackets using hinges and pins.

Fine160-107.jpg

The sub-frame on the brackets.

Fine160-108.jpg

There are four baseboards, intentionally made on the small side to keep weight down and be easy to handle.

Fine160-110.jpg

The four boards are now in place giving an "L" shaped layout, 8' 6" long x 4' 6" deep.

Fine160-109.jpg

The baseboards are aligned with dowels and the toggle latches hold them together.

Fine160-111.jpg

The baseboards are fixed on the sub-frame using bolts and Teenuts through stretchers on the subframe and the ply base of the baseboards. There are two bolts - one at each end of the layout.

"Dirty" work on the layout can be done elsewhere since the boards are easily removed from the frame and sub-baseboard electrical work can be done more easily by removing and upending boards.

Also, if the layout ever ventures onto the exhibition circuit, it can go as baseboards only to sit on a couple of tables, or three legs could be attached to the three corners of the sub frame to make a free-standing layout.

The Easybus system built for the previous layout can be adjusted to work with this one. I've already mapped out a new control panel for it and it will just be a case of re-routing wires on the panel. The servo setups on the previous layout were designed for tube-in-wire operation and also had micro-switches incorporated for polarity switching. I can't use them in this layout, so I will have to make new servo setups to operate under the trackbed. Since I'm going to use frog juicers on every turnout, they can be quite simple setups with no polarity switches.

All the rail has been recovered from the previous layout, including all the machined point blades.

The large warehouse made for the previous layout will also be re-used, its position on the layout being shown by the yellow rectangle in the top left hand corner of the layout plan.

Onwards and upwards - maybe. :)

Jim.
 
Last edited:

JimG

Western Thunderer
Nearly three weeks later, I've got all the baseboard topping done. It took a lot longer that I thought it would but it's been a bit of a fiddle getting all the supports for the tops in place. It's maybe the drawback in making baseboard frames "upside down" since you are forced into making additional framework to support the track bases.

I used quite a handy range of stripwood out of B&Q to do the supports. There is quite a large range of cross sections but I plumped for the 25mm x 15mm and 21mm x 15mm strips in the range with the 25mm wide strip supporting the intermediate level and the 21mm wide strip on top of that for the top level. These strips were fixed across the boards onto short blocks screwed and glued to the plywood underframes.

I opted to use 6mm MDF sheet as covering. I had a 4' x 2' sheet which had been used to hold a large scale floor plan of St. Mary's church in Yate which I used to plan out the model railway exhibitions which we held there. But I no longer work on the exhibition organising and the venue has been changed from the start of this year, so I had this sheet looking for a new use. I got another 6' x 2' sheet from B&Q and that has done all the covering, with the last board being a bit of a patchwork from offcuts from the other three boards. There has been a recent thread in the other place condemning the use of MDF but I've been using it for about thirty years and never hit a problem with warping.

Fine160-115.jpg

Here are all the boards mounted back on the underframe. I've given up on the two bolts holding the boards in place - they are extremely difficult to locate with the baseboard covering in place and I'll have to replace them with a method that's easier to use.

Fine160-116.jpg

The right hand end with the three levels on show - the main line into the yard climbing from the baseboard frame (about 1:40), the middle level which carried the yard headshunt on this board, and the top level which will have the industries.

Fine160-117.jpg

The yard area of the layout. The covering on the nearest board was the one made up from left-overs from the sheets used to cover the other three baseboards. Waste not want not. :)

Fine160-118.jpg

The board with the incline from the yard to the upper level and the industries. The incline is about 1:35 so should be fine with loads of a few cars.

Fine160-120.jpg

I printed out the Templot plans for all the boards so that I could watch out that I didn't foul any point motor placement with supports. This board is certainly not "less is more" :) (Sheep man eat your heart out :) ) The roads are, reading from right to left - yard arrival road; yard departure road; the four yard roads; and the kick back road to incline to industries. The two roads on the upper level will supply the warehouse which I built a while ago for the previous layout.

There is no actual longitudinal support for the MDF but I have screwed lengths of the 25mm x 15mm strip to the MDF between the cross supports to avoid the boards sagging over time. Time will tell if this will be sufficient but I reckon it will probably be fine.

I can now get my kitchen back to normal. It has had my build table of a 4' x 2' thick MDF sheet on a workmate in the middle of it for these past few weeks and the woodwork tools on the work surfaces. The vacuum cleaner has also been on almost permanent station beside it to hoover up sawdust to stop it being trailed around the house.

Jim.
 
Last edited:

JimG

Western Thunderer
After the interlude with the laser cutter, I've now got down to a bit of tracklaying. I'm going to build the track by starting off the baseboards then transferring it to the boards for final installation.

I'm starting with the board with the major part of the pointwork at the throat of the yard.

I've got a large building board mounted on a workmate (used for building the baseboards as well) and I've printed out and taped together the Templot printouts for the board. The plots show the base of the FB rail which helps a lot in positioning rails.

Fine160-121.jpg

I'm using the 2mm Association Code 40 FB rail as well as their 8' 6" PCB sleepers. I'm placing the PCB sleepers to have three ply sleepers between them. I've adjusted the pitch of the sleepers to be 24" to come close to the spacing of US sleepers (ties) but allowing for the PCB sleepers being slightly over scale width. So it's a bit of a compromise to get close to the US look - just like Peco. :) The sleepers are stuck to the track plan with small drops of glue so that the track can be separated from the plans when built.

Fine160-122.jpg

I'm using 0.6mm solder balls to build the track. I got the idea from other 2mm modellers who use the balls to get consistent sizes when reproducing chairs on bullhead track. It's beginning to work quite well, now that I've sorted out the best bit to use in my soldering iron which gets sleeper, solder and rail up to heat quickly to make a good joint. I use paste flux at the joints which holds the balls in place before applying the iron. I use tweezers to pick the balls and place them, using a mix of actually gripping them in the tweezer haws, or just getting a small amount of flux on the tweezer tips to pick a ball up without gripping them. They ping easily if you squeeze the balls too much and you can forget going looking for a pinged ball. :)

Fine160-124.jpg

The paste flux I use is Templers Telux. It works very well with the normal model railway metals and it does not oxidise if any residue is left at a joint. I dispense it from a syringe which works very well.

Fine160-123.jpg

A closer look at the track so far with the crossing of the first turnout being constructed. Glue for sticking the sleepers is in the white, squeezy bottle top left with the PCB sleepers alongside. Bottom right are modified 2mm track gauges, drilled through and tapped then cut in half with the inside edges faced off, then mounted on a screw and adjusted to 9mm gauge and locked with a nut. The other gauge is one of a set I milled to give gauge and check rail gaps to use in turnout construction.

The rail being use so far has all been salvaged from the previous layout. It has all been cleaned of old solder and polished up with a big, fine grain glass fibre stick. A large pile of short pieces have also been salvaged which will all come in handy for turnout parts. All the turnout blades have been salvaged as well.

Jim.
 

JimG

Western Thunderer
And a week later, the yard throat has been completed.

Fine160-128.jpg


Ten turnouts completed except for switch blades, which will be fitted when the track is removed from the Templot plan. The tiebar assemblies are also deeper than the PCB sleepering, so the track will go on 1/16" cork underlay with slots cut for the tiebars.

All the track used has been salvaged and cleaned up from that used on the previous layout. I'm getting quite used to using the solder balls. It's probably a bit slower than using core solder, but it does mean that I get a set amount of solder on each joint. I can remember soldering track on the previous layout using fine wire solder and a fair amount of time was spent getting rid of excess solder when I had got a bit too much on some joints.

I tried to salvage crossing noses from the previous layout but with not much luck, mainly since a lot of them had been cut very short to get round the problem with the frog juicers. So I had to make half a dozen. I normally do this using toolmakers clamps to hold the two bits of rail on a Templot printout, but than can be really fiddly with the Code 40 rail and I set up another way of doing things.

Fine160-125.jpg

I made up some jigs using bits of 0.8mm plywood left over from laser cutting the warehouse building. The main angle part was used to set and glue the two outer parts to a bit of MDF left over from building the baseboards. The edges of the central angle part and the two out pieces were relieved on their bottom edges to alllow for the base of the FB rail. Two bits of rail are cut and shaped to go in the jig.

Fine160-127.jpg

Then the central angle part is pressed in to hold the rails firmly. You can press the central part in not too tightly and fine tune the position of the two bits of rail, before pressing it fully home to lock them in position.

Fine160-126.jpg

Then apply flux and solder to the joint. Release the soldered nose by pulling the central angle part out, and spend a few minutes with files in the vice to tidy up the nose of the crossing.

I think I picked up this method of shaping the rails from a tip in Martin Wynne's Templot forum many years ago, but only hit on my plywood jig method now after years of fiddling with toolmakers' clamps. :)

There are another two jigs to the right of the 1:6 one to cover 1:7 and 1:8. I had hoped to stick to 1:6 turnouts for the layout but had to go to higher value angles to get noses far enough apart in crossovers to avoid problems with the frog juicers - i.e. getting at least the distance of a loco power bogie wheelbase between breaks of adjacent crossings so that the bogie doesn't connect with both juicers at the same time.

Fine160-129.jpg
Fine160-130.jpg

I've now cut the track and plan from the building board and placed it on the layout. The Templot plan was cut to the outline of the baseboard so I can mark off track ends on the baseboard ends then remove the track from the plan and situate it on underlay on the baseboard top.

Jim.
 
Last edited:

JimG

Western Thunderer
And a week or two later I've got the rest of the yard trackage made...

Fine160-131.jpg

... about seven metres in all. It's pretty well used up all my salvaged rail and what new rail I had to hand. There's an order off to the 2mm Association shop for further supplies.

I managed to get them all pretty straight just using the Templot plan which showed the base of the FB rail which allowed me to line the rail up by eye. I've always found dead straight track the most difficult to lay since it's always easy to see the slightest kink by sighting along the track. But my yard roads stand up to that test. :)

I'm really liking using the solder balls on the PCB sleepers (ties). It's a bit of a fiddle to get a blob of paste flux from the hypodermic syringe on each joint followed up by a solder ball applied with tweezers, but once that's done I can zip along each joint with the soldering iron in one hand and tweezers in the other hand to move a gauge or hold rail in the correct position. Having a hand freed up from holding the solder is a great bonus and the other bonus is getting small, regular amounts of solder on each joint with no hassle.

The next job is to design a mount for the servo point motors positioned under the track. I was thinking about CNC milling something but I'm now coming round getting the 3D CAD working and drawing something up for 3D printing.

So there will be a bit of a pause until that's done, and I've also got to do a bit of CNC work on S scale bits before the upcoming AGM in March.

Jim.
 

JimG

Western Thunderer
I had salvaged a dozen sets of switch blades from the previous layout and I set about cleaning them up and making new fittings for them.

Fine160-132.jpg

I like to attach small plates to the undersides of the tips of the switch bades which pass under the adjacent stock rails and prevent the tips of the switch blades rising. I cut some 1.5mm wide strips from a bit of 10thou nickel silver sheet using an Olfa cutter. These strips were then cut into 4mm lengths.

Fine160-137.jpg

One end of the plates was filed round...

Fine160-138.jpg

...and the rounded end was drilled 0.5mm diameter.

Fine160-133.jpg

I then made up a small jig from bits of wood to assemble the switch blades. The dropper wire is 0.45mm brass rod.

Fine160-134.jpg

The dropper wire goes through the plate into a hole in the wood.

Fine160-135.jpg

The switch blade is butted up against the piece of wood on the left to give a consistent distance from the blade tip to the dropper wire. The blade is also set against the dropper wire and the blade, plate and dropper wire are all soldered together. I use a couple of the 0.65mm solder balls and paste flux to do this and that seems to give me just the right amount for a good fillet round the dropper wire.

Fine160-145.jpg

On the previous layout I had used wire in tube set into the cork underlay with the servo motors at the rear of the baseboards. But I can't do that this time so I have opted to put the servos directly under the turnouts with the operating rods poking through the baseboard top to contact the tiebars. I'm using the servo mount provided by MERG. I was going to design my own and 3D print them but the MERG kit is £4.16 for six with screws and wire so there was no contest. :)

However, this gave me a problem with the tiebars for the switch blades. I intended to use a 2mm scale PCB sleeper which is 1.6mm wide. When I drilled a 0.9mm hole in one for the operating rod from the servo, it left the sleeper/tierod very fragile around the hole. But I got a way round it. :)

Fine160-139.jpg

First I drilled the two 0.5mm holes for the droppers in the sleeper...

Fine160-140.jpg

I then soldered a 12BA washer to the sleeper between the dropper holes and then drilled the 0.9mm hole for the servo rod through the hole in the washer, Success!! The fragility had gone. :)

Fine160-141.jpg

I then shortened the tierod...

Fine160-142.jpg

...and made another two dozen. :)

Fine160-143.jpg

Fine160-144.jpg

And a couple of shots showing the tierod fitted. The dropper wires are bent over and lightly hammered flat with my wee Hobbies toffee hammer, and then trimmed.

I'll get the blades and tierods fitted to the other nine turnouts on this slab of trackwork then get it fitted to the baseboard and then try fitting some servos. That's the problem with building a large track complex in one large chunk. :)

Jim.
 

Attachments

  • Fine160-136.jpg
    Fine160-136.jpg
    346.1 KB · Views: 4

jonte

Western Thunderer
Ingenious stuff, as always Jim, and most inspirational.

After all this effort, you deserve trouble free running and absolute enjoyment from your layout, and I continue to look forward to its development.

Jon
 

JimG

Western Thunderer
I got all the point blades fitted in the yard throat turnouts. Before I took the track off the Template printouts, I aligned it accurately on the baseboard and marked out all the openings for the tiebar operating rods, which were then cut out.

Fine160-152.jpg

Then the Templot printout was removed from the track, and the track replaced on the baseboard and, literally, nailed down. :) The caboose road and the rip track are missing at the moment - I removed them to allow clearance to get a piercing saw in to cut isolating gaps between crossings and closure rails in the adjacent turnouts.

Cork underlay was laid over the whole area of the board for ease, but I'll probably trim it back close to the track.

Fine160-149.jpg

I managed to find some small brass pins on Ebay which were 0.5mm diameter which meant that I could get a hole in the PCB sleepers without the danger of weakening them too much. The tools for the job were an 0.6mm drill in the Archimedes drill to drill through sleeper and MDF baseboard and a 0.7mm drill in the pin vice to create a clearance hole in the sleeper. This gave a nice "Goldilocks" fit for the pins in the MDF baseboard and clearance for the pins in the sleepers.

Fine160-150.jpg

A pin in place in the hole in a sleeper...

Fine160-151.jpg

...and after it's been knocked down using the Hobbies toffee hammer. The height of the pin head is just under the height of the Code 40 rail, so tapping the pin until the hammer starts hitting the rail gives a small amount of clearance between pin head and sleeper which allows the track a small amount of float. I put a pin in about every six inches.

Fine160-146.jpg

At the baseboard ends I use small brass countersunk screws as anchors for the rail ends. The screws are 0 x 5/16" and are screwed in to be just under the rail base. There are lengths of 6mm x 6mm wood strip inset into the MDF baseboard ends to accept these screws.

Fine160-147.jpg

The screws are sweated to the screws. I have thoughts to file off the visible bits of the screw heads but I'll maybe wait and see how obvious they are when the track is ballasted and weathered.

Fine160-148.jpg

And all the rail ends on the end of the baseboard. I've just seen from the rail shadows that I need to check the heights. :) Although I would do that in any case when I match with the rails on the mating baseboard.

Next job is now to fit the servo point motors to the turnouts.

Jim.
 

JimG

Western Thunderer
The first job with the point motors was to make up the MERG kits for the servo mounts.

Fine160-153.jpg

These were the first two built and the only change I made was to use 0.7mm nickel silver wire rather than the 0.9mm piano wire supplied with the kits. I did this to keep the hole in the tiebar as small as possible even allowing for the reinforcement of the 12BA washer.

However I did pick up on one problem.

Fine160-154.jpg

The horn on the servo locates in the pocket on the end of the arm - the picture above showing the operating arm turned over to show the pocket. This system works well provided the servo only operates over a total swing of around 90 degrees, which is the designated movement for the servo. But if the servo swings more than 90 degrees then the horn jumps out of the pocket - as shown below...

Fine160-155.jpg

...and if the arm swings back a bit while the horn is out of contact - which it most likely will do from the reaction of the wire - then the servo horn would not re-enter the pocket when it reversed direction and there could be a serious jam.

But I noticed that the second top hole in the horn always lined up nicely with the slot in the arm in all positions - I suspect the designer may have provided the slot for such likelyhoods although no mention is made of this in the instructions. The holes in the servo horn are just about spot on for 12BA tapping size...

Fine160-156.jpg

... so the hole was tapped part way through with a taper tap and a 12BA screw inserted - the partial tapping locking the screw in place.

Fine160-157.jpg

The assembly back together with the servo horn at it's extremity...

Fine160-158.jpg

...and in the normal working position with the horn located in the pocket and the screw in the slot. I've tested the full 180 degree swing many times and the horn always relocates in the pocket.

The servo should only move through about 90 degrees with the control pulse varying between 1ms and 2ms in duration. However a lot of servo driver circuits allow the pulse width to go beyond these limits to give more rotation so it's always wise to plan for that eventuality. With one of my servo testers, I can drive one of my servos to nearly 200 degree rotation. :)

Fine160-159.jpg

Finally the operating wire is fitted and the assembly is ready for fitting.

Fine160-160.jpg

...and all made up and ready to be fitted.

Fine160-161.jpg

Fitting the motors. The joiner's angle gauge was used to get the orientation of the motor correct - my guesstimation on fitting the first motor was about 20 degrees out. :)

Fine160-162.jpg

The first two motors fitted...

Fine160-163.jpg

...and the lot done a couple of hours later. One or two small alterations were made to the baseboard frame to accommodate the motors. When I carefully designed the baseboards to avoid clashes with point motor placement, I didn't know the actual design of the servo mount at the time. :)

Now onto the electrics and electronics to drive the lot. I can't really test the track until I've got the turnouts operating, the frog juicers fitted and the DCC feeds connected up.

Jim.
 
Last edited:

JimG

Western Thunderer
I decided to get back to a bit more track-laying and opted to finish off the yard on the left-most baseboard.

Fine160-164.jpg

All dead straight and laid with a straight edge. I normally try to avoid straight track like the plague because it has to be straight with the slightest kink showing up like a sore thumb. :) But it's an American yard and they all seem to be dead straight and parallel.

Fine160-165.jpg

I also started placing the infill sleepers. These sleepers are cut from 0.8mm ply which matches the depth of the 2mm Association PCB sleepers. They were laser cut from the left-overs of ply when making the large warehouse a year or two ago.

I place small spots of PVA between the rails where the sleepers (ties) will be placed then the sleepers are slid into position. I'm not going for extreme accuracy in the placing of the sleepers to try and get a slightly careworn appearance - following in the footsteps of Jordan but not going the whole hog. :) Although the Code 40 rail would kink and bend if you look at it askance. :) I've cut a couple of bags of the sleepers but I've no idea how far they will go. If I plucked up the courage I could calculate the total length of track in Templot and thence the number of sleepers I need. But I suspect that I might just use the two bags until I run out and fire up the laser cutter to cut some more. :)

Jim.
 

JimG

Western Thunderer
Well, I did have to fire up the laser cutter :)

Fine160-166.jpg

Fine160-170.jpg

Nearly all of the sleepering laid in the yard area needing a third bag of sleepers/ties. This took a bit of time :) , especially since the weather started to improve and some time had to be spent on the garden. I also had a bit of a campaign hunting a mouse in the house ("There's a moose loose aboot this hoose" :) ) I got it in the end with a humane trap and I hope it stays outdoors now that the weather is improving.

I also ran into a problem when laying the main road into the yard. This track is on a continuous gradient to the throat of the yard and I had tried to build in the gradient in the track support across three baseboards. But what did not work out was the transition at the yard throat. There was a definite horizontal angle at the baseboard joint at the start of the throat and I thought this would probably give problems, maybe especially with the N scale knuckle couplers which can be a bit sensitive to horizontal angles.

So I built up a new trackbed using the 0.8mm ply to provide a transition to bet rid of the hump.

Fine160-167.jpg

Here's the top end with the rule showing the track beds lining up.

Fine160-168.jpg

The same was done at the other end to ensure that the gradients matched at the other board joint.

Fine160-169.jpg

And here's the end result with the track laid on top. The 0.8mm ply track bed is supported in several points with strips of the same 0.8mm ply to give a good horizontal transition between the two joints. It doesn't look too pretty at the moment but it will all be covered up eventually. :)

Fine160-171.jpg

The track on the gradient to the upper level has also been laid. Here I had built the transitions into the baseboard with about a three inch level section at each end then allowing the MDF to supply the transition curves, and that seems to have worked well.

Fine160-172.jpg

A shot at the other end of the layout showing the three levels - the main line curving and climbing to the middle level, the yard head shunt on the middle level, and the top level with no industrial trackage as yet.

The next job will be to re-visit the servo point motor mounts. I had intended to use frog juicers on the layout for all crossing noses. This would require four Tam Valley hex units (the cheapest way of using their juicers). I have one hex unit already from the previous layout, but another three boards would cost about £240. I had a think about that and thought that micro-switch polarity control might be a better bet since I have a bagfull of ex-PO reset switches from dial handsets which I acquired many years ago. The problem is that the MERG servo mount holders give very little movement when operating FS160 tiebars, the typical movement at the tiebar being under 1mm which gives quite a small movement of the part of the arm which operates the micro switch. I suspect that this might give problems when adjusting the switch positions to give reliable changeover.

So I'm looking at designing a servo mount which gives a larger movement to operate the micro switch - basically giving a larger moment between tiebar and operating arm to give more movement to work the micro-switch.

Jim.
 
Last edited:
Top