jonte

Western Thunderer
Hello @jonte
Thank you. Coming from someone who can make weathered wood ‘talk’ I’m very chuffed.

I actually made a note of what I used, this time.
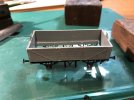
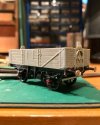
The wagon was repainted in BR Early Wagon Grey (Railmatch acrylic). The Slaters instruction say the Midland Grey

So anything goes, really :).
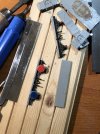
I used a very very thin wash of Vallejo 74.517 (Dark Grey) to try and pick out the plank joints. Once this was dry, I used the same colour, but painting along the boards horizontally. This was lightly dabbed at with a cotton bud to give variance. The floor was washed with 71.075 after scribing (I dolloped too much of this in my ‘mixing tub’ (a supermarket takeaway latte lid) hence the appearance of the Palbrick in the background!

I used the same technique on the inside, but after I had tried again with a 2B pencil to give some attempt at that elusive silvered sheen of old wood.

The ‘new’ plank at the bottom is just straight 71.077 (wood) applied with an 5/0 sable brush I got from Secret Santa :)

I hope that helps; you know where I am if you need clarification.

Thanks again

Cheers

Jan
You make me sound like Jimi Hendrix, Jan :))

Most kind of you to share, Jan, as I’m sure there will be other members here too wishing to replicate this remarkable finish.

Feel sure your time to post hasn’t been wasted, Jan, as rest assured they will become a matter of record (otherwise known as hastily scribbled notes!) to add to my growing ‘how to’ collection.

Best wishes, mate.

Jon
 

Lyndhurstman

Western Thunderer
Planks For The Memories
40BFE2E9-EB46-4D3D-8A4C-1E63BBC7B55F.jpeg
Another one destined for the Great Wooden Wagon Cull of 1963. The maroon really should have faded a bit more (I tried a thin wash but it didn’t look right) but these things are something of a cliff in my perilous personal psychology. So I went with more grime.
The other side is less apocalyptic:
A16F4580-E51D-4D25-9CFB-36CC0D216DBA.jpeg
Grime or crime; the jury’s out. Having said that, I like the righthand end in the first image. I need to put a P number on it.

Given all that, I have to confess this wagon almost defeated me. It’s a Bachmann Branchline effort, and converting it to P4 was a pig; I hadn’t realised that they’ve put two little vertical strengthening ribs on the back of each W iron. These had to be carved away. And even then clearances are papier de fag. Then I managed to wreck an axlebox (you can tell which one in the second picture, I suspect :)) so had to fit a replacement. Then it turned out the pinpoint axles I was using were overlong (bought long since in a joblot from Ernest Bay), so I’ve had to ferret for something suitable in Stores. I’m surprised I’m still here, frankly. Ho hum.. hills, Fabaceae seeds, and the GSOT…

Cheers

Jan
 

jonte

Western Thunderer
Planks For The Memories
View attachment 178073
Another one destined for the Great Wooden Wagon Cull of 1963. The maroon really should have faded a bit more (I tried a thin wash but it didn’t look right) but these things are something of a cliff in my perilous personal psychology. So I went with more grime.
The other side is less apocalyptic:
View attachment 178074
Grime or crime; the jury’s out. Having said that, I like the righthand end in the first image. I need to put a P number on it.

Given all that, I have to confess this wagon almost defeated me. It’s a Bachmann Branchline effort, and converting it to P4 was a pig; I hadn’t realised that they’ve put two little vertical strengthening ribs on the back of each W iron. These had to be carved away. And even then clearances are papier de fag. Then I managed to wreck an axlebox (you can tell which one in the second picture, I suspect :)) so had to fit a replacement. Then it turned out the pinpoint axles I was using were overlong (bought long since in a joblot from Ernest Bay), so I’ve had to ferret for something suitable in Stores. I’m surprised I’m still here, frankly. Ho hum.. hills, Fabaceae seeds, and the GSOT…

Cheers

Jan
More true to life than you give yourself credit for, Jan.

I’d be most proud if it were by my hand :thumbs:

Jon
 

Lyndhurstman

Western Thunderer
More true to life than you give yourself credit for, Jan.

I’d be most proud if it were by my hand :thumbs:

Jon
Thank you, Jon.
I have a doubting eye. Despite pouring over hundreds of images, I’m still not convinced. That intern voice…. But time for something else, now.

Cheers

Jan
 

Lyndhurstman

Western Thunderer
You’re Point Being?
Rewheeling an Oxford coal wagon. Nice design; vertical grooves in the back of the W-irons to facilitate dropping the axles out.
F3C6090D-1F7D-45A7-A01E-8418C361EB3D.jpeg
But WHY did they make their pinpoints 26.5mm, when the standard is 26mm? I changed the wheels on the axles, instead of dropping in a complete set - which would have been easier. I also moved the brake shots out to clear the rest flanges. To do this, I cut through the verticals with my piercing saw and glued them 0.5mm further outboard with some Plastic Weld.
7FFE344D-8B9C-4613-BA24-AE3D29D37223.jpeg
Now I just need to find some glue that will lock the wheels on the axles. Araldite might work. Thoughts welcome….

Cheers

Jan
 

simond

Western Thunderer
Caution using Loctite on plastic stuff….

The axle is metal and will happily catalyse the reaction, but the Loctite swells as it polymerises. It’ll probably be ok, but it might not be - worst case it’ll break the plastic hub. If it’s a pretty tight fit already, it’ll likely be fine, but if it’s loose, beware!
 

Lyndhurstman

Western Thunderer
Caution using Loctite on plastic stuff….

The axle is metal and will happily catalyse the reaction, but the Loctite swells as it polymerises. It’ll probably be ok, but it might not be - worst case it’ll break the plastic hub. If it’s a pretty tight fit already, it’ll likely be fine, but if it’s loose, beware!
Hello @simond
Thank you. Interesting. These wheels are not tight, but not that loose. I might just leave them and see if they move; Watkins Wharf is checkrailed throughout, so maybe that will help :)

Cheers

Jan
 

simond

Western Thunderer
Hi @michael mott
I have tried Zap CA, but not Loctite. It didn’t work. But me and cyanoacrylate have an “interesting” relationship.…

Cheers

Jan
I had an “interesting” relationship with a nearly full bottle of Wickes cyano on Sunday. It, and the A2 cutting mat on which it was spilt have been thrown out in disgust. Happily no other damage, but the mat is beyond repair!
 

Lyndhurstman

Western Thunderer
I had an “interesting” relationship with a nearly full bottle of Wickes cyano on Sunday. It, and the A2 cutting mat on which it was spilt have been thrown out in disgust. Happily no other damage, but the mat is beyond repair!
Sound like it came to a sticky end. I’ll get my coat..

I’ve done nothing so apocalyptic. Yet! But the number of times I’ve managed to stick my fingers together…. And bits to bits that weren’t even in the same postcode before I started… :headbang::)

Cheers

Jan
 

adrian

Flying Squad
I would also suggest Loctite as the first go to adhesive in this case - personally I've not witnessed the swelling that Simon suggests, perhaps I'm using a different version.

As a backup my preferred superglue now is the Gorilla Superglue, it's viscous enough to stay where you put it but doesn't set instantly so I get 5-10 seconds to adjust if required. It's also available in little 3g multipacks so I use a tube for a few weeks and by the time the nozzle gets all crusty with old glue it's nearly finished anyway so I chuck it and start a new tube.
 

Lyndhurstman

Western Thunderer
I would also suggest Loctite as the first go to adhesive in this case - personally I've not witnessed the swelling that Simon suggests, perhaps I'm using a different version.

As a backup my preferred superglue now is the Gorilla Superglue, it's viscous enough to stay where you put it but doesn't set instantly so I get 5-10 seconds to adjust if required. It's also available in little 3g multipacks so I use a tube for a few weeks and by the time the nozzle gets all crusty with old glue it's nearly finished anyway so I chuck it and start a new tube.
Thanks, @adrian
I think TESCO does Gorilla, so I might give it a go.

Cheers

Jan
 

Lyndhurstman

Western Thunderer
Upside Down You’re Turning Me
A little sequence of doing something different this afternoon. I’ve fixed an MJT RTR compensation unit into a Bachmann coal wagon. Just because I had some already made up (thanks, eBay :)).

The first job was to find how it all comes apart. It turns out the brake shafts are pins into the V hangers, and the brake lever guard support is pinned into the W iron. It’s a juggle, but achievable.

Then it was out with the drill, piercing saw, and file. This was done to drop/lift the unit down/up (depending on if you’re thinking upside down or not :))) to a proper height. Thankfully, the plastic is moulded, so easy to cut.

A piece of lead sheet replaced the steel weight, and I shaved off the securing boss at one end to make a level surface for the rocking unit.

Some dabs of clear - non-superglue - Gorilla Glue on the underside of the unit, followed by a sit in the locally-modified Bill Bedford jig. About an hours work, I reckon. 4758EBAF-C622-4168-BB39-E95016C4B081.jpeg
7C914CA1-82B7-407E-AB08-DB390B53B45E.jpeg
D9C6E7A9-D8EF-431E-B3B4-F15652228DDE.jpeg
D818E99A-3945-465E-88CB-E0FB4D0B4A36.jpeg9B3A441A-ACB1-4E4B-AD87-4990D0D3B910.jpegCheers

Jan
 

simond

Western Thunderer
Many years ago, when the kids were little, the local pub used to do Easter Egg rolling, and “best decorated egg” competitions. It was a pleasant way of spending Easter Sunday morning. Each year, I would suggest to the kids that they decorated their eggs well in advance, but to no avail.

About an hour before it all kicked off, MissD turns up at my workbench clutching a still warm hard-boiled egg, saying “Daddy, make me a helicopter”. “OK”, Cornflakes packet, Stanley knife, ruler, fat black felt tip, blades, tail rotor, tail boom, landing skids cut out, glue them to the egg. Then the nozzle of the glue bottle came off, and I’m standing there with a hard boiled egg firmly glued to most of my left hand.

Happily, we have plastic jugs, and litres of acetone, so once she’s stopped laughing, MrsD was despatched to the shed to arrange same, and after about ten minutes, I was able to let go of the egg. I think it took the entire contents of MrsD’s moisturiser collection to return the skin on my hand to something like normal. Then we managed to stick the bits to the egg, MissD decorated it, and won a prize….

So you could say that cyano and I have “issues”…
 

Lyndhurstman

Western Thunderer
Open to persuasion
A GWR 5 plank (I think it’s an O4, but anyone who knows better, by all means chime in.. I get confused easily, these days - especially with brakes!). I don’t know how many lasted with a sheet rail, but the fact that it got stuck in East London, and doesn’t have a vacuum cylinder means it’s fate is sealed….

Having broken the thing apart, I trimmed down the solebars to a more manageable size, because in the kit arrangement, if you don’t trim off the extra height in the solebar, you end up with 5 planks on the outside, and 4.5 on the inside. And if you’re like the previous builder, you make it worse by putting the floor in the wrong place, which throws the buffer height out by some margin! A handy piece of tongue and groove from the kindling store came in handy here.

It didn’t help that this kit was put together with polystyrene cement… it was REALLY difficult to get the brake subassemblies away from the floor, and the floor off the ends…

This drastic surgery completed, I put the bits back together. Not the way I’d normally do things, but sometimes needs must… Making sure the bottom of the solebars line up with the bottom of the buffer beam is the critical fit, for me. So the floor goes in last on this occasion. To make sure it’s all flat (and stays that way while the glue goes off) I use an old bathroom glass shelf; nice and flat, and easy to keep clean.
I’ve added the cross-shaft for the brakes at one end (it looks bigger than it actually is) and in the middle (I’m going with DC3 4 shoe, here - is that right?). I’ve also added the floor, and filled in the gaps at the joins in the corners with Ammomig Classic Arming Putty. I’ve not used it before, but it spreads well, and is easily shapeable. I’ll leave the brake handles until after painting. Which is next.
CC5283FD-D73C-4C10-8357-CDDB53B50359.jpeg
05A8698A-508B-4E3B-99B9-2DDB6FB24FAB.jpeg
7426FA73-E548-4805-9EB0-DBC963E2680F.jpeg

Cheers

Jan
 

Attachments

  • AA5B0C5E-9C86-4E42-B4E7-236368EACB02.jpeg
    AA5B0C5E-9C86-4E42-B4E7-236368EACB02.jpeg
    161.6 KB · Views: 1
  • BA1BF7DC-998F-47B4-87BD-583F09E99239.jpeg
    BA1BF7DC-998F-47B4-87BD-583F09E99239.jpeg
    154.1 KB · Views: 1
  • AB6158BD-C674-4B2B-8ACC-1FAF2DBCCB20.jpeg
    AB6158BD-C674-4B2B-8ACC-1FAF2DBCCB20.jpeg
    103.9 KB · Views: 1
Top