You are using an out of date browser. It may not display this or other websites correctly.
You should upgrade or use an alternative browser.
You should upgrade or use an alternative browser.
4mm London Road Sidings (formerly Poppy Lane)
- Thread starter Terry
- Start date
oldravendale
Western Thunderer
The wire up the leg? Stop it!
Hello Simon. I just dabbed a spot of 'Cosmic Shimmer' acrylic glue beneath each foot. I have yet to give them the finger poke test to see if they remain upright. With metal figures I usually use the wire up the leg method. However, I was afraid that the Modelu figures might shatter using that method. I was unable to discover how others fix them and couldn't find any advice on the Modelu website.I agree that the Modelu figures are splendidly realistic, I just hope that if I keep painting them, I’ll eventually do some I’m satisfied with!
have you glued them down, or used the “wire up the leg” fitted in a hole in the ground?
Terry
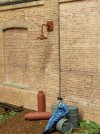
Having looked at that last photo again, I realised that a spot of weathering was required on the oil drums and gas cylinders. This has now been taken care of. I have been getting concerned of late that a derailment on the front siding might send one of my locos on a five feet, one-way journey to Mother Earth. Having mulled over the options to prevent this, I could only think of two solutions. Solution 1 is the usual 'shove a piece of perspex along the front of the layout'. I hate viewing layouts through a perspex screen. It somehow detaches me from the live action. Enter Solution 2 - attach a safety net in front of and below the siding at the front of the baseboard. I can't say that I have ever seen this spectacle on any layout, but then I'm not one to slavishly follow the norm. I mean, who in their right mind would build a layout on a 5.5 inch wide piece of mdf, not to mention covering it with tea leaves? I established that the safety net would need to be about sixteen inches long, and I set about making the wooden frame last night. I needed a suitable net with a reasonably fine mesh and the love of my life produced the very same from under the kitchen sink. It's a netting bag apparently used to hold delicate things in the washing machine. Don't ask any further questions, I haven't a clue! Anyway, if the bag is cut along the edges and opened out, it should provide enough material for my purpose. I guess that when attached to the frame the net would require enough sag to prevent it behaving like a trampoline. The last thing I want is to see is my cherished Class 08 shunter disappearing over the heads of any nearby visitors or layout operators! Or maybe I should just position people to catch my locos when they start bouncing around the exhibition hall! Of course, a safety net protruding from the front of the layout now becomes a hazard to passers-by. This is easily overcome by just pushing the layout back about 5.5 inches on the supporting hall table, until the safety net is in line with the front edge of the table.
Hopefully photos to follow soon. Of course, someone will now come up with Solution 3 which will make Solution 2 a complete waste of time!
Terry
Hopefully photos to follow soon. Of course, someone will now come up with Solution 3 which will make Solution 2 a complete waste of time!
Terry
John57sharp
Western Thunderer
Oo-er, reminds me of my favourite Ken Dodd joke,”what a lovely day, what a lovely day madam, for pushing a broom handle up Nigel Mansell’s trouserleg and saying how's that for pole position?”UThe wire up the leg? Stop it!
Me too, off to copy these lampsYeah, I initially missed that you’re doing this in 4mm…
John
Thanks Steve. The pipe joining the two tanks is simply a piece of bent metal rod. If memory serves me correctly, Knightwing produce the curved pipe at the end. They manufacture some very useful pipework on two large sprues, all in a polythene bag with a card header.Those figures are fantastic! I do like the Modelu stuff. Can you tell who makes the unloading pipework for the fuel tanks please?
Terry
Last edited:
The safety net, mentioned earlier in the thread, has now been completed and fixed in place. It is easily removed via two screws which secure it beneath the baseboard frame. The main concern was how to fix the net to the wooden frame. In the end I bought a staple gun. The net is held in place with a double row of staples around the outer edge. It feels quite robust and I'm happy that any wayward loco will be prevented from falling to the floor.
Terry
Terry
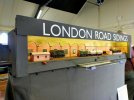
London Road Sidings made its exhibition debut over the weekend at the Orpington show. It performed faultlessly, but the exercise threw up a few minor problems with regard to operation. For instance, it became apparent that the final resting place of the two fuel tanks at the front of the layout, was causing sighting problems when trying to uncouple stock on the centre track immediately behind. A couple of people suggested a small mirror situated above the layout in order that the uncoupling process could be viewed from above. I have ordered a telescopic mirror from the usual auction site and we'll see how that works out. I also noticed that the fiddle-stick appeared to be sloping towards the layout, causing wagons to roll onto the scenic section when uncoupled from the loco. This is easily remedied by slicing off a small piece of the fiddle-stick support. This is already in hand. Unfortunately, I didn't get time before the show to weather all of the stock, but this didn't appear to trouble anybody. The safety net caused some interest. I suspect that the idea might catch on and we'll be seeing more examples on layouts. You saw it here first folks! Using tea for the ground cover also proved to be a novelty and promoted some discussion.
It proved to be quite enjoyable to shunt various wagons around the layout, the show being the first real opportunity for me to do so. However, I was a bit liberal in handing the controller to anybody watching and I found myself unemployed for considerable periods of time throughout the exhibition. People seemed reluctant to return the layout to its builder! After twenty seconds of instruction, it appeared that everybody was a better shunter than me, including the young lad who had to be prised off the controller by his mother fifteen minutes after the show had actually closed!
A very enjoyable weekend. I had a couple of tentative enquiries regarding exhibiting the layout at future shows. I'm open to offers so please contact me if you are interested.
Terry
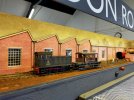


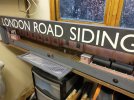
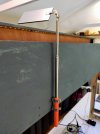
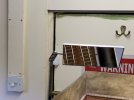
With regard to being able to view the uncoupling taking place on the sidings behind the fuel tanks, an extendable mirror was fixed to the rear of the layout with terry clips.
The red mark on the bund indicates the position where the centre of two adjoining couplings should be brought to rest to uncouple rolling stock on the adjacent siding. Likewise, the overturned fire-bucket marks the uncoupling position on the rear siding. It seems to work pretty well.
Terry
The red mark on the bund indicates the position where the centre of two adjoining couplings should be brought to rest to uncouple rolling stock on the adjacent siding. Likewise, the overturned fire-bucket marks the uncoupling position on the rear siding. It seems to work pretty well.
Terry
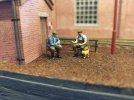
A few minor improvements to the layout have taken place recently. The front curtain is now held in place with velcro, negating the laborious job of pushing in pins, and removing same at the end of the day. A minor detail has been added to the front of the layout - a Cooper Craft wheelbarrow and tools. I think it belongs to the two blokes having a discussion over lunch.
Terry
I decided to add some more uncoupling magnets retrospectively to the entrance of the two longest sidings. The front siding was tackled first. This involved cutting through both ends of each sleeper, five in total, just inside the chairs. The short piece of each sleeper was removed and a 'trench' cut in the cork trackbed. The bar magnets were fixed in the 'trench' with glue, a thin piece of card packing being added to bring the top of the magnets in line with the surrounding ground level. The sleepers were returned to their correct positions, fixed on top of the magnets with superglue. Ballasting then took place. Once dry, and after a bit of weathering, the repair should be virtually invisible.Terry
Last edited:
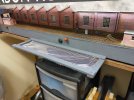
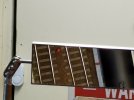
Having installed more magnets on the two longest sidings, I now had the problem that, once again, the structures were blocking the view on the centre siding. Fortunately, when ordering the first telescopic mirror, I bought two, for reasons which are unknown to me. This second mirror was installed alongside the first mirror behind the backscene board. So now we have a second mirror giving us a clear view over the new uncoupling site. Once again, a red mark on the adjacent building marks the ideal stopping place to ensure perfect uncoupling of two vehicles. This is now the operator's view:


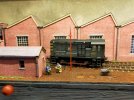
An update on this micro-layout. The building immediately to the right of the North Light Shed has taken on a rather pink tinge of late. I decided to replace this and it has been removed. I am currently constructing another building from the Scalescenes' North Light Shed to replace the origional. Photos to follow soon. After a running session in my railway shed, my fellow operator, Matt, pointed out that rolling stock tends to disappear from the view of onlookers when behind the fuel tanks. He's quite right and I have decided to remove the supports from under the tanks to lower them. This work should take place shortly.
Exhibtion invites are arriving and I am pleased to say that London Road Sidings will be appearing at the following shows: 2025 - January - Erith, February - Tenterden, March - East Grinstead, April - Ashford, October - Beckenham. 2026 - February - Tonbridge. More details in due course.
Terry
Exhibtion invites are arriving and I am pleased to say that London Road Sidings will be appearing at the following shows: 2025 - January - Erith, February - Tenterden, March - East Grinstead, April - Ashford, October - Beckenham. 2026 - February - Tonbridge. More details in due course.
Terry
An additional show date - September 2025 - South Croydon. I'll post more precise details of the shows as they get nearer.
The proposed work to take place in the last post has now been completed and I am now preparing suitable rolling stock, ensuring that every loco is serviced, has a driver and that all stock is weathered. To ensure trouble-free coupling and uncoupling, all couplings are being checked and adjusted so they sit at the same height above the rails. This manufacturer weathered class 08 has recently been through the process and is ready for exhibition service...
Terry
The Erith exhibition at Abbey Wood is just a couple of weeks away and I am busily preparing rolling stock for the layout. Here are some examples. I must get a matt spray and give a blast to the Bachmann wagons, which still have that plastic sheen to them.
Terry
The wagon posters are from the Sankey Scenics range. The faded poster to the left has been achieved by abrading with a glass-fibre pen. The centre poster is as provided and the right remnant is actually a piece of one of those yellow three-part little price stickers, it formerly being attached to the plastic bag in which the posters arrived. All posters were dusted with powder scraped from a brown pastel stick.
For maximum 'play' value I affixed different posters to the opposite side of the wagon. Only the eagle-eyed punter who has clocked the wagon number will realise that he is looking at the same vehicle, when it reappears on the layout.
A brace of meat vans. Pure Airfix, apart from wheels and couplings, being sixty or so years old. The paint finish appears to be bauxite in the photo but is, in fact, crimson. Trick of the light no doubt.
More Airfix. Two of the three tank wagons which will be running on the layout.
timbowales
Western Thunderer
I've just read through this entire thread. Very inspiring!
I must say that the chap standing with hands on hips in post #40 looks vey like Sid James
I must say that the chap standing with hands on hips in post #40 looks vey like Sid James

Thanks Tim. Very kind of you. Have a look at post 57 to see Sid's twin brother, Bert!I've just read through this entire thread. Very inspiring!
I must say that the chap standing with hands on hips in post #40 looks vey like Sid James
Terry

