mickoo
Western Thunderer
Crikey Mick, that is seriously impressive stuff; you’ll be modelling the thermic siphons next!
Nigel
Crikey Mick, that is seriously impressive stuff; you’ll be modelling the thermic siphons next!
Nigel
Crikey Mick, that is seriously impressive stuff; you’ll be modelling the thermic siphons next!
Nigel
They can....and to answer your next question....no I'm notDon't tempt him... That said, surely they can be seen if you look very carefully up through the firebox door...
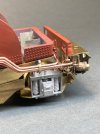
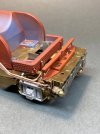
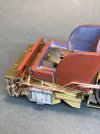
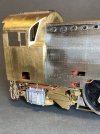
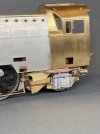
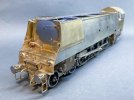
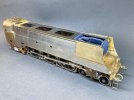
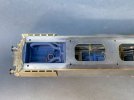
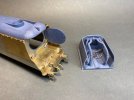
The final piece of the jigsaw at the rear end is the cab support beam, that closes off the rear aspect when viewing the opening under the cab, once that was it the pipework was added on both sides, it's a tight fit but it does all go somewhere now. I'm not quite sure yet what the upper casing opening is for, there's nothing obvious for servicing or needs access, a couple of conduit runs might run close and some pipes but most run well clear of it; I'll ponder that whilst the roof is printing and decide what to do before signing off the model.
From what I can see there are six utility lights under the casing to aid oiling, so brackets for those next as well as trying to discreetly hide the cabling for the cab lights, then just the front end to finish and roof to fit once it's finished printing.
View attachment 212679
View attachment 212680
View attachment 212681
View attachment 212682
View attachment 212683
View attachment 212684
Cheers, too neat when compared to the real thingYour pipe runs look very impressive and neat and it's good to see the injector delivery pipe unions so well represented. The layout is all very different from a rebuild.
The RHS upper opening in the casing is about where the manual blow-down valve operating handle is on a rebuild although I don't know if the originals had that. It wouldn't explain the LH opening, though.
Dave.
Simply stunning. No other word for it.Penultimate update on the Bulleid, next week I'll bore you all with something different
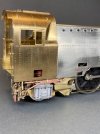
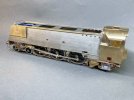
The roof is still several hours away from finishing (49 hours never gets any shorter) but that will be tomorrows task, spray in primer, attach fixing studs and fit to the casing. That'll just leave the steam pipe valve handle and securing post below the buffer beam for the vac pipe glad hand.
Sand pipes get fitted during strip down as they pass behind the wheels and steam cock pipes are fitted post paint. The smokebox door locking bar with magnet needs to also go in at some point, but it's not a deal breaker before paint and the door needs the brass arms blended in with the 3D print and priming.
One thing to watch on the Bulleids is the front electric lighting conduit, there are several ways to route it so check your engine and see which way they did it, more so when the AWS battery box comes into play.
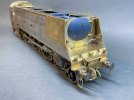
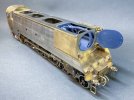
I'll do a couple of studio photos once the roof is on for closure and then it all needs a jolly good scrub and clean in the ultra sonic cleaner before heading for paint.
View attachment 212803
View attachment 212806
View attachment 212805
View attachment 212807
View attachment 212808
View attachment 212804
I am not sure what to write here... you could add your own thoughts...... next week I'llboreyou all with something different...
Sadly there's no skill in the recent photography, just a mobile and some lights on the desk, it's raining outside so I'm not going out to the shed where the big set up isI am not sure what to write here... you could add your own thoughts...
I tried "impress" and I expect that Mick shall not approve even though most of WT are likely to be so minded.
I tried "educate" and again I think that Mick is going to feel that eggs / suck / granny might come to mind even though I often feel that I have learnt plenty from posts showing Mick's skills in design, construction, photography.
Maybe I ought to just leave my response as "just keep doing what you do" because I feel good after reading one of your posts like that of earlier this evening.
regards, Graham
I'll do a couple of studio photos once the roof is on for closure and then it all needs a jolly good scrub and clean in the ultra sonic cleaner before heading for paint.
Yes the smokebox module drops out for paint, like the backheads I do those here to keep my hand in.So are the smokebox internals removable for the sanity of the painter or do they get it with a removable roof for access?
Apologies if I've missed the comment earlier - but spigots on the front bogie axles? Is there a specific reason for them or is it just what you had in stock at the time?
The last sets I bought came with both. 2 bogie/3 tender.These were the ones supplied in the kit, sometimes they come with the csk screws, sometimes with the stubs,
I suppose at one time the tinplate crowd had the same thoughts about electric motors and injection moulding. Or pencils and paper over CAD. Now where is my eraser guard…….Because the 3D hate brigade still hold sway in many dark corners, it's not real modeling you know!![]()
Us diehard tinplaters still insist on a goosefeather quill and vellum....I suppose at one time the tinplate crowd had the same thoughts about electric motors and injection moulding. Or pencils and paper over CAD. Now where is my eraser guard…….
Michael
Do you have an ink monkey, or are they too new-fangled?Us diehard tinplaters still insist on a goosefeather quill and vellum....
Actually, I was talking utter bollox, whilst preparing to strip down I've had a closer look at the bogie wheels; these are not screw in stubs, the axles are actually machined with the stubs on and a tapered shaft for the wheels to fit on to, secure and locate.Bogie axles are Slaters 5/32" with extended pins for outside bearings, they also do them with smaller Allen csk screws. I just haven't chopped the stub axles off yet as I still need to take the wheels off for paint; gripping the stub axle is the only way to screw them in and out.
Once the stubs are chopped off the wheels are pretty much locked in place but you do get a nice solid end to the hub and no ugly hex hole to fill, or not.
These were the ones supplied in the kit, sometimes they come with the csk screws, sometimes with the stubs, I can work with either, you can swap out the stubs for csk screws and vice versa if you wish; they're interchangeable.
That's also why all the crank pins are still full length, I trim them back in the final stages during assembly once I know it all runs smoothly.