Mike G's Workspace.

Mike Garwood

Western Thunderer
Still battling the man flu, I've managed to get a satin varnish onto the 51xx and start the new kit required for the County.

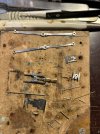
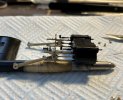
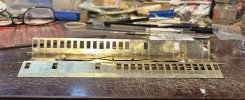
Finished the coupling rods, there are an awful lot of pieces to fit. And my goodness the finished articles are really thin. Disappointingly I had to open out every single etched hole. This made the build really tedious. But, the finished article looks great and the centers match. Admitedly these coupling rods are for a Hall, but they are the same measurements as a County (seven ft by seven ft nine). But once they're spinning are you really going to know the difference - if I hadn't told you?

GWR County coupling rods.jpg

Another dreadful photo from my iPhone!
Currently building the cross heads & slide bars for the County, so far everything fits without fuss. The nice thing about the slide bar construction is that Brassmasters provide a jig to build the slides and fit the pistons, very impressed with that. I'm going to order a few more of these - I have a number of built GWR engines that could do with this up grade.

Stay safe

Mike
 

Mike Garwood

Western Thunderer
Thanks to Simon I now have a decent photo of what I've been up to.

County upgrades.jpg

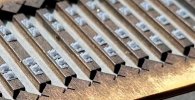
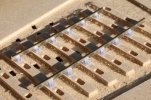
Top are the coupling rods, middle is one of the slide bars and cross heads - Just finished the second one before I started this. Bottom is the jig that's provided. To be honest I didn't use it as intended, but it is handy to fold up and get the registration between the piston head and the receiving piston valve absolutely spot on. Once everything was fitted in place it was just a case of removing the cusps on the slide bars and it all travels smoothly. Lovely little up grade kit, well worth the money and effort.

Back to the 51xx sometime this week, but most probably next week as my daughter has some surgery this Thursday and there will be quite a recuperation period. Here's hoping it goes as smoothly as this did. I've already placed an order for 2 more sets of this stuff.

Stay safe

Mike
 

Mike Garwood

Western Thunderer
Daughters surgery went according to plan, now recovering slowly. My man flu is still hanging around which makes it 4 weeks since it started!

Back with the 51xx...
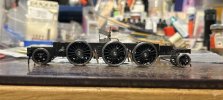
Wheels and springing sorted on the radial truck and pony. It all runs thru my plank when pushed - which was a bit of a surprise - it'll be a different story once the body goes on and power is applied.

GWr 51xx chassis completed.jpg

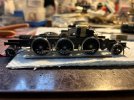
I've also put the brakes in, this makes a huge difference to the look of the chassis. The surprising thing with the brakes was that I had to file down some of the brake linings to get them to fit comfortably. Nothing major, just another annoyance.

GWR 51xx brakes on.jpg

The good thing about the radial truck is that the springing is fairly unobtrusive.

GWR 51xx topping out.jpg

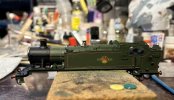
And finally a bit of a topping out ceremony as the polished top hat went on, and if I'm not mistaken needs some more of an adjustment for a better fit to the boiler. At least I feel as though I'm coming towards the end with this project. This Friday will see a trip to Barrow Road and there will be some more rolling stock to test. Can't wait!

Stay safe

Mike
 

Mike Garwood

Western Thunderer
What a month...
Having recovered from a dose of the flu and then having to contend with 3 complete weeks of Grand parenting duties equals one very frustrated modeller. But today, today was a catch up day with no children. Sooo, after the chores had been completed, I wandered into the study. First thing to do : re-acquaint myself with how far I'd got.

First thing was to clean up stuff that I'd left flux on, then clean the wheels - stop the rust getting any worse.

Next I added whippers / pick ups and then install the chip. Took a bit of time but no dramas. Onto the coupling rods next and it's only a temporary fix on until I've proven that the chassis runs.

GWR 51xx coupled up.jpg

One of the remaining jobs left to do was to attach the G hangers to the slide bars. Needless to say, they didn't fit. Not only did I have to widen them, I also had to thin them down to fit. After a lot of fuss and filling everything ran smoothly. I've had to thin the slide bars, this isn't a surprise. If you've ever built a steam loco kit, then you'll know that this is the norm. I've yet to build a kit where I haven't had to do this.

GWR 51xx cylinders complete.jpg

Too many jobs to list to get to the end of this. But I've wiped off a few from the blackboard today.

Tomorrow sees a first visit to Cheltenham, for a first fitting of my suit for my daughters wedding. I hate shopping at the best of times, having people fuss about me could call for some cold tea.

Stay safe

Mike
 

Mike Garwood

Western Thunderer
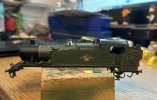
For a change I have good news concerning the 51xx! It runs freely!! Whooppeeeee! :). But now I have a dilemma, the front driver. The coupling rod is a single thickness of etch. This is going to sound daft, this is the first time I've done it like this - told you it would sound daft. So the problem being the crank pin bush fits the coupling rod but the locking nut boss is bigger than the bush. Bigger brains than mine have taken this problem on and a solution is at hand.
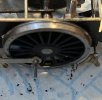
GWR 51xx front driver.jpg

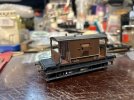
I have also been converting some R-T-R stock. Enter the Hornby BR standard brake van. I have vandalized it, hopefully it doesn't look so plastic now.

BR standrad brake van.jpg

And in more good news, I've started to use Templot for Hengoed High Level track plan, I'll rephrase that. Rod Hall kindly drew out this track plan back in 2016, since then Martyn has upgraded the system and so the track plan needs to be updated as I'm going to use the plug track system. Not using jigs really appeals to me...even though I have a box full of the damn things. And the blame for this choice falls on James Walters shoulders. If you haven't found 'Bexhill West' on you tube, then I'd suggest you do. Some really interesting modeling and some really innovative approaches to some old trackwork problems. Bexhill West

Stay safe

Mike
 

simond

Western Thunderer
I spent a long train journey watching and learning about plugtrack. Grenoble to St P. Not long enough…

I’ve got the concept, but I need to DIM (do it myself…)
 

Suffolk Dave

Western Thunderer
If I've understood the plug track system correctly, you need to have two 3D printers (a filament and a resin type), quite an outlay when your starting point is zero 3D printers.

It's an interesting approach to track building but it would be nice if someone were to market the 3D printed components.
 

simond

Western Thunderer
Or a resin printer and a laser cutter. You can do the woodwork in laser-cut MDF/plywood, probably also acrylic.

by happy chance, I have a resin printer and a laser cutter. And we have a filament printer at work, which is not very busy most evenings, so I’m all set. :).

But it is certainly an expense if DIY and starting with zero printers. Filament printers are pretty mainstream, and i read about a small resin printer that was quite cheap too. I suspect that for £500 you could be set up, which is certainly within the scope of most clubs, I’d expect. And I think 9 Peco 0 gauge points are about the same price, but the versatility of 3DP means there’s lots of other uses too.

I’m not convinced the filament printer is that useful for modelling. Clearly it can do sleepers and point timbers, and general brackets & holders, but for model components, I feel they’re rather limited by the surface finish, so I suspect I’d go with the laser, if I were starting from scratch. Lasers are probably the same sort of money, maybe more expensive.

The downside of someone marketing the components is that it would not capitalise on the “made to fit” nature of Templot track. I guess the plugs could be made & marketed as a set, but you’d surely want to home-brew your track base.
 

Mike Garwood

Western Thunderer
If I've understood the plug track system correctly, you need to have two 3D printers (a filament and a resin type), quite an outlay when your starting point is zero 3D printers.

It's an interesting approach to track building but it would be nice if someone were to market the 3D printed components.
True, you do need 2 printers. The new resin printers, a decent one can be had for £90. I’d go for a laser printer for ply sleepers, more cost I know. But a laser printer will also do your buildings for you and lots of other things once you open your mind to the possibilities.
Or…you could go halves with a modeller who’s similarly interested.
For me, this brings Hengoed from being more of a pipe dream to a doable project.
Just don’t tell my wife!

Mike
 

martin_wynne

Western Thunderer
I suspect that for £500 you could be set up
@simond

Hi Simon,

Alkaid resin printer £90

ALKAID LCD Light Curing Resin 3D Printer geeetech ALKAID LCD Light Curing Resin 3D Printer [800-001-0665] - $99.00 : geeetech 3d printers onlinestore, one-stop shop for 3d printers,3d printer accessories,3d printer parts (£84 + post in UK)

Using Anycubic water-washable ABS-Like resin, there is no IPA wash to buy. At this time of year UV curing is free on a sunny window cill.


Kingroon FDM printer £160

Kingroon KP3S 3.0 3D Printer with Meanwell PSU | ALTWAYLAB

It's small, at 180mm x 180mm, but it does a great job and Templot lets you split timbering bases into clip-together sections.

Total is £250, not £500 to get started. And you can do lots of stuff on them apart from plug track.

cheers,

Martin.
 

simond

Western Thunderer
And a lot of other things too.

My loco shed is all laser cut - sadly the original construction photos were lost in the RMWeb hosting fiasco, but there are quite a few in progress shots in my Porth Dinllaen thread.

SimonD’s workbench and the following few pages.

if you enjoy CAD drawing, it’s quite possible to design & cut kits for pretty much any building, rolling stock and plenty of scenic stuff.
 
Last edited:

jonte

Western Thunderer
Sadly, I didn’t have time to watch the Bexhill vids on track construction using printed track in full, as kindly shared by Mike, however, I’m sure the narrator recommended laser cut sleeper bases to printed resin due to ‘shrinkage’?

jonte
 

martin_wynne

Western Thunderer
Sadly, I didn’t have time to watch the Bexhill vids on track construction using printed track in full, as kindly shared by Mike, however, I’m sure the narrator recommended laser cut sleeper bases to printed resin due to ‘shrinkage’?

jonte
@jonte

Hi jonte,

3D resin printing is not generally suitable for the timbering bases, except perhaps in 2mm/ft scale. The shrinkage is unpredictable, making it difficult to set an accurate track gauge. They also tend to curl rather than stay flat.

For the timbering bases the three available options are:

1. 3D FDM printing -- slow, but user friendly and low-cost. Can clip together in small sections.

FDM machines are slow but run unattended while you build the rest of the layout. This is EM gauge:

em_c_switch3-jpg.jpg

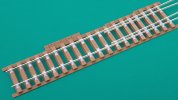
This is FDM printed base in 7mm scale:

7mm_plug_track9-jpg.jpg


2. Laser-cutting -- fast and can use natural wood, but more expensive and needs proper workshop facilities. This is P4 in plywood:

laser_cut_base.jpg


3. CNC-milled panels -- also needs a workshop. This is EM gauge milled in 3mm MDF:

mdf_sockets8-jpg.jpg

cheers,

Martin.
 
Last edited:

jonte

Western Thunderer
@jonte

Hi jonte,

3D resin printing is not generally suitable for the timbering bases, except perhaps in 2mm/ft scale. The shrinkage is unpredictable, making it difficult to set an accurate track gauge. They also tend to curl rather than stay flat.

For the timbering bases the three available options are:

1. 3D FDM printing -- slow, but user friendly and low-cost. Can clip together in small sections.

FDM machines are slow but run unattended while you build the rest of the layout. This is EM gauge:

View attachment 214766

This is FDM printed base in 7mm scale:

View attachment 214770


2. Laser-cutting -- fast and can use natural wood, but more expensive and needs proper workshop facilities. This is P4 in plywood:

View attachment 214769


3. CNC-milled panels -- also needs a workshop. This is EM gauge milled in 3mm MDF:

View attachment 214765

cheers,

Martin.

Thank you for the prompt explanation, Martin.

It would appear that 3D is the easiest option after all, but depends on the TYPE of material used, FDM(?) being the most suitable in this case, rather than resin (I’m afraid I’m not au fait with these materials…) for reasons disclosed.

This is very interesting.

Jon
 

martin_wynne

Western Thunderer
Thank you for the prompt explanation, Martin.

It would appear that 3D is the easiest option after all, but depends on the TYPE of material used, FDM(?) being the most suitable in this case, rather than resin (I’m afraid I’m not au fait with these materials…) for reasons disclosed.

This is very interesting.

Jon
@jonte

Hi Jon,

Folks refer to "3D printing" as if it is a single thing. There are many different methods of 3D printing, some completely unrecognisable from others.

For home use the two common methods are:

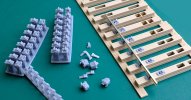
1. UV-cured resin printing. You purchase a bottle of liquid resin. It is cured to a solid material by exposure to UV light in a suitable printer. This method is used to make the chairs for plug track. This method is capable of very fine detail, but it can be a bit messy and smelly.

2. FDM (filament) printing. You purchase a reel of plastic filament. In the printer it is fed through a heated nozzle which moves across the build area to build up the finished part in layers. This method can be used to make the timbering bases for plug track. This method is very user friendly -- there are toy FDM printers available for children.

cheers,

Martin.
 

jonte

Western Thunderer
@jonte

Hi Jon,

Folks refer to "3D printing" as if it is a single thing. There are many different methods of 3D printing, some completely unrecognisable from others.

For home use the two common methods are:

1. UV-cured resin printing. You purchase a bottle of liquid resin. It is cured to a solid material by exposure to UV light in a suitable printer. This method is used to make the chairs for plug track. This method is capable of very fine detail, but it can be a bit messy and smelly.

2. FDM (filament) printing. You purchase a reel of plastic filament. In the printer it is fed through a heated nozzle which moves across the build area to build up the finished part in layers. This method can be used to make the timbering bases for plug track. This method is very user friendly -- there are toy FDM printers available for children.

cheers,

Martin.
Many thanks once again, Martin, for your kind clarification.

Jon
 

Mike Garwood

Western Thunderer
Well that was a worth while deviation...thank you to all who contributed.

Since my last posting I've been struck with a trapped nerve in my shoulder, doesn't sound much, but, has rendered my left arm as useless. High doses of Zapain have not helped matters - falling asleep and completely knackered from the pain. So I'm having to pay for my own physio, and the after effects from that are...uncomfortable. Anyway, some modeling continues.

GWR 51xx
Awaiting the arrival of parts to sort out the front driver, in the meanwhile...I've fitted the back head (which you cannot see), the crew (which are nearly as invisible) and the roof.

GWR 51xx roof on.jpg

As you know I had lined up the County as the next candidate for re-work, I changed my mind and decided to build a coach. This coach plus it's engine will comprise a whole train for Hengoed.
Most of the chassis is complete and a start on the sides has started, in fact only the top and middle hinges need to be added and the sides will be as complete as they can be before painting. I'll try and let you guess the diagram number. These coaches only ran in 3 areas of the UK, South Wales being one of them. The bogie spacing was was reduced from 41 ft 6 inches to 38 ft, before entering service. One of the compartments was only 3 feet wide...

Someting new.jpg

This has been a good start today, fortunately my wife is out tomorrow...

Stay safe

Mike
 
Top