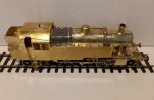
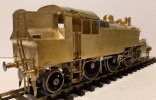
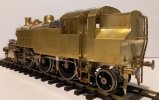
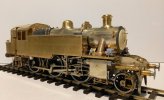
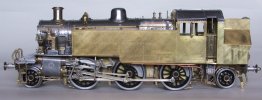
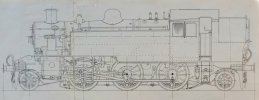
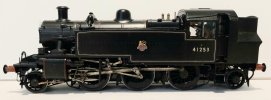
Oakville 7mm Ivatt class 2 tank

P A D

Western Thunderer
Thank you Simon.

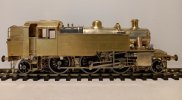
It's been a while since the last post, but I've been slowly chivvying away at the Ivatt and and have made a lot of progress. The cylinders and valve gear were quite tricky, marrying the replacement parts to the kit parts, but I finally achieved a smooth running chassis, with detachable valve gear and cylinders.
20251022_190514.jpg

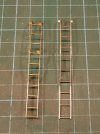
I decided to remove the kit white metal brake gear and replace with brass casting from Laurie Griffin, although I kept the scratch built cross beams and pull rods. After making the bunker ladder from the kit parts I realised that it was slightly too short and had 10 rungs instead of 9, so I scratched up a replacement. The kit one is on the left.
20251029_181610.jpg

I still need to finish off the cab interior, add the steam heating and brake hoses, pick ups, motor, couplings and of course paint, but here's the state of play so far. It's starting to tarnish after the last scrub with the Barkeepers Friend, but that's brass for you. The scouring powder leaves the,white metal parts a dull grey but that's no bother.
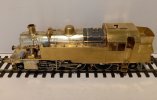
20251101_193918.jpg

20251101_193854.jpg

I need to tweak the guards irons front and rear for a better shape.
20251101_192809.jpg

20251101_192621.jpg

20251101_192502.jpg

There were no balance weights in the kit so these were made from black plasticard. I added the ash pan hopper sides from sheet brass along with the door operating lever on this side, which was spare from the College Models Ivatt class 4 that I built many years ago.
20251101_192432.jpg

Most of the replacement castings are brass from Laurie Griffin, but the lubricators are nice resin castings from Gladiator. The piping is 0.3mm copper wire and the lubricators are only "tacked" in place with a drop of PVA for the photos.
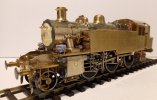
20251101_192413.jpg

I modified the frames at the front to widen them for a better appearance with the cover plate in between made from sheet brass.
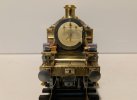
20251101_192328.jpg

20251101_192305.jpg

20251101_192242.jpg

It has turned out more of a chore than I anticipated, but I still enjoyed doing it and am very please with the results. Having said that, I'm looking forward to something more straightforward and of better design. I've got the Gladiator Horwich Mogul and Stanier/Fowler class 4 tank to choose from.

Cheers,
Peter
 

Arun Sharma

Western Thunderer
Hi Dave,
I have two racing yatchs, an IOM which 1 meter long and a Dragonflite 95 which is 95 cm. Both are recognised competition boats but whereas the 1 meter boats can vary in hull design, sails and weight within strict parameters, the 95s are all exactly the same and weigh 2 kg vs 4kg for the IOM. They both have a servo for the rudder and a winch which operates the mainsail and jib simultaneously.


Hi Paul,
I found the kit has the following errors which would prevent a running chassis.

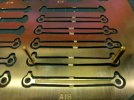
1. The holes in the etched rods at 3.4mm are way too large for Slaters' bushes which are 2.56mm. Maybe if I had larger bushes the rods would be found to match the chassis hole spacing and could be used. However:

2. When the frames were overlaid using an axle bush through the center holes, I found that the holes for the front and rear axles did not line up horizontally.

I knew about these issues when I bought the kit and that Premier Components sold a milled set. These are spot on for the 6ft 9in and 7ft spacing of the real thing.

This shows the discrepancy between the holes in the rods and Slaters' bushes. Totally unusable.
View attachment 248070

To get the chassis and PC rods to match, I first set up the axle spacing on the Avonside jig using one of the assembed rods. I then slid the axle bushes onto the jig axles and then located one of the frames onto the centre bush, having previously reamed the frame holes to fit the bushes. It was clear that although the outer holes were in line horizontally, the were spaced incorrectly from the center. This is a later image after the frames had been corrected,
View attachment 248072

I think the rear holes were spaced too far and the front holes too near the centre. It was just a matter of filling the inside or outside of the òffending holes to allow the axle bushes to be located to match the rods. The discrepancy was slightly different from frame to frame. The drawing exaggerates the error, but the bushes needed moving horizontally about 1mm so quite significant.
View attachment 248074

After fitting the wheels and rods a little reaming of the holes in the rods was needed to get a smooth rolling chassis. I have since elongated the centre holes to give some up and down "float" and all is still well.

Cheers,
Peter
I believe many early etched kits [the ACME Ivatt 4MT being a good example] were designed for used with Walsall wheels using an 8BA screw as the crankpin [rather than Slaters wheels] - hence the designed large crankpin hole.
 

Genghis

Western Thunderer
Excellent work as always.

Just one clarification: the mechanical lubricators are as we now supply in Gladiator kits but they are Paul Smith’s (Floyd Kramer) products available from him.
 

P A D

Western Thunderer
Many thanks Tony.

Thanks for the clarification on the lubricators David. That's good to know.

I believe many early etched kits [the ACME Ivatt 4MT being a good example] were designed for used with Walsall wheels using an 8BA screw as the crankpin [rather than Slaters wheels] - hence the designed large crankpin hole.
Arun,
I'm not sure that is correct, at least in the case of the Oakville Ivatt class 2 tank. The instructions quote Slaters wheels in the parts required to complete the model. Even back in the 1990s, Walsall wheels would have been very expensive compared to Slaters and severely limited the sales of the kit.
17620989686985833170447128875194.jpg

Here you can see an 8BA screw on the left which is clearly way too small for the size of the hole. On the right is a 6BA screw which is still too small for the hole and if used would have allowed the rods to slop around on the "crank pin".
17620989946107348649032232928632.jpg

An 8BA screw is 2.26 mm diameter.
A Slaters bush is 2.57 mm diameter.
A 6BA screw is 2.87 mm diameter

The holes in the rods are 3.05 mm, so clearly not designed for either of the above screws to be used as crankpins, which begs the question what were the holes designed for, bearing in mind that Slaters wheels are specified? In any case, the use of a 6 or 8 BA screw for the crankpins would look hideous.

As far as the Acme Ivatt 4F is concerned, I believe it was formerly a College Models kit designed by Mike Williams (the designer of the Oakville Ivatt class 2). I built one of those many years ago for my brother and my recollection is that the crankpins were larger than Slaters and were provided as castings, but Slaters wheels were specified. Other than that and the Ivatt 4MT kits later sold by Acme, I am not aware of any other kits designed specifically for crankpins of 3mm diameter. My feeling is that the large holes are down to poor design.

Cheers,
Peter
 

neaston

Western Thunderer
I once took JH to task re the size of the holes in the valve gear,.
His reply was that it "was good to have plenty of clearance" or words to that effect !!!!
 

P A D

Western Thunderer
I once took JH to task re the size of the holes in the valve gear,.
His reply was that it "was good to have plenty of clearance" or words to that effect !!!!
I assume JH was the guy at Acme. My reaction is the same as simond's!

I found the website of Floyd Kraemer mentioned by David Hill. He does a lot of interesting stuff


Quintus

Western Thunderer
You have turned a very average kit into a stunning model.
If you are modelling a particular member of the class, please be aware of detail differences at the rear of the cabside windows.
This mod does not seem to be exclusive to the locos with the later cab.
Regards
Mike20250219_223253~3.jpg20250219_223034~2.jpg
 

P A D

Western Thunderer
You have turned a very average kit into a stunning model.
If you are modelling a particular member of the class, please be aware of detail differences at the rear of the cabside windows.
This mod does not seem to be exclusive to the locos with the later cab.
Regards
Mike


I see what you mean Mike. It's a detail difference I wasn't aware of so I'll have to study my references.
Many thanks,
Peter
 

Arun Sharma

Western Thunderer
Many thanks Tony.

Thanks for the clarification on the lubricators David. That's good to know.


Arun,
I'm not sure that is correct, at least in the case of the Oakville Ivatt class 2 tank. The instructions quote Slaters wheels in the parts required to complete the model. Even back in the 1990s, Walsall wheels would have been very expensive compared to Slaters and severely limited the sales of the kit.
View attachment 250661

Here you can see an 8BA screw on the left which is clearly way too small for the size of the hole. On the right is a 6BA screw which is still too small for the hole and if used would have allowed the rods to slop around on the "crank pin".
View attachment 250662

An 8BA screw is 2.26 mm diameter.
A Slaters bush is 2.57 mm diameter.
A 6BA screw is 2.87 mm diameter

The holes in the rods are 3.05 mm, so clearly not designed for either of the above screws to be used as crankpins, which begs the question what were the holes designed for, bearing in mind that Slaters wheels are specified? In any case, the use of a 6 or 8 BA screw for the crankpins would look hideous.

As far as the Acme Ivatt 4F is concerned, I believe it was formerly a College Models kit designed by Mike Williams (the designer of the Oakville Ivatt class 2). I built one of those many years ago for my brother and my recollection is that the crankpins were larger than Slaters and were provided as castings, but Slaters wheels were specified. Other than that and the Ivatt 4MT kits later sold by Acme, I am not aware of any other kits designed specifically for crankpins of 3mm diameter. My feeling is that the large holes are down to poor design.

Cheers,
Peter
Thank you - I agree the Ivatt 4MT valve gear and rods were castings - Clearly "The Past was a Different Country- They did things differently there!"
 

P A D

Western Thunderer
Jim Harris was Acorn and I believe Oakville prior to that. The guy at Acme was John somebody or other, but they had similar approaches to accuracy! As to etch hole sizes, they couldn't grasp the notion that a hole that is too small can be reamed, but a hole too large.....:headbang:

From reading the Oakville instructions it's clear that Mike Williams designed the kit which was then marketed by Oakville. I'm pretty sure that Jim Harris was on the stand when my brother bought the original kit which I built. From having built the College Models Ivatt 4 (also for my brother), it's a toss up which one is the worst kit I've ever built! Clearly "our kid" likes giving me stress!
Mind you, thinking about it, he did build the the tender so the pain was shared.
 

Quintus

Western Thunderer
Regarding the College/Acme Ivatt 4, Allen Hammett advised me to 'chuck in 't bin'. It was sold off when the MOK ones came along.

I'm sure the cab door on the DJH model looks too narrow.
For comparison
View attachment 250763


Regards
Tony
Yes, the cab entrance on the DJH kit is iirc 6ins too narrow. It's only correct for the 84xxx. A few years have passed since I built the kit.
 

P A D

Western Thunderer
You have turned a very average kit into a stunning model.
If you are modelling a particular member of the class, please be aware of detail differences at the rear of the cabside windows.
This mod does not seem to be exclusive to the locos with the later cab.
Regards
Mike
Hi Mike,
Having checked the images in Jennison's book on the Ivatt 2-6-2 it would seem that the weather sheilds behind the rear cab side windows were only on those locomotives with the original eaved cabs. However, I found a number of images that show that some of the locos with the original roofs did not have the sheilds (41254, 41266 and 41280).

The new style eaveless roof was fitted from 41290 onwards. I found images of 41307 and 41314 with what looks like makeshift weather shields (wood?). Perhaps the crews had previously driven locos with the shields and decided to add their own.

Below is an extract from Jennison's book regarding modifications applied to engines built in 1949, which mentions the weather sheilds which would be to 41230 onwards. However, there are images showing the screens on 41207, 41219 and 41222. These images date from the 1960s so maybe they were retro fitted.
20251104_195341.jpg


Regarding the College/Acme Ivatt 4, Allen Hammett advised me to 'chuck in 't bin'. It was sold off when the MOK ones came along.

I'm sure the cab door on the DJH model looks too narrow.
For comparison
Hi Tony, you did right to sell on the College Ivatt 4 when the MOK version arrived. The pleasure you derived from building the MOK kit would have been in stark contrast to the misery I experienced building the College kit (loco only). I well remember every session at the bench being a PITA! The castings were all brass, but badly cast and covered in flash! It took me an age to fettle up each one.

The Ivatt 2 although poorly designed with rubbish castings, was nowhere near as bad. I knew it would be a labour of love when I decided to buy it and I wonder at how I managed to build the first one 30 years ago!

As to the cab width, according to Derek Rainer's drawing published in MORIL magazine, the width over the cab opening is 13mm. The Oakville kit is only 11mm so also too narrow. I notice now that the cab steps are also too wide. That said, I think both models more than pass muster and seen in a layout situation these errors wouldn't be noticed. I'm happy that it is an improvement over my original build and after painting will receive the correct 7mm scale lining from Fox as opposed to the 4mm lining applied to the first one.

20251105_165408.jpg
DSCF1691.JPG
20251101_192432.jpg
20250909_215909.jpg

Cheers,
Peter
 

P A D

Western Thunderer
This is as far as I managed before giving up the ghost back in 2004 - the LG castings were the best bit and they cost a darn sight more than the

kit. Sold at a Bring & Buy at Birkenhead.

regards

Mike
Hi Mike,
Was your kit from Oakville or Acme? The reason I ask is that the rivets seem poorly aligned, which I noticed on another Acme build on a different forum. Also the pony trucks seem to have very deep side panels and the shoulders of the firebox casting seem very square. It makes me wonder if the Acme kits were from a different design than Mike Williams, as I believe, back in the 90s there were one or two other kits available. It's good that kits like this are a thing of the past. It's a wonder that I continued with 0 gauge after building the first Ivatt 2, as the quality was so poor and was enough to put anyone off. I remember seeing a very nice prototype build on the Shedmaster stand at one of the shows, but unfortunately it was never brought to market. Fortunately Laurie Griffin acquired the castings.

Shame you didn't get it finished Mike, but I can understand why you sold it on. I see you added the riveted strip to either side of the cylinder wrapper. I've left them off as I knew it would be a pain to add the lining over the rivets.

Although I enjoyed building this kit, mainly for sentimental reasons, I'm looking forward to building the two Gladiator kits that I have in the cupboard.

Cheers,
Peter
Cheers,
Peter
 

Ressaldar

Western Thunderer
Hi Peter,

I'm pretty certain that this was an Acme kit (purchased at one of the Guildford trade shows at Reading in the late 90s) and I built it as part of my post op activities following my hip replacements in 2000. The riveting was done using a Leakey press and as can be seen, the guide used was the Mk1 eyeball rather than a fence!

Thankfully, a lot of lessons were learnt on this kit and came in handy with the kit building during my early retirement in 2003. Unfortunately the Mk1 eyeballs are even worse than during this build so 'kit building' as such has reduced to adding the odd detailing to RTR offerings nowadays.

Looking forward to seeing you next build.

regards

Mike
 
Top