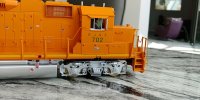
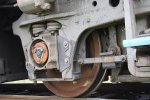
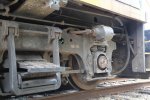
7mm Richards P48 US Thread

Overseer

Western Thunderer
Hi Fraser

Have you got a picture so I can see what I need to add please

Thanks
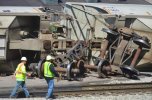
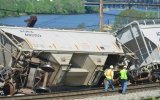
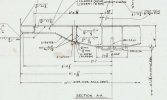
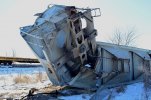
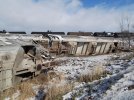
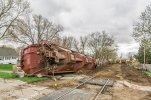
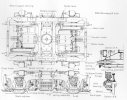
I don't have a GA for a modern hopper but found a Patent which shows the body bolster, but not to scale, see attached. Also some derailment photos showing a few different bolster arrangements. All have side bearing points to provide lateral support. There will be information for the actual hoppers you have somewhere online.
5dc06e79c230f.jpgHopderail1.jpgHopderail2.jpg
 

Attachments

  • US4348962.pdf
    375 KB · Views: 9

Big Train James

Western Thunderer
There are drawings on the N&W Historical Society website for the Wabash version of this early ACF cylindrical hopper. The thumbnails are low res, so it's hard to tell for certain if any of the drawing sheets include the bolster. However, the "Draft Sill" drawing appears to include plan and side views of the bolster. A similar drawing can be found for the N&W HC15 class of hoppers.

The drawings can be ordered with the option of electronic delivery. The price for this particular drawing is $22, which seems a bit dear. But the funds support the historical society and an excellent resource for prototype drawings. It's an option.

Jim
 

mickoo

Western Thunderer
ACF 6-A-1109 should give you what you need, if not it's close enough for modelling something that can barely be seen.

I've cropped a small section to preserve copyright.

Image.jpg

Important note, this is for the ACF monocoque type covered hopper where the beam extends to the outer cill, thru cill cars do not have the outer framework past the roll control bearing pads.

Monocoque aka ACF design

8523534488_5d32b80b63_o.jpg

Thru cill foreground, monocoque background

15833466711_df774a93d0_k.jpg

Thru cill

16608375843_4adfa3acfb_k.jpg

All images copyright respective owners, no idea who, just three images from thousands I've collected off the web.

There are variations between types and builders but the general shape is similar.
 

richard carr

Western Thunderer
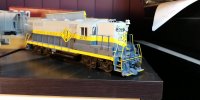
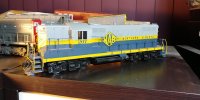
One of the other things I have been doing is sorting out the NAR GP9 that I purchased.

20220526_215619.jpg

20220526_215636_HDR.jpg

Yes you are all correct, it doesn't really look any different to when I bought it !

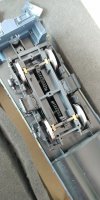
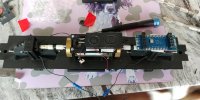
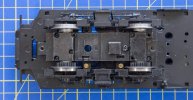
I have added protocraft couplers but other than that on the outside it isn't any different, but on the inside it has replacement P48 wheels by NorthWest Shortline, a Loksound V5 L decoder, a tangbang speaker and some lights, that don't really light up anything.

Here's the shinny new wheels

20220423_123028.jpg

The speak goes above the motor and the decoder above the gear train support. In the photo the decoder isn't in place just the conversion board here.
There is just enough room height wise for this.

20220423_152421.jpg

20220501_195626.jpg

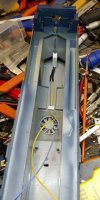
The lights are anLED stuck into a small plasticard box that I made and glued on top of the lenses.

Richard
 

richard carr

Western Thunderer
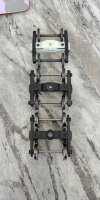
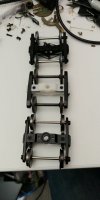
One other thing that I have done is for the Atlas trucks

20220520_094032.jpg

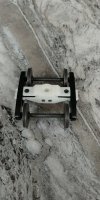
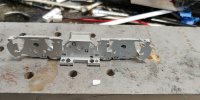
I have drawn up a new bolster for the truck to narrow it to a prototype width. To fit it you do need to take the truck apart including removing the springs and then refitting those springs. It wasn't too much of an effort. The wheels are some north west short line P48 wheels, they don't have extended axles so the roller bearing covers would need to be glued back on and wouldn't rotate.


20220527_155026.jpg

So this shows the modified truck, then an original Atlas truck and the lower one is the redesigned Atlas truck that has the thinner side frames so that it is prototype width.

20220529_101649.jpg

And this is compares the Protocraft truck at the top, my modified atlas truck in the middle and the latest Atlas truck at the bottom

20220520_094444.jpg

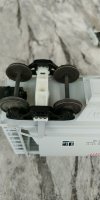
And finally my modified truck on an Atlas wagon.
 

richard carr

Western Thunderer
On to the next thing.

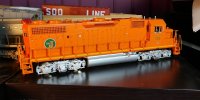
I have a couple of MTH diesels, both are very nice models and so I have been looking at how to convert them to P48
20220603_051853_HDR.jpg

So here is the first one, a GP 38-2 in Elgin Joliet and Eastern livery, you can still see them running in this livery today.
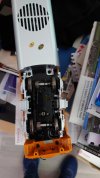
DSC_0212.JPG

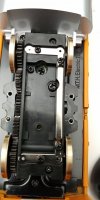
I wasn't expecting to see this when I opened it up, split axles !
One axle bearing is insulated (the black one) and the other is all metal. It does though mean that these locos have split axle pickup
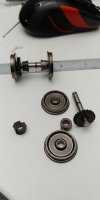
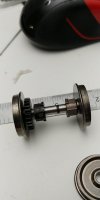
20220531_205742.jpg

20220531_205748.jpg

Although NWSL do a kit for MTH locos they are not drop in wheelsets and it warns you in the instructions that installation is difficult.
It also looks like these are designed for an earlier design and wouldn't work with this very recent loco (available from 2020).

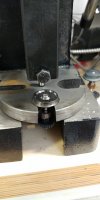
So the first job was to get the wheels of the axle so that the wheels could be reprofiled and thinned.
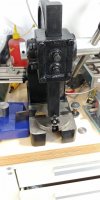
20220531_210031.jpg

20220531_210036.jpg

With this little monster, pushing out the axle is a nice easy job.
The wheels are 4.3 mm thick so they need thinning down to about 3mm. Right O Way sell P48 form tools so having got one of those reprofiling the wheels is a relatively straight forward job in the lathe, just the same as doing a Heljan loco to S7.
The tricky bit is getting the wheels back on the axle at the correct back to back.

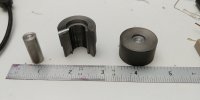
So I need to make a back to back gauge, that can be used with the geared axles
20220603_055559.jpg

So left to right the first is the die that fits into the arbour press, the recess is so that the axle can protrude out of the wheel by about 1.3 mm that the wheel has been thinned by.
The middle one is the back to back gauge 28mm for P48 and the right hand one is the bottom wheel support again with the recess to allow the axle to protrude out of the wheel by about 1.3mm.
The back to back gauge started out as piece of cast iron bar that had already been drilled through 10mm. I added the recess for the gear at the top and turned it to 28mm in length. I then chopped it up in the mill.
Unfortunately I could not take a photo of the wheels being pressed back together as that would have needed a third hand.
20220603_051927.jpg

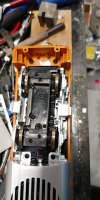
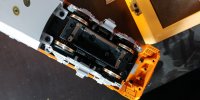
but here they are all back together, I would recommend photographing the location of the wheelsets in the bogies as you need to get the insulated and non insulated wheel bearings the correct way round and they are different on each bogie, but it all now runs.
I just need to narrow the bogie side frames.
Am I correct in thinking the model side frames are too thin and there shouldn't be too close to the wheels ?

Richard
 

richard carr

Western Thunderer
Thanks Fraser

That is just what I need, now I just need to work out how to drill some new holes without taking the bogies off.

Richard
 

mickoo

Western Thunderer
I'm impressed with the press, where did you get that little beastie from.

Side frames, pretty much all of the RTR offerings are too thin, mainly to accommodate 3R cookie cutter wheels. I've re-drilled Atlas trucks with securing holes further in but not attempted a MTH, not sure how hard that would be.

On the Atlas side frames I poked about with, I found it easier to slot the truck lugs and extend the slot outward to allow the side frame to sit closer, drilling new fixing holes is fraught with complications like threads and basically just not enough meat on the truck lug to take another hole inboard.

I keep looking at these MTH GP38-2, there seems to be a couple of different versions, one very toy like with moulded grabs, one more detailed with wire grabs, your's looks like the latter.

Mind, as with almost all RTR, the goodness disappears when you get to the chassis and tank areas :D... perhaps a cue for a MTH GP38-2 replacement etched chassis, same for the Atlas GP60s I have.
 
Last edited:

richard carr

Western Thunderer
Hi Mick

The arbour press came from Amazon, it was £80 with next day prime delivery, I wish I has bought one years ago !

Richard
 

richard carr

Western Thunderer
I have managed quite a bit more work on the MTH GP38 today, I have also been playing with the DCC setup of Proto Sound 3, more of that later.

20220603_085056.jpg

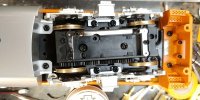
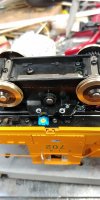
Here are the shiny newly reprofiled wheels. I have marked out locations for 2 new holes, these will be drilled 1.7mm and then tapped for M2.
Matching holes 2.3mm in diameter will then be drilled in the frame sides.

This is the original width frames

20220604_103355.jpg

And this is a narrowed one.

20220604_103348_HDR.jpg

It is fairly easy to drill the holes and tap them, but it is very difficult to drill them in exactly matching places.
It is better to do both holes in the frames first, then do one hole to match that and then if you are happy that is the right place use the frame to mark the position of the other one. I had to get the file out to adjust a couple of the holes to get the brakes to match up fairly well with the wheels.
Here's a frame with its 2 new holes

20220604_111438.jpg

and here is the bogie with a new hole that will be tapped M2

20220604_111458.jpg

I also added the the couplings, the model is designed to take Kadees, and screw and mounts are provided. I have used protocraft couplers in a kadee coupling box.
The box needs shorting at the ffront, you can just cut of the excess with snips if you use a plastic one.
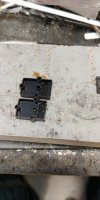
Here's an original and a shortened one.

20220604_122538_HDR.jpg

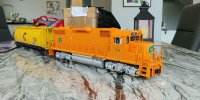
And here is the model as it stands now

20220604_124708.jpg

20220604_124717.jpg


The orange isn't quite that bright, thats the camera on the phone I use.

Richard
 

mickoo

Western Thunderer
Hi Mick

The arbour press came from Amazon, it was £80 with next day prime delivery, I wish I has bought one years ago !

Richard
Ordered, arrives tomorrow, I have just the project for this that's been sat stalled whilst I've been looking for one of these :thumbs:
 

richard carr

Western Thunderer
The other thing I have been playing with today is Proto Sound 3.
All the blurb seems to suggest that this is full DCC but after spending a few hours reading instructions and trying things with decoder pro and my NCE system, it is anything but full DCC.

The first thing to say is that you can only program PS3 on the main, the instructions do talk about using a program track booster, but I have never seen one of those, and trying to program it with decoder pro using a SPROG 3 sometimes worked and sometimes didn't.
There is a very limited number of CVs you can program. The locos run OK but its slow speed control is mediocre, and there is nothing you can program to make it better. It does say you can choose from about 10 speed tables, I choose one that seemed reasonable for good slow speed control, but the loco didn't move until speed step 30, and then wasn't consistent, sometimes starting at speed 28 but sometimes not until 32. I have gone back to a speed table that is almost linear so that movement starts at speed step 4, but it won't creep.

I have to say that I'm tempted to bin it all and install an ESU decoder.

Has any one else had any experience of this ?

Richard
 

Yorkshire Dave

Western Thunderer
I have to say that I'm tempted to bin it all and install an ESU decoder.

Has any one else had any experience of this ?

I always go with the former :rolleyes: - I generally rip out 'strange' decoders like there's no tomorrow and replace them with ESU (or Zimo). Primarily ESU though, due to their greater variety of US sound profiles, superior programming for running qualities and tweaking of sound profiles, volumes etc, etc......;)

I've only had difficulties programming the motor parameters with Digitrax and QSI decoders. In the end I ditched them in favour of ESU decoders :).

Having quickly glanced at some Proto Sound 3 manuals they appears very basic and certainly not as sophisticated as the higher end European decoders we are used to when programming the motor control CVs.
 

Overseer

Western Thunderer
Richard, can I suggest using a round nosed tool to turn the dishing in the face of the wheels? It doesn’t have to be the full profile but the thin tyre effect is characteristic (thin rim really as they are one piece wheels). Makes a big difference to the appearance from the side.

I keep meaning to ask how you get the brass wheels to work. I have always had real problems with poor pickup with brass wheels, much worse than steel or nickel silver. I have thought about setting up to nickel plate wheels but haven’t done anything about it yet.
 

richard carr

Western Thunderer
Richard, can I suggest using a round nosed tool to turn the dishing in the face of the wheels? It doesn’t have to be the full profile but the thin tyre effect is characteristic (thin rim really as they are one piece wheels). Makes a big difference to the appearance from the side.

I keep meaning to ask how you get the brass wheels to work. I have always had real problems with poor pickup with brass wheels, much worse than steel or nickel silver. I have thought about setting up to nickel plate wheels but haven’t done anything about it yet.

Hi Fraser

Yes you are right I really should have added a bit of dishing, but once the wheels are painted it won't be as noticeable. I will dish the wheels on the next one as I have a second EJ&E GP38 to do. This comes ready numbered 703, the one that is still running today. 702 was sold off to the Birmingham Southern in the late 80s.

The brass wheels just work for me, these are the same material that Heljan use and all my Heljan diesels run fine (I have over 50 of them most converted to S7). So I'm afraid I don't know what to recommend. The GP38 uses split axle pickup so there are no pick ups, the Heljans use wire pickups but they do have a nice shoulder for the pickup wires to rest on. Which models of yours have problems ?

I would say that they get dirty faster than steel or cast iron wheels but a good stay alive keeps things moving eventually they need a good clean.

Richard
 

Overseer

Western Thunderer
Which models of yours have problems ?
The problem ones have all been smaller HO scale locos which don't weigh very much. They can be OK when the brass wheels have just been cleaned but the running quickly deteriorates. Swapping the wheels to nickel silver fixes the problem without any other change. The mass of the Heljan locos probably changes things, as would the higher voltage of DCC. I have some Dapol steam locos to convert to S7 but haven't wanted to risk the same problem happening so they are still in their boxes.
 

richard carr

Western Thunderer
I haven't posted anything here for quite a while, but I have been busy.

I decided to bin the PS3 on the EJ&E GP38-2 and install a Loksound L V5, I have also installed a Loksound L in the PRR SD35 that I picked up at the show in April. I have also been working on a better bolster and coupler for an Atlas Trinity 5161 hopper. Robin is hopefully printing a pair of those as I write this, the attached file includes a rendered image.

Does anyone know how to embed a pdf file in a post so that it displays ?

More on the locos will follow.

Richard
 

Attachments

  • trinity hopper.pdf
    50.2 KB · Views: 16
Top