Rivermead Central

John R Smith

Western Thunderer
Martin

What an absolutely gorgeous model! You must be very proud and pleased with the end result. And as you say, getting any clockwork mechanism into such a small prototype is quite an achievement. Where is the winder - I presume on the other side?

John
 
Last edited:

40057

Western Thunderer
Martin

What an absolutely gorgeous model! You must be very proud and pleased with the end result. And as you say, getting any clockwork mechanism into such a small prototype is quite an achievement. Where is the winder - I presume on the other side?

John
Have a look on Tom Mallard’s workbench thread.

Martin
 

40057

Western Thunderer
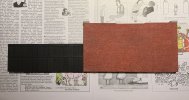
Back to construction of the current length of ‘wall covering’. I have joined with glue, permanently and irrevocably, the sleeper-built fence and the brick wall:

3704C840-222F-43FA-A2D3-F28D6393606A.jpeg

With all the boundary walls and buildings I have made so far, my general approach has been to take the various sub-assemblies as close to completion as possible before joining the different elements. I do think it’s easier to paint and fettle (and correct problems) when the various sub-assemblies are still separate. A disadvantage of this approach is the need to sometimes drill quite large holes in parts that have a lot of time already invested.

I have joined the fence and wall shown above because the fence is finished and the wall is now as finished as it can be until the storage shed is attached. I intend putting two good sized wood screws through the wall and into blocks of wood fixed inside the shed. The screws will pass through the horizontal strips of wood attached to the back of the fence where these are behind the wall, then through the wall and into the shed. So all the parts will be strongly held together. But I will need to drill a couple of 3.5 mm holes through my beautiful wall.

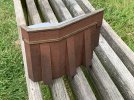
The slightly lower section in the top of the wall visible in the above photo is to allow me to embed the flashing at the top of the shed’s roof into the wall under the coping. The coping at each end of the wall is fixed. The long section of coping between the block at each end needs to wait until the shed is in place and flashing attached.

I still need to make and install the window in the storage shed before it can be fixed to the wall.

I was hoping to get this section of wall covering installed on the layout this year, but I think that is doubtful.

Martin
 

40057

Western Thunderer
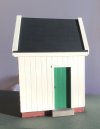
The storage shed now has wooden edging strips (walnut) on both sides of the roof:

95E363FC-4C41-42CE-B9C7-F78F5975F115.jpeg

9148DCDF-178B-4CBC-B4FF-82C9C61E6B8D.jpeg

It still needs its window, the interior painted black and some pilot holes for fixing screws drilled in the base and back.

Once attached to the wall, flashing will be added along the top of the roof. Then the rest of the coping can be put on the wall. Not that much to do to get the whole structure finished.

Martin
 

40057

Western Thunderer
Season’s greetings to all on WT. The only ‘Christmas-themed’ image I have been able to come up with for this thread is very similar to last year’s (post #219):

7AE11E7E-3A52-4461-B72D-D1A22069E59A.jpeg

However, it’s not the same van. This one is from shortly before WW2; the earlier Minic post vans carry ‘E R’ (for Edward VIII). Differences from the post-WW2 van shown last year include the tinplate wheels with rubber tyres, the petrol can on the running board and no rear bumper.

I can easily use two post vans on Rivermead Central — one outside Cairnie Junction station and one waiting at Rivermead Central. However, since I ‘discovered’ Minics after my wife’s present of a post-war lorry (see post #118), I confess to having become totally charmed by them. Yes, officially, they are set dressing for Rivermead Central. But I have become interested in them as models in their own right and have bought ‘The Minic Book’ (Peter Bartok, New Cavendish Books, 1999). There has definitely been some mission creep. The ambulance is a very common Minic model and can be bought very cheaply in excellent condition. So I have bought one — but, really, where is this going to get used on the layout? I have no idea. It isn’t ridiculous though to have an ambulance somewhere. I am not going to be buying (I mean it) Minic racing cars or army vehicles.

OK, then, I’ll make one exception in respect of army vehicles. Just one, mind. In 1939, Triang introduced a new model into the Minic range (model 66M), a 3-axle open-backed lorry in a dark green paint finish. It was ambiguous whether this was an army vehicle or a civilian lorry that happened to be dark green. By 1940, and until toy production stopped because of war-time restrictions, the 3-axle lorry and a number of other vehicles in the Minic range were being produced in army camouflage colours. Unambiguously military. I bought an example of the plain, dark green, 3-axle lorry a few months ago. I wasn’t expecting to buy it. It was a lot in an auction but no-one else bid for it. So I did and got it at the starting price.

Not made after WW2, it’s a scarce model due to its short production period. Definitely a useful vehicle to stand outside one of the factories on Rivermead Central:

216B1B52-E80C-4BBA-97C9-4F36F2471E2C.jpeg

This lorry is essentially a 3-axle version of the standard delivery lorry, the first Minic I got:

591AD0D3-4D1A-4889-A34E-911A8971A669.jpeg

I can use both lorries on the layout recreating a busy scene as goods are loaded and unloaded at one of the rail-served factories.

Martin
 
Last edited:

John R Smith

Western Thunderer
Martin

And seasonal greetings to you, too, of course. I do like your Minic road vehicles, and I am amused by the way this has become a serious collection off to one side of your main interest, as it were. I have looked at the road vehicle aspect for my own layout, and came to the conclusion that Minic, although delightful, were now too collectable and too expensive for me. The same really applies to period (pre-War) Dinky toys, which are also very hard to find in good condition.

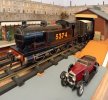
Having very little space on the layout for roads in any case, I nontheless wanted a few period cars and vans to bring the scene to life. And for some irrational reason I did not want the (very nice) 1/43 die-cast models on the market these days, because they are all made in China. So what I have done is to purchase Solido "Age d'Or" models which were all made in France in the 1980s - which are quite nice, at least 40 years old and European if not British -

Pilot 5374 in Goods Shed Web.jpg

Here we are down by the goods shed (Milbro) and 5374 is on pilot duty. The little Solido Hispano-Suiza does look the part, especially as it is in Midland Red!

John
 

40057

Western Thunderer
Hi John

I was very slow to think about road vehicles at all, due I think to a total lack of interest in the real thing. But the unexpected present from my wife of the Minic lorry made me realise there would have to be some road vehicles on Rivermead Central. Obviously. And once that realisation eventually dawned, it was clear Minics were the right choice — for several reasons.

Similar to you, Dinky Toys were ruled out partly on cost and the strong collectors’ market. But more fundamentally, they aren’t the correct scale and the models of larger vehicles were made to a smaller scale to allow standard size boxes to be used. Basically, they were toys and made no claim to be anything else. Modern car models are, to my eyes, too detailed. Analogous to introducing a modern model of a wagon onto my railway. Not in keeping. My trains are clockwork, tinplate, approximately 1:43 scale, well proportioned but with simplified detailing and mostly made in the 1930s or soon after WW2. And Minic road vehicles are clockwork, tinplate, approximately 1:43 scale, well proportioned but with simplified detailing and made in the 1930s or soon after WW2.

They were made for each other (literally).

We all have to accept compromises to produce a working layout. However, one aspect I am trying very hard to get right is consistency of level of detail. Not too toy-like, not too much a highly detailed model. It would only take a couple of detailed scale model coaches, or garishly coloured toy wagons, to upset the look of the whole layout. So I try to stay vigilant about not introducing ‘wrong’ items. I have to keep stopping myself from over-detailing my buildings, for instance. But so far, I think, everything is working together. Including the Minics.

Martin
 

John R Smith

Western Thunderer
Well, Martin, unlike you I am an inveterate petrolhead and was obsessed with cars long before I was old enough to drive one. I have had a long line of Classic cars in various stages of decrepitude and refurbishment, as well as several classic Italian motorcycles. These days, advancing years have forced me to compromise with a fairly recent somewhat sporty saloon. So I suppose I am coming at the model road vehicle side of things from a somewhat different angle.

John
 
Last edited:

Roger Pound

Western Thunderer
I have misty memories of early post war Minic vehicles. The commercials were then all considered to be based on Fords or Fordson vehicles, although with hindight the six-wheeler is a bit of a stretch! To an eight year old they were a delight in those days and seeing them again at Rivermead allowed me a smile of happy memories of childhood. I do have to own up that in later years I fell victim to the spell of the 00 scale successior, Minic Motorways................... :eek:!

Roger
 

John R Smith

Western Thunderer
The commercials were then all considered to be based on Fords or Fordson vehicles, although with hindight the six-wheeler is a bit of a stretch!

Roger, I think that I remember back in the day (1950s) that there were in fact three-axle conversions of some LWB Bedford and Thames commercials, to upgrade their payload capacity. So Martin's six-wheeler may be on target!

John
 

Roger Pound

Western Thunderer
Roger, I think that I remember back in the day (1950s) that there were in fact three-axle conversions of some LWB Bedford and Thames commercials, to upgrade their payload capacity. So Martin's six-wheeler may be on target!

John
Quite right John. I have the feeling that they were usually fitted with an extended chassis though, whereas the model is just a clever adaptation of the original. The only Fordson six wheelers I have clear memories of were from my time in the RAF where the chassis was used with a box van style of body which was multipurpose - they were used to take parachutes for repacking after use at my unit. They were also used by the Service as fire engines. I believe that other versions were used as specialist rescue vehicles too. Those were indeed the days and fondly remembered by those of us of certain years.........;)!

Roger
 

40057

Western Thunderer
Hi Roger, John

I doubt if anyone at Tri-ang spent much time checking their model for prototypical accuracy.

The Minic road vehicles are exactly like Bassett-Lowke’s tinplate model trains in this respect. Some freelance, representative of a ‘type’ but not depicting a particular prototype, and some recognisable representations of real vehicles. All only as accurate as was possible within commercial constraints (e.g. the need to use common parts to reduce cost) and the limitations of the method of manufacture. But very well done (generally) in both the Minic and Bassett-Lowke ranges.

Martin
 

Roger Pound

Western Thunderer
Quite right . In those days just wonderful toys enjoyed by we boys (and we still do enjoy them.)

Roger
 
Last edited:

40057

Western Thunderer
The storage shed now has its window:

0C1A4C9C-3D59-4CCF-BE7A-C5FFE6B16067.jpeg

Again, glass cut from one of my late father’s microscope slides. Window frame cut to fit from a larger LCUT Creative frame (MDF). As seen above, the window just tacked in position with a spot of glue at each end. This afternoon, I have applied slow-set epoxy all around the edge of the glass. I will need to use a little filler to cover the join between the edge of the window frame and the surrounding wood-work. Then paint the inside of the building black and fix it to the wall.

Martin
 

40057

Western Thunderer
Rivermead Central review of the year — 2025

A few days early, but nothing is going to change before 1 January. So what ‘layout progress’ has there been during 2025?

Finds

Building a vintage layout requires vintage equipment. Several items necessary for the layout were obtained during the year. Notably, another Lowko Track electric turnout and a quantity of electric 3’ 2 1/4” radius Lowko Track curves (see post #329). Not essential but very useful, some pieces of post-WW2 Scale Permanent Way. Specifically, a ‘parallel point’ and two rail-built buffer stops (posts #514 and #566); these additions will allow a better yard (track layout and appearance) to be built at Cavendish Goods. Not essential at all to producing a working layout but certainly part of making it look right, accessories obtained this year included a poster hoarding (post #405), passenger figures (post #488) and various Minic road vehicles (posts #567, #568 and #626).

I replaced my Hornby fish van with a better example (post #275), and the one I had for many years is now sold. I bought five other vintage wagons during the year (see posts #407, #573 and #588), one coach and one locomotive.

So that vintage rolling stock can be repaired, the search for spare parts never stops. I was particularly pleased to find some more Carette wagon wheels during 2025 (post #274).

New builds

Two short lengths of track needed for the layout were assembled from vintage components (posts #228 and #533). The Benham’s office building and Cairnie Junction yard office were completed (posts #300 and #537) together with adjacent lengths of boundary wall and fence (post #556). Also a section of retaining wall (see post #506). I collected my new Caledonian Railway 0-6-0 from its builder, Tom Mallard (post #620).

Restoration and repairs

Nine wagons were cleaned or repaired as necessary, so are ready for use (posts #311, #473, #479 and #573). Also one signal (post #436) and one set of points (post #269). I repaired the tender and motor for my rebuilt Royal Scot (posts #247 and #349). However, I have still to fit the clockwork motor into 46100 (get on with it, Martin).

Progress with the layout

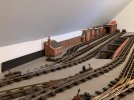
There has been definite, visible, progress with the layout during 2025. On the high level base-boards at Cairnie Junction, three turnouts were installed, track was extended southwards in the yard and the loop in the station (centre road and platform 2) was completed (posts #424 and #548). On the low-level base-boards at Cavendish Goods, the first Scale Permanent Way track was laid at the entrance to the yard (post #518). Along with the track, various buildings and boundary walls/fences against the western wall at the back of the layout were also installed further south. This is how the layout looked in December 2024:

3A08E549-E0EE-40E8-8658-671DC4D275D8.jpeg

A year later:

E2DE2BF2-0CC6-41EC-B8AA-CF6AB4B6A415.jpeg

Most importantly to me though, I can now see the layout coming together just as I had imagined it. In the very first post in this thread, I wrote:

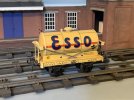
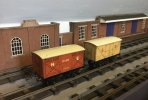
‘… the intended ‘look’ is mid-20th century, built-up/industrial with buildings in brick. The buildings and other scenery will be correctly proportioned but not highly detailed — impressionistic, not photographic. The scenery will be deliberately restricted to a muted palette, predominantly browns and greys — perhaps the colours of an L.S. Lowry painting. It is there to provide a context for and contrast to the much more brightly coloured vintage trains.’

I can’t say whether the above attempt to describe my aim was clear to anyone other than me. But this is what I meant:
ABD379EC-5BB0-4A7D-926D-67B3268214EB.jpeg

2C52CAE8-EDE3-4532-B47B-8CA344D2375C.jpeg

Of course, I would like to have got more done during 2025. Overall, though, I feel good progress has been made. And I can now see this is becoming the layout I had imagined.

Martin

 
Last edited:

40057

Western Thunderer
Work has resumed on the storage shed + wall + fence which will extend the ‘scenery’ covering the west wall another 13” southwards. I have applied light weathering to the storage shed:

1F9662A1-1D2C-4F6A-B5F4-E1A5A4660B0D.jpeg

9CBAE8AE-8B96-40A6-8212-92836C9124ED.jpeg

It really helps that the wood is actually wood as the weathering coat (matt varnish mixed with a spot of black paint) collects in the wood grain producing a realistic weathering pattern almost incidentally.

The storage shed is now finished externally apart from the flashing at the top of the roof. That will go on once the shed is fastened to the wall. I still have to paint the interior of the storage shed matt black.

The shed/wall/fence assembly won’t be finished in 2025, but I expect it to be the first addition to the layout in 2026. Since completion is pretty close, I do need to think about what to do next. Amongst the lessons learnt during the past two years of layout construction is the desirability of installing scenery and track starting at the back of the layout (against the wall) and then working forward. I am going to try to keep to that as construction proceeds southwards along the west side of the layout. Following this principle, the next build project should be a further length of boundary wall which will go approximately in the position shown here in red:

0D18A42A-AEDF-42EB-AE52-70C4FF1290DF.jpeg

I can’t say I am much enthused by the prospect of building yet another wall. I’d much rather by laying the Permanent Way track (which I have ready, cleaned and repaired) at Cavendish Goods. However, I know it will be much easier to install the back boundary wall before the track is laid on the low-level base-boards. Also shown in the above photo is the next track to be laid on the high-level base-boards. The section in green is electric with a third rail. So four Lowko Track points need to be repaired to continue track laying southwards from Cairnie Junction. After the section shown above, there are then no more turnouts in the main running circuit until half way down the other side of the room. Once the high-level tracks indicated in the photograph are in place, the next job should be the retaining wall in front of them separating the high- and low-level base-boards. Then I can get on with the yard at Cavendish Goods …
 

Yorkshire Dave

Western Thunderer
I can’t say I am much enthused by the prospect of building yet another wall.

Rather than use laser cut walling perhaps you could use the relevant scale brickpapers which would be more commensurate with style and period of the rolling stock and model railway products available the time.

I suspect the problem is trying to think and model in the style of the tinplate era without the model railway baggage and knowledge we have amassed over the last 100 years or so.
 

40057

Western Thunderer
Rather than use laser cut walling perhaps you could use the relevant scale brickpapers which would be more commensurate with style and period of the rolling stock and model railway products available the time.

I suspect the problem is trying to think and model in the style of the tinplate era without the model railway baggage and knowledge we have amassed over the last 100 years or so.

Hi David

Thank you for your suggestion.

I am not sure when printed brick papers were first sold. They were certainly around in the 1960s. I know that because my father made a dolls’ house for my sister which had brick paper covering the walls. He also made some farm buildings covered in brick paper to go with our Britain’s animals. The bricks were definitely too large for the Britain’s models (which were 1:32, Gauge 1).

If I was building my model railway 100 years ago, the material I would be using for walls would be this:

1ED057E2-67BD-4520-88F2-A61F2592C328.jpeg

(From the spring 1924 Bassett-Lowke catalogue)

The brick or slate pattern was impressed into the surface of the wood. I am pretty sure the patterned wood was produced by being fed between rollers under pressure with the pattern in reverse being on one roller. The above materials were first offered in 1911. Through the ‘20s and ‘30s, several other manufacturers offered similar products, notably Mills Bros of Sheffield (Milbro). Sheets impressed to represent planking were also made — which I have used to make the storage shed shown above.

I have made some structures from vintage ‘brick effect’ wood, but realised long ago I would never have enough and dismantling beyond-repair vintage buildings (my only source of material) was too time consuming. So I asked Poppy’s Wood Tech to make me some new ‘vintage-style’ laser-cut brick-effect plywood sheets, replicating the dimensions of Milbro ‘bricks’ (slightly smaller and closer to 7-mm scale than Bassett-Lowke ‘bricks’). The replica material doesn’t look quite like the original because of the different method of producing the brick pattern. However, it’s the closest I can get to contemporary material that goes with my trains.

I used Poppy’s Wood Tech brick sheets to make this retaining wall, imitating the architectural style Bassett-Lowke used for tunnel mouths:

12DC4433-F3F8-4C33-9974-0433ADD3E385.jpeg

I guess using brick paper would be much quicker! As I say, I don’t know when the paper was first produced. In my head, because of childhood associations, I think of it as ‘60s era. The model railway buildings produced by the main manufacturers before WW2 were either tinplate or painted wood. The materials offered for home construction I am aware of were also painted wood. So I got replica(ish) material made in wood.

Martin
 

Yorkshire Dave

Western Thunderer
I guess using brick paper would be much quicker! As I say, I don’t know when the paper was first produced. In my head, because of childhood associations, I think of it as ‘60s era.

After a bit of a rabbit hole dive into model railway building papers - Merco was founded in the 1930s by Edward Beal and Sir Eric Hutchison (two notable railway modellers of their day). Lithograph brick and wagon papers produced for both O and 'OO'.

After seeing the extract from the Basset Lowke cataloge then wood is the material to use.
 
Top