7mm Rob's Rolling Stock Workbench

Rob Pulham

Western Thunderer
Very nice. What is called, I think, a characteristic prototype. I wish more kit manufacturers would provide etched corner plates, as it much easier to get them to look like what they are supposed to be, a single folded piece of metal. Usually, with the plate in two halves, much filling, filing and rubbing down is necessary to get it right.


Thanks Brian,
I have obviously done a good job on them then because these corner plates are in two parts:drool:I have to admit like you I would have preferred one piece and folded, but they did go on quite well.
 

Rob Pulham

Western Thunderer
Very nice Rob I like it something quite different


Thanks John, that's what attracted me to it when I saw it on Jim's site.

I have built a few of the Majestic models kits and by large they are pretty good. The castings in the original kits are superb even the quite big ones.
 

Rob Pulham

Western Thunderer
Since finishing the build of the tender truck at the weekend I have spent some time playing with additional details. I have also primed and started the top coats of paint but I haven't taken any photos yet (not much to show to be honest).

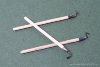
First I got a bit carried away and made a few more shunting poles.... I found that the pin shanks bent so much better without annealing first.

IMG_6559_zpsff92328f.jpg

Then I had a rummage in my scrap etc box to see what if anything I had in the way of tool boxes or something that could be made into them.

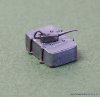
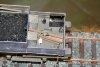
First off I came up with this it was a bit fiddly to make up and the first wash lost some of the bits of rod on the sides.... The oil can is one of the Peter Roles castings.

IMG_6561_zps2b31518f.jpg

IMG_6566_zps4bdf0bb1.jpg

IMG_6567_zps989255fb.jpg

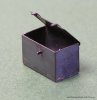
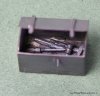
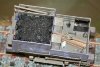
Next up I really wanted an open toolbox. A spare etch and some scratch built straps etc. gave me this which I am quite suited with.

IMG_6565_zpsf2f36dbf.jpg

IMG_6564_zps59a817c4.jpg

With tools inside.....
IMG_6562_zpsfa417d73.jpg

Jim also supplies a few cast details in the form of buckets, upright oil cans and shovels so I made a start on painting some of them.

IMG_6563_zps76604f98.jpg

I am not too sure about the buckets......
 

Rob Pulham

Western Thunderer
Thanks Richard,

I did contemplate trying to drill them out for all of half a second. I will have a go with some sand and see if I can improve them. If not I will look for some that are a bit more bucket like....
 

Dog Star

Western Thunderer
If not I will look for some that are a bit more bucket like....
Peter made some by rolling lead foil around the pointed end of a pencil (with the point flattened to the width of the bottom of the bucket)... and then cut the top / bottom of the foil cone (whilst on the pencil end) to the required height of the bucket. As the bucket was lead he was able to solder a "bottom" and a "handle" to the cone. At least one of those buckets lives in a hole in the floorboards of a LNER 8-wheel tender.
 

Simon

Flying Squad
Which reminds me of a hilarious spoof article in MRC from the Seventies (it was a yellow one I think) covering a P4 approach to fire buckets, left handed, right handed, Drummond, Urie - you get the picture.....

Nice to see that this shunters truck is going to be AWS fitted(!)

I need a sticky out tongue cheeky emoticon here but I'm on an IPad so you'll have to imagine it.

Simon
 

Rob Pulham

Western Thunderer
Nice to see that this shunters truck is going to be AWS fitted(!)

I need a sticky out tongue cheeky emoticon here but I'm on an IPad so you'll have to imagine it.

Simon
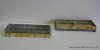
Ahh so that's what it is, well it's going to be a box of junk in the bottom of the wagon..... Rule 1:p
 

iploffy

OC Blue Brigade
The curly bits on the end of the shunters pole are called pigs tails. Shunters would refer to the whole pole as a pig stick or curly.
 

Rob Pulham

Western Thunderer
I took up the building reins again in between bouts of weathering over the wet and dismal weekend.

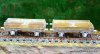
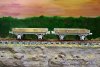
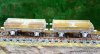
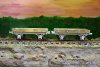
Next up is another simple project in the form of a pair of CR/LMS 8 ton Timber and Ore wagons. One is the original Majestic Models kit and the 2nd is the same kit as produced by Dragon Models under the Celtic Connection banner. The kits are a little basic but form the basis on which to add some additional details if you wish and come in as a very cheap addition to the stock box - £8 for the first kit via eBay and £20 for the second from Dragon.

The sides are formed from two layers of etch which have separate hinge detail applied (I also added some rod to represent the hinge pins)and the ends and sole bars are whitemetal castings. There was a sheet of brass supplied with the Majestic kit for the floor but Dragon supply a sheet of planked plasticard. I replaced this with a bit of scrap nickel etch from the 8F kit which was just the right width. This allowed me to solder all the way making for solid construction - they weigh a bit too!

IMG_6683_zpsc7519ed2.jpg

IMG_6684_zpsbd16652e.jpg

IMG_6685_zps588f7798.jpg

IMG_6686_zpsada93882.jpg
 

Rob Pulham

Western Thunderer
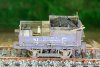
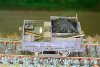
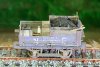
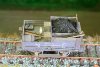
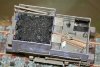
Meanwhile I managed to finish painting, weathering and adding the details to the tender truck.

IMG_6678_zps3ae83b7d.jpg

IMG_6679_zps96edbc5c.jpg

The pieces of timber are coffee stirrers cut lengthways, and I am particularly pleased with the bundles of rope which are made from 4 strands of 32 gauge brass beading wire, twisted together in a couple of pin vices. This was them wound around a lolly type stick to get the length of coil and further wound around itself then it was blackened and dipped in the mix of paint that I used for weathering the inside of the cattle wagons featured earlier.

The lamp is by Slaters and the hammer another one of the Peter Roles castings.

IMG_6680_zps4c2d0d7c.jpg

IMG_6681_zpsbc44d10c.jpg

IMG_6682_zps706715a3.jpg

I have also taken a few pictures of the various stages of the weathering process on this and a couple more vans that I am on with and will post then to my weathering thread later.
 

Attachments

  • IMG_6678_zps3ae83b7d.jpg
    IMG_6678_zps3ae83b7d.jpg
    123.8 KB · Views: 0
  • IMG_6679_zps96edbc5c.jpg
    IMG_6679_zps96edbc5c.jpg
    123.2 KB · Views: 0
  • IMG_6681_zpsbc44d10c.jpg
    IMG_6681_zpsbc44d10c.jpg
    130.6 KB · Views: 0
  • IMG_6680_zps4c2d0d7c.jpg
    IMG_6680_zps4c2d0d7c.jpg
    134 KB · Views: 0
  • IMG_6682_zps706715a3.jpg
    IMG_6682_zps706715a3.jpg
    139.7 KB · Views: 0

Rob Pulham

Western Thunderer
Thanks John.
It's been one of those quirky kits that have needed a bit of work, but the scope for extra detailing has made it infinitely satisfying
 

Rob Pulham

Western Thunderer
Thanks all.

A bit of time over the last couple of evenings has seen the two timber and ore wagons up on their wheels and the buffer stocks fitted. I had to drill out the hole for the buffer shanks on the Dragon castings but this didn't present any problems.

IMG_6688_zps28466a9f.jpg

IMG_6687_zpsd3fb06aa.jpg

The next bit of fun is going to be the brakes because at the moment neither sets of brakes will line up with the wheels so a bit of improvisation will be needed - watch this space....
 

Attachments

  • IMG_6688_zps28466a9f.jpg
    IMG_6688_zps28466a9f.jpg
    126.5 KB · Views: 0
  • IMG_6687_zpsd3fb06aa.jpg
    IMG_6687_zpsd3fb06aa.jpg
    141.2 KB · Views: 0

Dog Star

Western Thunderer
Robin,

I can see how these two models fit the idea of timber wagons - how do the kits build into ore wagons?
 
Top