Its been a few weeks since I posted about 7mm scale Templot developments in making trackworks
Baculellum articulatum - World of Succulents
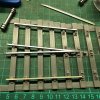
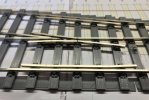
The new system is called COT track, simply printing chairs on timbers or sleepers directly using FDM (filament) Printers. In my opinion a much simpler system than plug track. It still is an experiment as it needs a few more refinements, but is showing a lot of potential
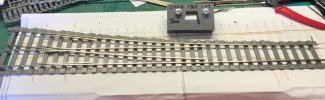
I have now wired it up and had 2 locos running on it, a Dapol Terrier and a kit built loco with Slaters wheels. Both worked faultlessly
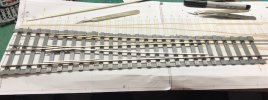
From memory the bases cost under £2 to print and used just over £8 worth of rail, that's for a 22" long B7 turnout, Templot is constantly evolving in all scales (and gauges) as improvements are made
Templot had a demonstration stand at Scaleforum this year and at times the stand was mobbed, clearly a 4mm scale event but 7mm scale was also well represented, hopefully having 2 printers working dispelled some of the fears about cost and ease of usage. 3D printing is becoming more normal in our hobby

")