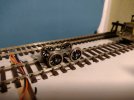
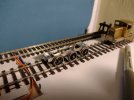
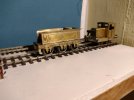
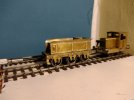
The Chronicles of Canary Sidings - the Tale of an Untidy Workbench

2023.01 - GER 73 class #74

Herb Garden

Western Thunderer
Hello,

Greetings to you all....

With encouragement from @AJC @Rob R and @john lewsey I've started this post to tell the stories of the various bits of rolling stock I build. Or try to.....

This continues from a previous thread 'Greetings from Gosforth East' but for necessity of completeness I may end up repeating myself, apologies if I do.

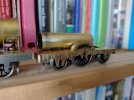
The current major project at 'the sidings' is GER No 73 class. Which illustrates the type of thing I usually build... Victorian/Edwardian East Anglian stock....
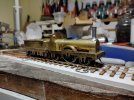
IMG_20221221_181502307.jpg

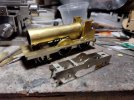
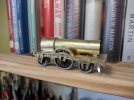
The locomotive is entirely scratch built and has taken me since may to get to what I think is about 70% complete.... You can do the maths yourselves....

As the class is an often ignored footnote in GER locomotive history allow me to give you a brief history of the real thing.

In the 1840s the East Anglian Railway and Eastern Union Railway both purchased a number of similar 5'6" drived 2-2-2 locos from Sharp bros of Manchester... These 'sharpies' (not to be confused with the later GER no 1 class) were for the 1840s about as close as you could get to an off the shelf catalogue item for that time. And many railways including the Manchester and Sheffield and London and Birmingham had them to a total I have been told of approx 600 of these being built. The GER in 1862 absorbing 21of these... As built illustration....
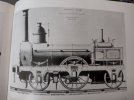
IMG_20221226_121047356_HDR.jpg

By the late 1860s this fleet, which was a large class for the time (there were more of these on the GER than J65s!), Was getting long in the tooth and Robert Sinclair instigated a rebuilding program which was continued by Sam Johnson when he took over at Stratford. This rebuilding covered new boilers and cab weatherboards but didn't alter much more. However the last 8 locos were treated rather differently.

The next 6 that were withdrawn were combined into 3 2-4-0 outside frame locos using the cylinders, motion sets and tender from one loco and the driving wheels from both. This became the no 109 class and more on these anon.... I've cut the main frames for a 109 but nothing else as yet

The last two, which based on withdrawal dates were two of no's 110, 114, 115.. (we aren't sure which two but I can share more thoughts and research on this another time) were kept at 2-2-2s but we're rebuilt with brand new cabs and new boilers and even given new numbers and listed as new builds.... But we know that they were just a new boiler on an old chassis. No's 73 & 74 were outshopped in 1870.
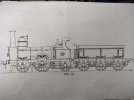
IMG_20221226_121142652.jpg

Sadly for unknown reasons they didn't last long 73 going in 1877 and 74 going a couple of years later. I find this rather sad and an uncharacteristic of the GER whom in early days were veritable horders where old locos were concerned.

To rectify this my model of 73 will bend the space time continuum and carry similar features and fittings to other GER locos rebuilt at the end of the 1870s. Stovepipe chimney. Unflared smoke box, a more modest done and sv arrangement, Westinghouse and possible it might even get the early ultramarine blue livery.... Who knows....
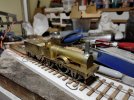
IMG_20221221_181510857.jpg

Sorry that's a lot of intro for a small engine .... I will promise to put some more photos up of how it went together... And some of the mistakes made....

Herbie
 
Last edited:

Herb Garden

Western Thunderer
So history of the prototype aside...

What about the model?

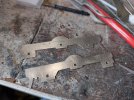
It started with 2 pieces of nickel silver

IMG_20220604_130223695_HDR.jpg

Which was soldered up into a set of frames (pictured next to GER T26 (LNER E4) for scale)
IMG_20220607_221925700.jpg
And we had a rolling chassis

IMG_20220615_174252296_HDR.jpg

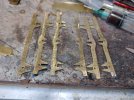
What makes this class of engine bit special is the outside sandwich frames so I really wanted to do something special with these.... After fretting out 6 identical pieces .....


IMG_20220622_071840665.jpg
These were then pinned together with wire to creat definition between the rivet work around the axel boxes and the frame bolts... IMG_20220625_085147581.jpg
IMG_20220626_185229893_HDR.jpg
Tbc....
 

Herb Garden

Western Thunderer
So a bit more showing how it got to where it is today....

So the boiler is small enough it could be made from tube (14mm dia)

IMG_20220701_200242562.jpg

Smokebox and firebox were built up from more tube and flat

IMG_20220702_111817837_HDR.jpg

Luckily I was having my roof done at the time so was able to get hold of some lead to add weight to the loco

IMG_20220722_221608468.jpg

And that got the loco to aesthetically where it is today.... Apart from the splashers.... Which I made way too big first time round and I have since remade....

IMG_20220713_190628152.jpg

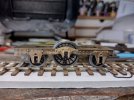
Then I thought it would be a good idea to motorise the loco.... I made 2 mistakes.... I stupidly decided to use the smallest/highest reving motor I had. And I had employed a flexichas system without reading Mike Sharmans book properly. Needless to say the wheels spun beautifully.... It's a shame it didn't go anywhere....
IMG_20220729_064320285.jpg

And back we went to the drawing board.... Tbc....
 

Herb Garden

Western Thunderer
Well I hope you do John ...

It will be very much warts and all modelling.... Mistakes and solutions aplenty....

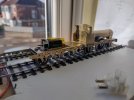
As an interlude I probably should explain the Canary Sidings reference......

IMG_20221226_120512935_HDR.jpg
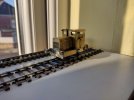
Canary Sidings was the over flamboyant nickname given to my tiny test track that sits next to my work bench.... With no layout to speak of this is where the action happens.... Accordingly the name has something to do with me comming from a city that has a less superior football team than the local one.... Or so I'm told...

The track is mainly EM but still retains some 00 for now.... It also had the capabilities to run with DCC or analogue at the flick of a switch.... I use DCC on layouts but prefer to get things running on analogue first.

The sidings also has its own resident shunter...
IMG_20221226_120524000_HDR.jpg
This is Upton a Ruston 48ds from the old time workshop kit on an RT models chassis with high-level power unit.... Bit of a mash up but it was my first ever EM loco that I built during the first lockdown....

IMG_20220602_130405404.jpg

This is Upton's power unit .... Unfortunately it is not running as well as usual today...(had to demo for family) I think it's down to the fact that it only has phosphor bronze wipers rather than the phosphor bronze with gold contacts I've used on later locos for pickups.... So will need to go back into the works to get those fitted and the other details fitted and oh I nearly forgot paint.....

Does everyone else have loads of half finished projects or is it just me?
 

Brian McKenzie

Western Thunderer
. . . rather than the phosphor bronze with gold contacts I've used on later locos for pickups
I have only come across one reference in the modelling press to the use of gold for pickup contact. A friendly jeweler gave me a short length of gold wire and advised using silver-solder for its attachment, and not ordinary solder. Does this suggest a change in the eutectic state, diminishing the benefical use of gold, if tin/lead solder was used?

Does everyone else have loads of half finished projects or is it just me?
Put me down for having projects at only 1/3rd finished.

I'm intrigued that you have the book, 'Railways & the Raj' on your bookshelf. Is there interest in India's railways?

Brian McK.
 

Herb Garden

Western Thunderer
I have only come across one reference in the modelling press to the use of gold for pickup contact. A friendly jeweler gave me a short length of gold wire and advised using silver-solder for its attachment, and not ordinary solder. Does this suggest a change in the eutectic state, diminishing the benefical use of gold, if tin/lead solder was used?


Put me down for having projects at only 1/3rd finished.

I'm intrigued that you have the book, 'Railways & the Raj' on your bookshelf. Is there interest in India's railways?

Brian McK.
Hi Brian,

So I've been using 9 carat jewelry wire wrapped around the end of a phosphor bronze wiper. 0.3mm wire to minimise the contact area. I just use normal solder

The benefit is that the gold doesn't tarnish like phosfor bronze or nickel silver so provides a better contact. Something else I got from a Mike Sharman book. It works for me at least

IMG_20221226_232237038.jpg

Another chassis for something else showing the arrangement.... If you zoom in a little

Yeah railways and the Raj is a very good book... I don't model those railways as I don't many countries or subjects but yes I'm interested in Thier development. The influence the railways here had on the subcontinent and visa versa. After all the barsi light railway in India did more than inspire the leek and manifold in Staffordshire
 

34091 Weymouth

Western Thunderer
So history of the prototype aside...

What about the model?

It started with 2 pieces of nickel silver

View attachment 176887

Which was soldered up into a set of frames (pictured next to GER T26 (LNER E4) for scale)
View attachment 176888
And we had a rolling chassis

View attachment 176889

What makes this class of engine bit special is the outside sandwich frames so I really wanted to do something special with these.... After fretting out 6 identical pieces .....


View attachment 176890
These were then pinned together with wire to creat definition between the rivet work around the axel boxes and the frame bolts... View attachment 176891
View attachment 176892
Tbc....

Herbie,

That's some fantastic work you've got going. The 2-2-2 is especially nice. I'm going to start a scratch build myself this year for a north british loco. This has spured me on to get cracking.

Si
 

Herb Garden

Western Thunderer
I think it likely that quite a few of us have. If you look at my bits I have three engines on the go at the moment and some coaches........ ho.... Hum
Don't worry I think I'm similar or worse.... Although most projects are in the aptly named cupboard of doom!

But I don't think it matters much. A wise old friend of mine once said to me modelling has two purposes:

"To have fun making things and to have fun playing with things. And so long as you finish things enough so you can play with them .... It first matter that you don't finish everything "

I totally agree with that but I do hope to get most things done at some point
 

Herb Garden

Western Thunderer
Herbie,

That's some fantastic work you've got going. The 2-2-2 is especially nice. I'm going to start a scratch build myself this year for a north british loco. This has spured me on to get cracking.

Si

Si,

Really glad to hear that my tinkerings in brass have helped encourage in a little way. Do let me know how you get on.

The 2-2-2 is my first full scratch build. I've done bits before but never a full loco. And as well as being the most fun and frustration combined into one project I've also found that oddly it's a much more 3d process. I'm mean if you etch components you can get all the relief you need but here you have to rivet, drill, emboss and shape to get what you want.

Certainly very therapeutic after a long day in the office.
 

Herb Garden

Western Thunderer
So to continue the story of the 2-2-2 we now turn to the tender. This I'm particularly proud of and it follows on nicely with the comment on the 3d nature of scratch building.

From the earlier history you will deduce that although the loco was rebuilt in 1870 the tender is still the old 1846 model clanking along behind so it gave me a chance to go all early Victorian in a big way....

The tender frames are exactly the same sandwich variety done in the same way as the loco but without the extra gusset plates....

You will also be able to note that by now I've moved to a much bigger motor in the tender and fixed the loco compensation

IMG_20221030_123425124_HDR.jpg

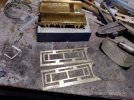
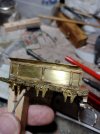
The tender body is yet more brass with the distinctive riveted beading made as separate pieces then to be riveted on

IMG_20221122_213351663.jpg

Good use made of the rivet press and the RSU slow progress but the effect is worth the effort

IMG_20221130_070856933.jpg

IMG_20221220_223910104.jpg

Once that was done on both sides and rear I added the coal plate to the front and the beading to the edge which hid my wonky edges

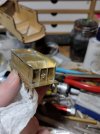
Then to my favourite bit the buffer headstocks. These took quite a bit of research and design given I only had a side drawing but I think the assembly works.

IMG_20221219_071139354.jpg
This was a common design at one point and I really love the nuts and bolts elements of it.... There is even a leaf spring in the coupling hook in there if you look very closely (and not at the angle of the photo)

Well that's sort of where I've got to with it.... The tender mechanism is in bits at the moment as it needs refinement so more on that once family Christmas is over and can get modelling again
 

James Spooner

Western Thunderer
George, firstly welcome to WT and secondly many thanks for giving your run down of progress on your little spinner so far. I think your progress so far is an inspiration to anyone who is contemplating some scratch building but hasn’t plucked up the courage to actually give it a go. I shall be following this thread with much interest! It also helps that it is of a Great Eastern prototype, even if much earlier than many of us model.

Cheers

Nigel
 

Herb Garden

Western Thunderer
So with the family all departed some modelling commences again! Woop woop!

IMG_20221229_222923055.jpg

So this is the free bogie for under the tender.... Just made from scrap...

IMG_20221229_223017394.jpg

And attached to the frames

IMG_20221229_223124655.jpg

With the tender body on. (Note the forward lean)

IMG_20221229_223138520.jpg

And with a screwdriver standing in for the loco drawbar. The aim is that the weight of the tender rests on the loco drawbar and counter balances the forward weight of the loco.
 

Herb Garden

Western Thunderer
One slight issue is that due to the narrow nature of the tender the wheels are at risk of comming in contact with the tender side frames which could cause a short.... If anyone has any suggestions as to a thin coating that could be applied to the inside of the brass to stop this I would welcome your expertise
 

Herb Garden

Western Thunderer
Oh of course, that's the ticket.... I've got some really fine stuff with a thin carrier which would be perfect....

Must have had a complete mental block today.... Thanks @Phil O
 

Herb Garden

Western Thunderer
Happy new year everyone!

So suddenly it's 2023 oh..... And I'm back at work.... And all that festive relaxation has vanished.....

Good news is I'm back modelling full time rather than the odds and ends I got done over the festive period.

I'm actually pro new years resolutions weirdly.... Last year I made a resolution to move from 00 gauge up to EM and have a go at scratch building a full loco for the first time.... Well that's hasn't gone so bad has it?

So here's a sneak peak of what's to come....IMG_20230101_122348783_HDR.jpg
Yep my plan this year is to get some of this lot moved over to EM/finished ..... Would be nice to do some painting one day.... (Sighs)

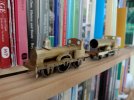
Just for those GER loco fanatics out there.... From front to back we have:
GER class 73, class 1 (unrebuilt... Needs new smaller boiler for that), class 1 (rebuilt) and at the back a T26 that's feeling lost without it's tender....

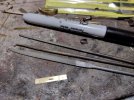
In other news... I started work on the tender drawbar for the 73 class this morning.... It's looking right but was a real faff to do.... If anyone could point me in the direction of where I could get Uber fine/slimline needle files I would be very grateful.... My smallest are pictured beside the drawbar.

IMG_20230103_183815757.jpg
Finally I just wanted to say thankyou. Having joined WT only recently I've been really struck by the supportive and encouraging nature of the community here. I may sound like I know what I'm doing but I'm just making most of this up as I go along.... So thanks for the wisdom, encouragement and support it means more than you realise

Herbie
 
Top