The Heybridge Railway, 1889 to 1913

GER sand wagon New
  • RichardG

    Western Thunderer
    DSC_2858.jpeg
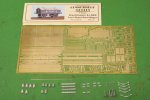
    This kit is the GER Sand Wagon by Connoisseur Models. The kit comes with a 16-page instruction book filled with advice and photos of a completed kit.
    DSC_2890.jpeg
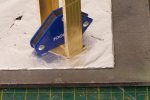
    The instructions mention using drawing pins to hold the model onto a block of wood. Now I have my sheet of armour plate for work with the RSU, I am sometimes using welding magnets to do the same thing.

    Everything was plain sailing until I came to the solebars, which were a bit fraught. So I stopped for these next photos after the first 26 parts.
    DSC_2900.jpeg
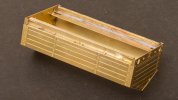
    I like this photo - just about all of the excess solder is on the inside.

    The first solebar overlay went on straight away and without difficulties using the RSU. Unfortunately, the anxiety of getting this on right lead me to forget to do all twelve rivet impressions on the overlay. I have undone enough brass parts to know, the half-etched locations will be clogged up with solder and I will never get the impressions in the right place. So I have accepted this and moved on. This will definitely be "my model".

    The tabs on the solebars go into slots in the model, and the slots are sensibly too wide. But the tabs have to be aligned against the inner sides of the slots, which is the opposite side to where they naturally want to go. So for each side, I tacked the solebar assembly into place, adjusted these joints until the alignment was just right, and then soldered up the rest.

    DSC_2902.jpeg
    I am using the RSU and the microflame torch for nearly all of the assembly, and the result is needing very little clean up. Well, so far.

    I have now paused to emboss every remaining rivet. There are only a few, but they are on both sides of the etch . . .
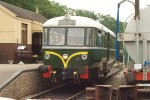
     
    ( Diversion : railbuses at the Middy and elsewhere ) New
  • RichardG

    Western Thunderer
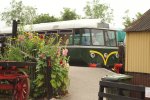
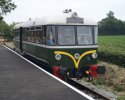
    We went to the Middy today to see the railbus. I don't have a bucket list but I have never even been inside one of these before let alone travelled on one. And so we made the trip.

    DSC_2911.jpeg

    DSC_2913 (1).jpeg
    At Brockford.

    2026-06-21 11.04.10.jpeg
    2026-06-21 11.02.41.jpeg
    At Aspall Halt.

    We were both impressed by the comfortable seats and the ride! Of course it doesn't go very fast here but we had panoramic views of the countryside to enjoy.

    This particular railbus is usually at the EARM at Chappel and it will be running again at the Middy next Sunday 28th June.
     
    Last edited:
    ( Diversion : soldering white metal to brass with the RSU ) New
  • simond

    Western Thunderer
    "I am told I can use the RSU to do this but I haven’t yet sussed out a method without melting the casting."

    Richard, my method is as follows.

    tin brass with ordinary solder, ideally a layer one atom thick. A little more is probably ok :)
    tin W/M item with 70 deg solder, ideally a few microns thick
    apply flux to brass
    locate W/M item and secure with scalpel tip or whatever - if you can arrange gravity to help, so much the better.

    Apply RSU to brass, close to item being soldered - say 5-10mm away. Either side, doesn't matter.
    Press on toe-switch and watch the edge of the W/M part - you'll see the 70C solder melt and the part will settle.
    Remove toe from switch and wait for it to cool.

    On bigger things I sometimes put the 70C solder on so it leaves tiny peaks, these melt and the W/M part settles into place -again very visual.

    Obviously best to practice on scrap bits - I have found the method very controllable.

    atb
    Simon
     
    Conversion of analogue locos to DCC New
  • RichardG

    Western Thunderer
    I have an ergonomic problem with model railway controllers. Faced with a mixture of throttle designs with a centre-off and a separate reversing switch, it always takes me a while to adapt from one to the other. And the Heybridge Railway has had a problem here for a long time.

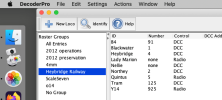
    Somehow, the centre-off throttle works best for me with a wireless handset, and I have such a handset for DCC for my H0 trains. The Heybridge Railway has eight locos in all: five analogue and three r/c ones. It is difficult to find a wireless analogue controller, and so it seems sensible (even logical) to ditch the analogue control in favour of DCC.

    DSC_3009.jpeg
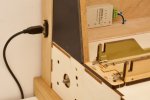
    So the new arrangements look like this. Just like watching modern television really :)

    I have salvaged three decoders from 00 locos I rarely run, and so my only outlay is to buy two non-sound decoders.

    At a glance, 'Nellie' (Lenz) and 'Blackwater' (Zimo) are already running better than they ever did on analogue. 'Heybridge' and another loco will be plug and play when their decoders arrive. This just leaves the GER tram, which will be tricky - it has a modelled interior and hardly any free space inside.

    The trigger for this has been seeing how well a couple of unrelated 0 gauge locos are running with DCC. It is as though the better running of 0 gauge over smaller scales continues with DCC. There is still no sound though. I just don’t enjoy it.

    I am still not entirely happy. I do find DCC a misery to set up, and fault-finding can be exasperating. But I am telling myself, setting up is a one-time activity. Heybridge Basin is electrically simple (and wired for DCC from the outset), and the Roco z21 Start has been reliable since purchase. I expect I will get the hang of things.
     
    Top