Breaking Ground - Finescale - of a sort

Tom Insole

Western Thunderer
We've something similar to this at work. I periodically go around checking files and running them over it. Would sure help keeping things neat.

I'm really impressed how well those points are coming along. Really can't wait to see them laid down now knowing that once they're in some radii and plank sawing will be a breeze. Well, something I might be able to manage to get my PW gang rambled together to help with...
 

Peter Insole

Western Thunderer
Thanks so much for your advice class27. I will definitely pick up some flap discs for the next one (?!) I had finished, fitted, (plus tie bar) and tested both blades by the close of play this afternoon - and was so cream crackered by all the effort that I could barely stay awake during dinner!

Pete.
 

Peter Insole

Western Thunderer
Thanks too Tom! If I whip the flanges off a spare pair of centre wheels and swap them on one of the two new (Rollplay) locos, we might be able to give it a thorough road test next time you come over?!

Pete.
 

Peter Insole

Western Thunderer
I had a much needed break from the points project yesterday, although the job was partly connected!

Here are three shots of the state of play from the day before:

hhSAM_6950.JPGhhSAM_6952.JPGhhSAM_6953.JPG

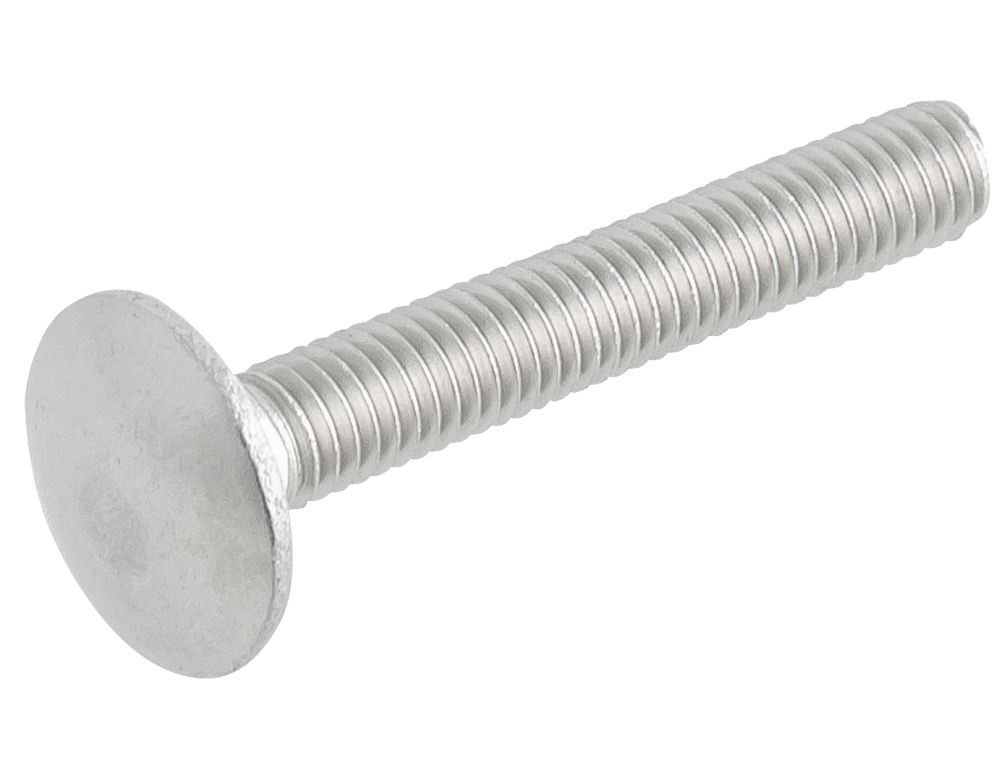
The pivots on the blades are a bit of a bodge, but after much thought there seemed to be no viable alternative? On the prototype, the joint is usually made by conventional fishplates - relying on a degree of flexibility in the rail, but this scaled down stuff is terrifically rigid! I cannot solder or indeed know how to weld on any extra material to provide anything sturdier, so am relying on a simple hole and screw in the foot approach!

It is working perfectly well at the moment - but I'm not so sure about it's durability?!

The next major task will be to make up some bearing plates to fit under the blades. Not wishing to use buckets of grease (the points are being set in a footpath/play area after all!) I am thinking of using some brass sheet. The benefits may be threefold, in that the stuff laid dry won't corrode and become coated in a grabbing, gritty oxide, that brass is "self-lubricating" to some extent anyway, and lastly, although it will be horribly bright at first, (it will quickly dull down to brown outdoors) I already have a sufficient supply of large enough plate to do the job!

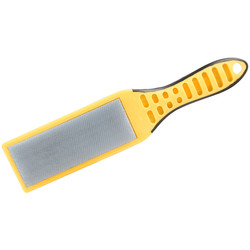
Anyway, that's all for later! Meanwhile, yesterdays light relief was all about modifying brightly coloured plastic!

hhSAM_6954.JPGhhSAM_6955.JPG

I know at first sight this doesn't appear to have a place on this thread, but it is related!

As promised, while checking all functions, I removed the flanges from the centre wheels of the new (second hand!) toy engine for Tom's little Miss S., just as an experiment. I am very happy to declare that it was a complete success !!

The original setup designed for the ultra sharp track curves was, as I suspected, a quite unnecessary extravagance! The test revealed that the broader treads alone are sufficient, and even when pushed to the extremity of travel, the flanges have no effect and barely make contact with the plastic rail. It is quite clear that Chad Valley never intended to include pointwork in their package, whereas I would particularly like to be able to add that facility!

Those flanges did make that dream impossible...

Until now...!!

hhSAM_6959.JPGhhSAM_6960.JPG

I am absolutely delighted that the toy, (with more youngsters on the way to potentially enjoy it!) will not only have an extended service life, but some additional entertainment flexibility too!!

It can still run at home on it's plain, portable track, but can now be brought over for some excursion work on the "big railway!"

Pete.
 
Last edited:

Osgood

Western Thunderer
I really can't see those screws lasting too long in an accurate locating role.
I would definitely put on fishplates - firmly bolted to 'the rail that doesn't move' and with blades loosely located with a fishplate bolt or two.
You could pack fishplates out or, better still, bend one side out at the blade end, to give enough operating clearance.
 

Dog Star

Western Thunderer
I would definitely put on fishplates - firmly bolted to 'the rail that doesn't move' and with blades loosely located with a fishplate bolt or two.
You could pack fishplates out or, better still, bend one side out at the blade end, to give enough operating clearance.
Sounds just like a "loose heel" switch from the late Victorian / Edwardian eras.
 

Peter Insole

Western Thunderer
Indeed Tony, I couldn't agree more!

I have been looking very seriously at every possible permutation of fishplates and bolts, but have a very peculiar problem at the present time - and can't see the wood for the trees!

As previously mentioned, we have a small collection of varying stock with different wheel and flange profiles. All work perfectly on the plastic, but require a bit more care on conventional metal rail. I expressed my concerns to Col, (Eastside pilot) at Love Lane some time ago about our nylon wheels, and he surprised me by assuring that they could be turned down on a lathe. That is something that I consider most desirable, but is not practical, in the immediate or short term at least.
Those nylon wheels have integral bearings that run on fixed axles, (typical of quarry and mining wagons) a flat profile and distinctly deep flanges with a very shallow taper. The reason why I had an issue with ill fitting fishplates was that the flanges caught on any loosened plates and their projecting bolts - causing some damage! To help manage this, I used countersinks for all the inner plates.
Setting fishplates deliberately loose or with any free play at either end to cope with the angular movement is unfortunately therefore out of the question - until such times anyway?!!

I have considered drilling and tapping holes in the rail webs and fitting fixed machine screws from the "inside" faces of both wing and blade, and locking a single, shaped fishplate to the "outer" (non interference) face of the wing rail, while leaving the other end loose?
I fear that might cause very rapid wear of the holes in the plates though? Locking tiny M3 nuts in that situation might be problematic as well?!

Something along similar lines, but without the bolts on the moving blade and only acting as an alignment "tongue" would at the very least reduce the risk of any outward thrust of the blade?!

Even though we do not have to worry about extremely heavy, live steam locomotives - and indeed the sort of grossly overscale speeds that most people seem to like driving their trains, :rolleyes: the pressure on the the infrastructure must not be underestimated!

For the moment, the worrying pivot bolts will have to do - but I am already thinking of fitting horizontal brass plates under the rail, with firmly soldered, vertical threaded ferrules let into the timber - at least to give us half a chance...(?) !!

Regards,

"Worry pot" Pete!
 

Peter Insole

Western Thunderer
Sorry Tony, I was so busy with my reply - that might even sound like a diatribe, I completely forgot to say "thank you" and how much I appreciate your timely warning!!

Pete.
 

Osgood

Western Thunderer
We could swap "worry pot" recipes, Pete! :eek:

I can see your dilemma, but am having difficulty comprehending the degree of it because I don't know the rail dimensions and thus whether this crackpot idea (which is the only other thing that I can think of suggesting) might stand any chance of working:

Given the clearance issue is with the inside of each blade, on the other side could you have (if necessary, much thicker) fishplates made of a flexible nylon-esque material that will bend enough to accommodate required blade movement?
Bolts heads (on inside of blade and fixed rail) could be filed flush with inner top rail head face.
As each fishplate's' flexing movement opposes the other they should cancel each other out and may even impart a useful 'state of springiness' to the blade / tiebar assembly?

Blades.jpeg
 
Last edited:

Peter Insole

Western Thunderer
Thanks again Tony, and for taking the time with this one!

You are correct about the problem: Largish bolt heads alone will actually sit happily under the broad rail head on the "inside" - but only become troublesome with a fishplate behind them!

I hadn't thought of a "flexible" material for fishplates - and it looks very worthy of further investigation! I would want to provide some type of fixed "stoppers", in order to prevent any outward misalignment of the joint when set and under load though - especially important with flat profile, free wheels on the sharper curves where the wheel flanges are in close contact with the side of the rail head - something I discovered the hard, and uncomfortable way when running bunker first on a main line test run recently !!

Incidentally, the existing tiny screw head pivots are deceptive in the pictures: I reduced the head diameters of long machine screws to fit as close as possible to the web, and retain as much "meat" as possible on the foot. The M4's actually reach almost all the way through the two inch depth of the sleeper - and it took what felt like an age to drive them both in!!

Even so, I do share your concern, and really don't trust them to last for very long

Regards,

Pete.
 

Simon

Flying Squad
Hmmm, I think I'd stick with what you have got and press on.

Worst case scenario, you have to do something a bit more complicated later on if it doesn't work.

I do think that we on WT sometimes over complicate things....

Anyway, whatever you do or don't do - maximum respect for what you have achieved so far. It really does inspire me to get out into the garden and plug on with my own lunacy garden line.

By the way, you wouldn't by any chance be interested in a large pile of smallish rocks - I have some going spare.....

Onwards and upwards!

Simon
 

simond

Western Thunderer
Pete,

at risk of over complicating things…. The issue with the blades is that the rail will tend to fall over “outwards” due to flange pressure on the inside of the head, and whist your pivot screws are holding the inner foot down, the geometry is perhaps not ideal to counteract this.

I don’t know how big the rail section is, but I agree with Tony that a fishplate of some sort on the outside of the rail would be a good thing. I’d suggest using coach bolts - something like this - to fix them


with the head filed down as required to fit the web of your rail as these won’t chew holes in your plastic flanges.

I think I’d go for a rigid fishplate fixed firmly to the outside of the closure rail (two bolts and nuts), and a very small amount of play at the blade fixing (one bolt and nut). You won’t need much clearance to get the required throw. Fishplates are shaped to wedge into the gap between the foot and the head, and that seems to me to be a good thing too.

hth
Simon
 

Peter Insole

Western Thunderer
Thank you so much both Simons! I really do appreciate all the comments and sound advice so freely given. I just hope that my tendency to plough on regardless and often dig myself into ever deepening furrows is not insulting to anybody?!

I must confess that while sitting here, with the points laid out in front of me, I found myself this morning having one of "those moments":

"Ho hum... So much still to do!... How much longer will all this take...? Will I ever get it done?"

With some notion of escape, I got up and walked down the garden. Despite being gently bathed in the warm Spring sunshine, I could not help looking forlornly down at the big hole in the ground where a whole load of hardcore has yet to be pounded in and ballast laid to set the contraption in. I only succeeded in making myself feel even more miserable!!

Simon (of Bath!) how could you have known just how encouraging your perfectly timed "press on" message was..??

Also; garden railway building does seem to generate quite a bit of excess... you with half a ton of rocks... me with a mountain of topsoil. It is a pity we live so far away from each other?!

Simon (with a d!) I know you are absolutely right - and I too would feel much happier with an added sense of security in a more "belt and brace" approach of using fishplates! I can only take a couple of very small crumbs of comfort from the existing pivot arrangement, and they are;

The rail has a very low CoG with a squat, 16mm height and 16mm footprint. It also has a broad, flat, 9mm wide head, supported by a 3mm thick web and foot (latter tapering down to 2mm). That rather stocky section probably explains why it is so rigid and resistant to bending in any direction?! There appears to quite a bit of "meat on the bone" for the pivot to bear on - and hopefully, the combination of sideways forces and vertical loading with flat (no coning) wheels on a broad, flat rail head, with such a wide foot means that the rail would have to climb a considerable height before "falling over"? Besides, both blades are also curved outwards, (it is an unequal Y point) and that alone should help by increasing the height required to "tip" the rail? Looking at the stuff in front of me, I am guessing that most of the pressure on the pivot will be an almost pure sheering action?!

The other little crumb? Well not so much crumbly digestible bits, but nasty, non crunchable, gritty stuff - and the inevitability of it's ingress into moving parts!

As the "trailable" blade movement is quite acute, the pinching action at the joints will be subject to a massive amount of leverage when activated by a rolling train. These points will be outdoors, and subjected to the constant effects of wind blown or foot carried debris! I have already made some allowance for this; in leaving a (minimum, warm weather) credit card thickness gap between the rails, and filing each rail end to a curve (facing away from the joint) to accommodate the movement, as well as assisting with dispersal.
A quick "swipe" through the perpetually open vertical joint at regular intervals should hopefully be an easy way to clear obstructions, and go some way towards ensuring reliable operation?!

The big test of all this is yet to come of course!!

I fully expect there will be ever more furrows - soon - and in the brows too!!

Pete.
 

simond

Western Thunderer
Hi Pete,

I think “press on” is a good message! I’ll add a further crumb or two.

If your current approach proves (eventually) to be unsatisfactory, it’ll not prevent you doing something akin to Tony’s or my suggested approach, so that might offer a “reserve parachute” should it be needed.

The clearances you have built in look (at this distance) to be entirely sufficient.

I guess “suck it and see”!

best
Simon
 

Peter Insole

Western Thunderer
Buoyed by Simon's encouragement - and after finding some online images of commercially available points - I felt a lot happier about carrying on, despite being a bit unwell!

Yesterday, I finally managed to to get the "easy-clean" gaps between the closure rails and blades completed. Both sets had to be dismantled and taken up before I could work on them, and then re-set afterwards... I think I fitted everything rather too well the first time around?!

hhSAM_6973.JPGhhSAM_6975.JPG

Unfortunately, I woke up this morning feeling particularly groggy, so progress was somewhat slow at first!

Pottering quietly in the sunshine, enjoying Mr. O's tulip display and spending some time looking at the nearly completed set laid out for alignment checks did seem to strengthen the constitution!!


hhSAM_6977.JPGhhSAM_6976.JPG

I had deliberately left one of the stock rail tails slightly over long at the approach end to allow me to trim it in to the existing railhead. It only required a sliver cutting off and fettling up before a start could be made on drilling out all the fishplate holes.

Fortunately, only the running rails/crossing nose had to be taken up to get the drill and chuck in - all the other ends could be reached from the "outside" with the rails left in situ on the sleepers!

hhSAM_6980.JPG

I have decided that, for the time being, it is a case of job done!! The rest of the odd (but essential) bits and bobs can jolly well wait for later!

A big hammer, buckets of smashed up hardcore, a tamper, a roll of membrane and several bags of ballast are in prospect now...!

Pete.
 
Last edited:

Osgood

Western Thunderer
And in the unlikely chance you have any issues down the line with the blade fastening, may I present a super-bodge in the form of a simple 'add-on' without disturbing any existing - two stepped plates shaped around the existing rail fasteners and blade pivot screw, and pinned to the sleepers, providing lateral and vertical stability without any clamping effect.
Uncle? Bob? :)

Point 1.jpeg
 
Last edited:

Peter Insole

Western Thunderer
Brilliant Tony! That will do nicely, and thank you!! Your idea has given me a bit more confidence to press on with the task.

Trying to obtain materials locally is proving to be a bit of an issue though. Empty shelves and "out of stock" notices still seem to be everywhere. I cannot help recalling Miss Minnie Banister and Henry Crun's rueful refrain; "You can't get the the wood you know"! or; "There's even a shortage of shortages nowadays!"

So not much pretty progress to show today I'm afraid...

We've already got some of this:

hhSAM_6994.JPG

But there's still a huge pile of this:

hhSAM_6996.JPG

That has to be turned into that...

hhSAM_6992.JPGhhSAM_6993.JPG

and then pounded well in - before some sand, a membrane and some "fines" are laid and levelled to set the sleepers on!

Just don't seem to be able to get the right sort of grit at the moment!

Pete.
 

Peter Insole

Western Thunderer
I discovered that a nearby garden centre has bags of the right stuff for sale, so I nipped over to pick some up! To my dismay on arrival, the gates were firmly locked and a there was a rather terse "Closed on Thursdays" message crudely scrawled on a scruffy sign!

Not wanting to waste a trip, I diverted to a DIY store, and bought some fence paint instead!!

I had been thinking about the desirability of adding some extra protection to the freshly cut timber sleepers, as well as slopping some "rust" on the silvery sides of the rails anyway - so today's activity was decided!

hhSAM_6997.JPG

Some of the ridiculously fanciful names given to paint products sometimes amuses me, but perhaps more often is a distinct annoyance!

Looking at sample patches on a point-of-sale display, I found only one shade that was close enough for the rust effect - and that was called "Medium Oak" - although quite what someone thought the connection might be is anyone's guess?!
For the sleepers; "Tudor Black" really takes the biscuit though - for it is neither black, but a very dark, blue-grey - nor is it indeed something invented by our ancient ancestors, as far as know?!

As the minimum quantity available is in 5 litre tubs, I will have rather more of the stuff to play with than I will ever need, so mixing some up would lead to very little loss. I was more than happy with the greyish-brown combination as it dried on the timbers!

I was slightly less satisfied with the "Oak" (?) applied neat as a first coat on the rails though...

hhSAM_6999.JPG

It just appeared to be far too "orange" for my taste...?!

The true shade for rusty rails is entirely variable, and is significantly dependent of local environmental conditions, amount of usage and the actual type of traffic running on it.

Nevertheless, I find it very difficult to argue with the following comparison between my stirring stick and the latch on our garden gate...

hhSAM_7000.JPG

I might still add a tiny smidge of "black" for the wing and check rails on a second coat tomorrow though...?!

Pete.
 

Simon

Flying Squad
Pete, don't tell us you are going to get down on your hands and knees and paint rust all both sides of both rails all along the route of the "Empire Builder" to the back door?

And there was me thinking you were sensible...

I'm doing the Bristol show with the books this weekend so will have limited "digging opportunities" on my own venture.

Have a great weekend:confused:

Oh I nearly forgot, your painted point looks utterly magnificent.

Simon
 
Top