Chas Levin

Western Thunderer
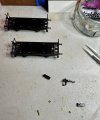
Slightly slow progress on the KWStE wagons due to various factors, some railway-related some not, but I made up and fitted some safety chains at the weekend. I know these may not be quite right for c1890 but I was very taken with them in @michl080 's KWStE van photo on the previous page of this thread and there aren't that many detailing things I have information on for these wagons, so I thought I'd fit them.

The chain is pre-blackened 33 links per inch but two lots have gottne mixed together in my stock so I'm not now sure whether it came from Cambrian Models or Weinert Modellbau; the wire is 0.3mm brass, which I blackened using Birchwood Casey Brass Black and it's just the right thickness to fit through one of he chain links:
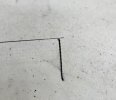
RAI-MO KWStE wagons 20230715 (1) safety chains.jpg

It's then snipped off just behind the loop - I didn't get my batch building numbers right though and only made four initially, instead of eight:
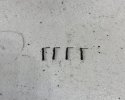
RAI-MO KWStE wagons 20230715 (2) safety chains.jpg


Then, another piece of the brass wire is popped into the other end of each pength of chain and formed into a sort of slightly elongated figure of eight, but the larger loop is snipped off early:
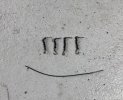
RAI-MO KWStE wagons 20230715 (3) safety chains.jpg

The stright piece of wire on each chain was then popped into a hole drilled in the buffer beam, having first been dipped into a drop of thick low-odour cyano and while that went off, the remaining four were made up:
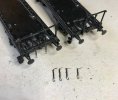
RAI-MO KWStE wagons 20230715 (4) safety chains.jpg


And with all eight in place, they'll just need a little touching in with some black paint where my slightly clumsy working has scraped away the black finish on the brass:
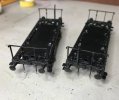
RAI-MO KWStE wagons 20230715 (6) safety chains.jpg
 

Chas Levin

Western Thunderer
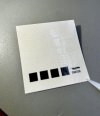
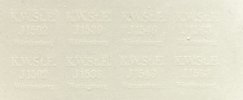
And today's challenge: reading what's on these transfers:

KWStE RAI-MO transfers.jpg

I finally deciphered them all, by a combination of viewing it at a very acute angle, with light hitting it from an equally acute angle, under very high magnification!
I wonder if it's partly the effect of ageing on the ink colour?
I'd also wondered why they included the black squares to put on the blackboard-type notice boards on the wagon sides, when painting with matt black paint produces a much better result, but then I remembered that the kit includes a single colour of paint, that rather light red oxide shade shown on the box top, so with the underframe made of black plastic, they could get away with supplying just the one colour of paint by providing those black squares: quite ingenious!
 

Chas Levin

Western Thunderer
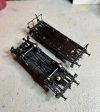
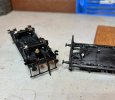
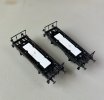
With the KWStE wagons' chassis / underframes pretty much done it's time to look at couplings, with the first up being my home-brew Fleischmann fittings, one each end of each wagon:

RAI-MO KWStE wagons 20230723 (1) Fleischmann couplings.jpg

RAI-MO KWStE wagons 20230723 (2) Fleischmann couplings.jpg

RAI-MO KWStE wagons 20230723 (3) Fleischmann couplings.jpg


Though of course as I'm actually fitting NEM pockets and just using the Fleischmanns', there's always the possibility of change at a later date...
 

Chas Levin

Western Thunderer
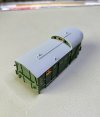
A quick break / brake from KWStE wagon works to deal with an RTR detailing project that's been sitting on the side of my work area for ages because I couldn't figure out how to get the van body apart!
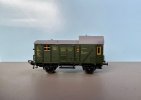
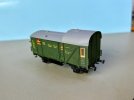
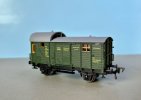
I neglected to take a photo of the van before working on it but here's a photo of the same model in a different livery - it's a Piko model of a brake van, in some cases they describe it as a goods brake and this one's in SNCF, just to show how these quite crisply moulded vehicles look when there's no colour visible other than the roof and chassis:

Piko brake van dismantle, glaze etc 20230727 (1).jpg

It's fairly obvious when you handle the thing that the chassis parts company with the body (and equally obvious that the roof is a painted part of the same moulding as the body) but it's far from obvious how they part company. I'd gently tried on numerous occasions, a useful piece of displacement activity to be picked up, fiddled with and put down again; I tried gently prising the sides apart with the van upside-down, on the assumption that the chassis clipped into place inside the bottoms of the sides; I tried sliding, twisting, cajoling, praying - nothing! Eventually, the other day, I decided I was pulling off the chassis come what may and if something broke, I'd just buy another one. (I know that's not very clever, but sometimes...:headbang:.
So, what's the answer? Two prongs pointing upwards from the chassis, mating with two drilled pillars pointing downwards from the inside of the roof!!

Piko brake van dismantle, glaze etc 20230727 (2).jpg

And so finally, glazing can be done, using Deluxe Materials Glue'n'Glaze which sticks to glazing (this is the Wizard Models 0.2mm stuff) better than 3 or 4 other similar glues I've tried:

Piko brake van dismantle, glaze etc 20230727 (3).jpg

You can also see, in the above two pictures, that I've painted the window frames a light wood colour, something I'd seen in photos which makes things look a great deal better, with just a small touch of colour.
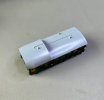
While I had the thing apart and more easily masked, I thought I'd try and improve the roof a little too - as supplied, it's a little light coloured and rather shiny looking:

Piko brake van dismantle, glaze etc 20230729 (1).jpg

But after a quick coat of Halfords Plastic Primer and then one of Testors Dullcote, things look a lot better:

Piko brake van dismantle, glaze etc 20230729 (3).jpg

And the final result is a lot better I think. Glazing's a funny thing: you don't often actually see the light reflecting off it but even the occasional glint makes a huge difference and empty window frames look surprisingly wrong:

Piko brake van dismantle, glaze etc 20230801 (1).jpg

Piko brake van dismantle, glaze etc 20230801 (2).jpg

Piko brake van dismantle, glaze etc 20230801 (3).jpg
 
Last edited:

Chas Levin

Western Thunderer
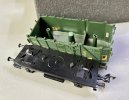
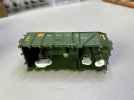
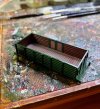
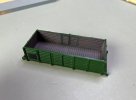
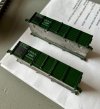
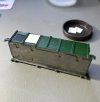
Not that the KWStE wagons are being neglected. I've been painting the interiors, following my plan of doing the wood in a very dark brown / greyed colour and the metalwork initially in black, then with washes of rust and greyish dirt, so that the black ironwork doesn;t stand out too much, which might draw attention to the fact that I'm not really sure it should be black in the first place!
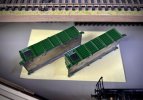
Here's one of the wagons halfway through the process, which consisted of an initial coat of Phoenix Precision GNR Freight Brown (visible here on the inner areas of the doors) followed by a coar of Phoenix GNR Frames Chocolate (visible on the wider interior areas), both coats being very heaviy thinned with Phoenix thinners:

RAI-MO KWStE wagons 20230727 (1) interior paint 1.jpg

Then, a wash of even more thinned GNR Freight Brown:

RAI-MO KWStE wagons 20230729 (1) interior paint 2.jpg

Followed by another wash of 1 drop matt black to 6 drops of Phoenix LNER Freight Grey (you'll have gather that much of my paint stock is GNR and LNER related!):

RAI-MO KWStE wagons 20230729 (3) interior paint 2.jpg

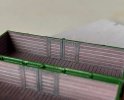
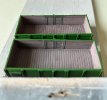
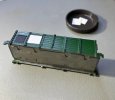
And the (current) final dry result, which has a good degree of greyness to it, something that was pointed out to me recently when I was showing some efforts ot representing old, worn wood and another modeller said that in fact, old wood tends to look more grey than brown, which I then realised was absolutely right after I spent some time looking a bit more closely at colour photos:

RAI-MO KWStE wagons 20230801 (2) interior paint 3.jpg

RAI-MO KWStE wagons 20230801 (1) interior paint 3.jpg

You can also see in the last photo that I've done the same with the pairs of boards on the brakeman's platform at each end of each wagon. No direct photographic evidence for this of course and I realise that those boards, being outside the body, might have been green to match the outer sides, but I believe they'd not have been painted because they'd have been used for walking on. Plus the fact that it adds a bit of colour detail!
 

Chas Levin

Western Thunderer
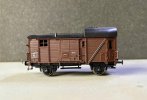
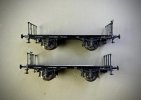
The transfers stage has been reached with the KWStE wagon pair, a stage I always enjoy because it produces sudden and exciting improvements, plus I find precisely aligning things very satisfying.
Yes, I'm the sort of person who will get up from dinner to go and straighten a picture to hang perfectly horizontally and feel happy afterwards!

Consulting my shiny new Diener book I saw that the usual place for much of the lettering is along the solebar, even when the body overhangs it and comes down quite low over it - here are a couple of examples of what I mean:

DE wagon solebar (1).jpg

DE wagon solebar (2).jpg

When I came to a trial fit of these wagon bodies onto their chassis however, they drop down very low, so low that anything on the solebars would be almost completely hidden:

RAI-MO KWStE wagons 20230815 (1) body-to-chassis, solebar transfers.jpg

Clearly spacers were needed to raise the bodies touch - not too much, or gaps are apparent between the brakeman's pltform boards and the bottoms of the end rails, plus those vertical moulded steel struts that project downwards are a little short for raising the body, but with a little experimentation, there's a compromise point to be found...

RAI-MO KWStE wagons 20230815 (2) body-to-chassis, solebar transfers.jpg

These plasticard pieces provided about half a mm of lift and also provided a more stable mating surface so that the bodies sit level, something that was a ltitle tricky before. The difference in the amount of solebar visible is very slight, but it looked enough to allow lettering to be visible (plus I could always add more if needed):

RAI-MO KWStE wagons 20230815 (3) body-to-chassis, solebar transfers.jpg

The transfers themselves worked perfectly well - you never know with a kit that must be about 40 years old - but actually seeing and reading the white lettering on the white background was extremely awkward (as mentioned a few posts back) so it was slow going. These are as just applied, so they haven't flattened down fully yet (plenty of Humbrol Decalfix being used!) plus varnishing will hide the edges and the shine of course:

RAI-MO KWStE wagons 20230815 (4) body-to-chassis, solebar transfers.jpg

And on another trial fit, I think the compromise will work. The lettering is visible at eye level though it will be partially obscured when viewed from above, but from some of the prototype photos, I think that must have been the case on the originals too:

RAI-MO KWStE wagons 20230815 (5) body-to-chassis, solebar transfers.jpg

Those side pieces that project down below the bottom plank (I'll have to look at one of those diagrams that tell you the names of all the parts of a wagon) do look a tiny bit short, but in a reverse of the case with the lettering, when they're viewed from above they'll actually look like they go down further!

I've also mde a start on the body lettering..

RAI-MO LWStE wagons 20230816 (1) body transfers.jpg

...but the larger section of lettering - with the large KWStE and wagon number - I need to check for location before applying. The instructions show that set applied to the right of the wagon side doors, but quite a few prototype photos show those identifying markings immediately to the right of that first set of body side lettering you can see in the photo above, to the left of the side doors... I need to learn a bit more about changes in lettering styles.

Incidentally, @magmouse - Nick, do you remember suggesting, a couple of pages back, that I use a text recognition plus online translation system to read books like Diener more quickly? I just had to get a new phone (the previous one's battery starting getting very hot all the time, scarily so) and the new one seems to have that already built in to its camera! :)
 

Chas Levin

Western Thunderer
Did you re-letter the Pwg14, if so where did you source the lettering?

Thank you
Hello Tim, no, can't take credit there: the lettering is as applied by Piko for the van in Czech livery. It's pretty crisp lettering, isn't it? I also have one in SNCF but that has very little lettering so I plan to detail that too as it's even plainer and could use the lift...
 

Chas Levin

Western Thunderer
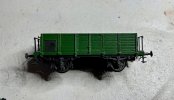
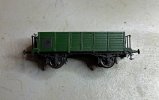
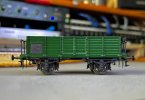
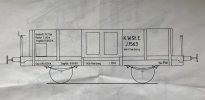
The KWStE wagons' chassis are finished bar the couplings (unsightly and non-prototypical so I'll leave them off until after photographs!) but I'm still hesitating on the positioning of the main 'KWStE' lettering and numbering to the bodies.
The kit instructions - and box - show this lettering on the RH side...

RAI-MO KWStE wagons 20230617 (1) transfers layout.jpg

...and while I realise there's no prima facie reason to take this as correct, I'd feel more comfortable going against it with some decent evidence; or, to put it another way, I'd be delighted to find a prototype photo to confirm that's actually right, because so far, all I can find are photos that contradict that layout!
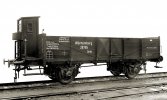
The most common layout has pretty much all wagon - or van - body lettering on the left-hand side - here's a photo freely available online which, while it's a later style, shows the layout effectively:

KWStE gondola 28765.jpg

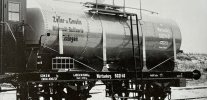
The only cases I can find of the KWStE or Wurttemberg lettering on the right-hand side are on private owner vehicles, where it looks to me like it's moved over to make room for the private owner's markings - here's a crop of an example from the Diener book:

KWStE Zeller tanker 502140.jpg

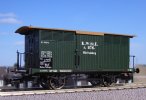
I haven't yet found any prototype photos of the earlier 'KWStE' style of lettering and from what I've read so far of Diener's book I can't help suspecting that if there's none in there it's quite possible none has survived, but some RTR manufacturers such as Brawa have done them, using at least two other layouts. I know very well that's no guarantee of accuracy, that there was discussion further up this thread about RTR manufacturers putting out all sorts of pretty looking but very inaccurate liveries and that we should in any case always try to avoid 'modelling a model', but I can't help assuming they must have done some research, had perhaps one or two photos or diagrams to work from, because Brawa's KWStE models are actually pretty consistent - here are examples of alternative lettering layouts:

KWStE van 1176 Brawa 2085.jpg

KWStE wagon J1841 Brawa 47708.jpg

Now I'm pretty sure that having the lettering in the middle of the vehicle wouldn't look right on a wagon like the ones I'm building, as the centre opening doors would split the lettering, but that last photo, the one immediately above, is surely of a wagon pretty of much the same type as I'm building, so where did they get that layout?

Interestingly, I could duplicate it by cutting up the kit's transfers:

RAI-MO KWStE wagons 20230717 (1) transfers.jpg

Given the scant info and the apparent considerable variation in livery styles at the time, I'm very tempted.

If nothing else, putting all three lines - the 'KWStE', the number and 'Wurttemberg' - on the left-hand side with the other lettering will leave the right-hand side a bit empty looking, whereas moving the number over to the right side would give a better visual balance. I know, I know: how can I be considering aesthetics ahead of authenticity? Well, this is meant to be a fun hobby... What do you think: can I get away with it? ;)
 
Last edited:

Chas Levin

Western Thunderer
I vote for putting it all to the left side ;)

Michael
Thanks Michael: I know you know your stuff in this area, so I value your vote. And that does seem to be in keeping with the photographic evidence, doesn't it?

There don't seem to be anywhere near as many photos of 19th century wagons - or railways of the period generally - from Germany and other European countries as there are of those built in the UK. Is that a result of there having been so much more interest in railways here in the UK, so that more photos were taken at the time and there was wider interest in preserving them? Or is it to do with so much of Europe having lost archives and other hardware in the course of war, changes of administration and other disruption? Or is it perhaps a combination of both?

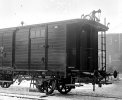
Edited to add: I suddenly remembered that the photo you'd scanned in a few pages back on this thread is of course a KWStE van with the lettering in the centre, a similar layout to the Brawa model numbered 1176 that I posted above: serves me right for failing to read back through my own thread!! :confused:
 
Last edited:

Chas Levin

Western Thunderer
I'd also vote for left side...... and be going for authenticity :).
Thanks Dave: I think you're right too.

I think it's partly just the idea of cutting the kit transfers to move the number that I find appealing, because I like trying to do difficult things that are a little more of a challenge... but this is clearly not the time to practise my transfer manipulation skills: there'll be other times for that!
 

Yorkshire Dave

Western Thunderer
There don't seem to be anywhere near as many photos of 19th century wagons - or railways of the period generally - from Germany and other European countries as there are of those built in the UK. Is that a result of there having been so much more interest in railways here in the UK, so that more photos were taken at the time and there was wider interest in preserving them?

There doesn't seem to be when I've been searching, however there must have been some interest as K.Bay.Sts.B. and K.P.E.V. do turn up (being popular) as does the K.Sächs.Sts.E.B. I've also noticed quite a number of photos do exist in local archives rather than a central archive. It's only recently some archives have been made available online and I find it is also knowing the relevant language railway search terms.

I've been modelling DB (and SBB) on and off for years and always search online using German. Although I was using French when searching for data on the SNCF BB67400 diesel.


Or is it to do with so much of Europe having lost archives and other hardware in the course of war, changes of administration and other disruption? Or is it perhaps a combination of both?

More than likely a combination of both and today it's knowing where any remaining archives ended up after the disruption. There is a good archive here (and you can switch the language to English): Bildarchiv Waggonbau Görlitz ....alas no KWStE.


Chas Levin

Western Thunderer
There doesn't seem to be when I've been searching, however there must have been some interest as K.Bay.Sts.B. and K.P.E.V. do turn up (being popular) as does the K.Sächs.Sts.E.B. I've also noticed quite a number of photos do exist in local archives rather than a central archive. It's only recently some archives have been made available online and I find it is also knowing the relevant language railway search terms.

I've been modelling DB (and SBB) on and off for years and always search online using German. Although I was using French when searching for data on the SNCF BB67400 diesel.


More than likely a combination of both and today it's knowing where any remaining archives ended up after the disruption. There is a good archive here (and you can switch the language to English): Bildarchiv Waggonbau Görlitz ....alas no KWStE.


Thanks Dave, newbie error on my part in failing to stop and think about which language I should be using to search!

Interesting point too about local as opposed to state archives; I have read quite a bit about the origins and formation of Germany in the nineteenth century and gained the impression that unlike somewhere like England - a single state for many centuries - there is still a surprising amount of local administrative, political and social structure in place, beneath the federal surface.

Alas, the railways of Bavaria and Prussia do seem to have a larger fanbase, don't they?

Thanks too for the link, I'll have a look at that, though not right now as we're off to the Twinwood Festival today: Twinwood Festival | Ultimate Vintage Festival for Music & Dance :thumbs:
 

Chas Levin

Western Thunderer
Yep, definitely the best way to go, over on the left:

RAI-MO KWStE wagons 20230830 (3) transfers.jpg

They took some very fine trimming though, to be able to fit between those uprights - here's before what I thought was narrow enough:

RAI-MO KWStE wagons 20230830 (1) transfers.jpg

And here's after:

RAI-MO KWStE wagons 20230830 (2) transfers.jpg

The other text, at the very left-hand side - tare weight and so forth - also needed some attention with the razor to be able to fit top and bottom. Given that that the text for the solebars was also a tad larger then necessary I tihnk it's safe to say that these transfers were a little over-sized.

On the plus side however, they've settled into the planking very well indeed (with careful but generous use of Humbrol Decalfix) and I wasn't sure how well they'd do that, given their age (probably about 40 years) so I'm not complaining!

Prototype photos also show the occasional very small sign or symbol over on the right-hand side and I think at 4mm scale I could find something that'll look the part, so I'll take a proper look at the Verkehrsmuseum Dresden link you posted above @Yorkshire Dave and then have a look through my transfer stock to see if I can find something to relieve what is otherwise a very empty looking area...

Also there's some poorly scubbed chalk effect to do on those blackboard sign areas.
 

Chas Levin

Western Thunderer
There is a good archive here (and you can switch the language to English): Bildarchiv Waggonbau Görlitz ....alas no KWStE.

Thanks again for this link Dave - there's a huge amount of material there, really fascinating and freely available to download in decent resolution too.
It's not just photos of complete vehicles (and not just railway vehicles either) but also photos of bogies, chassis, partly constructed wooden bodies, carraige interiors, vehicle plans and diagrams, wagon works, offices, personnel (including some superb moustaches!) and factories - an amazing resource!
Here's a crop from an AKE Co van photo - can anyone please tell me what the significance is of the small white(-ish) semi-circular marking with a '15' on it, high up on the right-hand side and also on the vehicle end?

Wagon - Altona-Kaltenkirchener Eisenbahn-Gesellschaft (AKE) AG GML Schraegansi 8856 1906 Crop1.jpg

I know this is a closed van but similar markings are also on some wagons, I've just used this example as it shows the marking in question more clearly. I realise these markings may be from a later era (this photo's from 1906) but I wondered whether they might be relevant to the wagons I'm finishing off and I think I might be replicate something similar...
 
Last edited:

Chas Levin

Western Thunderer
Nice picture and great source of information!
The "15" designates the payload in metric tons.

Btw., the chains on the roof are part of the Herberlein Brake system
Thanks Michael: do you know when that metric payload marking started to be used and if it was used during the Länderbahnen era, might the KWStE have used?

Interesting detail about the Herberlein braking system, just reading about it: I hadn't guessed that's what the rig was - I assumed it was to do with loading into the van. Also very interesting to learn that this system's still in operation on some narrow guage German railways today!

The whole picture's on the site, though I've applied some contrast and other correction via an old copy of Photoshop, as many of the photos are quite low contrast and/or faded...
 
Last edited:

Chas Levin

Western Thunderer
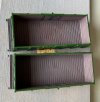
With reference to discussion further up this thread about what colour the insides of late nineteenth and early twentieth century German open wagons were painted, here's another crop from this admirable museum's archive, showing a wagon of the NWE with its doors open and assuming the outside of the wagon is the typical dark green of the time, I'd suggest that the inside colour is some sort of light brown, sand or natural wood, though it might of course be another lighter colour. Definitely much lighter and definitely a different colour to the outside, at any rate when freshly painted:

Wagon - open Nordhausen-Wernigeroder Eisenbahn-Gesellschaft (NWE) 1907 Crop2.jpg
 
Top