Hayfields 7mm 3D Printed Turnouts

Hayfield1

Western Thunderer
I thought you had a 3D printer!!!!!!!!

I do but I rely on others doing the CAD.. Downloading a 3D Templot file is child's play. However CAD design is another world, far beyond my pay grads

Now if someone else has the skills something about 2.5" tall and 3"/4" wide to hold shorter tools (Jewelers screw drivers) would be useful

I might even buy a third to hold my needle and 6" files
 

Hayfield1

Western Thunderer
397.jpeg

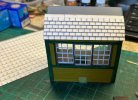
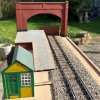
As well as putting removable end stops I have started to prepare for adding some ground work opposite the platform. The idea being to show 3D printed track in a scenic setting on half of the board, in the hope fold can not only see it running but also how it blends into the scenery

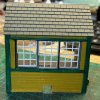
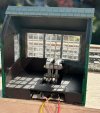
399.jpeg The view through the lever frame cabin

400.jpeg

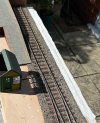
The weathering is starting on the scenic section

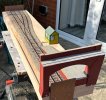
401.jpeg This is the initial stage of adding a bit of extra scenery. Firstly a layer of DAS on top of wet PVA. Next up will be a covering of plaster bandage (hoping it will prevent cracking. Then the top layer of DAS will be added

Ages since I built any scenery and enjoying something other than track and stock building
 

simond

Western Thunderer
John,

I cannot understand anyone using plaster bandage. It’s messy, expensive, heavy and fragile.

I’d suggest ripped green paper towels (or newspaper) and diluted PVA (possibly with added brown acrylic paint or powder paint), over woven strips of thin greyboard. Greyboard is what Cornflake packets are made from.

Cheap, robust, lightweight, and easy to change.

you might give it a try?

best
Simon
 

Hayfield1

Western Thunderer
Simon

Thank you for your advice and concern, I have obviously not fully explained that it will be a single layer between 2 layers of DAS.

I am using it to reinforce the DAS, the idea is the mesh/fibers in the towel reinforces the DAS from cracking during transit. No need for any framework as the height is only a few mm. My thought process is that as the baseboard is made from lightweight 5mm ply a length of 2' unsupported clay would crack when moved due to lightweight construction

As for cost, its NIL. The plaster bandage came in a job lot which ended up not costing much and as the bandage was a small part of the lot its basically a freebie, especially as it will be only a few inches of the roll.

I could have used one of those car repair metal meshes (which also came in a lot) but I will use it for something more substantial. Anyway its also a test bed for scenic ideas

Thanks again for your sensible advice which I would usually follow

John
 

Rob R

Western Thunderer
Manilla envelopes (from the taxman!) work well as a newspaper substitute, a little stronger and the right colour.
 

James

Western Thunderer
I suspect you’re in a minority of one if you’re finding ballasting interesting - it seems like everybody’s worst nightmare (though it may be a close second to wiring - which I personally enjoy)!
I find ballasting quite relaxing! Test Match Special in the background and I'm well away!

Wiring is certainly not my thing!
 

Hayfield1

Western Thunderer
407.jpeg My scenic work is way behind the times so I am just trying a few bits out.

I now must concentrate on the Scale 7 meet on the 26th of this month, so the printer is working again, its surprising at my age how quickly I forget processes. Anyway after a couple of errors/false starts (mostly of my own making, I am cooking on gas again, then its a few short weeks to the GOGA Kempton Park show, a much bigger event

I must start making my list of things to take again, this time the kitchen sink will be left behind as will a lot of duplications, also I must get back into Terrys plug track kit. Which is essential to take with me

But I will do a bit more tinkering with the display plank as time allows

John
 

Hayfield1

Western Thunderer
I have got back to 3D printing, mainly to be ready for the Albury Scale 7 meet, couple of Scale 7 B6 bases printed408.jpeg

I had been having small issues with adhesion to the build plate, mainly my fault as the heat box was both too far away and at a too severe angle. In solving one issue a second one occurs. Well printing 7mm chairs to the build plate is a good test

409.jpeg

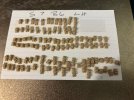
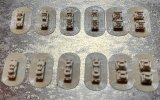
A completed set (with a couple of spares) for a Scale 7 left hand B6. The standard chairs are fine for all gauges as are the PL1-4 switch chairs, but the common crossing and check rail chairs are too fine for other gauges

Anyway a very simple solution to an irritating issue quickly resolved the issues

I have tried to print plug chairs directly on the build plate was only partially successful, so back to the time honored way of printing them both on supports and a base
 

martin_wynne

Western Thunderer
I have tried to print plug chairs directly on the build plate was only partially successful, so back to the time honored way of printing them both on supports and a base
@Hayfield1

Hi John,

I have posted some instructions for doing that at:

https://85a.uk/templot/club/index.php?posts/17463

index.php


cheers,

Martin.
 

Hayfield1

Western Thunderer
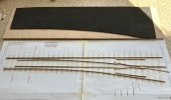
I have finally got round to finishing "Terrys Preproduction" 7mm 32mm gauge plug track kit. Firstly can I say this was Terrys first entry into 7mm kits and was the basis and learning curve for the production versions, Firstly its has a 6mm ply base, production kits use 3mm ply

410.jpeg

Terry has revised both the check rail chairs and here the switch PL3 & 4 chairs making them in halves to ease the build method. You can see the two PL half chairs on the straight switch rail, saving a lot of effort threading 2 rails in to two double chairs
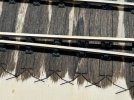
411.jpeg

The switch rail partly pushed into place

412.jpeg

Like wise the check rails have their half check chairs threaded on
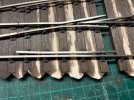
413.jpeg

And easily pushed home, for me a much easier method than using loose jaws
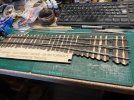
414.jpeg

The completed turnout waiting for some electrical bonding wires, then I have to find some board to mount it
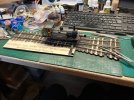
415.jpeg

A very quick test and as you would expect the loco ran smoothly without any fettling
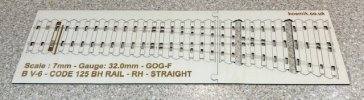
416.jpeg

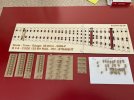
This is the production version made from 3mm thick fret which I am about to try using some FDM chairs (once I have printed them).

A first class kit at an affordable price available in 4mm scale as well as 7mm, now also in S scale. £25 for a 4mm kit £35 for 7mm, rail is not included


John
 

Hayfield1

Western Thunderer
417.jpeg

After belated finished the pre-production Kosmik B6 kit, some weeks ago Terry sent me the production version of the laser cut turnout timbers with the request to try the FDM chairs I printed, well yesterday I printed off some plug track chairs. The one benefit of FDM over resin is FDM prints are more flexible than resin printed chairs

418.jpeg

I tried to print the plug chairs directly on the printer build plate, it works for non-plug chairs, but the plugs have bases that do not adhere very strongly, so I reverted to print them on supports attached to a raft, works every time

I now need to form the rails, not that difficult, but its an easier build if all the rails are ready to use together

John
 

Hayfield1

Western Thunderer

Hayfield1

Western Thunderer
421.jpeg

Before I got side tracked in finding how to attach brims to the chair plugs, I cut and formed the rails for use on the production version of Kosmik's revised 3mm turnout ply frets. I am feeling lazy so printing a set of plug chairs without supports. So the second build will start either a bit later or tomorrow
 
Top