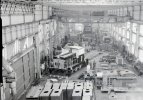
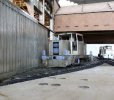
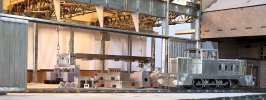
Hunslet Works in 7mm

Andy Ross

Western Thunderer
Hunslet Works Update.

Apologies for the lack of posts recently. There has been some activity but at a reduced rate due to ongoing issues recovering from Shingles.

I took the test track board to Narrow Gauge North at the beginning of the month and this was well received.

We are now on the last push to get the complete layout ready for York which is less than a week away.

All the wiring is (I believe) complete and there will be a final test on Tuesday.

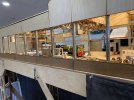
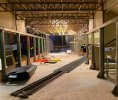
One of the main jobs still to do was to get some sort of lighting into the Boiler shop roof.

This also means I had to sort the removable section by cutting the longitudinal beams and finding a way to secure it in place.
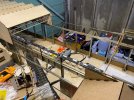
IMG_2246.jpeg.6c2897de1128191a97841853c18e0580.jpg

It's been a long time since I had this much access into the main shop.

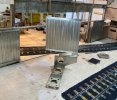
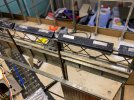
The roof lips under an angle on the wall side, and the solution on the other side is magnets.
IMG_2248.jpeg.986dcdf110bc881be648b0e2689fce4c.jpg

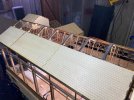
The magnets are mounted in some special sections I made on the filament printer.

In the bottom edge of the roof panel is the opposite magnets but these are behind a 2mm layer of plywood to stop them locking too tightly together.

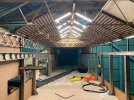
The LED light strips are mounted on another 3d Printed section that positions them behind the top of the roof truss.
IMG_2256.jpeg.6a920b05edc042f1c7997388e3ba402d.jpg

IMG_2254.jpeg.ac360cc2631adbd73fb826617c1d348c.jpg

From the viewing end these should not be too noticeable.
IMG_2255.jpeg.c314864ee210513ef73a51fc0e461d83.jpg

The top section will be glazed.

You will also notice the roof panels are all done with all the layers of ply for the inner structure. These take hours to cut.

I have also been fitting chips into a couple of locos and I am still on with getting the MOD loco working but more on that later.

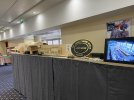
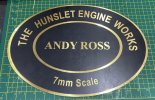
We also realised we did not have any sort of name plate for the layout.

I mention this to Jill and when I got home form work on Friday she had come up with a design based on the Hunslet works plates. I cut some ply to mount it on and Jill used the Cricut to do the rest.
IMG_2245.jpeg.05e78cdcb902aa69e755109c8555c9ca.jpg

If you come to York over Easter please say hello. We will be on the first floor mezzanine with the demonstrators as we are still very much a work in progress.

Hope to see you there.


Andy
 

Andy Ross

Western Thunderer
Hunslet - last push for York


So apart from crating up the main board and repacking all the loco parts etc. for an operating layout rather than a demonstration stand, we are all ready for York at the weekend.

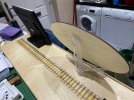
As seen in the previous post Jill.had made a name plate for the layout but were to put it. The simple solution was a plate stand and for it to sit on the fiddle yard.

IMG_2257.jpeg.efd3e300b02b673dff30d4f2484b25df.jpg

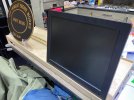
I also want to continue running the slide show - so were to put the screen?

Again this can go on the fiddle yard, but the original support leg fowled the track - so this was shortened and I printed a support on the filament printer.

IMG_2258.jpeg.ce7f810221da1f971b542875ce98e2db.jpg

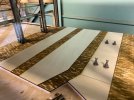
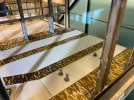
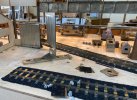
The only other thing I wanted to do was mock up how the floor is going to work with the wood block and concrete floor.

I had done the drawing for the parts last week. I had also engraved a sheet of 2mm ply with the block work. I then cut the parts for the walkways and under the benches from this sheet. To get to the 5mm track level there is 3mm foam board under the 2mm ply. At the moment this is all held in place with double sided tape

IMG_2261.jpeg.b83f7062c4990ec4781446b394395926.jpg

IMG_2260.jpeg.17db146aca314f91460b6f646b479f1b.jpg

This has come out far better than I expected. Obviously once it is in place for good it will all be weathered down. It will now be interesting to see how this will look with all the kit in the shop.

As I have said before if you come to York, please say hello and if you have any questions please do not hesitate to ask.

Andy
 

oldravendale

Western Thunderer
As I have said before if you come to York, please say hello and if you have any questions please do not hesitate to ask.

Andy
Hi Andy.

I'll see you there - providing I can park the car. Last year was a nightmare, as was getting through the crowds with my pre-purchased ticket.

Brian
 

Andy Ross

Western Thunderer
The Layout went down well at York with some positive comments and a lot of general interest.

When I brought the layout back to Leeds, instead of taking it home, it has gone to the Leeds MRS clubrooms. This is for two reasons, I need to take some photos for a magazine article and on the 18th May it is the open day at the club.

I have spent the last two weekends setting it all up and doing a couple of repairs.

IMG_2355.jpeg.c7c9ee36aee19d23d53b4e4b25f337f0.jpg

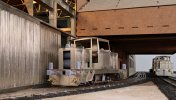
During the York Show we found the crane at the boiler shop end started rocking diagonally as we got near the end of the track and stalling.

On closer examination in the club I noticed that one of the special support columns must have come out a bit high - this was always a risk with a lot of etched layers. It would be impossible to reduce this so I have broken the joint on the opposite standard column and added two pieces of packing and soldered it all back up. The crane now runs to the end without issues.


IMG_2347.jpeg.e8e2ebce53d0944ac858404f6b6bef02.jpg

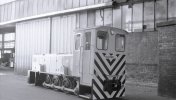
Something else I managed to get done just before York was the cab for the Scunthorpe Bo Bo.

IMG_2352.jpeg.0c7ef28fa644cd0b208ee93f12d98c74.jpg

I was really pleased with this as it went together first time with the roof meeting the cab sides with no gaps.

IMG_2354.jpeg.65f412c2b122651e549e954018343ef0.jpg

When you drop it on the loco frames it shows how impressive this loco will be in O Gauge.

I also put the etched Snowdon cab together which also went together but it was far more fiddly.IMG_2360.jpeg.fd8fea1e4374d7209916b6a1e75e1737.jpg

Since York I have also put the radiator casing together.

IMG_2361.jpeg.d7ce42593baa5f9e7947fe3f70024a0b.jpg

This is also more complex than it looks.

IMG_2359.jpeg.14d8988395b83c1fb3a8ae0e18683646.jpg

I am again pleased with how it all fits into the frame just like the real one.

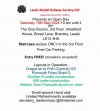
If you didn't get to York and you would like to see the layout, it will be fully operational on the open day on Saturday 18th May. See Details below.

16at23_38_05.jpeg.ed4f44a3740811357351a60da2548911.jpg
Andy
 

Andy Ross

Western Thunderer
I have finally got around to taking some photos at the clubrooms with my new Canon R50 Camara.

This has the ability to take several photos at different focal points using the screen on my iPad to position the focus. I have then put these through what they call stacking software, this merges all the photos together so it is all in focus from front to back.

I am still messing with this but I think I am getting there. See one of the set ups I have done which is similar to a real photo also attached.

1(BR8S4)copy.jpeg.410184c0ec5b76dd24b62944aa6d7767.jpg

The photos below is from around 1972 with the locos for Sri Lanka.

SriLankalocos.jpg.90c436c70c8fc25d9eb9d3087779b655.jpg

We are getting there but I still need to make so much more clutter.

As detailed in the previous quote if you want to see the layout it will still be set up in the clubrooms for the Leeds Model Railway Society CIO open day on the 18th May.

Andy
 

Scale7JB

Western Thunderer
I have finally got around to taking some photos at the clubrooms with my new Canon R50 Camara.

This has the ability to take several photos at different focal points using the screen on my iPad to position the focus. I have then put these through what they call stacking software, this merges all the photos together so it is all in focus from front to back.

I am still messing with this but I think I am getting there. See one of the set ups I have done which is similar to a real photo also attached.

View attachment 213879

The photos below is from around 1972 with the locos for Sri Lanka.

View attachment 213880

We are getting there but I still need to make so much more clutter.

As detailed in the previous quote if you want to see the layout it will still be set up in the clubrooms for the Leeds Model Railway Society CIO open day on the 18th May.

Andy
Painfully impressive!

JB.
 

Andy Ross

Western Thunderer
Over the last few weekends, I have been taking photos of the layout set up in the clubrooms. This has been going OK and I have been learning a lot about photo stacking.

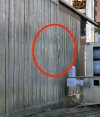
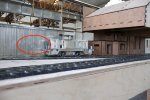
However, I have come across a problem taking pictures just outside the workshop doors. The door panels are built up from layers of etches bonded together with double sided adhesive sheet. On one of the doors, I got the outer layer slightly out of line. I thought at the time I had managed to reposition it, but one of the panels keeps lifting and the rest are not as flat as they should be. No one has made any comments about this but I had noticed, so I had added the outer panel etches on the my last order with PPD with the plan to replace it when I removed the doors for painting.

The problem is that it was very noticeable in the pictures as can be seen in the marked up photos.

-22-10(BR8S4).jpg.a5c62424513a5f102eb62ef76fe176ea.jpg

-10(BR8S4)(1).jpg.5417d936c113cf10e6ee01cdf56a5a4f.jpg

-26-54(BR8S4).jpg.92e99939f1d17ee7414192ef6623f1c0.jpg

So, Friday afternoon I called into the clubrooms and took the plunge and removed the door. To remove the door it has to come out through the bottom of the baseboard and this is not straight forward due to the cross bracing and took a little while to work out how I got it in.

IMG_2435.jpeg.3d8729d8a43432279d2ff5ac499c501c.jpg

Once at home it took quite a while to remove the old panel and all the adhesive left behind. Which is good as it means the panels should not delaminate in time.

The new panel was fitted very carefully, and I managed to get it in line first time.

IMG_2436.jpeg.73e28832d88d85028a858cd5e06be75f.jpg

Saturday I refitted it and it looks so much better. It also still works but there is a small amount of tweaking required when I am next at the club.

k4reviseddoor.jpg.8ee021bd1febb077ba30e6106d5c547c.jpg

As you can see the pictures are now far better.

I still have a few more to take, but that will have to wait until after the open day on the 18th May. See previous posts for details of the open day.

Andy
 

Andy Ross

Western Thunderer
So just back from a week away.


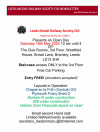
After spending a few weekends taking photos, the layout is still up in the clubrooms for the Open Day this Saturday.


Along with my layout the club OO Layout, O gauge layout will be in operation. See details below. 23-13-16(CS4).jpg.11be8c5189c4cccde1c24342a925fe24.jpg


-16at23_38_05.png.7bc78e5152dbe1e3fff140c1f2d174d4.png

I hope to see your there.


Andy
 
Last edited:

Andy Ross

Western Thunderer
The open day went well with several visitors. I also had a visiting DCC Sound fitted Austerity on the layout. Built by one of our club members. The Leeds club has several O Gauge modellers.

IMG_2517.jpeg.784ab4e7e7a75b93687f5b36e1fd8ca4.jpeg
IMG_2523.jpeg.a5492c31115a3448deaa9a6552da423d.jpeg


IMG_2514.jpeg.445bf66f2355bfe264e53f2a78039ed1.jpeg


I have also finished taking photos for a magazine article so in the next week or so the layout will be packed up and taken home.

We have now come to the point of no return, the next job is to paint the steelwork. With Guildex at the beginning of September I need to 100% confident that I can strip back the layout, paint the steelwork and then refit all the walls etc. during the summer.

One of the issues issue is that the steel work is three different colours as can be seen in the attached photo.


TWMetro4083F.jpg.7fcaa023030cff5fdb6116a4bc056f12.jpg


So I have made a small test section of the structure to carry out a painting preparation and paint trials.

IMG_2524.jpeg.a5ef320a1012c61a95723d66cc90e42e.jpeg


I have already got a small grit blaster and airbrushes and I have ordered some acrylic paint from Army Painters range.

I also need to work out the best order for masking the different colour.

Wish me luck.


Andy
 
Top