jonte

Western Thunderer
Occupational Hazards
View attachment 124410
Another blast from the past.
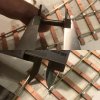
The Wharf is getting some attention. That special relationship... The formation is being solidified - not so much set in stone, as concrete. This is the third siding being relaid; the last solution was deemed too hazardous to the shunters. This gives a bit more clearance opposite more distant nose of the crossover. The engineers were very keen to use the existing 3-way, which - while saving space - does have a quite slow divergence. Apparently, it was built with the intention of running 2-10-0s through it, but Mister Holden’s Beast would never have shown its legs on the Wharf.

Cheers

Jan

Hello @jonte
I have one I can send you (I've managed to acquire 3 in my extended dalliance with all things P4-ish..). No cost.

Cheers

Jan

I’ve just realised from the close-up that the trackwork is inlaid - and complex. I’m off for a lie down.

Commendable stuff, Jan.

Jonte
 

Lyndhurstman

Western Thunderer
I’ve just realised from the close-up that the trackwork is inlaid - and complex. I’m off for a lie down.

Commendable stuff, Jan.

Jonte
Hello @jonte

Thank you. Commendable to a psychiatric hospital, probably.

There was a very wonderful little called ‘Making Tracks’ about the Redbridge Permanent Way Works. A lovely book full of manufactured sinuosity. And one picture in particular that set me off on this weird journey.

All the trackwork on Watkins Wharf is fully check-railed. Including the crossover seen above, the afore-mentioned 3-way, and an outside single slip. So twice as much Code 75 as a normal construction. And all those noses... When I started it back around 1991, I couldn’t find any suitably-dimensioned NS strip to make the check rail, so went with this option. I enjoy making trackwork, and am particularly chuffed with the outside single slip, which I drew up “freehand” and constructed on an MDF shelf.

I’m just working up the plan for a short ‘industrial’ point that will turnout on to the Wharf edge; it comes out (by fag packet calculator) as a tad under 2.5 chains (about the same as Gotham Curve on the Cromford & High Peak). This point - and it’s straight lengths will be single rail only - is modelled as a remnant of the prewar use of the Wharf, when it took coal from the narrow boats bringing coal from the north to feed the stations of the
Gas Light & Coke Company in Stepney, Limehouse, and other local districts.

Cheers

Jan
 

jonte

Western Thunderer
Hello @jonte

Thank you. Commendable to a psychiatric hospital, probably.

There was a very wonderful little called ‘Making Tracks’ about the Redbridge Permanent Way Works. A lovely book full of manufactured sinuosity. And one picture in particular that set me off on this weird journey.

All the trackwork on Watkins Wharf is fully check-railed. Including the crossover seen above, the afore-mentioned 3-way, and an outside single slip. So twice as much Code 75 as a normal construction. And all those noses... When I started it back around 1991, I couldn’t find any suitably-dimensioned NS strip to make the check rail, so went with this option. I enjoy making trackwork, and am particularly chuffed with the outside single slip, which I drew up “freehand” and constructed on an MDF shelf.

I’m just working up the plan for a short ‘industrial’ point that will turnout on to the Wharf edge; it comes out (by fag packet calculator) as a tad under 2.5 chains (about the same as Gotham Curve on the Cromford & High Peak). This point - and it’s straight lengths will be single rail only - is modelled as a remnant of the prewar use of the Wharf, when it took coal from the narrow boats bringing coal from the north to feed the stations of the
Gas Light & Coke Company in Stepney, Limehouse, and other local districts.

Cheers

Jan

It’s such a shame that Watkins’ seems to have slipped under the radar, Jan.

I’m sure many others would like to see more of it.

Your research has paid dividends in producing something quite unique to say nothing of it’s longevity (can there be many other projects out there of this vintage?) which showcases such ‘lost’ skills as drawing point work ‘free hand’ ?

Perhaps this employs the use of some flexible ‘beading’ to draw an arc, a bit like boat builders scaling up a plan from a drawing? Forgive my ignorance here; if it involves skill or forethought, I’m ignorant!

Thanks for the links btw. Some interesting sources there.

Many thanks for posting.

Jonte
 

Lyndhurstman

Western Thunderer
It’s such a shame that Watkins’ seems to have slipped under the radar, Jan.

I’m sure many others would like to see more of it.

Your research has paid dividends in producing something quite unique to say nothing of it’s longevity (can there be many other projects out there of this vintage?) which showcases such ‘lost’ skills as drawing point work ‘free hand’ ?

Perhaps this employs the use of some flexible ‘beading’ to draw an arc, a bit like boat builders scaling up a plan from a drawing? Forgive my ignorance here; if it involves skill or forethought, I’m ignorant!

Thanks for the links btw. Some interesting sources there.

Many thanks for posting.

Jonte

Hello Jonte
You’re very kind. I’m not sure the decadal quasi-planktonal journeying from the dark depths to the enlightened surface of plain sight would be of benefit to the attendant throng, here. But I potter along, as and when the gravitational pull of external galactic forces permits.

Yes, it’s certainly been around for a while. The only other thing of significance that has attained a soupçon of corporeality is the viaduct (lots of Wills retaining arches and 60 thou supports) and the girdered overbridge (again, drawn out and built upon a board). Lots of Plastruct I-section RSJ’s there.

As to the outside slip; I confirm your presumption. The baseline geometry was the angle of the crossing diamond. Once that was down, it was a simple matter of extending the radius back until the arc touched upon both extremities. Then that radius was reduced by ~19 mm to provide the second stock rail.

I’m still not sure why I decided to waste time and effort in representing every single sleeper on the layout; I think I might initially have been considering an ash-based surface, rather than the concrete that is envisaged now.

Thanks again

Cheers

Jan
 

jonte

Western Thunderer
Hello Jonte
You’re very kind. I’m not sure the decadal quasi-planktonal journeying from the dark depths to the enlightened surface of plain sight would be of benefit to the attendant throng, here. But I potter along, as and when the gravitational pull of external galactic forces permits.

Yes, it’s certainly been around for a while. The only other thing of significance that has attained a soupçon of corporeality is the viaduct (lots of Wills retaining arches and 60 thou supports) and the girdered overbridge (again, drawn out and built upon a board). Lots of Plastruct I-section RSJ’s there.

As to the outside slip; I confirm your presumption. The baseline geometry was the angle of the crossing diamond. Once that was down, it was a simple matter of extending the radius back until the arc touched upon both extremities. Then that radius was reduced by ~19 mm to provide the second stock rail.

I’m still not sure why I decided to waste time and effort in representing every single sleeper on the layout; I think I might initially have been considering an ash-based surface, rather than the concrete that is envisaged now.

Thanks again

Cheers

Jan

:))
 

Lyndhurstman

Western Thunderer
Freehand Fettling
A little sequence covering a few more hours on Watkins Wharf’s dockside access. Stock rails and crossing nose in place on the quayside point. The point is about 1:2.8; so anything coupled will be banned. Work for the 48DS and a wagon or two. The diverging curve was mapped (using a length of Code 75) to the existing geometry between the opposing point and the quayside track at the toe end of the point.

The cardboard curve was taken from the alignment of a metre length of Code 75. Then transferred to a square of melamine.
C14FFD09-E2B7-428D-A532-4B44F60ECD48.jpeg

The nose timbers were placed on double sided sticky tape. Less sticky than we would have liked; most o the glue was powder. It has been a while since we did anything like this, obviously.

35D8E412-5FC8-4276-923D-7E7278C6C673.jpeg

The straight stick rail was laid in and soldered. Placement of every other rail will work off this datum.

3C38F457-C4DA-4DF7-82B5-89490076634A.jpeg

The nose dimensions were marked out on the board:
B5B13BD1-D485-44AF-A6EF-613F2AAD910C.jpeg

...and the straight rail nose filed to suit:
41B14325-CE29-476C-BA86-182A79A10032.jpeg
... using the top of the vice, and some downward pressure. Nothing scientific here.. just lots of fettle, fit, finesse....
581F2D53-4AD8-429A-91E4-50ACDF001BC1.jpeg

Louping the loupe for the fit of second nose rail...

7F2BF0EC-701C-4A11-AABA-370A0BCA1B85.jpeg

To mount the curved stock rail, gauge width dimensions were taken off the Scalefour Society gauge and transferred to vernier callipers, as the gauges couldn’t be used at the nose...

4A0C5777-5505-4F69-B9B4-DFA7BEB690B6.jpeg

The curve was loosely tacked at the divergent end, and curved to fit, with a couple of jigs at the toe end, where the radius becomes infinite...
82A4FFF9-14DD-4DA9-AEF2-42D5364D7854.jpeg

And this is how the session ended. It’s supposed to look rough and ready, and will be buried under tarmac, so we’re not really bothered about the tatty sleeper alignment..

A6E17FE4-12DD-4E51-921C-E75384AFE926.jpeg

Wing rails, and check rails next.

Fun was had. Which is good.

Cheers

Jan
 

Attachments

  • 30F2564B-FB12-4A89-88B9-CE85E4F04E61.jpeg
    30F2564B-FB12-4A89-88B9-CE85E4F04E61.jpeg
    58.6 KB · Views: 0
Last edited:

jonte

Western Thunderer
Freehand Fettling
A little sequence covering a few more hours on Watkins Wharf’s dockside access. Stock rails and crossing nose in place on the quayside point. The point is about 1:2.8; so anything coupled will be banned. Work for the 48DS and a wagon or two. The diverging curve was mapped (using a length of Code 75) to the existing geometry between the opposing point and the quayside track at the toe end of the point.

The cardboard curve was taken from the alignment of a metre length of Code 75. Then transferred to a square of melamine.
View attachment 125214

The nose timbers were placed on double sided sticky tape. Less sticky than we would have liked; most o the glue was powder. It has been a while since we did anything like this, obviously.

View attachment 125216

The straight stick rail was laid in and soldered. Placement of every other rail will work off this datum.

View attachment 125217

The nose dimensions were marked out on the board:
View attachment 125218

...and the straight rail nose filed to suit:
View attachment 125219
... using the top of the vice, and some downward pressure. Nothing scientific here.. just lots of fettle, fit, finesse....
View attachment 125220

Louping the loupe for the fit of second nose rail...

View attachment 125221

To mount the curved stock rail, gauge width dimensions were taken off the Scalefour Society gauge and transferred to vernier callipers, as the gauges couldn’t be used at the nose...

View attachment 125223

The curve was loosely tacked at the divergent end, and curved to fit, with a couple of jigs at the toe end, where the radius becomes infinite...
View attachment 125230

And this is how the session ended. It’s supposed to look rough and ready, and will be buried under tarmac, so we’re not really bothered about the tatty sleeper alignment..

View attachment 125232

Wing rails, and check rails next.

Fun was had. Which is good.

Cheers

Jan

The work of a true craftsman, Jan, and not a silicon related tool in sight (not a dig at modelling in the modern age, but reassuringly ‘basic’ for those of us without the funds or technical know how required to operate).

I think the battle-weary square lying forlornly in that ninth shot, sums it up quite nicely.

I admire the precision of your ‘nose’, having attempted and failed to achieve such. The addition of solder ‘glue’ is a blessing to those of us looking to hide its blemishes; it would be a shame here to mask such fine form.

Many thanks for the blow-by-blow account replete with in-focus photography that makes easy enough for even me to follow ;) And follow I shall (although I’ve no idea where the ‘follow’ button lies :(). Wouldn’t like to miss anything.

Most of all, however, I’m most pleased to read that you’re enjoying it :thumbs:

Keep on.....

Jonte
 

Lyndhurstman

Western Thunderer
The work of a true craftsman, Jan, and not a silicon related tool in sight (not a dig at modelling in the modern age, but reassuringly ‘basic’ for those of us without the funds or technical know how required to operate).

I think the battle-weary square lying forlornly in that ninth shot, sums it up quite nicely.

I admire the precision of your ‘nose’, having attempted and failed to achieve such. The addition of solder ‘glue’ is a blessing to those of us looking to hide its blemishes; it would be a shame here to mask such fine form.

Many thanks for the blow-by-blow account replete with in-focus photography that makes easy enough for even me to follow ;) And follow I shall (although I’ve no idea where the ‘follow’ button lies :(). Wouldn’t like to miss anything.

Most of all, however, I’m most pleased to read that you’re enjoying it :thumbs:

Keep on.....

Jonte

Thanks, Jonte.

I do enjoy trackbuilding. There used to be SMP plastic-based kits in 00, which was how I started. Then a brief flurry with EM (I actually built a dual gauge EM/009 point for a GMRC competition.. ) before diving into P4. I used to have a wonderful small guillotine (an apprentice piece I rescued from a skip at work) but I lost it in a house move. So the sleepers are cut with a razor saw in a mitre box.

I may ease the curve a bit, if I can; that’s another boon with copperclad - the ability to adjust. I couldn’t have done the diamond crossing without it!

I like the neatness of that vee, Jan. Mine are always a bit rough and ready...

Adam

Thanks, Adam. This one is so sharp, there’s not much to make a mistake on! I use the loupe a lot (more and more these days :() to make sure the nose is OK. And the wing rails, too..

Cheers

Jan
 

Lyndhurstman

Western Thunderer
Winging It
Ninety minutes of knuckle noodling this evening.

First off, the straight road.
9627D9D7-B07E-45E2-9223-8D53A6169FF6.jpeg
Yummy in the gauge department. The two gauge-cum-clamps are Brook Smiths from the Scalefour Society Stores. They are akin to those elastic-powered cotton reel and matchstick tanks of yore...
D6DB27E2-06A3-4D74-A40E-7CB9DDAAB6D4.jpeg
Then it’s the other one. This is a bit more tricksy, as it’s curved. I didn’t bother with gauge widening - the EM Society do a nice tri-corner gauge that does it for you, but the Scalefour Society equivalent doesn’t fit Code 75. Again, the loupe is our saviour..
F545CD01-1210-49EC-AA49-9575B01B690E.jpeg

I occasionally get the relationship right from the get-go, but it’s no biggie if it takes a few shimmies with the soldering iron to get the two noses of the knuckle aligned, and the correct clearances in the individual crossing noses and check rails. The main thing is that wagons wander hither and thither without coming to grief - or being thrown in the Basin.

Finally, a few checks against a bright background:
D34F635C-9EAF-40C0-9374-9B2D57F04BC1.jpeg

2D8B30EC-9C4F-4C2B-A49E-C586C349C0FF.jpeg


Cheers

Jan
 

Attachments

  • 110C3E10-BEF0-4B96-A4AF-F0ACF830AAE8.jpeg
    110C3E10-BEF0-4B96-A4AF-F0ACF830AAE8.jpeg
    272 KB · Views: 1

jonte

Western Thunderer
Top stuff, Jan.

Especially impressed with the mirror image-d knuckley knees. For some reason (apart from my clumsy track making skills) I can never get them to line up, and if I do, I end up with the dreaded wheel-drop. Which is why I started to buy ready formed crossings from C&L, although I did miss the fettling and forming of my own parts.

Interesting to see the gauges too. It seems that each time I read a thread on the subject, there’s a gauge I haven’t seen before, many (sadly) saying ‘not available to non-members’ or ‘no longer available’ :(

May I ask what you used to gauge the gap between the wing and stock rails, Jan? I think I can just make it out in one of the shots.Liking the natty use of the magnifying glass btw. An arty shot indeed :thumbs:

Shall continue to enjoy.

Jonte
 

Lyndhurstman

Western Thunderer
Top stuff, Jan.

Especially impressed with the mirror image-d knuckley knees. For some reason (apart from my clumsy track making skills) I can never get them to line up, and if I do, I end up with the dreaded wheel-drop. Which is why I started to buy ready formed crossings from C&L, although I did miss the fettling and forming of my own parts.

Interesting to see the gauges too. It seems that each time I read a thread on the subject, there’s a gauge I haven’t seen before, many (sadly) saying ‘not available to non-members’ or ‘no longer available’ :(

May I ask what you used to gauge the gap between the wing and stock rails, Jan? I think I can just make it out in one of the shots.Liking the natty use of the magnifying glass btw. An arty shot indeed :thumbs:

Shall continue to enjoy.

Jonte

Hello, @jonte

Thank you. I’m glad you like it.
I fully understand - and can sympathise with -your issues with the knuckles. This is where the forgiveness of copperclad comes to the fore.

I make the straight road first. I generally make a suitable bend in a piece of rail I’ve cut deliberately a few mm too long at both ends. I then align the knuckle with the nose of the point (whilst maintaining crossing flangeway distance (0.68 mm*) using that gauge in the pictures) Only then do I trim the ends of the rail to fit, and then bend the far end slightly for the lead-in to the nose. I tack-solder it into position.

The second rail is done the same way; cut over length, and bent at the knuckle. Once this is done, I can then push the second rail against the first to align the knuckles, and while it’s in position, and having curved it approximately to the radius of the opposite stock rail) I mark its ends to the same lengths as the first one. This should give me as near a mirror image of the straight one as I can get. It’s then just a matter of soldering in place, with the crossing flangeway gauge holding it off the stock rail. Like I say, it’s not exactly exact sometimes, but it’s usually only a gnats dangly bits out.

*0.58 mm is the exact scale distance for the crossing flangeway. But 0.68 is recommended by the S4 Society.

If you need any gauges - or want any ordered - then let me know. I generally have two (or sometimes three) of most of them!

Cheers

Jan
 

jonte

Western Thunderer
Hello, @jonte

Thank you. I’m glad you like it.
I fully understand - and can sympathise with -your issues with the knuckles. This is where the forgiveness of copperclad comes to the fore.

I make the straight road first. I generally make a suitable bend in a piece of rail I’ve cut deliberately a few mm too long at both ends. I then align the knuckle with the nose of the point (whilst maintaining crossing flangeway distance (0.68 mm*) using that gauge in the pictures) Only then do I trim the ends of the rail to fit, and then bend the far end slightly for the lead-in to the nose. I tack-solder it into position.

The second rail is done the same way; cut over length, and bent at the knuckle. Once this is done, I can then push the second rail against the first to align the knuckles, and while it’s in position, and having curved it approximately to the radius of the opposite stock rail) I mark its ends to the same lengths as the first one. This should give me as near a mirror image of the straight one as I can get. It’s then just a matter of soldering in place, with the crossing flangeway gauge holding it off the stock rail. Like I say, it’s not exactly exact sometimes, but it’s usually only a gnats dangly bits out.

*0.58 mm is the exact scale distance for the crossing flangeway. But 0.68 is recommended by the S4 Society.

If you need any gauges - or want any ordered - then let me know. I generally have two (or sometimes three) of most of them!

Cheers

Jan

Many thanks, Jan, for your thorough explanation. That makes total sense.

It’s very kind of you to offer to help out with the gauges too.

Bestest

Jonte
 

Lyndhurstman

Western Thunderer
Blade Runner
A start has been made on the point blades. A relatively straightforward step, and one covered well in Mr Rice’s book on the subject (it’s good, but even I - as an avowed fan of his work - don’t think it’s worth the £40.00 someone AbeBooks is asking for it...).
1416770E-CEE9-4FA6-8884-BB8D8D857EA2.jpeg
The setup is very simple; the only difficulties being my eyesight, and the cat occupying the chair!

I mark the web of the blade along the distance I want to remove using a marker pen. This makes it easier to see how I’m progressing.
E867A6CA-2042-4DD9-AECE-2A0485C02B66.jpeg
... I must get work to buy me a phone with a better camera!

Then, it’s just a matter of file a bit, check the fit, file a bit, check the fit... I start off with a small (6”) file, progressing to needle and diamond files as I get closer to the final surface.
Early doors...
C834BBF2-8A79-487B-9FB9-1A53DD3BACFD.jpeg
(I marked both rails to make sure I was returning to the same spot every time). As I wanted this point to look more rudimentary, I’m using unjoggled stock rails.

Halfway There (Livin’ On A Prayer)
724F6BBB-FEB6-480A-B42C-EDDE9D30CB23.jpeg

The End is Nigh
81148888-A838-4942-A403-D8685A35BD80.jpeg
We’re almost at the full length of the stock rail side planing* here: down to the web on that side, with the inner side planing still to do. This image from Martin Wynne over there shows the two areas of attack:
https://www.rmweb.co.uk/community/index.php?/topic/81779-switch-blade-planing-and-vee-tapering-questions/&do=findComment&comment=132869
T
he final - and trickiest - bit is putting the angle on the front of the blade, while staying away from the foot of the rail. I have a flat needle file with a safety edge I use for this part.

There’s more on blade planing on Martin’s excellent site:
real track

Cheers

Jan
 

jonte

Western Thunderer
Blade Runner
A start has been made on the point blades. A relatively straightforward step, and one covered well in Mr Rice’s book on the subject (it’s good, but even I - as an avowed fan of his work - don’t think it’s worth the £40.00 someone AbeBooks is asking for it...).
View attachment 125648
The setup is very simple; the only difficulties being my eyesight, and the cat occupying the chair!

I mark the web of the blade along the distance I want to remove using a marker pen. This makes it easier to see how I’m progressing.
View attachment 125650
... I must get work to buy me a phone with a better camera!

Then, it’s just a matter of file a bit, check the fit, file a bit, check the fit... I start off with a small (6”) file, progressing to needle and diamond files as I get closer to the final surface.
Early doors...
View attachment 125651
(I marked both rails to make sure I was returning to the same spot every time). As I wanted this point to look more rudimentary, I’m using unjoggled stock rails.

Halfway There (Livin’ On A Prayer)
View attachment 125652

The End is Nigh
View attachment 125653
We’re almost at the full length of the stock rail side planing* here: down to the web on that side, with the inner side planing still to do. This image from Martin Wynne over there shows the two areas of attack:
https://www.rmweb.co.uk/community/index.php?/topic/81779-switch-blade-planing-and-vee-tapering-questions/&do=findComment&comment=132869
T
he final - and trickiest - bit is putting the angle on the front of the blade, while staying away from the foot of the rail. I have a flat needle file with a safety edge I use for this part.

There’s more on blade planing on Martin’s excellent site:
real track

Cheers

Jan

By Jovi this is good.

And you make it all look so simple, Jan, though I know only too well it’s No Bed of Roses.

Fascinating.

Jonte
 

Lyndhurstman

Western Thunderer
Bullet Points
A quick burst of photonic enlightenment covers the last knockings of the point.
C4B062EE-8BE6-41CF-9CDC-0637EAFE5AF8.jpeg
The curved road blade is filed in much the same way as the straight one, and then bent by gentle pressure of finger and thumb into some close approximation of the correct curvature. Care is taken to make sure a twist is not imparted onto the rail when doing this; it needs to be flat against the stock rail. If something does go wrong, it’s not too difficult to redress the issue with a pair of smooth jawed pliers and a loupe...
A50FA402-C6B5-41EA-9477-036FF90B9DFC.jpeg
It’s is held against the stock rail at the toe end by hair clips, bent slightly to enable visualisation of the fit, and - if necessary -. allow access with the iron. Gauges hold the other end in place - and the rail vertical. Tack solder at the crossing end, check, and solder up - not all the way down, obviously...
0E3C66E3-BD3C-4CCA-9A70-9479A0AAD33A.jpeg
After that, it’s the check rails. Located correctly vis-a-vis the nose using S4 Society Gauges (I had a moments confusion when I tried to make the EM version fit... ).
61AE26E3-D866-457C-85DF-B97FDC7863BA.jpeg
Which brings us to the end (well, nigh on - the tiebar arrangement has yet to be finalised, so we’re leaving that until we can source some PB wire of a suitable diameter).
B5A20D04-F36F-4067-869C-9D5514DEA02B.jpeg

So that’s that. Not rocket science, and I daresay not even the right way to do this, but - as ever - it’s been enjoyable. There’s a useful PDF from the EM Gauge Society that may help allay any fears for the uninitiated (not to mention inform without waffling..)
https://www.emgs.org/wp-content/uploads/MANUAL_1_2_0_3_pages_all.pdf

Cheers

Jan
 

jonte

Western Thunderer
Bravo!

This should be pinned as a valuable resource on the subject.

Your brevity of post is also a feature I wish I could adopt.

Thank you, Jan.

Jonte
 

Lyndhurstman

Western Thunderer
Bravo!

This should be pinned as a valuable resource on the subject.

Your brevity of post is also a feature I wish I could adopt.

Thank you, Jan.

Jonte

Hello Jonte
Thank you. And thank you for your continued interest and support. I was toying with the idea of buying a C&L point kit just for fun, but they’re £55! So that’s a no from me, then.

As to brevity of discourse; that’s because I’m doing this on my phone there’s days! I spend half the time trying to get the photos to upload the right way round (some of them flip through 90 degrees).

Thanks again

Cheers

Jan
 

AJC

Western Thunderer
That's sterling work, Jan, but re: those C&L kits - How much?! Presumably that includes fully formed vees and machined point blades (I'd want the stock rails joggled for me for that kind of money, too). I'm quite capable of making my own jigs and filing those parts so like you I'll pass, please and thank you.

For various reasons, I'm thinking about making an HO flatbottom double slip (the Italians love a double slip in sidings it appears - both friendly to the space starved modeller and a challenge so what's not to like?) which I reckon I can make for less than £20 - and that allows for buying enough copperclad to serve multiple purposes. The remaining points for Podimore will cost me about the same as a single C&L kit...

Adam
 

Lyndhurstman

Western Thunderer
That's sterling work, Jan, but re: those C&L kits - How much?! Presumably that includes fully formed vees and machined point blades (I'd want the stock rails joggled for me for that kind of money, too). I'm quite capable of making my own jigs and filing those parts so like you I'll pass, please and thank you.

For various reasons, I'm thinking about making an HO flatbottom double slip (the Italians love a double slip in sidings it appears - both friendly to the space starved modeller and a challenge so what's not to like?) which I reckon I can make for less than £20 - and that allows for buying enough copperclad to serve multiple purposes. The remaining points for Podimore will cost me about the same as a single C&L kit...

Adam
Hello Adam
Thank you. It was fun.
Yes; the C&L kits come with the vee and knuckle as a single unit, and - as you say - machined blades. Not sure if there's joggling involved... I guess you pays your money, you takes your choice.. I note that Marcway do the old SMP range now.

The slip sounds fun. They are great spacesavers. I've not done anything in flatbottom, myself. I'll look forward to the build... :)

Thanks again

Cheers

Jan
 
Top