Kings Lynn Stabling Point, 1980's

Colin M

Western Thunderer
A time delayed post... Here's the output of my efforts over the Easter weekend...

A rail system for safe transit of boards into my loft. The whole lot splits using hinges with removable pins and goes up into the loft too for storage. Each baseboard has an eyebolt sunk into the endplate for attaching a cable and the joints were designed to be strong enough to take all the weight on this single point. I'm still pondering a pulley arrangement.

Fingers crossed, it should be a one-man job, even after track and buildings etc. are added and everything is much more fragile.

254e.jpg

255e.jpg

256e.jpg

257e.jpg
 

Attachments

  • 253e.jpg
    253e.jpg
    140.7 KB · Views: 2

mickoo

Western Thunderer
A time delayed post... Here's the output of my efforts over the Easter weekend...

A rail system for safe transit of boards into my loft. The whole lot splits using hinges with removable pins and goes up into the loft too for storage. Each baseboard has an eyebolt sunk into the endplate for attaching a cable and the joints were designed to be strong enough to take all the weight on this single point. I'm still pondering a pulley arrangement.

Fingers crossed, it should be a one-man job, even after track and buildings etc. are added and everything is much more fragile.

View attachment 19960

View attachment 19963

View attachment 19961

View attachment 19962

Ingenious, I like that, might have to blatantly copy that idea LOL.

Anyway, real reason for posting here is this little gem I found tonight.

http://railphotoprints.zenfolio.com/p916326077/h6689a709#h6689a709

Enjoy
 

Colin M

Western Thunderer
Ingenious, I like that, might have to blatantly copy that idea LOL.

Anyway, real reason for posting here is this little gem I found tonight.

http://railphotoprints.zenfolio.com/p916326077/h6689a709#h6689a709

Enjoy

Feel free; copy away. Although some improvements could be incorporated... If I did it again I would take a bit more time to offset the gauge ties (sleepers?) rearwards behind the ladder rather than in front of it. (They were measured to sit below the loft ladder rungs so you don't step on them, but it would be better to have them totally out of the way at the back. And I'd include a method to separate the rails from the ties so it packs down less bulky for storage.

03175 on shed... A gem indeed! That is really helpful; best detail I've seen for the pit construction and metal work for the windows. Interior shots from the eighties are seemingly very rare. Thanks!

Quick layout progress update - The carpentry phase is over half-way now. I'm getting faster now the design is well established. Four main boards and 4 sets of legs are completed. Two main boards, 2 narrow scenic only boards , 3 sets of legs and 3 transit trolleys left to build. I'm itching to get on with some proper modelling!

Colin
 

Colin M

Western Thunderer
Wow, how quick the time flies...! It's been a year since I said anything about this project.... :eek:

Considering a whole year has passed, not really much to show, but here goes...

I have been slowly getting on with the carpentry. (Several lengthy phases of lost mojo have hampered progress).
6 main boards are now finished. My final design ended up with 5 narrow scenic boards to add width to the layout. Two of those included curved removable backscenes which made the design and carpentry quite complex for my limited build ability and facilities. (But necessary to allow me to set the layout up in my confined space loft). Just some assembly and painting to finish. Transit trolleys not started yet, but in order to fire up some motivation, I've decided to abandon comedy carpentry for a while and get on with some track laying and scratch building of the shed area.

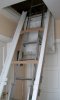
Here are the six main boards on the low setting of the dual height legs,
009e.jpg

Cartridge fiddle area will be disguised as plat 4 of the station. (You can just see one of the narrow boards to make the shed area wider at the far end).
008e.jpg

The 350 is standing where the buffer stops behind the shed road will be sited,
012e.jpg

The layout plan was drawn full size, on a roll of leftover wallpaper, long before any wood was cut. My original intention was to add only a few inches of width to accomodate the fuel tanks and workshop/drum store, but I ended up adding 11" to maximise the use of available space and add some depth behind the buildings.014e.jpg

The station end. The dotted lines denote a board join. These gradually moved outwards as the design progressed adding a further 16" to overall length for shallower curves off the pointwork. 016e.jpg

More to follow after a cup of tea...
 

Colin M

Western Thunderer
And last ones for today...

The first three boards narrowing as it moves away from the shed area. The open baseboard area will allow me to build a small fall-away gradient that bordered onto the adjacent park land.031e.jpg

Alignment of backscenes using hinges with removable pins. 035e.jpg

The first cut... The shed pit cut out very carefully and stretghened with 20mm aluminium angle. (Possibly overkill, but given the weight of current 0 gauge locos i didn't want to risk the hole bowing at a later date. The rounded slots you can see will eventually house the the pit lighting.
038e.jpg

Plasticard lining components, with some pre-weathering as it is going to be impossible to paint them properly in situ. Flouescent lighting shades are clear material set in cutouts in the main sides
037e.jpg

And with some rail.. C&L chairs set onto longitudinal timbers
039e.jpg
The next job is the concrete base for the shed. More plasticard butchering. Hopefully not too long before the next installment...

Colin
 

Colin M

Western Thunderer
Nice one, thank you! I'm still eagerly collecting all shots of the area to help with small details.

(I think that is 03017. Unusal hinged sides on the conflat L).
 

alcazar

Guest
My records show it to be 03017, as you suggest. At that time it was the earliest example I'd seen, until I photographed 03008 at Cambridge, sadly out of use.
 

Colin M

Western Thunderer
A little bit of progress... and some back-pedalling..!

I'm happy with the pit steps 010e.jpg

And the concrete plinth for the shed is done,
006e.jpg 001e.jpg
(excess UHU glue used to tack the track in place peels away quite easily).

012e.jpg

But! ...after getting carried away and laying both roads for the depot, I realised I'd made a horrible mistake. ...The track to the right has quite a few concrete sleepers :rant: ...That'll teach me to look more closely at the photos!

Now I'm faced with my first significant compromise decision. The track in the yard is a total hotch-potch of different styles, including bull-head rail with cast chairs on concrete sleepers and flat bottom rail spiked into timber. Neither of which are readily available commercially.

The track colour totally disguised, (from me at least! :eek:), the fact that there even was concrete in the shed roads. So I'm going to compromise by using some Peco 'Dow-Mac' Sleepers which are the right basic shape and hope that not too many folks notice that Pandrol clips are incorrect. A good layer of grime will help to hide them!

I've ripped up the track to start again.:( I'll be back...
 

Osgood

Western Thunderer
I've been trying without any luck to track down information on the earlier styles of concrete sleeper, which would have used cast chairs and bullhead. I recall several differing styles, quite unlike the DOWMAC shape.

My idea is to possibly get some 3-D printed or more likely make a decent pattern and cast them in resin from a silicone mould…...

Suggestions on where to look would be welcome - I've found nothing on the web so far. I believe they came into common use in the 1940s? Maybe a more recent track bible might yield scale drawings?
 

mickoo

Western Thunderer
and flat bottom rail spiked into timber. Neither of which are readily available commercially.

The pit looks good already;)

Regarding the track, you mean like this?

IMG_1237a.JPG

Maybe you can use Peco flat bottom track and cut off the rail castings and bolts, then use Peco US track spikes http://www.ebay.co.uk/itm/121230969686?ssPageName=STRK:MEWAX:IT&_trksid=p3984.m1423.l2649 to represent the 'r' clips, don't buy these though, you can get them cheaper elsewhere I'm sure, though maybe not blackened?

They won't be the exact same shape but closer than anything else other than bespoke clips, much like Jordan and I discussed in the US track posts. These are for narrow gauge track but main line is pretty similar, depending on the steel hardness you may be able to bend them some more to represent the UK 'r' clip.

You could either drill small holes in the remaining chair base or maybe heat a pin up and poke it through whilst hot?
 

mickoo

Western Thunderer
I've been trying without any luck to track down information on the earlier styles of concrete sleeper, which would have used cast chairs and bullhead. I recall several differing styles, quite unlike the DOWMAC shape.

My idea is to possibly get some 3-D printed or more likely make a decent pattern and cast them in resin from a silicone mould…...

Suggestions on where to look would be welcome - I've found nothing on the web so far. I believe they came into common use in the 1940s? Maybe a more recent track bible might yield scale drawings?

Like this?Image1.jpg

These are Pandrols in castings fitted to wooden sleepers, I think early concrete sleepers had this arrangement or something similar before the pandrol fitting became cast integral into the sleeper.

Edit, just seen your looking for BH castings on concrete 'doh'. I don't think we have any here on the port, pretty much everything else though spanning the last 40+ years LOL
 
Top