Dan Randall
Western Thunderer
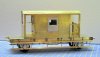
28ten said:Eileens will probably have some suitable N/S for the pull rods. Still anything is better then the plasticard in the instructions:lol:
How is the compensation coming on?
I hadn't thought of using N/S strip - trust me to over-complicate things.
 I'll try and get some at Kettering and retro fit it to the brake hangers, before completing the bogies.
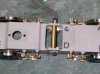
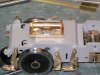
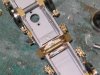
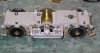
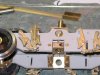
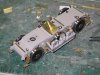
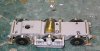
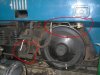
The compensation seems to work well on the first bogie thanks (as do the split-axles). If I do get any modelling done this week, I'll probably aim to get the other bogie up to the same stage. I forgot to take a couple of pictures of the build sequence when doing the first one, so need to get these second time round, in order to be able to show how it was done. Once the bogies are back on, I can think about installing the sound chip and wiring-up the smoke unit. Stay tuned!
")
Regards
Dan
")


 :wave:
 I need something much quieter