One thing I had to do was sort out fitting 3D printed parts to the wagon underframes - like buffer stocks and axleboxes and springs. I've done a fair bit of printing of parts over the last year or so but I haven't actually fitted anything to a model.

So I thought I would start with the Caledonian buffer stocks and that started a fairly frustrating week or two.

The problem was that I wanted to fit sprung steel buffers to the stocks and that would require drilling to accommodate the steel parts. Technically you can 3D print the bores, but in the sizes I was going to use - 1.2mm and 0.5mm diameters - stray resin tends to block the bores, or reduce the diameters. So I opted to drill out the bores to the required sizes and use the lathe. I did attempt to do the drilling by hand but the accuracy was way off.
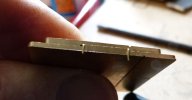
I opted to use the spigot on the back of the buffer stock to grip in a collet chuck and then I hit another problem. When printing parts, the undersides, or non-detailed sides, are normally supported from the printing plate, and I started printing the stocks with the spigots on the underside. But the resultand prints gave quite uneven results with the spigots due to roughness caused by supports and excess resin caught between them. When I tried to chuck the stocks in the collet chuck, the results were definitely not square and concentric. The only way I could try and clean the spigots up was by hand with a knife or a file and that didn't work out too well.
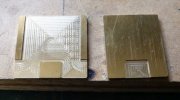
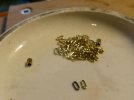
So I opted to print the buffer stocks with the spigots to the top to get away from the problem, but that then brought in another problem and that was how to support the stock with the supports on the detailed side. Supports can leave marking when they are removed and there then starts a balancing act of using as few supports as possible in the least critical places to avoid marking, but to provide enough supports so that the parts aren't pulled off them during the printing process. So it becomes empirical, with about two hours per print, and another half hour per print if lots of bits have dropped off into the resin and the resin bath has to be drained, filtered and cleaned. This is the waste bucket by my bench with the grey bits being the discarded prints...

...there's even more in the bin beside the printer.


But at last I got some decent prints and started to drill them out for the buffers.

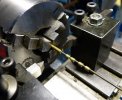
I made the three small tools above to go in the Jacobs chuck in the lathe tailstock. They were all made to the same diameter so that changing in the chuck was quite quick. The one on the left has a small spigot on the end which fits in the hole printied in the buffer stock and is used to line the buffer stock up when clamping in the chuck. The middle tool holds a 1.2mm drill which is clearance for the buffer spindle and the brass collar limits the depth of cut. The end tool holds a 0.5mm drill to dill the hole through the spigot for the reduced end of the buffer's spindle. (I would love to find a rotating multi too holder for the Cowells tailstock, but I haven't found one yet.

)

Here, the buffer stock is being presented to the chuck on the tool with the small spigot and the chuck is tightened gently. I found the three jaw easier to use than the collet chuck.

Here the 1.2mm drill is being presented to the buffer stock to drill a clearance hole, 4.5mm deep when the coller hits the end of the buffer stock.

Next, the 0.5mm drill is used to drill right through the buffer stock and its spigot. This operation needs a bit of care with a lot of withdrawal to clear the flutes.

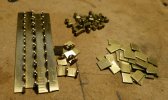
Here are the component parts with the drilled out stock and the S Scale Society steel 12" buffer. The springs are from Wizard Models - as used on their 4mm scale sprung buffers. I've lost two already and I've hardly started.


...and the assembly temporarily fitted in the underframe.
Thinking ahead, I shall probably mount the machined buffer stocks in the headstocks and fit the buffers and springs after the underframe has been painted. The Caledonian painted its buffer stocks the same colour as the wagon body and underframe, so it might make sense to make up the body and underframe with buffer stocks, then paint the lot, then fit the buffers.
Springs and axleboxes next.


Jim.
 I think I must have used the styling of the "D"s and "R"s to generate the tops and bottoms of the "O"s.


 So the layout has languished in the loft for several years and I've actually started to scrap and recover the track from it. I've got some ideas about another layout but I want a long think about it so that it might stand half a chance of getting up and running.


