TFW’s workshop

Tim Watson

Western Thunderer
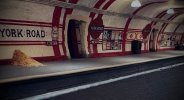
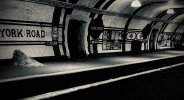
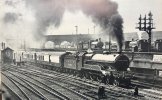
I think you may have to dim the station lighting to create a similar evocative atmosphere as portrayed in the original photograph.
It’s really a matter of playing with the parameters of the image, Dave. In reality, the lights are visibly dim; projecting pools of light onto the platform and of course their relative intensity is affected by the ambient room lighting.

The only things missing now are firebuckets (on their way from Modelu).
IMG_9315_xBqN3u8ukWRLbZs188EA3C.jpg

IMG_9315.jpg

Tim
 

Attachments

  • IMG_9315_76E54SRC5hRHbpwuAW9FKQ.jpg
    IMG_9315_76E54SRC5hRHbpwuAW9FKQ.jpg
    90.8 KB · Views: 30
Last edited:

Tim Watson

Western Thunderer
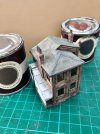
I thought there might be some interest in my painting techniques for London buildings. The first coat is Farrow & Ball ‘London Clay’ to give a dullish background, and ‘Downpipe’ for the slates.
9934E071-D2A8-46A9-88E6-BC05CCC1CA30.jpg
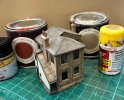
The yellow brick colour is then added with a wash of ‘Afrika Corp Tan Yellow’. More care was taken with the chimneys and window/door lintels painted in a red oxide colour (‘Picture Gallery Red’) and the chimney flaunching and the windowsills in ‘London Stone’. The sloping roof was given a wash with the Lifecolor ‘Roof Grey’.
7866AD8C-B6AE-4EE6-BFBF-CB513280AA52.jpg
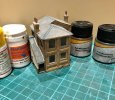
The brickwork was then darkened in places and given some richness using Lifecolor ‘Sleeper Grime’ mixed in situ with the tan yellow colour. some individual bricks were picked out with either colour and any dodgy brush-marked areas painted out. White and ‘Weathered black’ were mixed and used for the lead flashing, whilst the sloping roof had further coats of ‘Roof grey’ mixed with Lifecolor ‘Weathered black’ and F&B ‘Downpipe’ - which was also re-applied on the main roof.
1EB2012E-D978-4CA0-AF3A-372347BBE55B.jpg
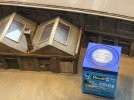
The final weathering was achieved with some feint washes of ‘London Stone’ to ‘bring the whole lot together’ and, most importantly, the use of ‘Dunkel grun’ washes to darken areas with rain run-off and add mosses & lichens.
F3D0AF77-66BC-4DB8-BF8B-709973328868.jpg
In the this close up photo, the potato warehouse roof furthest away has had a wash on its north face, the one nearest hasn’t - the effect is very subtle, but it really brings the model to life.
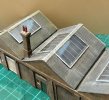
1BC9C353-6029-4C90-BD07-EA05904F6111.jpg
Finally, the thing that brings the layout to life is colourful advertisements, figures and vehicles. The advertisements help massively in this view: the wall and pavement have recently been weathered.
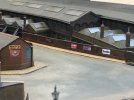
C4222947-4A3C-4FA3-BDAE-7A3DB29DCFD6.jpg
The use of bright red patches is an excellent way of drawing your eye into a scene.

All of the colours are applied in washes, rather than discrete colour blocks, it is an impressionistic way of painting, rather than slavishly painting brick by brick: that is needed occasionally for decorative patterns, but I tend to favour letting the eye see what it thinks it sees.
I hope these ramblings are of some help, I would strongly recommend that people give the dark green washes a try around areas that are north facing, damp i.e. near the ground, or where people rub.

Tim
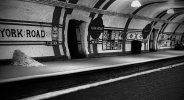
Jon (Jonte) has asked if I had a formula for painting buildings - I recollected describing it some time ago and found the thread above. The same palette is more or less still in use.

Tim
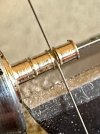
 

Tim Watson
Western Thunderer
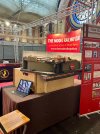
York Road is nearly ready for Ally Pally. The standard stock is now fitted with lights and I have a big pull up banner with construction photos.
Also showing for the first time in many decades on the MRC demon stand is part of the original 2mm fine scale layout, Rydes Vale. This is being shown by Simon Humphries a great grandson of HH Groves.

IMG_3219.jpg
The mechanisms on these locos are amazing and many have been nursed back to health over the last few months.

Tim
 

Tim Watson

Western Thunderer
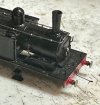
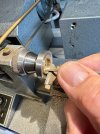
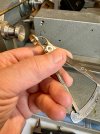
One of the Grove’s locos had obviously sustained a fall and had a badly mangled chimney.
IMG_9386.jpg
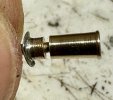
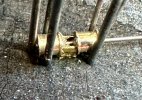
This has been screwed on to the smokebox and had a made-up saddle, with a filet of solder around the base. The brass chimney did, however contact the smokebox. Fortunately, it was easily removed from the loco and a brass dowel plug turned to fit from the base up to half the height of the chimney: it was then Loctited in place.
IMG_9385.jpg
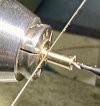
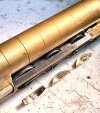
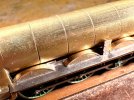
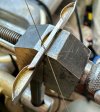
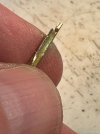
The chimney top was then parted off from the base, but retaining the plug. I often use a piercing saw blade for parting off, these days. It is very precise, and makes very little kerf.
IMG_9388.jpg
A replacement top section was then turned up with a central hole to fit the plug. A graver was used for fine turning.
IMG_9389.jpg
This was then parted off and offered up to the base.
IMG_9390.jpg
IMG_9391.jpg
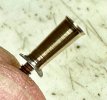
Once Loctited in place, the chimney was finish-turned to the same dimensions as the original.
IMG_9392.jpg
The chimney was chemically blacked, Araldited in position and painted satin black to match the rest of the engine,
IMG_9394.jpg
Quite a long winded description of a fairly challenging little job. Should be ready for Ally Pally on Saturday.

Tim
 
Last edited:

Mario KESR

New Member
One of the Grove’s locos had obviously sustained a fall and had a badly mangled chimney.
View attachment 211457
This has been screwed on to the smokebox and had a made-up saddle, with a filet of solder around the base. The brass chimney did, however contact the smokebox. Fortunately, it was easily removed from the loco and a brass dowel plug turned to fit from the base up to half the height of the chimney: it was then Loctited in place.
View attachment 211458
The chimney top was then parted off from the base, but retaining the plug. I often use a piercing saw blade for parting off, these days. It is very precise, and makes very little kerf.
View attachment 211459
A replacement top section was then turned up with a central hole to fit the plug. A graver was used for fine turning.
View attachment 211460
This was then parted off and offered up to the base.
View attachment 211464
View attachment 211461
Once Loctited in place, the chimney was finish-turned to the same dimensions as the original.
View attachment 211462
The chimney was chemically blacked, Araldited in position and painted satin black to match the rest of the engine,
View attachment 211463
Quite a long winded description of a fairly challenging little job. Should be ready for Ally Pally on Saturday.

Tim
 

Tim Watson

Western Thunderer
I had a really fun time at Ally Pally with the YR diorama last weekend. It was great to have visitors being able to get really close to the model to actually see it! The interest in underground modelling is clearly developing and I spent some considerable time showing individuals historical images and also construction images using the iPad. These have now been ordered into logical albums, which will also simplify giving talks.
IMG_9400.jpg

Now back to the Skittle Alley.

Tim
 

Tim Watson

Western Thunderer
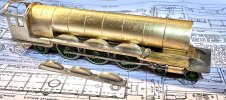
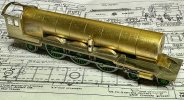
I have been working on the splashers for the Raven NER 4-6-2 class over the last few days. She’s beginning to look a bit more racey, with the wheels covered in a bit. The gap at the front of the running plate is because the assembly is just resting on the loco.
IMG_9439.jpg

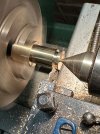
The brass disc blanks were turned from a lump of brass in the Myford 254. The front face of the splashers, including the brass rim was finshed on this lathe as can be seen:
IMG_9413.jpg
Five discs were made and parted off. One as a prototype and two were used.
IMG_9414.jpg

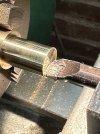
The discs were mounted in a step collet on the watch maker’s lathe and hand finish-turned using a graver. Important to note that the graver is held with a pen like grip so that should it ‘catch’ then it flies from your grip, not through your hand.
IMG_9421.jpg

1711319955012.gif

The thickness of the splashers was checked using a thickness gauge, which has dental uses as well….
IMG_9424.jpg
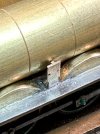
Once happy with the proportions the splashers were cut off as chord segments with a piercing saw. The tops of the running plates were made from 5thou steel, with suitable clearance notched for the wheels. The splashers were rebated at each end so as to locate on the steel when soldering into place.
IMG_9432.jpg

The engine has a Westinghouse pump on the RHS: that should be fun…

Tim
 

simond

Western Thunderer
I had a really fun time at Ally Pally with the YR diorama last weekend. It was great to have visitors being able to get really close to the model to actually see it! The interest in underground modelling is clearly developing and I spent some considerable time showing individuals historical images and also construction images using the iPad. These have now been ordered into logical albums, which will also simplify giving talks.
View attachment 211752

Now back to the Skittle Alley.

Tim
Tim,

it was lovely to meet you and put a face to the name, and great to see York Road too.

Those of you who model in 2mm serve as a reminder that “I can do better” when tempted to say “that’ll do” in 7!

cheers
Simon
 

Joe's Garage

Western Thunderer
Totally agree Simon, seeing the models in the "flesh" makes one look in awe.
Those Raven engines are very hansom.
Cheers Julian
 

Tim Watson

Western Thunderer
Thanks, Simon & Julian: it was good to chat at AP. Just a little more progress on the Skittle Alley today.
IMG_9456.jpg

The representation of the prototype frames between the splashers have now been fitted. These were made by soldering a strip along the back of the splashers and then cutting out the unwanted bits with a piercing saw; finally tidying up with a bur, so saving fiddling with small pieces.
IMG_9444.jpg

The next item was the bracket for the Westinghouse pump. This was a very substantial casting in real life.

IMG_0292.jpg

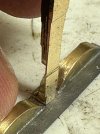
This photo is of a prototype made with a (too) small brass T section. The end piece is folded over and the junction with the upright pillar flooded with silver solder paste and gently heated to flash into the crack, so making a strong assembly.
IMG_9446.jpg

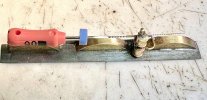
The definitive bracket was made from 3mm brass T section, filed down to size (approx. 2mm wide) with the foot silver soldered in place. A long handle was retained for holding during construction and positioning the bracket on the running plate whilst soldering: I use this technique a great deal for stabilising small pieces during assembly.
IMG_9447.jpg

The top had been partially cut through so that it simply needed twisting to remove the handle.
IMG_9449.jpg

I have a cunning plan for making the pump…

Tim
 
Last edited:

timbowales

Western Thunderer
I have to keep reminding myself that you are working in 2mm/foot, fabulous work and beyond my aged eyesight.
Tim T
 

Tim Watson

Western Thunderer
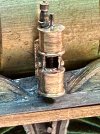
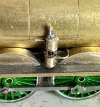
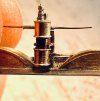
After a few hours of fiddling, the basics of the Westinghouse pump on 2400 are now complete. The steam supply & exhaust plumbing will probably be made later, the air delivery pipe rather sooner.

IMG_9471.jpg

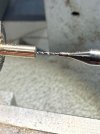
A 2.3mm diameter blank for the cylinders was turned and centre drilled 0.4mm over 5mm depth. Drilling such a deep hole is taken very carefully, with many clearance removals, aided by RTD cutting fluid, and sharp TC drills.

IMG_9459.jpg

The blank was then finish turned with a graver, giving the raised ends to the cylinders. A piercing saw was used to separate the two cylinders, also making the stuffing box at each end.

IMG_9462.jpg

A conventional 0.4mm diameter steel drill shank was used to align the cylinders and a U shaped piece of brass (box section 1.6mm square with a side removed) inserted between the two cylinders - this represents the casting that holds them together on the real thing. The assembly was anointed with silver solder paste and pinned into a stable relationship with old drill shanks thrust into the charcoal block. The whole assembly was gently brought up to red heat for the solder to flash. On a very fine and small component such as this I turn off the workbench lighting so that I can gauge the temperature more easily.

IMG_9463.jpg

After pickling in citric acid, a few holes were drilled in the cylinders for the shuttle valve and oiler on the top, compressed air outlet pipe and a slot cut on the back for the steam inlet and exhaust pipes. The drill shank is a very useful handle to hold this rather titchy component.

IMG_9466.jpg

The mounting bracket on the running plate had been fitted previously (with two holes drilled in it) and this was augmented by a couple of pieces of brass wire which were threaded as one U shaped staple from behind and soldered in place. The excess wire was cut off and dressed in front and behind to neaten them up.
IMG_9467.jpg

These two pegs represent some substantial brass bolts in this area and made it easy to locate the pump for soldering to the bracket: the drill shank had previously been sliced off with a diamond disc. Having the main pump silver soldered ensured that it didn’t fall apart when attaching it to the locomotive.
IMG_0747.jpg (photo courtesy Owen Chapman)

The final result needs to fit very close to the boiler as the hand rail takes a detour round the top of it! The extra bits for the pump will be made when the associated plumbing is fitted.

IMG_9469.jpg

The piston is scarcely visible - like the real thing - but at least I know it’s there. The Association makes a 3DP version of this which is very fine, but I prefer turned metal in this situation. The 3D metal print looks a bit ‘hairy’. Quite crazy really, as the whole thing is only 6mm tall.

Tim
 
Last edited:

Tim Watson

Western Thunderer
I couldn’t really resist continuing with the Westinghouse pump, so it now has the compressed air pipe fitted and the basic fittings for the steam feed and exhaust.
IMG_9489.jpg

The feed pipe fitting was made from some 0.5mm OD brass pipe, soldered into the groove cut in to the back of the steam cylinder. This did not have a large enough bore and so it was reamed out using an 06 endodontic file. These are the smallest used in root canal treatments and are made from nickel titanium alloy. The size represents 0.06mm diameter measured 1mm from the tip.
IMG_9476.jpg

The video clip shows it in action.

The regulator on the LHS is next to be added and the pipe work can be seen here as a piece of 33swg phosphor bronze wire.
IMG_9481.jpg

Having this running plate unit as a separate sub-assembly has made it much easier to work on. Apologies if this post relives dental memories for some!

Tim
 

Tim Watson

Western Thunderer
Now the fun and games can start. IMG_9567.jpg
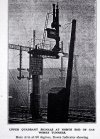
This is the beginning of the four doll gantry at the north end of Gasworks Tunnel on the down lines. IMG_1914.jpg
There aren’t any decent close up photos of it, but these are the arms that will be modelled. At least two of them should probably work sometime, as they signal a conflicting route, but we’ll see.
IMG_2780.jpg
Maybe we should just put a steam generator in the tunnels, so they’re hidden, a bit…

Tim
 

Tim Watson

Western Thunderer
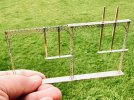
Some more progress on the signal gantry at Gasworks Tunnel.
IMG_9602.jpg
The dolls were filed up very quickly from some 2mm square brass. I use very sharp, coarse, Vallorbe files to shift metal and then dress with finer grades.
IMG_9595.jpg
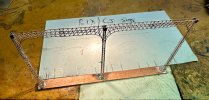
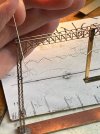
The bridge is only partly planked, with over half open at the top. This was not catered for in the etch and so it required the herringbone bracing to be made. This was bent up from brass wire.
IMG_9600.jpg
IMG_9601.jpg
After bending, the wire was flattened in a vice and soldered in place one node at a time. It has strengthened the structure rather well, as have the lower footboards for the signal dolls.
IMG_9597.jpg
Should add a bit of interest in the ‘trough’.

Tim
 

Yorkshire Dave

Western Thunderer
There is another signal in the vicinity which is rather fun.
IMG_0067.jpg

The image also shows step pegs on the nearer dolls and only partial railing on the gantry at high level. The more you look the more you see…

That is interesting - a 3 position upper quadrant signal (with a rule 55 track circuit indicator) amid all the the lower quadrant signals.

Then into a rabbit hole as I initially thought it would be a Westinghouse product. This signal was produced by the British Power Railway Signal Company Ltd which was a division of GD Peters and Co. Turns out they also provided 3 position ground shunt signals for the SECR at Victoria.
 
Top