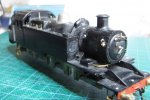
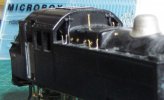
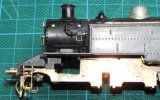
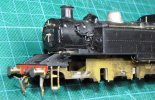
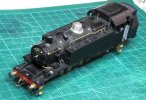
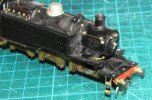
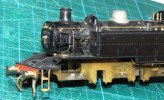
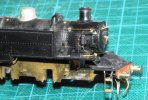
4mm Ivatt Class 2, 2-6-2 tank in P4

Pannier Tank

Western Thunderer
Brian. The subject matter does seem to have only a rather tenuous connection to the thread headline, so if it is to continue, it might be preferable to start a new thread?
Dave.
Dave, My apologies for instigating the off topic discussion. I should have taken the discussion to PM's.
 

Dave Holt

Western Thunderer
Ok, gents, no problem.
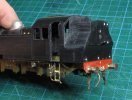
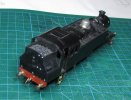
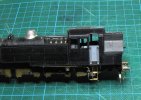
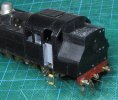
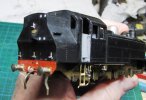
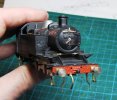
No modelling this evening - band rehearsal - but a start was made on the body this morning. First job was to drill holes and fit turned boiler washout plugs, twelve in total, four each side of the firebox and four on the upper boiler barrel. The Bachmann moulding had a sort of representation of the two near the front of the boiler, but none of the others. There was one tricky access problem on the LHS of the firebox, just in front of the cab, due to the tank level gauge and vent pipe. As a result, the plug is slightly out of positions between the two. On the other side, the vent pipe came off, so the plug there is in the correct position. Mind you, the plugs on the firebox are partially hidden by the ejector steam pipes (LHS) and the fire irons (RHS) and are generally not too obvious in photos of the prototype.
The other work was to fill the over-size slots where the Bachmann lamp irons have been removed, using stalks of plastic card fixed with solvent. Handrail knob holes, bunker ladder mounting holes and smokebox dart holes still to do.
Ivatt_2T_044.JPG
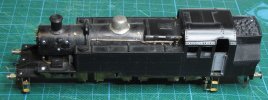
Having acquired various cast W/M, lost wax brass and turned brass replacement chimneys, I've decided to retain the existing version. The rim isn't quite right, somehow, but it captures the overall proportions better than the alternatives, to my eyes. I have done a bit of work with files to remove the mould part line and improve the underside of the rim.
No modelling tomorrow, or rather I'm doing my 304.8 mm to the foot scale work on P&O.
Dave.
 

Dave Holt

Western Thunderer
Not much physical modelling recently, although I have been busy preparing dimensioned sketches for chassis and body detailing parts to be etched for a future project and also arranging for a further building to be made for my layout.
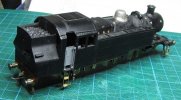
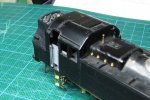
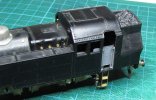
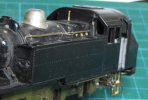
That said, the erstwhile loose bunker has been re-affixed to the body, so it no longer a cabriolet. Initially, tried DL-Limonene for the horizontal joint, but it just didn't appear to work on the type of plastic used by Bachmann (which I assume to be polystyrene) so I resorted to Plastic Weld, which did work. The vertical joint and under the cab roof, Loctite 480 was employed and also used to fill the joint line gaps. Prior to fixing, the inside surface, together with the scratch built interior were painted using spray can etch primer and satin black as these will be hard to fully access for painting once fixed.
Ivatt_2T_045.JPG
Ivatt_2T_046.JPGIvatt_2T_047.JPG
The various white splodges on the bunker rear are plasicard plugs where various oversize holes were located in the moulding.
Dave.
 

Dave Holt

Western Thunderer
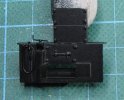
Just for the record, here's the painted inside bulkhead for the cab. My original intention was to fix this to the rear of the cab floor/boiler backhead but realised, just in time, that the coal watering (pet) pipe representation would prevent the assembly sliding in past the recessed cab door units. Instead, the rear plate will be attached to the front of the recently fixed bunker. I'll do this using origin, slow setting epoxy, so that everything can be assembled and the final position adjusted before the adhesive cures.
Ivatt_2T_048.JPG
Dave.
 

Dave Holt

Western Thunderer
The cab rear was fixed using original, slow curing Araldite, as proposed. This gave time after inserting the adhesive smeared rear plate into its rough position to temporarily fit the cab floor/boiler backhead, inset cab doors and the chassis to ensure the back plate was located in exactly the right place.
Subsequently, the cab floor/backhead and door inserts have been painted with rattle can etch primer and the inside faces of the doors painted satin black.
The doors have now been fixed using supposedly 12 minute epoxy - it actually took about half an hour, so perhaps I got the mix slightly wrong. These were quite tricky to get just right with the edges flush with the body moulding both vertically and horizontally, front and back. Lots of adjustments were required during the initial cure time, so perhaps it's as well that it took longer than advertised!
Despite all the earlier trial fits, I found that after fitting the doors, I had to trim the cut-outs in the cab floor very slightly in two places. It's currently all fitted and the chassis mounting screws tightened and all now seems well.
The cab floor/boiler backhead unit will remain a loose item, so it can be painted and the loco crew affixed. It is quite a good fit and is located fore/aft by the inset cab doors and vertically between the top of the chassis and the bottom of the moulded tanks and the cab back plate.
Here are various shots of the fixed doors with, perhaps a hint of the boiler backhead in some.
Ivatt_2T_049.JPGIvatt_2T_050.JPGIvatt_2T_051.JPGIvatt_2T_052.JPGIvatt_2T_053.JPG
Dave.
 

Dave Holt

Western Thunderer
Slow progress continues, with lamp irons and capacity plate fitted to the bunker and top lamp iron ,handrail and VCR steam balance pipe fitted at Ivatt_2T_054.JPG
These lamp irons are the second attempt. I previously found some ready made up and thought it had saved some work. However, after fitting them, it dawned that they were the wrong shape, being rather like angular tea cup hooks rather than the correct :MS/BR type now fitted. These are folded up from some etches done for me by Rumney Models for the BR Standard tank.
Ivatt_2T_055.JPG
The steam balance pipe, made from 0.8 mm brass wire, linking the cylinder steam pipes and routed below the smokebox, highlights another dimensional error in the Bachmann body. It is a tight fit between the smoke box bottom and the top of the footplate, whereas there should be a gap between pipe and footplate. Clearly, the Bachmann boiler is too low or the footplate too high. Ah well.
Dave.
 

Dave Holt

Western Thunderer
A bit more progress with the fitting of the ejector steam pipes along the boiler and re-fixing the Bachmann moulded tank vent pipe that had been detached at the top but couldn't be unplugged from the tank top, like the RH one had been.
Not a huge item, but surprisingly tricky to get the shape right. The result isn't perfect, but the full sized versions were quite untidy, so it will do.
Side view:
Ivatt_2T_056.JPG
Three-quarter view:
Ivatt_2T_057.JPG
Beginning to run out of things to do to avoid tackling the front end details of brake ejector and steam pipes/push-pull vacuum gear.
Dave.
 

Dave Holt

Western Thunderer
Thanks, Andrew. I' sure your version is perfectly OK.
I did manage to find some further distractions from the front end detailing, namely the fire iron rests on the tank tops and the steam lance connection on the smokebox. The former are bent up from some etchings done for me by Rumney Models and the latter is a nice cast brass item left over from the Brassmasters re-built Royal Scot.
The detached RH tank vent moulding has also been re-affixed.
Ivatt_2T_058.JPG
Ivatt_2T_059.JPG
Dave.
 

Dave Holt

Western Thunderer
At the far end of the pipes running along the boiler is the brake ejector. On the push-pull fitted locos, the standard LMS ejector has a different shaped discharge pipe to the smokebox, bending upwards to avoid part of the VCR equipment.
The Bachmann moulding represents this arrangement quite well so it has been re-fitted but with some additional details to represent the small drain pipes, steam feeds and their union nuts.
Another small step forwards.
Ivatt_2T_060.JPGIvatt_2T_061.JPG
Dave.
 

Dave Holt

Western Thunderer
A bit more slow progress with detailing the body. The smokebox side hand rails have been fitted and a crude representation of the tank filler lid clamps made. These latter were filed up from 0.55 mm shank brass lace pins to create a tee shape. Not very accurate to the prototype but better than what was there before - nothing at all.
LHS.
Ivatt_2T_062.JPG
RHS - slightly blurred for some reason.
Ivatt_2T_063.JPG
I now realise it was a mistake to fit the fire iron holders at this stage as the front one, in particular, has already been bent several times during handling. I've tried to reinforce it with extra solder. Just hope a leg doesn't snap off.
Getting perilously close to having to deal with the steam pipe/VCR equipment and associated pipework.
Dave.
 

Dave Holt

Western Thunderer
A start has been made on fitting the push-pull (vacuum controller regulator) gear. The main parts are the original Bachmann mouldings which represent the gear quite well. They have been drilled to take thin brass wire and small bore tube for the drain and equalising pipes on each side. Fitting these parts has involve copious quantities of black Loctite 480.
Unfortunately, on the RHS, the rather tasty Brassmasters cast steam lance has had to be sacrificed as it was very slightly oversize and protruded too far from the smokebox outer, interfering with the VCR lever. A simplistic replacement was fashioned from brass rod and wire.
Still the vacuum operating pipes to do. They come up from the front step, splay out and connect to the bottom of the actuator diaphragms on each side.
Ivatt_2T_065.JPGIvatt_2T_064.JPG
No more modelling for a few days as I have a visitor. We're off out tomorrow (NT property) and Monday (evening gig in Oxford) and I'm at the EM show, in Bracknell on Sunday.
Dave.
 

Jack P

Active Member
Dave, this is truly inspirational work!

Could you explain how you build your vac/steam heat pipes?
 

Tim Hale

Western Thunderer
As a follower of OO, this shouldn’t interest me but the body modifications are very interesting as I have Bachmann’s updated Mickey Mouse, unfortunately Bachmann didn’t upgrade the body. Do you intend to carry out further work on the body, notably the chimney?

Thank you

Tim
 

Dave Holt

Western Thunderer
Jack.
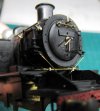
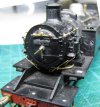
The steam heat pipes on this model are commercial cast brass items and I am hoping to be able to use modified castings for the four vacuum hoses (two normal brake hoses plus two VCR push-pull hoses). Most of my other locos are modelled with the steam heat hoses removed (for summer) with just the hard pipe and shut-off cock with oval flange. Where I've found it necessary to make my own, they have a brass wire core, 0.7 mm for vacuum and 0.5 mm for steam heat, tightly wrapped with thin wire, then flooded with solder, to represent the hose. In the past I used 0.2 mm fuse wire but would probably use smaller brass wire in the future. Hose end clips are represented by extra windings at the hose ends.
Tim.
I've agonised over the chimney for ages. Umpteen cast white metal and brass and turned brass alternatives were purchased from every source I could find but, to be honest, none seemed to be quite right. I made up a comparison chart of height, basic chimney diameter and diameter of the rim compared with the scale dimensions. None of them was spot on and the original Bachmann moulding was actually quite close except the rim being about 0.1 mm too small. On balance, I decided to keep the original chimney after some minor filing under the rim to slightly improve the profile.
Besides the modifications and additions already made to the body, I have commissioned some tank front overlays with rivets and much finer steps and replacement lubricators. The loco I'm modelling had the cylinder lubricator (LHS) with an angled top filler plug. level gauge on the forward facing side and seven oil feed per side - not really represented by the original moulding or any commercially available replacement that I could identify.
A friend is developing an accurate etched rear ladder and there are the various push-pull related fittings as well.

Dave.
 

Dave Holt

Western Thunderer
No modelling today - I went to the EM Gauge Soc show in Bracknell. How nice it was to be able to attend a show once more, idle in front of the layouts (and check out the fiddle yards - like congregating in the kitchen at house parties), chat to acquaintances and old friends and get some supplies from the specialist traders. Just so good to be back at a live show.
Didn't manage to get everything on my list - some items had sold out! Although it wasn't that busy today, several people said it had been very busy yesterday and trading had been exceptional. Pent up demand, I suppose.
Thanks to the organisers for providing a grand day out.
Scaleforum next, I think.
Dave.
 
Last edited:

Jack P

Active Member
Jack.
The steam heat pipes on this model are commercial cast brass items and I am hoping to be able to use modified castings for the four vacuum hoses (two normal brake hoses plus two VCR push-pull hoses). Most of my other locos are modelled with the steam heat hoses removed (for summer) with just the hard pipe and shut-off cock with oval flange. Where I've found it necessary to make my own, they have a brass wire core, 0.7 mm for vacuum and 0.5 mm for steam heat, tightly wrapped with thin wire, then flooded with solder, to represent the hose. In the past I used 0.2 mm fuse wire but would probably use smaller brass wire in the future. Hose end clips are represented by extra windings at the hose ends.
I think I first saw the steam heat hose removed on one of your models, modelling the high summer myself means these are usually obvious in their omission.

Where are the commercial cast items from Dave?
 

Dave Holt

Western Thunderer
Sorry Jack, I haven't a clue. This model has been on the go since at least 1995 (schemes for etched pony trucks), so the origin of many of the bits is now lost to memory. I'm not sure if the pipes were bought specifically for this loco or just suitable spares from other projects. They could be any of: DJH, Comet, Alan Gibson, Brassmasters or even Dave Bradwell, though perhaps not the first two as they mainly supply white metal items, I think.
Dave.
 

Dave Holt

Western Thunderer
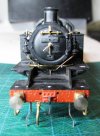
Houston (or should that Delph?), we have control! The vacuum control pipes to the VCR actuators have been made from wire and tube and fitted into position. Other than the buffer beam mounted standpipes and hoses, that completes the front end pipework.
Ivatt_2T_066.JPGIvatt_2T_067.JPGIvatt_2T_068.JPG
Front lamp irons and grab handles next, I think.
Dave.
 
Top