7mm Richards P48 US Thread

mickoo

Western Thunderer
A 9" thick slab seems a bit excessive for a shed unless you have a traction engine or a steam roller parked in there .
I was pulling your leg about jacking the slab up :)
We have soft ground here, previous thinner ones have all cracked.
 

richard carr

Western Thunderer
I did a bit more on freight cars at the weekend

First was decals for the Golden West boxcar

20250202_143238.jpg

20250202_143243.jpg

It always amazes me the difference a few decals make.

Then I did the gondola, it went a bit wrong

20250202_143258.jpg

Oh dear I lost a bit of the "O", the whole thing fell off in the water and getting back on to the paper sheet and onto the model just didn't go to well. The saving grace of course is that these often lost and worn away as they aged.

20250202_202119.jpg

I then started to weather the boxcar. The green is the right kind of colour but it needs to be faded. So I tried my mix of tamiya X21 flat base 20% paint 80% tamiya lacquer thinners.
I think it's working, it needs a second coat but I want to let this one dry thoroughly before I put the second coat on.

20250202_233642.jpg

20250202_233648.jpg

20250202_233657.jpg

I also use the tamiya mix on this tank car

20250202_143333.jpg

It needs to be a very thin coat as it goes white if you put too much on.
 

richard carr

Western Thunderer
One of things I have acquired recently is this Atlas GP35 in Kodachrome livery.

20250205_224646.jpg

20250205_224702.jpg

The good news with this is it has already been fitted with NWSL P48 wheels, the bad news is that the nose is of course completely wrong.
6533 had a full SP light set. Quite a few GP35s were painted in this livery, and some had a revised lighting pack of 2 horizontal headlights on the nose with a blanking plate above and a blanking plate over the cab head lights.
MTH do offer this on their SP locos so I'll be on the lookout for one on Ebay.

20250205_224726.jpg

20250205_224739.jpg

20250205_224749.jpg

Locos in this livery survived into the mid 90s.
 

richard carr

Western Thunderer
This weekend the plan was to get the Overland GP60 up and running.

It almost is,

20250209_204350.jpg

But I decided that the nose wasn't painted well enough, so that got stripped in a jar of celly thinners and is now red again. I just need to mask that off to put on the grey.
Here's all the internals, everything went OK except that the sound was almost silent even though the volume was set to max.

20250208_152808.jpg

20250208_152751.jpg

It turned out that the speaker was the issue, a replacement speaker fitted and all was well.
And yes it does appear to be a lot of wiring for just headlights and front ditchlights.

20250208_152754.jpg

Once it was all back together and the decoder programming complete I added a few detail decals and the number.

20250209_204358.jpg
 

richard carr

Western Thunderer
What a difference a nose makes !

20250210_224746.jpg


Once I had stripped it I painted it red and then printed a mask drawn in CAD. I based this on the decal you can get from Micro Scale.

I also removed the hand rail and the other small item on the left side of the nose so that the mask sits flat on the nose.


20250210_165512.jpg

and the other side. I then completed the rest with tamiya masking tape.

20250210_165516.jpg

I've added the handrail back in, it needs painting grey.

20250210_224751.jpg
 

richard carr

Western Thunderer
Hi Jordan

Funny, thats what I did the first time round, the grey first and then the red and it all went a bit wrong, so this time I went red first, which is what I did before on a couple of other locos.

It seems to work much better

Richard
 

richard carr

Western Thunderer
Well how did we survive the weekend with no WT, easy just get on with some modelling instead !

20250215_165258.jpg

Some more progress on the GP60, the white stripe on the footplate edge. I did want to paint it but the paint didn't cover very well and I couldn't get a consistent line so I used the decals on the MicroScale sheet. It takes quite a time to do this as the hand rail stanchions are not white. I did the other side yesterday. Painting the hand rails was the easy bit

20250215_165302.jpg

I did paint the louvres with some dirty black but it doesn't seem to show up much,
 

richard carr

Western Thunderer
Another busy weekend

This arrived as a birthday gift from the Boss

20250221_093510.jpg


It turned out that his was an easy switch toP48, the wheels simply dropped out of the trucks and were replaced with P48 ones

20250221_093532.jpg


20250221_093716.jpg

20250221_093522.jpg

There was also thes 2 boxcars

20250222_112217.jpg

20250222_112939.jpg

20250222_113024.jpg

It's going to take a bit more work to convert these 2. So I've been busy painting trucks over the weekend

20250223_125510.jpg

A mix of protocraft 70 and 100ton barber S2 trucks

20250223_130730.jpg

20250223_130753.jpg
 

Stephen

Western Thunderer
Nice venture into the Canadian side of things Richard - those Malcolm Byrd's caboose builds are pretty damn good - shame he's not done anything on the Southern Pacific or Sacramento Northern side of things.

Sort of kicking myself for not picking up the two Rich Yoder 1937 AAR 40ft box cars from Ellis Clarke, but give if three weeks and we'll see what MoM has to offer.

Cheers,

Stephen
 

Big Train James

Western Thunderer
Stephen,
Malcolm used to do commission builds all the time, so it might be as simple as asking him. Although I don't see as much activity from him on the various forums I frequent, so he may have cut back or stopped altogether with the commercial projects. I would suggest sending an email if you are interested.

Do you have drawings of the desired cabooses?

Jim
 

Stephen

Western Thunderer
Stephen,
Malcolm used to do commission builds all the time, so it might be as simple as asking him. Although I don't see as much activity from him on the various forums I frequent, so he may have cut back or stopped altogether with the commercial projects. I would suggest sending an email if you are interested.

Do you have drawings of the desired cabooses?

Jim
Hi Jim,

He still posts details of new builds on FB and the O Scale Yard sale yahoo group - it was his FB posts which gave me the first exposure to his work, however didn't realise he does (did) commissions, so yes will make contact with him.

I don't have any drawings for any SN cabooses, although in all fairness haven't make a conscious effort to look for any, but there are a few Western Pacific websites which have some decent photos, so a few enquires with them might lead to some drawings.....

Cheers,

Stephen
 

richard carr

Western Thunderer
Yes it is going iin the right direction, I think I still need to do some more work on the ends, they are almost too dirty.
Thats the nice thing about oil washes you can come back a few days later and attack it again.

Richard
 

richard carr

Western Thunderer
I got back today after an extra day in Chicago due to technical fault on Wednesday nights plane. The main thing is that everything arrived back safely.


Including this an Overland SP SD70M

20250307_110140.jpg

From what I have seen on the web, Overland did one batch of 25 of these in 1995, so a lucky find.
I was hoping that the missing windscreen was in the model somewhere, something was rattling around inside, but it wasn't to be, but it's not difficult to fix.

20250307_110146.jpg

20250307_110200.jpg

20250307_110215.jpg

It's DC and runs nicely, a little noisy but not too bad. All the lights work so that makes the decoder install a lot easier.

So I stripped it down into it's main parts, the first job is to convert it to P48, fortunately Jay does some suitable wheels for theseso I can avoid doing any machining, and his wheels are very nice.


20250307_150418.jpg


20250307_150423.jpg

20250307_150428.jpg
 

richard carr

Western Thunderer
At first sight converting this to P48 and adding a sound decoder seemed relatively straight forward, sadly it didn;t quite turn out that way.

The easiest bit was the conversion to P48, right o way does some very nice wheels for these later overland models that have 3mm axles.

20250308_131201.jpg

Here are 2 of the gear boxes with the new wheels pressed on. The other nice improvement over earlier models is the addition of roller bearings on the axle ends and in the gearboxes.

20250308_131207.jpg

20250308_131222.jpg

I added fresh grease and everything went back together fine. This model is now 30 years old.

To install the speaker and decoder you need to create a platform above the motor and drive mechanism. I decided to print one as the weather was a bit warmer. Fortunately this doesn;t need to be that accurate as you can see it has lifted at the right hand end on the build plate.

20250308_173051.jpg

It works well enough and goes in like this

20250308_174422.jpg

That's a big speaker, it unfortunately doesn't fit it's too wide.

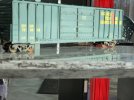
So having got everything wired in I went to put it all back together to find that the body opening wasn't the same as the foot plate, oh shot !


20250309_184434.jpg

So back to the drawing board for a new platform, and the decoder needs to be mounted vertically

20250310_203912.jpg


So now it's all back together and runs really well the ditch lights flash on F14. I just need to make a new windscreen


20250312_095651.jpg

20250312_095735.jpg
 
Top