4mm Llanfair ....

PhilH

Western Thunderer
If I may comment , not wishing to pre empt Larry's reply, I had a very bad experience spraying varnish from an aerosol onto a recently completed 7mm coach side, which lifted the paint, resulting in a terrible mess. I had sprayed prescision paint with my airbrush, and thought acrylic varnish would be OK. I came to the conclusion that it was the propellant in the aerosol that caused the problem rather than the varnish itself.
regards
Mike

Is the problem that while enamel might be touch dry fairly quickly it takes days for the solvents to evaporate fully, and spraying acrylic before this process is completed effectively seals the solvent in and causes the problem ?
Note I put this as a query rather than a statement and confirmation or otherwise would be helpful.
 

LarryG

Western Thunderer
Been tied up with non-railway matters, so this is the first visit to WT for a few days.

Halfords Acrylic Varnish aerosols: I used the satin varnish straight from the can on the 45xx loco, but it was on top of Halfords satin black anyway. I have not had any problems on top of enamel paint, but enamel was only on the running plate. I often decant the varnish into a spraygun for a finer spray when spraying 4mm scale locomotives. Always best to test things beforehand.

diafly, thanks for uploading the picture of 4560. Sods law that it carried the early small BR totem. My mistake, so the loco will have to carry a different number now.

EDIT: I have since come across three photos of black 4560 with small totem. So I have an alternative 'Cambrian' choice of 4549 with large totems.
 
Last edited:

LarryG

Western Thunderer
If I may comment , not wishing to pre empt Larry's reply, I had a very bad experience spraying varnish from an aerosol onto a recently completed 7mm coach side, which lifted the paint, resulting in a terrible mess. I had sprayed prescision paint with my airbrush, and thought acrylic varnish would be OK. I came to the conclusion that it was the propellant in the aerosol that caused the problem rather than the varnish itself.
I can imagine the anguish. I've used cellulose since the early 1960's, mainly for speed. Anyone remember the 'Celspray' spraygun? It was like a scent bottle with a hand activated bulb. I once sprayed 50 Hornby TT gauge coaches for George Mellor (GEM) using the darn thing. You should have seen the sags across my hand. By 1970 I was using a DeVilbis Type M miniature spraygun while dad built me a compressor.
 

LarryG

Western Thunderer
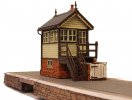
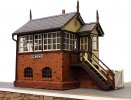
Signalbox 'new', number goodness knows what, has been completed after two weeks of hard going. New spectacles allowed me to continue driving while reading became actually a pleasure. Then disaster struck with what was thought to be an eye infection. A week later a piece of wood was found embedded in the eye. It has been removed and I am now on antibiotics to prevent infection.

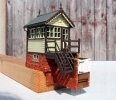
Anyway, Rail Model agreed to produce for me a right-handed version of their 4mm scale Llansantfriad signalbox. The parts helped me produce something akin to the box at Llanfyllin. The typical Cambrian wavy bargeboard trim is from Intentio as is the signalbox door and roofing slate....
WEB Signalbox new 1.jpg

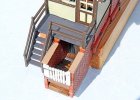
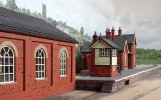
The face of the locking room is below platform level and the entrance has steps down to the door. The gate was built from Plastikard...
WEB Signalbox new 2.jpg

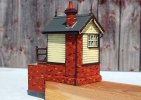
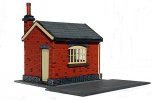
The chimney stack and pot are 3D resin. An interior was added plus a signalman. I realise the brickwork is very simplistic, but it matches my other buildings and actually didnt look bad to me before I had an eye test....haha.... :D
WEB Signalbox new 3.jpg
 

LarryG

Western Thunderer
The track needs to be sprayed with Howes Sleeper Grime to make an impression on the baseboard, then glued & ballasted down in convenient sections. I didn't have a catchpoint for the coal siding, so a point was used. Empty coal wagons could be pushed by hand into that short stub.....
WEB Track new 3A.jpg

Update : Bullhead track with flat bottom points below. All flat-bottom in picture above. Sprayed Howes Sleeper Grime....
WEB Track new 4A.jpg
 
Last edited:

LarryG

Western Thunderer
The two sunny days we had at the beginning of the week were too hot for gluing down track using the glue & ballast in one go method. Since then, we've had more than a months rainfall in two days in North Wales. I've noticed water on the railway baseboard via a split roofing board, but there is no chance of investigation yet.
 

Richard Gawler

Western Thunderer
I've just done a test area using Ballast Magic. This is a powdered glue you mix with the ballast and set off with a mist of water. My result wasn't strong enough for a permanent installation, but it was strong enough to stay put while I added a dribble of diluted pva. The result has set rock hard so good for a siding, less so for a main line.
 

LarryG

Western Thunderer
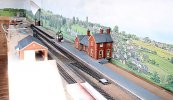
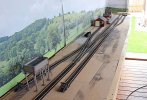
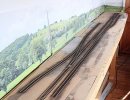
Track laying today at long last after months of messing about.....
WEB Track new 5A.jpg

Track laid aside while neat PVA brushed onto baseboard....
WEB Track new 5F.jpg

Track laid and ballasted before noon.....
WEB Track new 5B.jpg

All done by late afternoon....
WEB Track new 5C.jpg

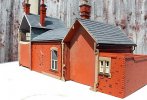
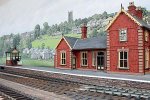
Buildings in place just to see how things looked.....
WEB Track new 5D.jpg

Ballast was a mix of fine light grey and fine dark brown to give a speckled finish.....
WEB Track new 5E.jpg
 

LarryG

Western Thunderer
Please Larry, are you using the PVA neat to do this or are you adding something into it to help it percolate upwards?
It's neat PVA, and the best I've found yet. It is applied thickly with a soft 3/4" brush. Track is lowered onto it and straightened with 3' steel ruler, then ballast poured on. It is firmly tamped with the fingers and hand for a while and the track re-checked in case it had moved. Then strips of 3" x 1" timbers placed on the track with heavy books on top.

Only after the lot is dry do I vacuum off the surplus ballast. This way, the PVA has time to peculate and attach a thicker layer of ballast.
 

Richard Gawler

Western Thunderer
Thanks Larry. A few years ago I had a go in a children's workshop run by Mrs Gravett. I soon learnt I was spreading my pva far too meanly. I don't quite know where it all goes, but it pays to be generous. I still have my sample weeds somewhere.
 

LarryG

Western Thunderer
The compressor and rarely used Airbrush were set up in the railway shed today. There then followed a dismantling session, which failed to make the Airbrush function. I've had three of these toys and they WILL stop working! So the job of weathering the track with rust washed down from rails to ballast was done with the trusty spraygun...

WEB Track new 6.jpg
 

LarryG

Western Thunderer
My dislike of the ultra fragile Peco '00' bullhead track has barely been disguised over the years. I've been messing about....

The nearer rail is bullhead, the farther rail being flat bottom....
WEB Chaired rail 1.jpg

The nearer rail is flat bottom slid onto bullhead track base. In dreams, I wish Peco had used its flat bottom rail to produce a far stranger product.
WEB Chaired rail 2.jpg
 
Top