7mm David Andrews Princess - 6206 Princess Marie Louise

Rob Pulham

Western Thunderer
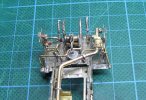
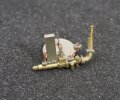
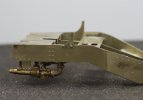
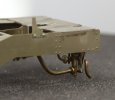
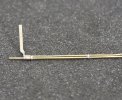
Very nice, Rob. Don't forget the water control rod carrying on up to the cab from the universal joint on top of the middle bit of the injector,
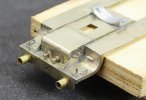
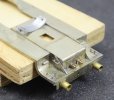
The front end of the injector was supported on a bracket that attached to two of the flange bolts holding the large bore exhaust steam pipe. You can see it in the colour photo you posted earlier. Perhaps the component you query is an attempt at that?
Dave.
Thanks Dave,

I had meant to add the control rod (admittedly I didn't actually know what it was) but got distracted by trying work out how it mounted. I will add it next.

If the bracket is meant to be the one that you refer to on the photo, the mounting slots in the rear frame etch are in the wrong orientation.... I think that I will be doing my own thing to fit it securely.
 

Dave Holt

Western Thunderer
Rob.
You're right. The etched item bears no resemblance to the front end support bracket. The bracket runs across the loco and is a solid plate. You can see my representation in this photo of my rebuilt Royal Scot.
Scot_077.JPG
On the Princess, the arrangement looks slightly different due to the frame geometry, but I bet the principle is the same.
Dave.
 

Rob Pulham

Western Thunderer
Thanks Dave,

I have been advised by a friend that the bracket is a generic item that David Andrews includes in many of his kits.
 

Rob Pulham

Western Thunderer
As I mentioned above. a friend advised that the spurious bracket was a generic item included in quite a few David Andrews Kits to aid in fixing the exhaust injector casting.

In the end I elected to do without it and drilled and tapped the main pipe. I will probably do the same to the flat on top of the bracket too because I have fixed one problem and create another - where it needs to sit there is nothing above it to screw it to. I will add a small plate under the main plates that fit under the cab to extend it and allow me to fix to it.

Hopefully it will make sense when I have done it and taken photos. I have also added the missing control rod on top of the universal joint.

53326885487_f5f3144e8f_k.jpg

The screw is slightly on the wonk but it won't be seen and I have used a countersunk screw to help compensate for it not sitting perfectly flat
 

Rob Pulham

Western Thunderer
Well things have moved on somewhat since my last post. I did get the injectors fitted.

53339173677_ba3dfc84ac_k.jpg

53340056231_fbb529e2a3_b.jpg

Then I moved onto the sandpipes which are almost the last bits for the chassis (unless I find something that I have missed. I say almost because there are also the bottom halves of the sandbox fillers to fit to the chassis, they are split at footplate level.

53340279068_dc4aceed06_k.jpg

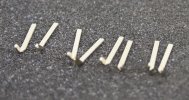
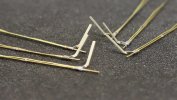
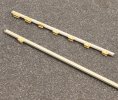
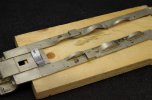
I started with the brackets which come as a hockey stick shaped etch. Looking at photos they need to be bent into handed pairs. where they fit around either side of the wheel.

53340509855_bbd0fe21fc_k.jpg

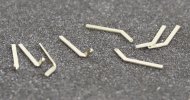
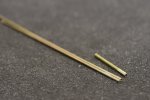
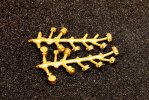
Next in order to make the fittings for where they pass through the brackets and combine with the steam pipes I soldered two different diameter microbore tubes together.

53340510395_f9ebc014f5_k.jpg

I cut half a dozen lengths at 2.5mm and another eight at 1mm using a pin chuck a ruler and a piercing saw
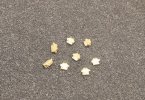
I also created a hex on some thick walled tube to make nuts from. Again cutting lengths off with the piercing saw

53340278383_4bd8a668c8_3k.jpg

From all the photos that I have, there are only six sand pipes fitted so I have two spare brackets.
In the photo below you can see the assembly order of the various bits of tube, bracket and nut. I will have to trim all the pipe ends to the same length

53340649048_9d6adae3eb_h.jpg
 

Rob Pulham

Western Thunderer
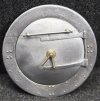
This week has been about adding small details to the body work starting at the front, I added the smokebox door dart, and the handrail above it. The LMS design of handrail has the rail ending in a button at each end. I have heard of people making these from microbore tube but I didn't have any nickel silver tube so I put a short length of 1.4mm nickel rod in the lathe and drilled it out to fit over the handrail at either end and then fitted the rod into a pin chuck to chop of the appropriate length soldering on to the hand rail and filing to finish. From the photo I still have a bit of cleanin up of excess solder to do on the handrail knobs.

53355993103_9aea2de9ef_h.jpg

One detail that is quite prominent on the smokebox door but absent from the kit is the door latch. It is included in the GA reproduced on the front cover of the Wild Swan volume so I was able to import this into Fusion 360 not only to get the length and spacing of the handrail and knobs but also the outline and dimensions of the latch.

53355980763_45bd5db534_b.jpg

53355980718_70f73e8a64_c.jpg


The latch itself was filed up from a strip of scrap etch which I doubled up at the thicker end to file to shape to accommodate the curve of the smokebox door.
The brass rod will be the stay which fits into the front ring. It's 2mm x 1mm bar and I popped it in a 1-2mm ER 25 collet to turn the spigot on the end. The fun bit will be soldering the latch onto the door. But more of that when I have achieved it.
 

Rob Pulham

Western Thunderer
Still plugging away at the small details but it's moving forward and that's what matters.

I got the top feed fitted to the boiler which in the period being modelled is domeless so one less bit to worry about. Then I added the covers for the pipework underneath and two circular covers on top of the boiler. - Since starting to post this I have re-read the instructions and realised that I have fitted the wrong etched covers under the top feed so they will have to come off and be swapped.

53370616615_307b95eb83_4k.jpg

53370616650_1ecf10e841_4k.jpg

I still have the pipes to fit where they come out of the sides but as they disappear into the centre splashers I need to wait until the boiler is mounted to fit those.

Next I have been working on the front end of the footplate where there is a surprising amount going on and photos are invaluable here as the instructions are not that easy to follow.

53370354433_13e5c2e9d8_k.jpg

Initially I fitted all the lamp irons the same way around but noted that the two outer ones are in fact reversed. Fitting the steps to the curve of the footplate was fun. The first one went into place really easy and first time. I tinned them and used the RSU from the back with the footplate on it's edge and clamped to the workbench to stop it moving away as I held the footstep in position. The second one took three or four attempts to get it in the right place...

53370616785_be62649221_k.jpg

Looking at a 1935 photo when Princess Marie Louise was built, I thought that I would have to make the earlier style sandbox filler lids which had a knob on the top rather than a recessed bar. However, when I looked at a 1936 photo taken when the coal pusher tender was fitted I noted that it had already had the later style filler lids which are included as casting as in the kit. One job less There is still much to do, but we are getting there.
 

Rob Pulham

Western Thunderer
Progress has been inhibited somewhat by another bout of cold but I have been working away at the sand box fillers which are mostly fitted but I have forgotten to take photos of them and the many oil boxes that are dotted about the footplate. I haven't got them fitted yet, or to be more accurate I haven't even finished piping them all up yet.

This is the process I went through to get the pipes fitted to them.

53395032793_d188ccf5ee_3k.jpg

Starting with the castings, I cut them from the sprues and cleaned them up making sure that the backs were flat.

53395276245_7767831d20_k.jpg

Next I soldered them to some lengths of coarse scale nickel rail that I have.

53394839286_c1bc9ee15d_3k.jpg

It was at this point where I realised that I had yet another sprue so the process started again...

Once soldered to the rail, the rail was supported on a parallel and held in place in the vice with a small offcut from a brass plug pin.

53395281830_2bc283efd2_6k.jpg


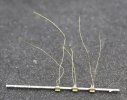
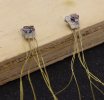
Initially I tried to drill out the cast 'nuts' on the bottom of the oil boxes but they were so misshapen that I ended up filing/milling them down to witness marks and redrilling. I soldered in short lengths of micro bore tubing which I had filed to a hex and them some lengths of 28 gauge brass beading wire.

53395152224_fb05d1d1b7_k.jpg

In hindsight I am not sure that on most of them it was worth the effort of filing the hex but I know it's there...
 

Ian@StEnochs

Western Thunderer
Rob,

Sometimes, quite often actually, lost wax cast brass is very hard to drill. I find that heating the sprue to red heat and letting cool slowly helps to soften it a bit. However that doesn’t solve the problem of cast drilling dimples which are misshapen or full of flash! Your solution is good, less chance of breaking a bigger drill and you have the bore of the tube for fine oil pipes/wire.
Satisfying if a bit mad to make them hex too.

Ian.
 

Rob Pulham

Western Thunderer
A one step forward and two back moment this morning. Yesterday I spent some time finishing off piping up the rest of the 2 port oilboxe castings. This morning I pored over photographs to see where on the footplate these things were fitted. the upshot was that I was quite dismayed to find that of the 10 or 12 2 port oilboxes only possibly 2 of them were piped from the bottom as in the castings. The rest were piped from the back or inset into the footplate. I need to see if I can find a clear shot of the rear of the bracket supporting the front 4 port oil boxes as the instructions show a 2 port mounted to the inner side of the back of this bracket but I don't know whether this was fitted by 1936 or if it's a later addition. BR period photos show what appear to be two 4 ports back to back but they may be a 4 port on the front and two 2 ports side by side on the back.*

Now I need to decide whether I file off all the pipes and 'nuts' that I have added to those that don't need them or whether I make some replacements and put the piped up versions in the spares box. I did a quick check through my spares box and kits to see if I had any suitable castings that I could swap them out for but I don't.

Decisions, decisions...

Edited to add that I found a photo and I do need a couple piped up from the bottom.
 

Rob Pulham

Western Thunderer
I have managed to make steady progress over the festive period despite the setback of a power cut all day on Christmas Eve.

I now have all the oilers repiped and soldered to their respective brackets or direct to the footplate.

53442247590_6f397e1fe5_5k.jpg

53441975113_e8dbd63ba3_k.jpg

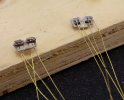
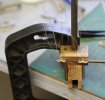
This was the setup that I used to solder the pipes into the rear of the bracket mounted two port oilers. An oak block with a hole drilled in it to accommodate the leadscrew f the handvice. The hole is quite a snug fit so that when the block is clamped to the bench the vice itself doesn't move. The brackets were clamped in the vice with a piece of square bar supporting them which seemed to make up for the third or fourth hands that I could have done with when soldering pipes to the others.

53441975688_a8eb65b944_4k.jpg

53441835896_0a5facb32d_h.jpg

I won't fit the bracket mounted ones until I have the firebox and boiler fitted in the next couple of days or so. I have also done work on a few other details but I am not ready to share them yet as they aren't completed yet.
 

OzzyO

Western Thunderer
I have managed to make steady progress over the festive period despite the setback of a power cut all day on Christmas Eve.

I now have all the oilers repiped and soldered to their respective brackets or direct to the footplate.

View attachment 205688

View attachment 205689

This was the setup that I used to solder the pipes into the rear of the bracket mounted two port oilers. An oak block with a hole drilled in it to accommodate the leadscrew f the handvice. The hole is quite a snug fit so that when the block is clamped to the bench the vice itself doesn't move. The brackets were clamped in the vice with a piece of square bar supporting them which seemed to make up for the third or fourth hands that I could have done with when soldering pipes to the others.

View attachment 205690

View attachment 205691

I won't fit the bracket mounted ones until I have the firebox and boiler fitted in the next couple of days or so. I have also done work on a few other details but I am not ready to share them yet as they aren't completed yet.

Hello Rob.

for oil pipes I use tined copper wire available in a wide range of sizes.

ATB

OzzyO.
 

Max M

Western Thunderer
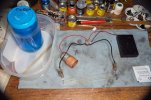
Being a simple lad I use a simple method.

I use a saturated solution of Copper Sulphate, a copper plumbing joint for the anode and the parts to be plated as the cathode.
Power is from 3 x AA batteries in a switchable battery box.
I also use an old ice cream container for the solution/ anode and cathode and alcohol wipes to clean the parts to be plated.

I'm happy with the results although I'm not sure if the crocodile clips onto the parts to be plated would be better replaced with the wire directly soldered. They are getting a bit manky after only several uses. I'd also like to try using a slightly higher voltage to see what difference it makes.


CP_5.jpg
 

Max M

Western Thunderer
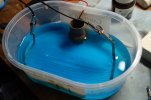
I've made a couple of changes to the above.

Cut a slot in the side of the container to retain the anode wire which stops the anode from moving about.
Used longer pieces of scrap etch which allows the crocodile clips to make contact out of the solution.
Used Viakal to clean the metal before plating.

Not sue what has made the improvement but I'm very pleased with the results.
I'll post a close up of the result tomorrow.

CP_6.jpg
 
Top