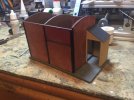
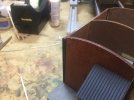
SimonD’s workbench

Pencarrow

Western Thunderer
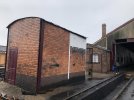
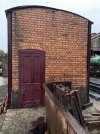
Simon, the flap was rail side and 5’ from the rail according to the GWR book. Just note window side and flap side are the wrong way around on your model. So you’ll need to turn the whole building 180 to get the sand flap the same side.View attachment 202284View attachment 202285View attachment 202286View attachment 202287View attachment 202288

Took me a while to understand the error, but finally saw that, as built, the side door would open into whatever kit is behind the sand flap. Hopefully Simon hasn't glued it solid yet...
 

magmouse

Western Thunderer
a hopper to put the sand in - presumably from a wagon, by shovel.

Simon - thinking about the wagon, some care is needed not to overload it. This website gives a density of 1922kg/m3 for wet sand, so for a diagram O.5 4-plank open (like the Peco kit, which I think is what is in your picture) the 10 ton capacity represents the wagon loaded 1'8" high (up to the third plank, near enough) - based on a level load.

If you used the Peco ballast wagon, which were apparently used for sand deliveries, then we are looking at diagram P.4, rated at 8T, which would be a level load 1'2.5" (the sides are about 1'10" high). Again, easy to model it overloaded.

Curiously, the P.4 was stated to have a cubic capacity of 7 cubic yards, or 5.6m3. Filled level with the top of the sides would be a volume of 6.12m3, while 8 tons of wet sand is 4.16m3. Presumably the wagons were designed on the basis that the load would be heaped, but well below the height of the sides at the edges, and perhaps sticking up a bit in the middle. The nominal volume also seems to assume contents lighter than wet sand, though I am not sure that either ballast or soil would be that different in density.

Anyway - looking forward to a suitably loaded wagon of sand arriving at your furnace!

Nick.
 

simond

Western Thunderer
Took me a while to understand the error, but finally saw that, as built, the side door would open into whatever kit is behind the sand flap. Hopefully Simon hasn't glued it solid yet...
Don’t panic, Captain Mainwaring!

image.jpg

thanks, I guess I might have worked out that the door does not open directly into the furnace..

but the windows will still face the backscene :(
 

simond

Western Thunderer
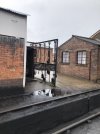
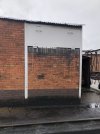
Thanks to Phil for sharing his pictures, mine are similar, but wetter…

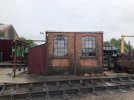
IMG_8094.jpegIMG_8093.jpegIMG_8092.jpegIMG_8091.jpegIMG_8090.jpegIMG_8089.jpeg

Unfortunately I didn’t go inside, from what I can glean, the bin side was the dryer, with the fire below, presumably the door was for the stoker, and the side with the porch was where the loco crews went to get their sand. I guess you could walk through, but maybe not. It won’t be visible so I guess I don’t need to worry about it…

Lyons’ book shows a vestigial chimney about one foot towards the porch from the centreline, and pretty much centred on the doors, whic is surprising, I assumed it would be the other side.

And it confirms the 5’ from gauge face of rail that Phil notes.
 

simond

Western Thunderer
Tony,

You should see the ones I took of the shed at Aberystwyth. Shall we say that the brick pattern is quite close…? (Though I still haven’t put the glazing in, or the windowledge overlays on. One day..)

image.jpg

Anyway, back to the script.

footings bedded in…

image.jpg

Walls primed and mortared, and roof pre-curved.

image.jpg

I think this’ll work rather well.
 

simond

Western Thunderer
The Warwickshire railways website is a veritable treasure trove, it’s excellent.

(and isn’t the lamp magnificent?)

that sand bin appears to be an entirely different beast, rather smaller, with what look like filling hatches on the roof, and a much more impressive chimney!

the drawing in Lyons’ book gives a stumpy thing a couple of feet high, I’ll print something to suit.
 
Last edited:

simond

Western Thunderer
Thanks Jon,

just had a little look, Madame is out this evening, so I think I’ll save it, and watch it whilst eating my supper!
Jon,

thanks, I thoroughly enjoyed that.

I am just a couple of years too young to remember very much of the steam, though I do remember the diesel Summers trains, and the policeman on point duty at Duke St. I said to my dad, many years back, ”why didn’t you take me to see it all before it went” and he said, as I guess many others did, “I don’t suppose we thought it would change”.

When I was very little, we lived about 200 yards from Leasowe station, and lots of other memories there. Just not many steam memories!

thanks again
Simon
 
Last edited:

Rob R

Western Thunderer
Steam?
The only BR steam I saw was the VoR in lined blue - looked good, better than the plain blue - as I was only 6 months old when the GE went "modern image"
 

simond

Western Thunderer
I’m really enjoying this kit. Still a bit to do, and still not glued together, but plenty of progress.

image.jpgimage.jpg

I‘m planning to add an internal light, and maybe some notional internal detail (if you have photos of the inside PLEASE post them!)

Lots of little bits to do, but well on the way.

I’m particularly taken by this H girder detail.

image.jpg

Well pleased. More soon.

atb
Simon
 

simond

Western Thunderer
The glue is drying on the sand furnace. Piccies tomorrow. Question for the congregation: the pictures of the Didcot furnace, and the picture of Banbury on page 43 of Lyons’ book show the bottom 2’6” of the brickwork or thereabouts is apparently painted black on the rail sides, (but not the end in the Lyons picture). I‘m pretty sure this colour is not blue bricks. Does anyone know why, and/or when it was introduced? And why only the sand furnace, the other brick structures are not so coloured?

Unfortunately the team are not going to Guildford, it’s probably two and a half hours each way, not really an appealing prospect, weather, train strikes, M25 :(

Over the last few days, I’ve been doing a lot of CAD modelling, following @Dog Star ’s post referring to laser cutting brass. Three loco-sets of files (a 1361 Saddle tank, a 1366 pannier, and a Manor, all with CSB springing) have been sent for cutting and I’ll report back. It is an attractive technique because unlike etch, there’s no tooling cost, and the turnaround is likely quicker.
 
Last edited:

daifly

Western Thunderer
The glue is drying on the sand furnace. Piccies tomorrow. Question for the congregation: the pictures of the Didcot furnace, and the picture of Banbury on page 43 of Lyons’ book show the bottom 2’6” of the brickwork or thereabouts is apparently painted black on the rail sides, (but not the end in the Lyons picture). I‘m pretty sure this colour is not blue bricks. Does anyone know why, and/or when it was introduced? And why only the sand furnace, the other brick structures are not so coloured?
Pure speculation on my part - might it have been some form of waterproofing? A single-skinned building might have been prone to water splash percolating through.
Dave
 

simond

Western Thunderer
Thanks Dave, it’s a reasonable hypothesis for sure, and I guess the whole point of the building is to keep sand dry…

I'm wondering whether to do mine.
 

simond

Western Thunderer
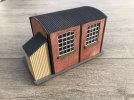
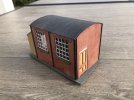
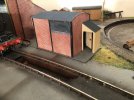
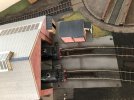
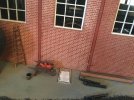
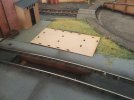
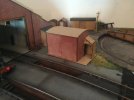
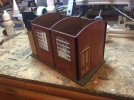
As promised, some photos of the building, pretty much complete. I’ll do some further photo searching over the weekend before probably painting the lower brick courses with a thin black wash.

I’m going to run the printer this weekend too, I need loco springs and a backhead for Tony’s Manor and some other details for the 136x projects, to which I’ll add a stovepipe chimney to finish it off. There are some other printer projects bubbling away, more later maybe…

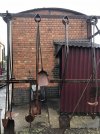
I have an inkling to tinkering with some brass to make all those fire dropping shovels, scrapers and darts, and the rack on which they’re hanging as in my photos above. Would add some interesting detail and might fit nicely in the triangle between the sand furnace and the turntable.

And I have a lattice post for a high lamp, typical of GW shed aprons. Not sure how to make the lamp glass yet, but I think that and some cleaning platforms will just about finish that area of the shed.
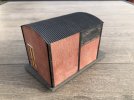
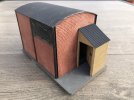
IMG_8485.jpegIMG_8488.jpegIMG_8487.jpegIMG_8486.jpegIMG_8489.jpegIMG_8491.jpeg

image.jpg


Though this last photo reminds me that I still haven’t finished the shed doors, and the windows & smoke hoods above them. Must get the artwork for the etched hinges over to Jon.

Back to the Sand Furnace.

@BrushType4 Phil had included a spare test made from self adhesive material - this was for the H girder flanges and the sand hopper door & some hinge detail. I didn’t use it for the girders, but I did for the sand hopper door - having pre-painted it, I lined it up with wires for the handle holes before dropping it into place and pressing down. The half etched finish is slightly rough, welcome texture, and if you’re modelling latter days where it might be showing signs of rust I think it would dry brush nicely. Not in 1930s GW though :)

The roof is lovely corrugated card, looks entirely reasonable for wriggly tin in 7mm at 3.5 corrugations per foot, and around 1.5” thick (apparently sand furnaces had asbestos roof panels, slightly coarser corrugations I think).

I fitted a light, which will shine out through the windows and door - I had lasered some doors and door frames a while back when I was backdating the station buildings I purchased from @LarryG and I used one of them in the porch so I could model the door open.

I didn’t fit an interior in the end, no data. If ever I find out what should be in there, and if I decide it’s a modelling priority, I might have to ask Phil for another roof.

Conclusion, as Tony joked, my photos were indeed for brick counting, but Phil has saved me the effort of designing and making my own building. The kit is lovely, goes together very precisely, and captures the prototype very well in my view. This was a pre-production kit and there was one minor issue which Phil has fixed in the artwork, and the corrugated card roofing is nicer that the stuff I was going to use, and I think Phil’s approach to the H girders is better than what I would have done, so a winner all round.

Mark me down as a happy customer, happy to recommend the kit!
 
Last edited:

magmouse

Western Thunderer
I‘m pretty sure this colour is not blue bricks.

Looking again at the photos of the Didcot building, further up the thread, I think they are blue bricks. On the track side, there is also a layer of dirt, probably splashed up from puddles in the space between building and track, which makes it hard to see what is going on. The weathering of the bricks, and the lighter areas under the window sills where the rain is kept off, throw the eye out, I think - there are several layers and different weathering effects in addition to the underlying brick colour. Overall, though, my money is on blue bricks for the lower courses.

Anyway, whatever final decision you make, it’s a very nice model from an excellent kit.

Nick.
 
Top